Device Enrollment Configurations are a quick and easy way to enroll your Windows devices. By creating a configuration, you can choose the default Group or Profile and a naming convention for the devices that are enrolled using this configuration.
For each Kiosk/Corporate enrollment configuration, there is one unique URL generated which can be used on all the Windows devices that you want to enroll using this configuration. You can create as many enrollment configurations as you want depending upon the number of Device Profiles that you have.
Before you Begin
- Create a Windows Device Profile.
Create an Enrollment Configuration
Enrollment configurations are useful to create basic rules for enrollment like device naming convention, the default device profile or group of devices and a default license that should be applied. Once created you can get a QR Code for your enterprise mobile devices and a URL for Windows 10 devices. Follow the steps below to create a configuration,
- Navigate to Enrollment Configurations > QR Code Configurations. Click on Create Config.
- In Basic section, give a name for your configuration and select a naming convention for the devices that enroll using this configuration. Click NEXT to go to next step, If Serial No. is selected as Name Convention, an additional flag will be available, viz.
- Update Windows Device Name to use the Serial number sync'ed from MDM agent first time post install: If this setting if enabled, then device name will be set to Serial No. once Scalefusion MDM agent updates the serial number.
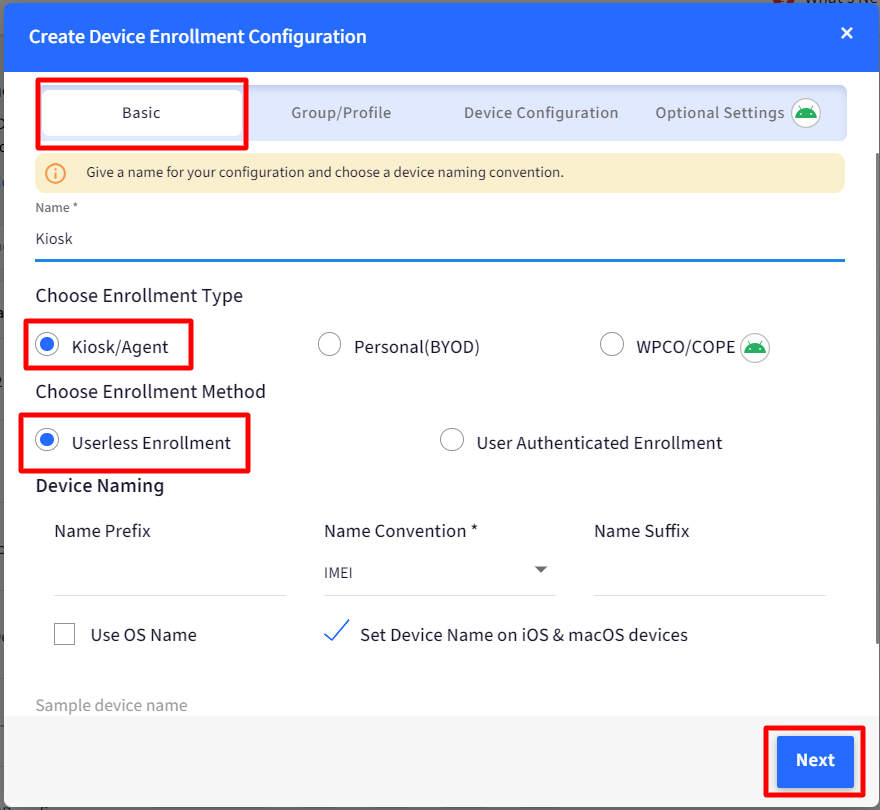 Selecting Use OS Name as name prefix, prefixes the device names with their OS types. For example a Windows device will be prefixed with Windows- and an Android device will be prefixed with Android-
- In the Group/Profile section, under Windows Device Profile dropdown, select the windows profile that we created as a pre-requisite.
- Apply Enrollment Rules: If any enrollment rules are defined in Global settings, they get applied when a device is enrolled using this configuration. Disable this setting to skip applying the rules for enrollment using this configuration. Click NEXT You can use the same configuration across Android, iOS and Windows devices.
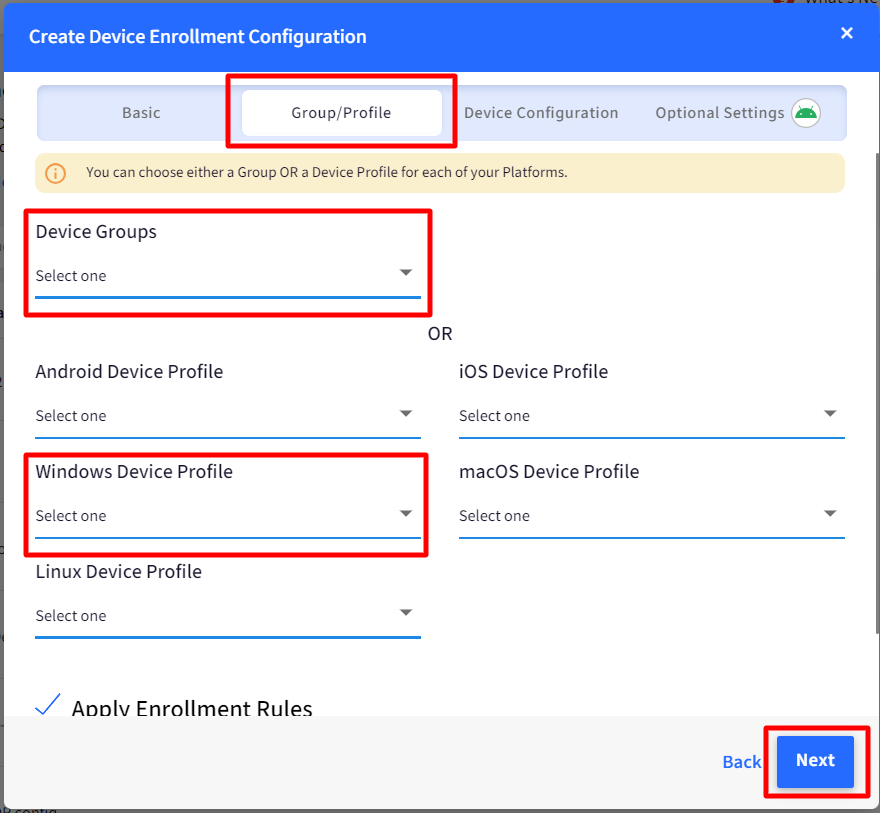
- Apply Enrollment Rules: If any enrollment rules are defined in Global settings, they get applied when a device is enrolled using this configuration. Disable this setting to skip applying the rules for enrollment using this configuration. Click NEXT
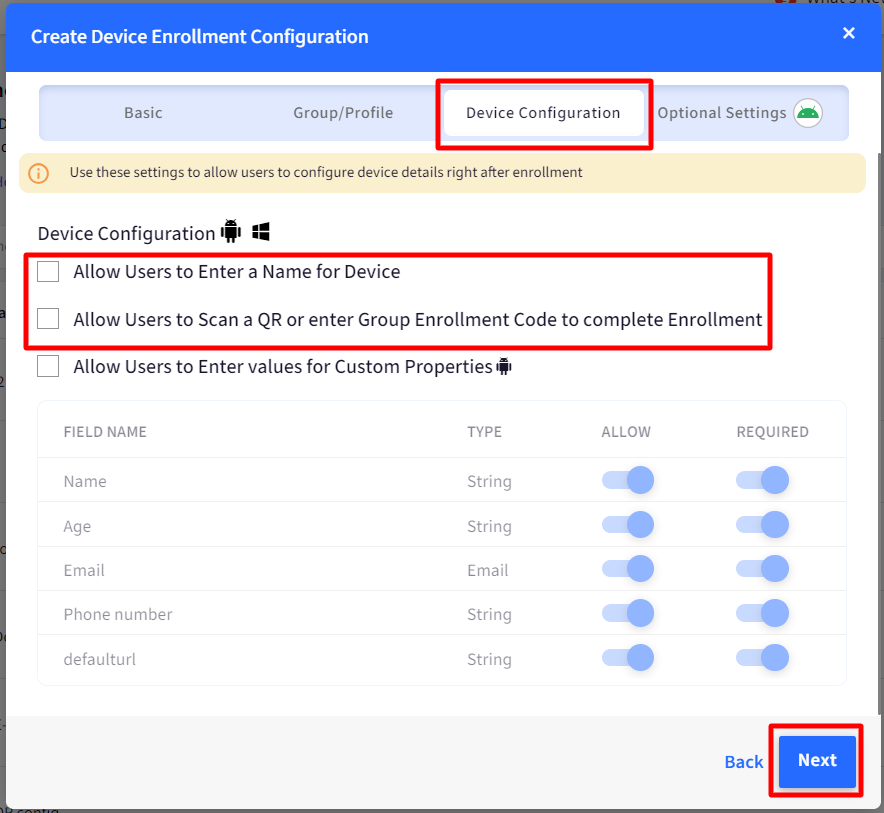
- Device Configuration:The following are the additional settings that can be configured under this:
- Allow Users to Enter a Name for Device: If this is selected, then users are allowed to set the device name from the device when they enroll it.
- Allow Users to Scan a QR or Enter Group Enrollment Code to Complete Enrollment: Enabling this will show a screen at the end of enrollment that will allow users to scan a QR Code or enter a Group Enrollment code to move the devices to their respective group before they start using the device. When the devices move to a specific group, the device profile of the group gets applied to the devices.Device Configurations are applied in the following cases:
- Agent based enrollment (with Enrollment URL and Code)
- Enrolling via Modern Management (Provisioning package & URL) and then launching Scalefusion MDM agent.
- Optional Settings: These settings are for Android devices and can be skipped.
- Click on SAVE to create the configuration. Once a configuration is created it will appear in the list of enrollment configurations.
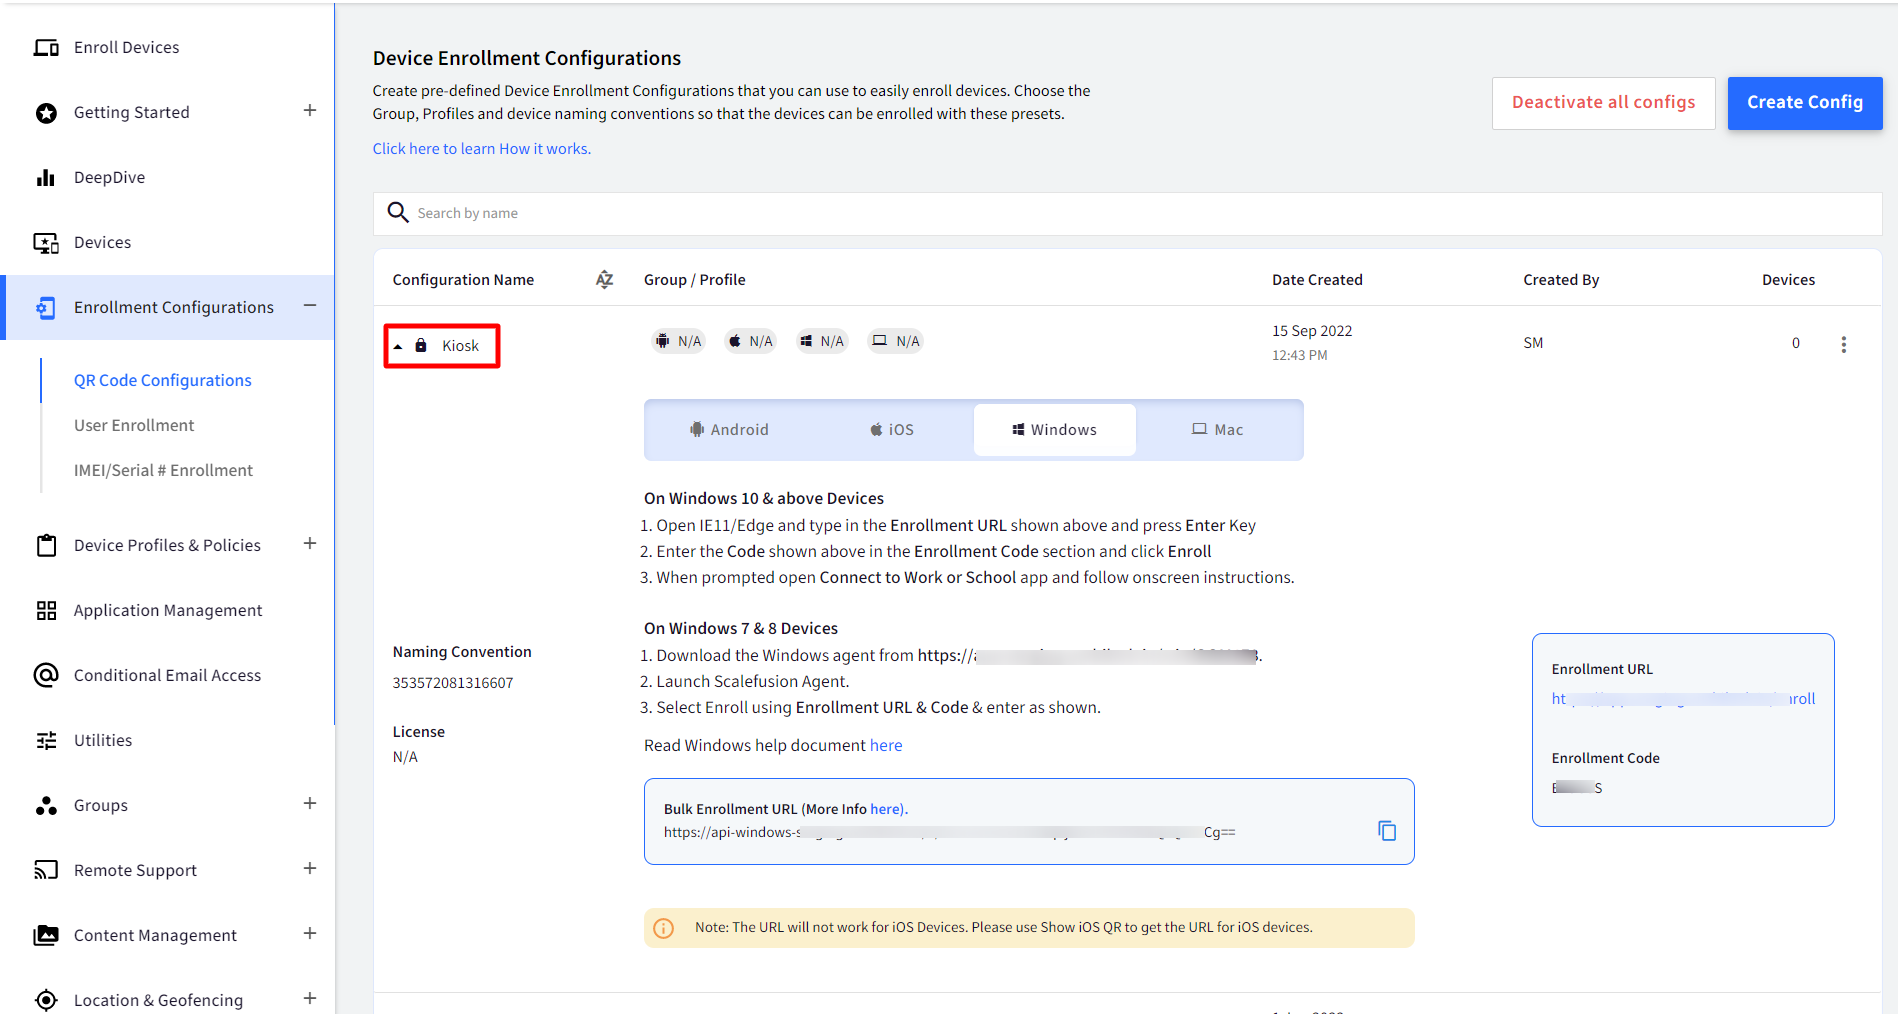
- To enroll your Windows 10 and 11 devices, you would need the enrollment URL. To get the enrollment URL, expand the configuration from the list and click on Windows.
- This shows the Enrollment URL and Enrollment Code. Open IE11/Edge and type in the Enrollment URL shown and press Enter.
 Windows OS 7 and 8.1 can be enrolled by downloading Scalefusion MDM agent. Please visit here to learn the process of Agent Based Enrollment.
Use the Email
.png)
In the Send Enrollment Email dialog which opens on selecting Email option shown above, you can select the Windows OS (10 & above and/or Windows 7&8) and the enrollment information with steps will be sent based on the OS you have selected. .png)
Once you have created enrollment configurations and have received the enrollment email, head over to our Enrolling a Company Owned Windows Device guide to learn how to enroll a device.