Enrollment Configuration for Apple User enrollment
- 12 Feb 2024
- 1 Minute to read
- Print
- PDF
Enrollment Configuration for Apple User enrollment
- Updated on 12 Feb 2024
- 1 Minute to read
- Print
- PDF
Article summary
Did you find this summary helpful?
Thank you for your feedback
Device Enrollment Configurations are a quick and easy way to send invitations to your employees. This would allow you to create a configuration wherein you can choose an auto device-naming convention and the BYOD profile that should be applied to the devices that enroll using this configuration.
In this document, we will see how to create an Enrollment configuration for iOS devices using a BYOD Profile.
Before You Begin
- Sign In to the Scalefusion Dashboard
- Have added Users as explained in User Management.
- Have created at least one Apple User Enrollment (BYOD) Profile as explained here.
Creating a QR Code Configuration
- Navigate to Enrollment Configurations ➞ QR Code Configurations. This section displays all the device enrollment configurations that you have created.
- Click on Create Config to open the configuration creator window.

- The configurator creator is divided into following,
- Basic: Use this section to set the following:
- Configuration Name: Enter a name for this configuration
- Enrollment Type: Choose Apple User Enrollment. This will be used to create a configuration that will be used to enroll employee-owned devices.
- Device Naming Convention: Choose a naming convention that will be used to auto-generate device names when the devices are enrolled using this configuration.

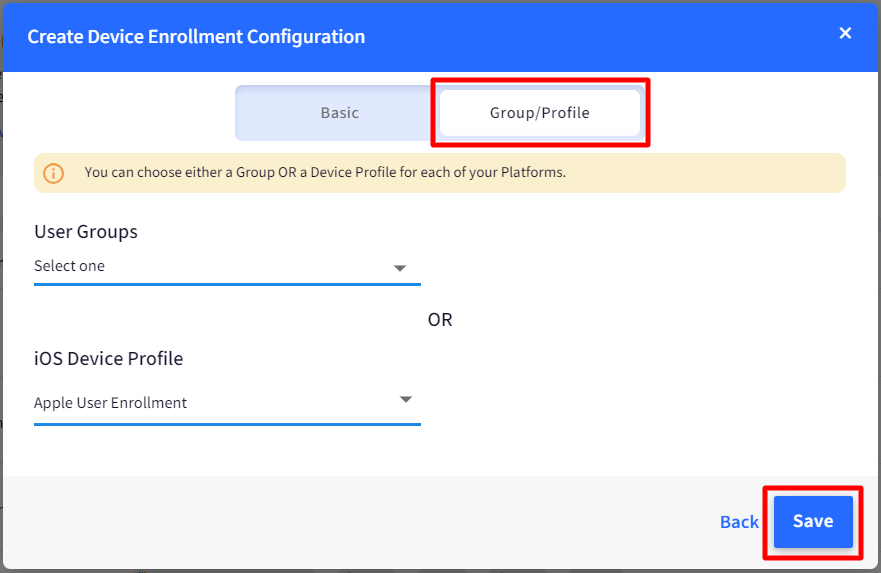
- Group/Profile: The next section is to choose the User Groups or iOS Device Profile. For the BYOD enrollment type, you can choose only the Apple User enrollment (BYOD) Profiles.
- Basic: Use this section to set the following:
- Click Save once you have selected the profile.
- Once a QR Code configuration is saved, it will appear on the configuration listing along with other configurations, if any.

- Now that enrollment configuration is created, you can enroll your iOS devices as BYOD, using any of the following methods:
- Scan iOS QR code
- Enrollment URL and Enrollment Code
- Invite Users


Was this article helpful?