When deploying company owned devices in bulk, IT Admins typically using imaging techniques to generate OS images that can be repurposed on multiple devices. Provisioning packages provides a much simpler technique where the complexity of imaging is taken out and yet the device can be configured as per requirements and enrollment to Scalefusion is happens right at first time boot.
When to use this technique?
Use this method to generate provisioning packages when you are planning to enroll Windows 10 and above devices that are fresh out the box or are factory reset.
If you have an Azure AD subscription then Scalefusion's integration with Windows Autopilot may be a better choice for easy enrollment.
If you are looking to generate packages for devices in the field and being used by end users then refer to our document here.
Prerequisites
Scalefusion Account
Install Windows Configuration Designer
USB Drive
Test Windows 10 or 11 device
Scalefusion MDM Agent file (in .msi format)
Step 1: Generating Provisioning Package using Windows Configuration Designer
Launch Windows configuration designer and click on Provision desktop devices.
.png)
Enter a name for the project and choose a folder. Click Finish to start the process.
.png)
Set up Device:The first section lets you configure basing set up information,
.png)
Device name: Enter a name for the device or use placeholders like %SERIAL% or %RAND5% to generate name based on serial number or randomly.
Enter Product Key: You can enter the product key for Windows activations.
Configure devices for shared use: Keep this option disabled.
Remove pre-installed software: If you want to remove the pre-installed software on the machine then enable this else leave it disabled.
Click Next once done
Set up Network: Devices need to be connected to internet for enrollment. You can choose to configure a network that will be used during provisioning. If your are not sure if the device will have access to Wifi during provisioning then you can leave this blank and the device will use Ethernet. Click Next
.png)
Please note that if there is no internet during provisioning a device then the device will not complete enrollment.
Account Management: Create a local admin account that will be the master account on the device. Click Next
.png)
You can also choose to Enroll into Azure AD but we recommend using Windows Autopilot if you have Azure AD subscription.
Add applications: You can leave this section blank and click Next
Add certificates: You can leave this section blank and click Next
Switch to Advanced Editor: Once the basic setup is done, switch to advanced editor to complete the remaining steps.
.png)
Runtime Settings: Once in advanced editor click on Runtime settings to expand it.
.png)
In the search bar under Available customizations, search for Command Files.
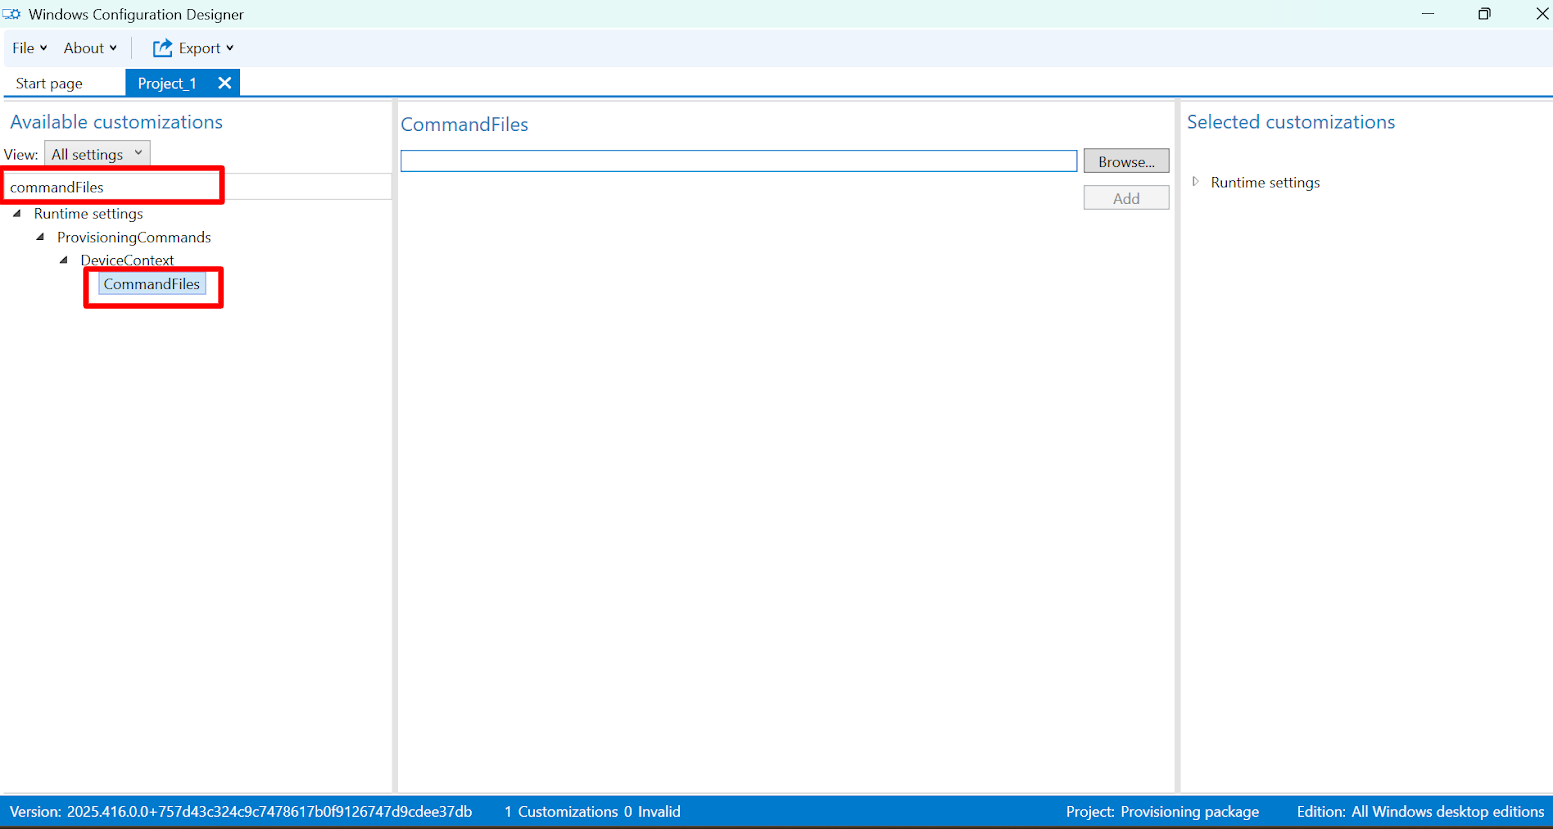
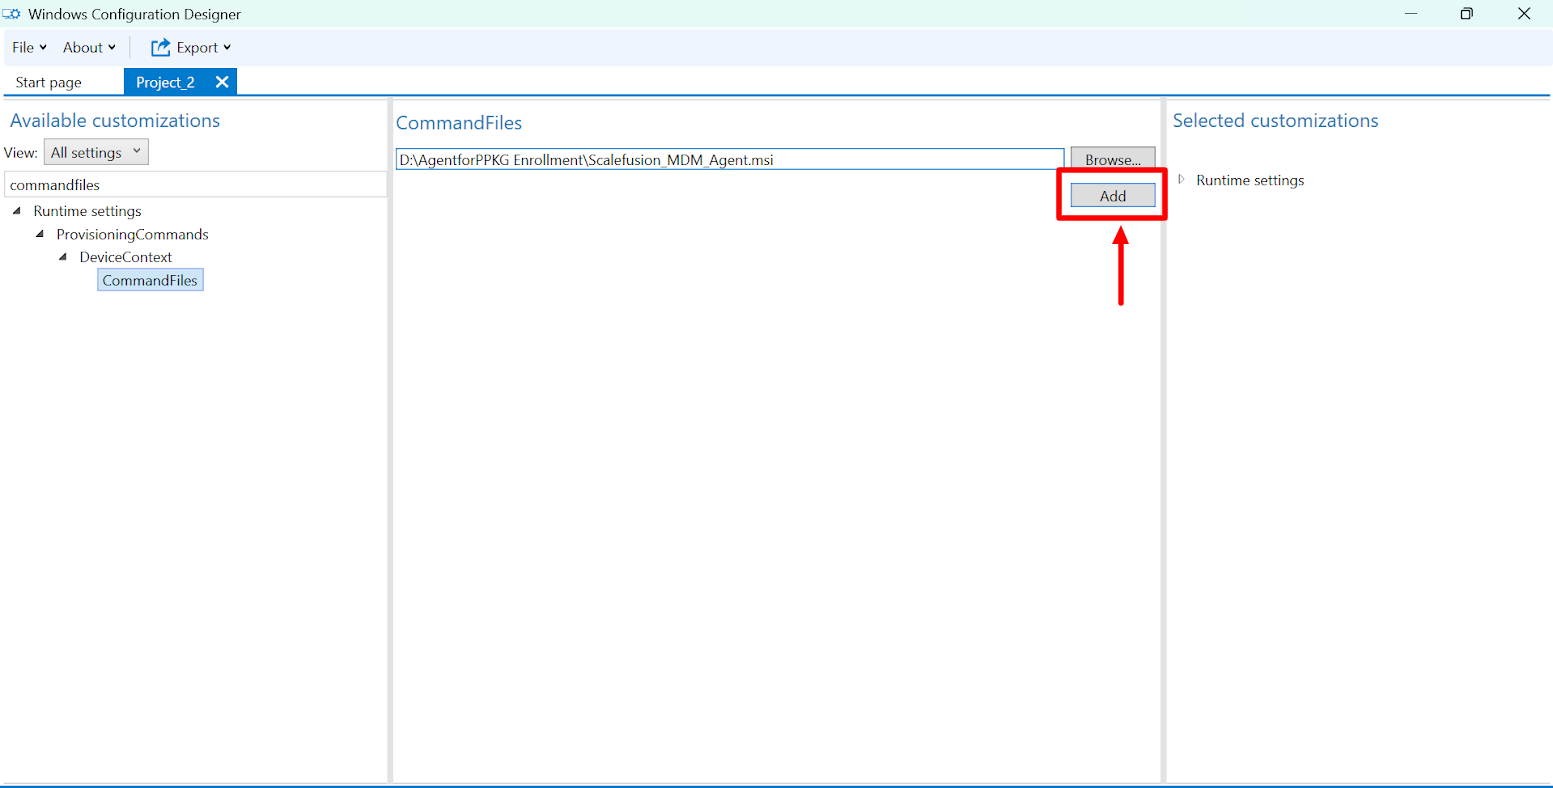
On the right side, click Browse and navigate to the location where the Scalefusion MDM Agent MSI is stored.
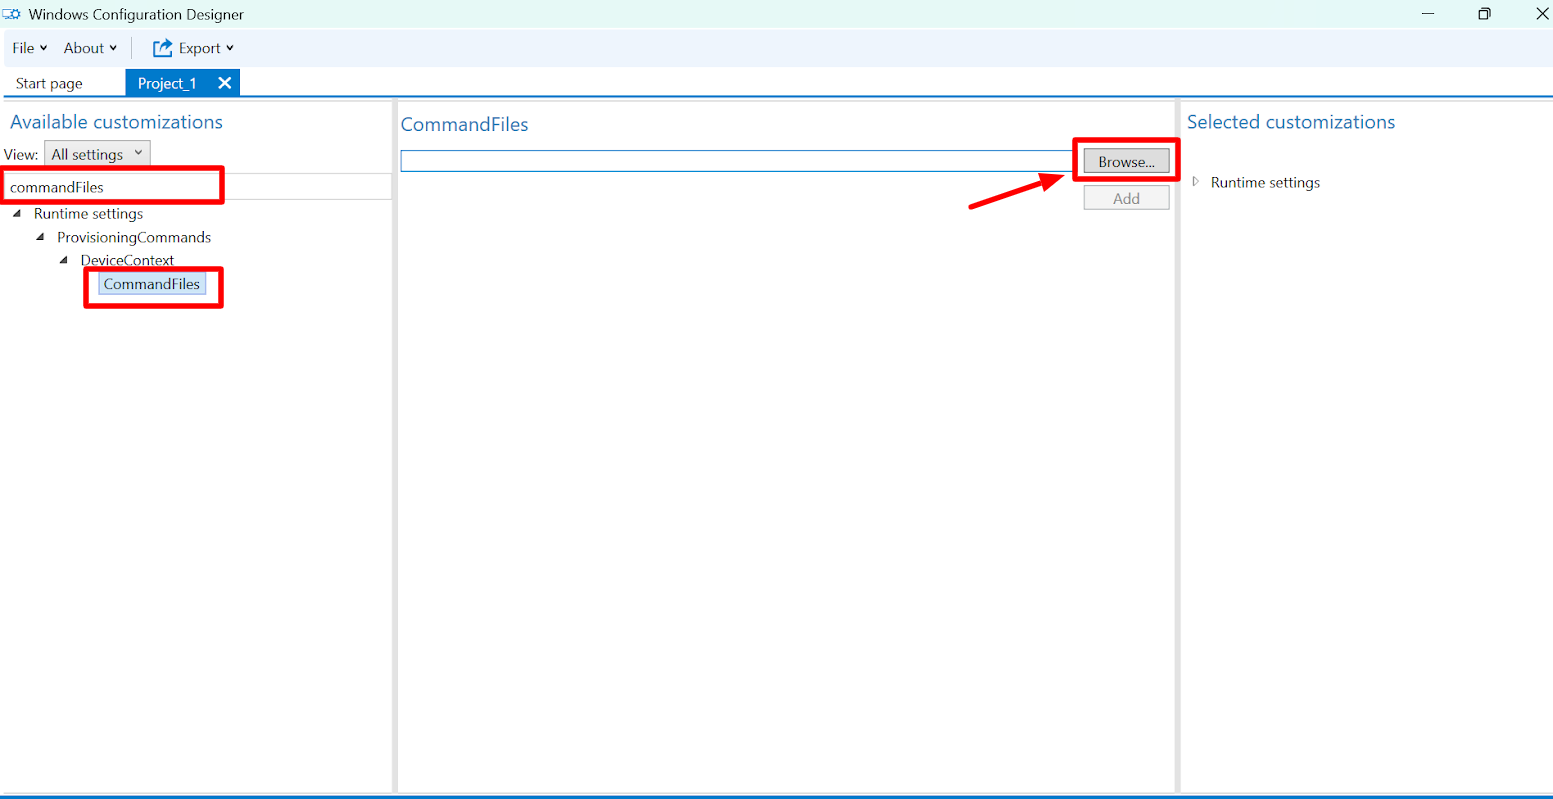
Click Add to attach it to the package.
Now, search for commandline and add the below command on the right side:
cmd.exe /c msiexec /i "<MSI Installer File Name>" ENROLLMENT_URL="<Instance URL>" ENROLLMENT_CODE="<Enrollment Code>" /qnHere, replace the placeholders:
"MSI Installer File Name" → The actual Scalefusion Agent MSI file name with extension(.msi) (The SF Agent MSI file name which you have added in Command Files)
"Instance URL" → Scalefusion Instance URL / Environment URL
"Enrollment Code" → Enrollment code present in Enrollment config.
As for example:
cmd.exe /c msiexec /i "Scalefusion_MDM_Agent.msi" ENROLLMENT_URL="https://app.scalefusion.com/enroll" ENROLLMENT_CODE="xxxxxx" /qn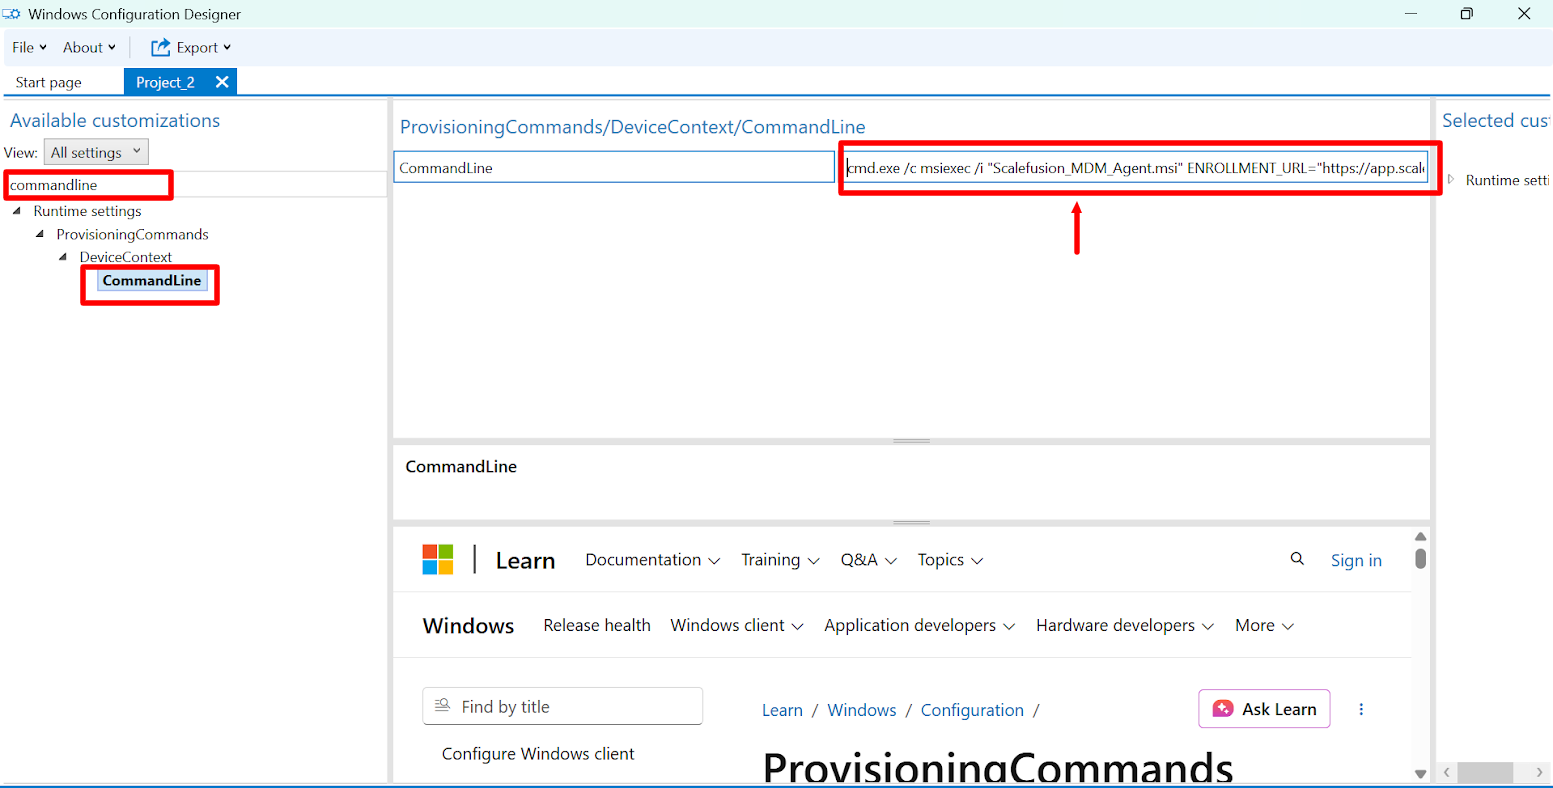
Generate PPKG file: Now you are ready to generate the PPKG file. To do so follow the steps below,
Click on Export > Provisioning package
.png)
From the Owner drop-down select IT Admin and click Next

Now you can select to encrypt the package using a certificate and sign the package as well. Select the options as required and click Next
.png)
Choose where the generated package file should be saved and click Next
.png)
Click Build to generate the PPKG file.
.png)
Prepare a USB Drive: Copy the generated provisioning package and the other files from the saved location to the the root of a USB Drive that would be used for enrolling devices.
.png)
Step 2: Enrolling a Windows device
When Wi-Fi is configured in Windows Configuration Designer
Power on a new Windows device and wait for the first run setup screen to appear.
.png)
Insert the USB drive at this point, Windows will automatically recognise and start the setup.
Depending on the OS version, you may be prompted to browse and select the PPKG file from the USB drive. Please refer to the following documentation from Microsoft.
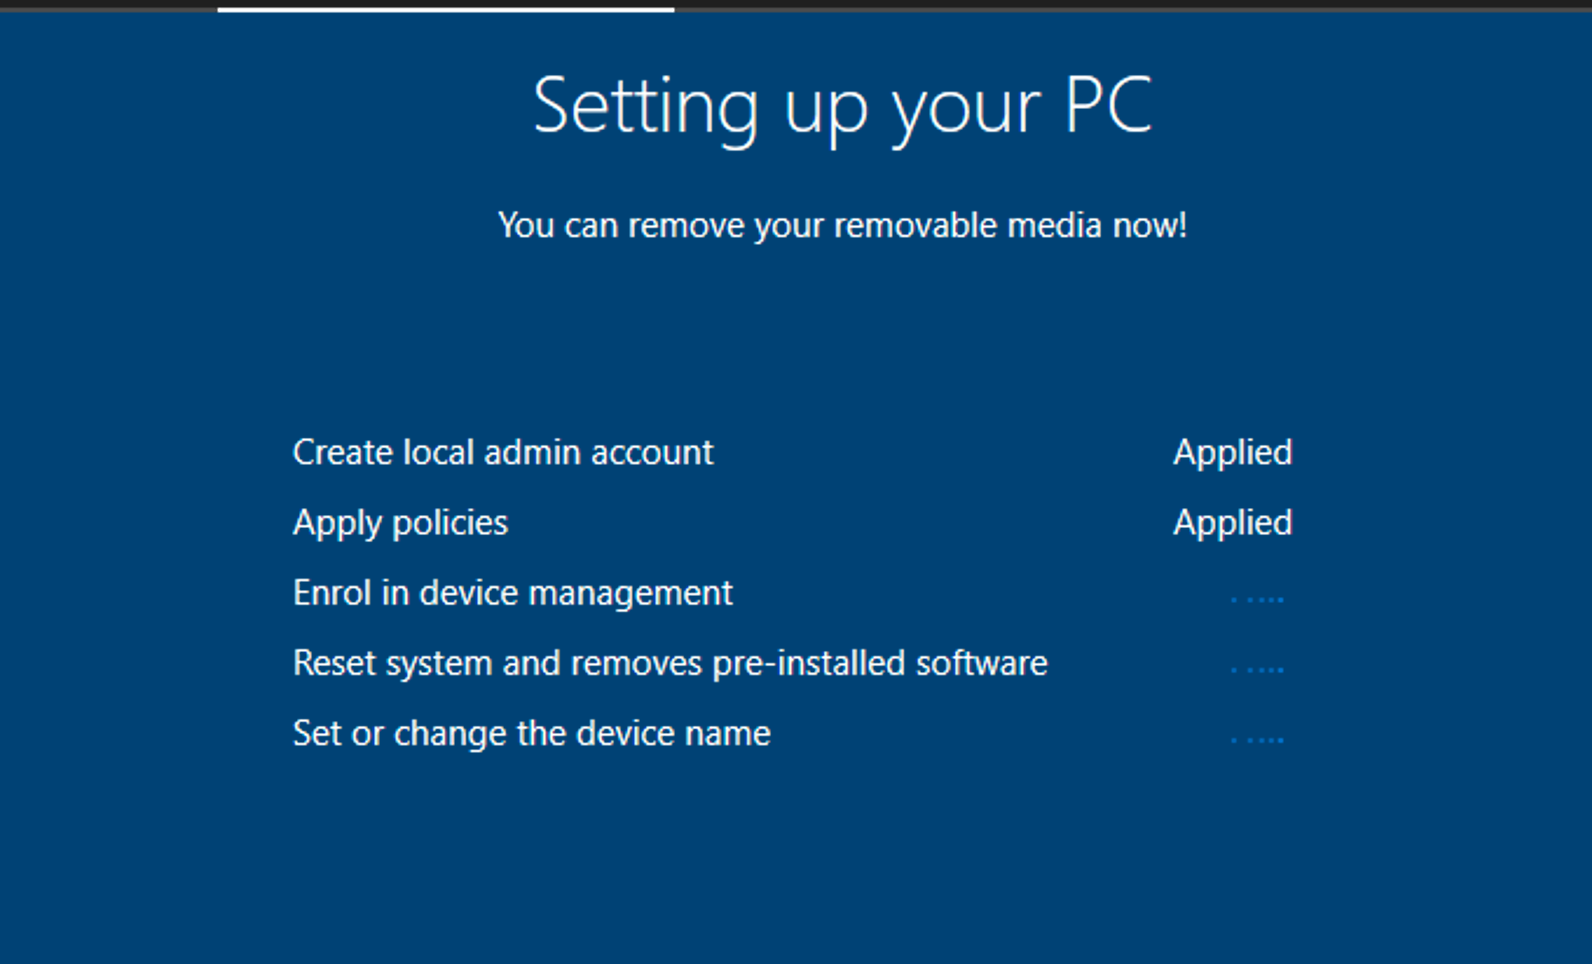
Once the setup is complete, the device will boot normally and you can see the admin account as per the package file. The device will also enroll to Scalefusion Dashboard and other policies will be applied like creating a Kiosk or a user account and installing enterprise applications.
When Wi-Fi is connected manually (not configured in Windows Configuration Designer)
Select Region
Select Keyboard layout
Connect to Wi-Fi manually & Stay on that same screen
Insert the USB drive and click Next
The PPKG automatically applies the configuration and installs the Scalefusion Agent with the specified enrollment details.
Frequently Asked Questions
Question: We see the following error when we insert the USB Drive. How do we recover from this?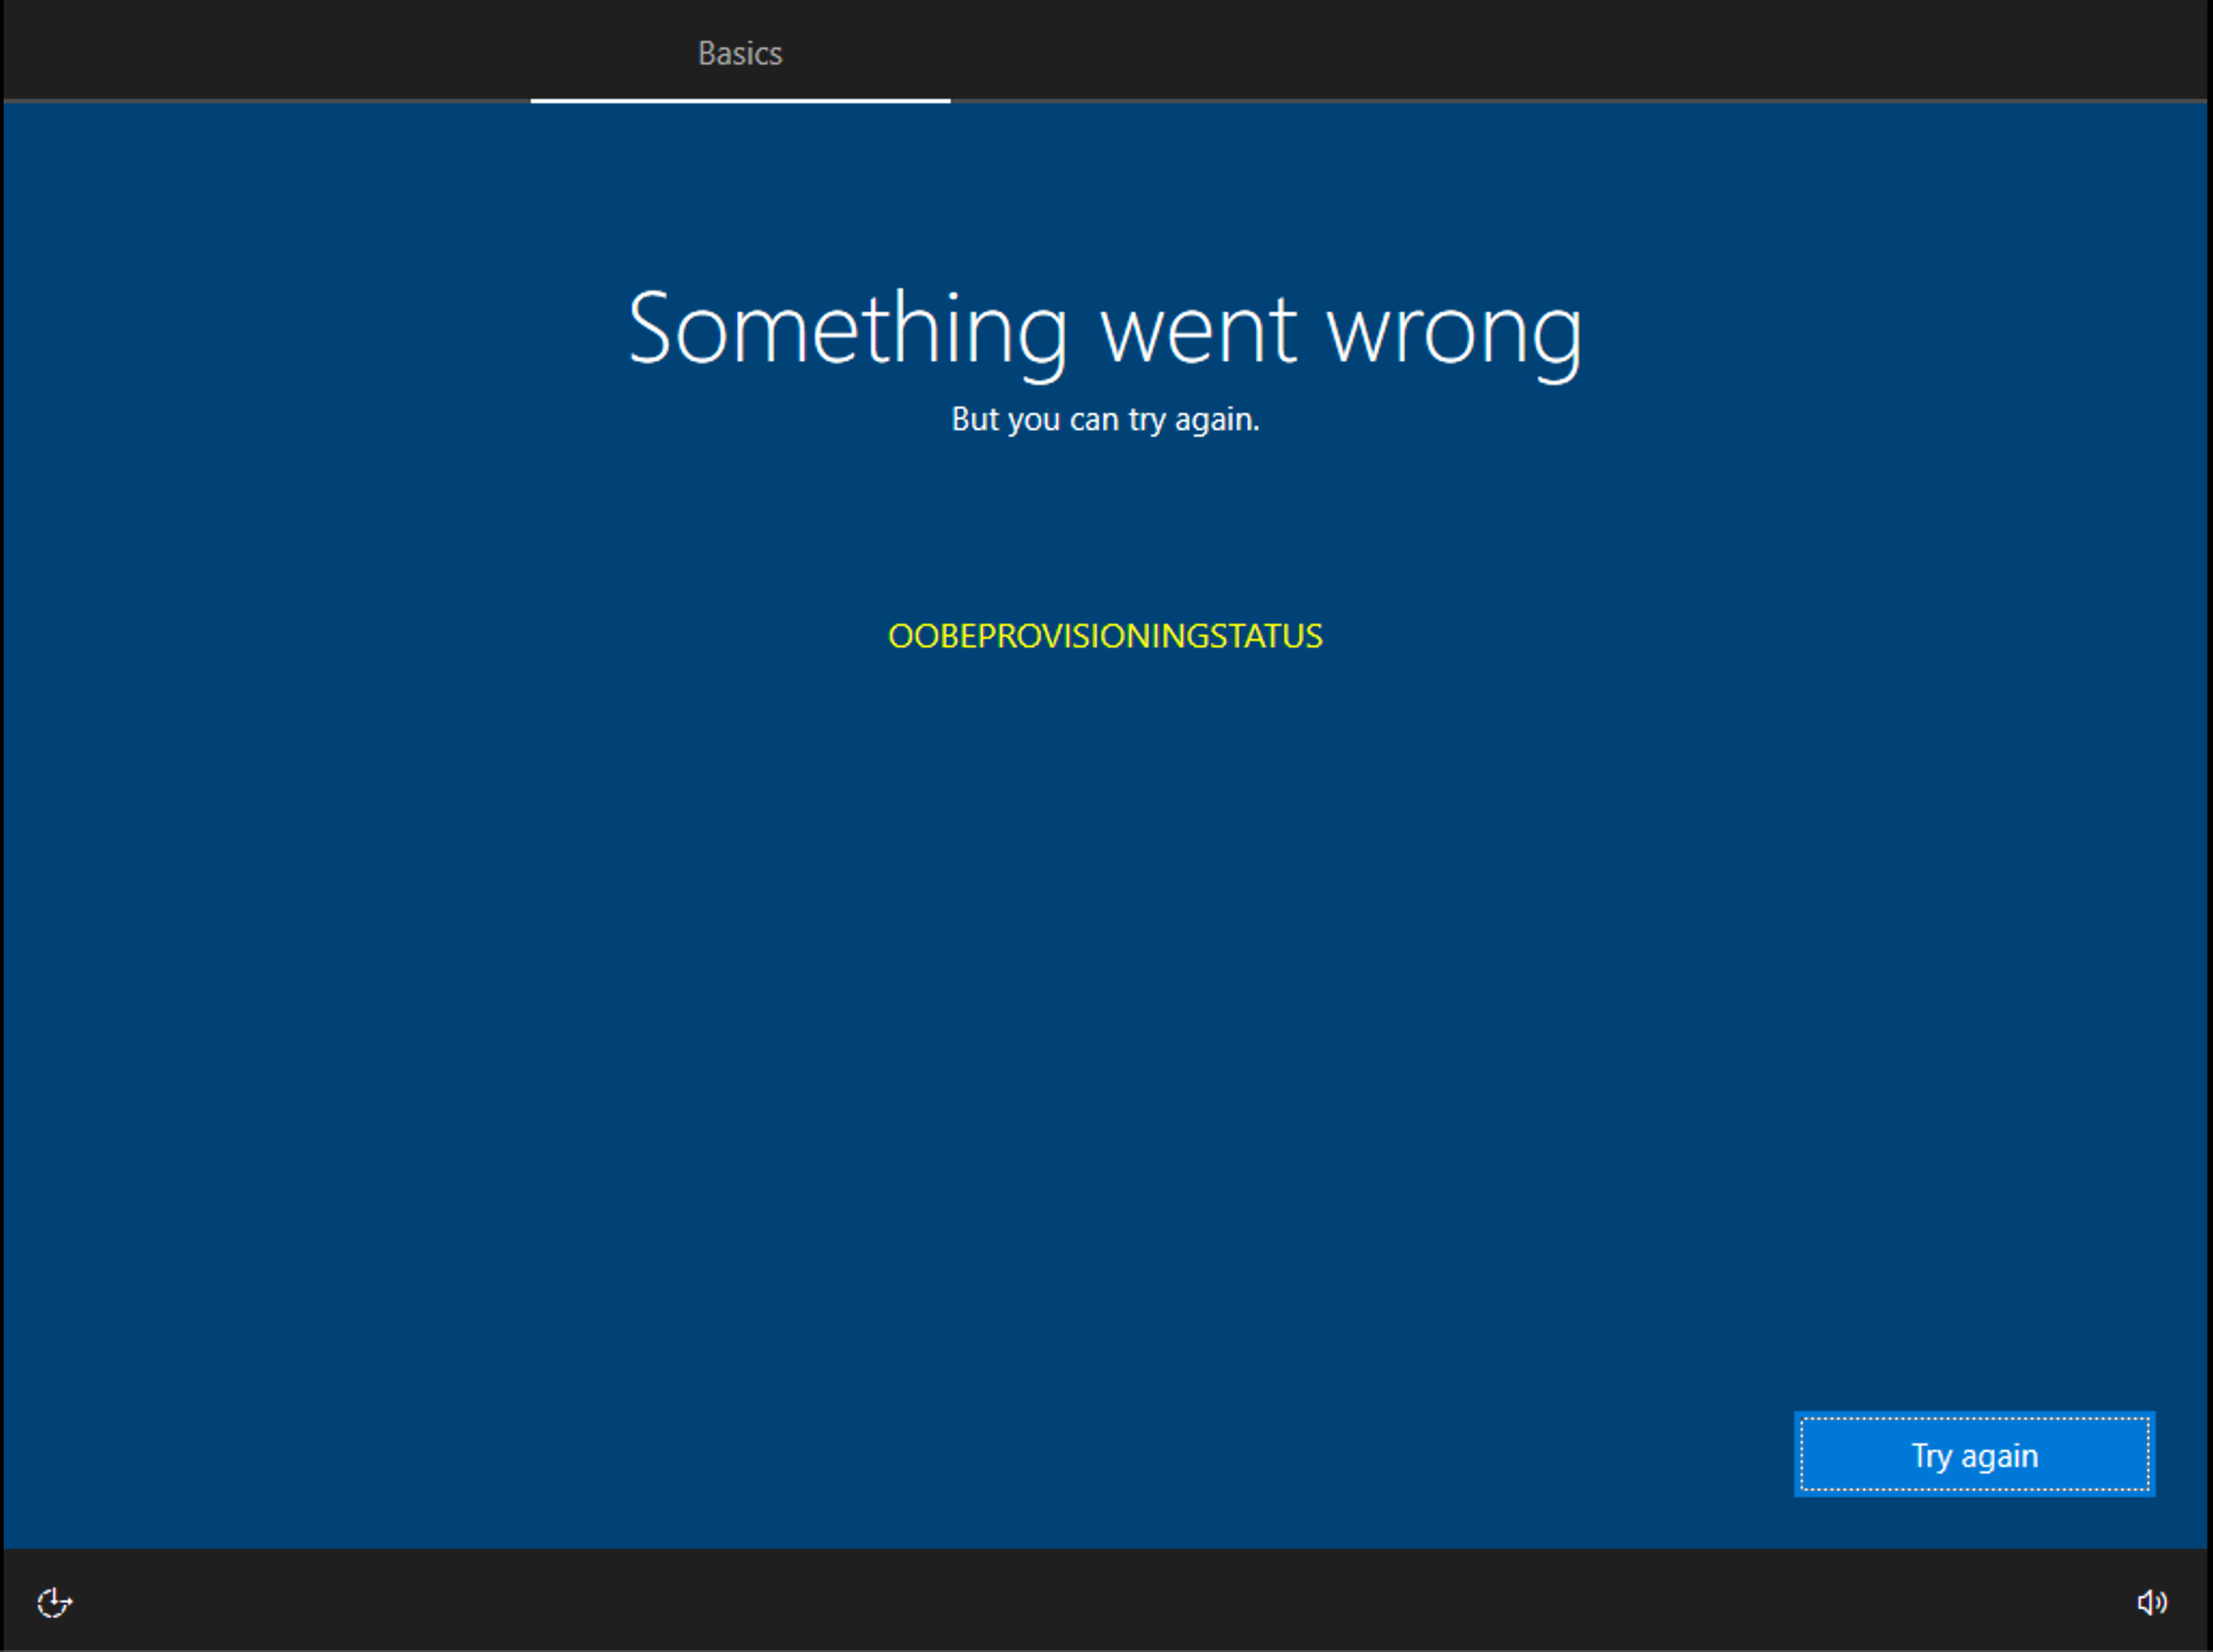 Answer: This error is shown if the device is not connected to any network or the Wifi configured in the package file is not reachable. Sometimes it is shown even if the network is there. If the Wifi configuration is correct and the device is connected to the internet, then click Try again and the process should start.