User Authenticated Enrollment of Company Owned Windows Devices
- 15 Jan 2025
- 3 Minutes to read
- Print
- PDF
User Authenticated Enrollment of Company Owned Windows Devices
- Updated on 15 Jan 2025
- 3 Minutes to read
- Print
- PDF
Article summary
Did you find this summary helpful?
Thank you for your feedback
Scalefusion now enables enrollment of Company Owned Windows devices on Scalefusion Dashboard with User Authentication making them more secure to use. Let us learn in this document how user authenticated enrollment can be done on Company Owned Windows Devices managed by Scalefusion.
Pre-requisites
- A valid Scalefusion Dashboard account.
- Windows Device Profile should be created on Scalefusion Dashboard.
- Users should be added on Scalefusion Dashboard under User Enrollment section.
- Organization Info and Terms of Service should be updated on Scalefusion Dashboard.
- Supported OS: Windows OS 10 & 11
Account types supported
User Authenticated enrollment can be done on the following types of accounts:
- Normal Scalefusion account
- GSuite based sign-in
- O365 based sign-in
- SAML SSO (Okta and PingOne)
Step 1: Create Enrollment Configuration
The first step is to create an Enrollment Configuration specific to User Based enrollment. To create,
- On Scalefusion Dashboard, navigate to Enrollment Configurations > QR Code Configurations. Click on Create Config.
.png)
- A new dialog box will open. Under Basic, enter the following:
- Name: Give a name with which the configuration will be identified
- Choose Enrollment Type: Select Kiosk/Agent
- Choose Enrollment Method: Select User Authenticated Enrollment. Click Ok on the dialog box that opens.
- Device Naming: Select naming convention for the device. In the Name Convention dialog, notice an additional option to select Username. Username can also be used as a naming convention for the Windows device.
- Use OS name: This is optional. Selecting Use OS Name as name prefix, prefixes the device names with their OS types. For example a Windows device will be prefixed with Windows- and an Android device will be prefixed with Android-
- Click Next
.png)
- Group/Profile: Select a Windows Device Profile / Device Group that should be applied to the enrolled device and Click Next.
.png)
- The next two tabs, that is, Device Configuration and Optional Settings are specific to Android. Click Next under Device Configuration
- Next, click Save.
.png)
- The enrollment Configuration gets created and is listed in QR Code Configurations list on Dashboard.

Step 2: Enroll Windows Device
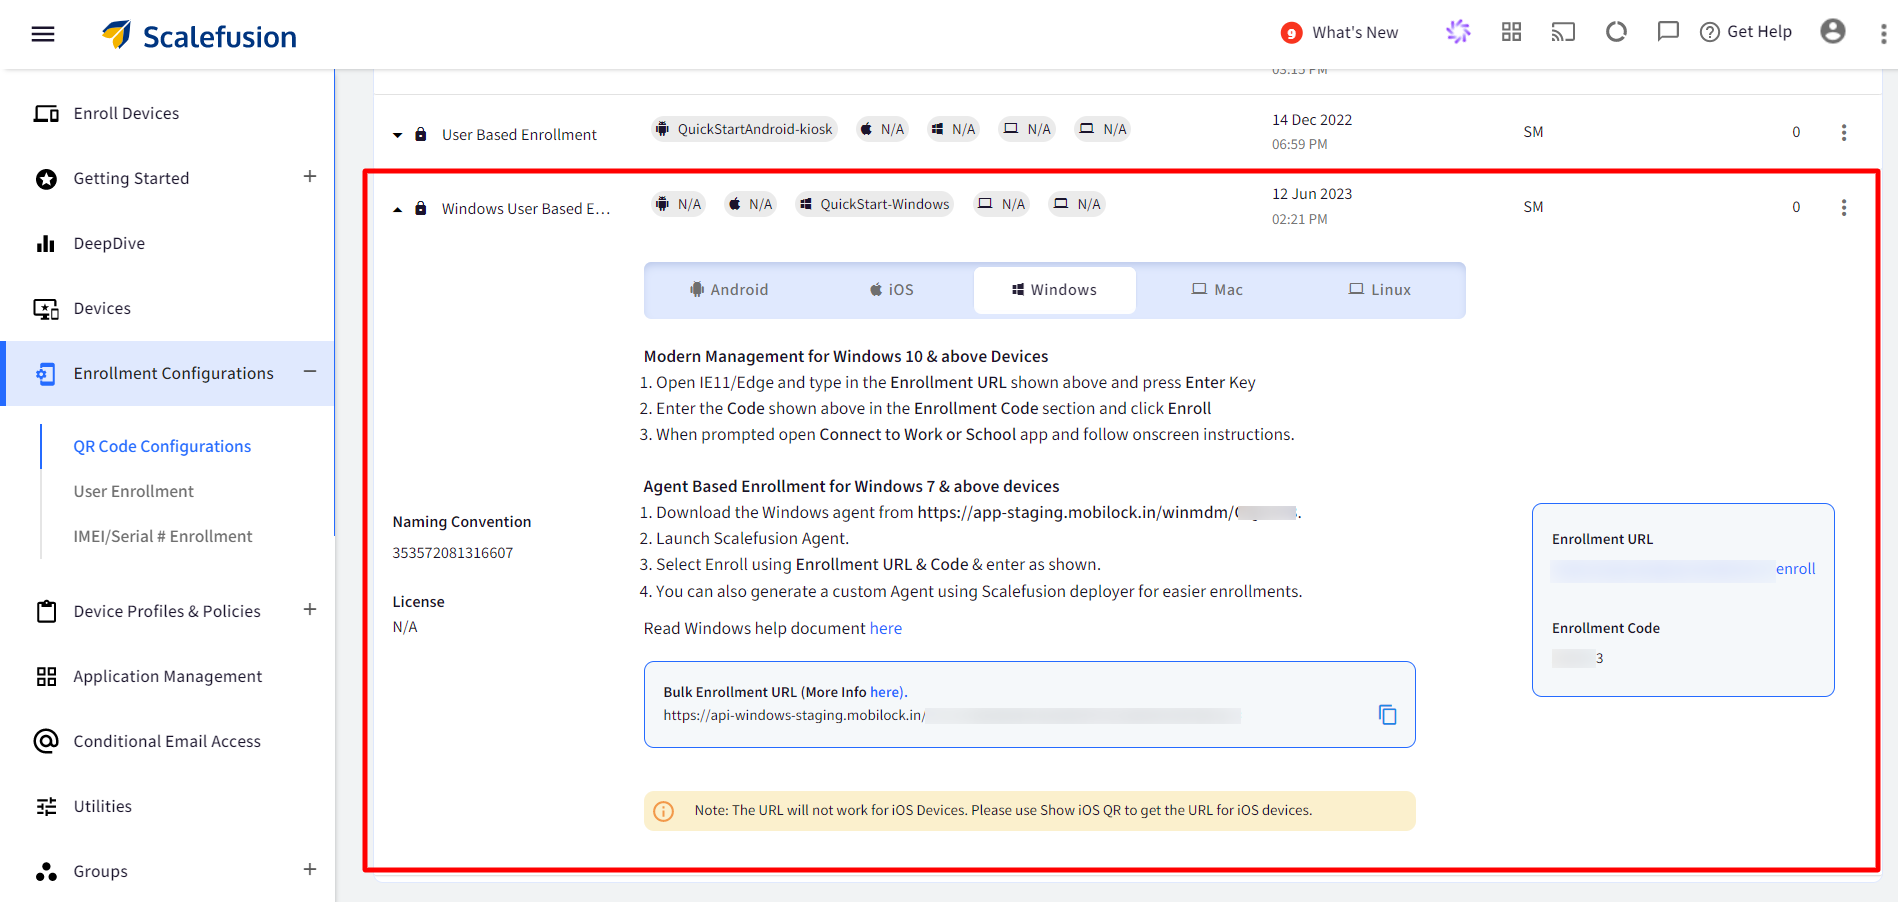
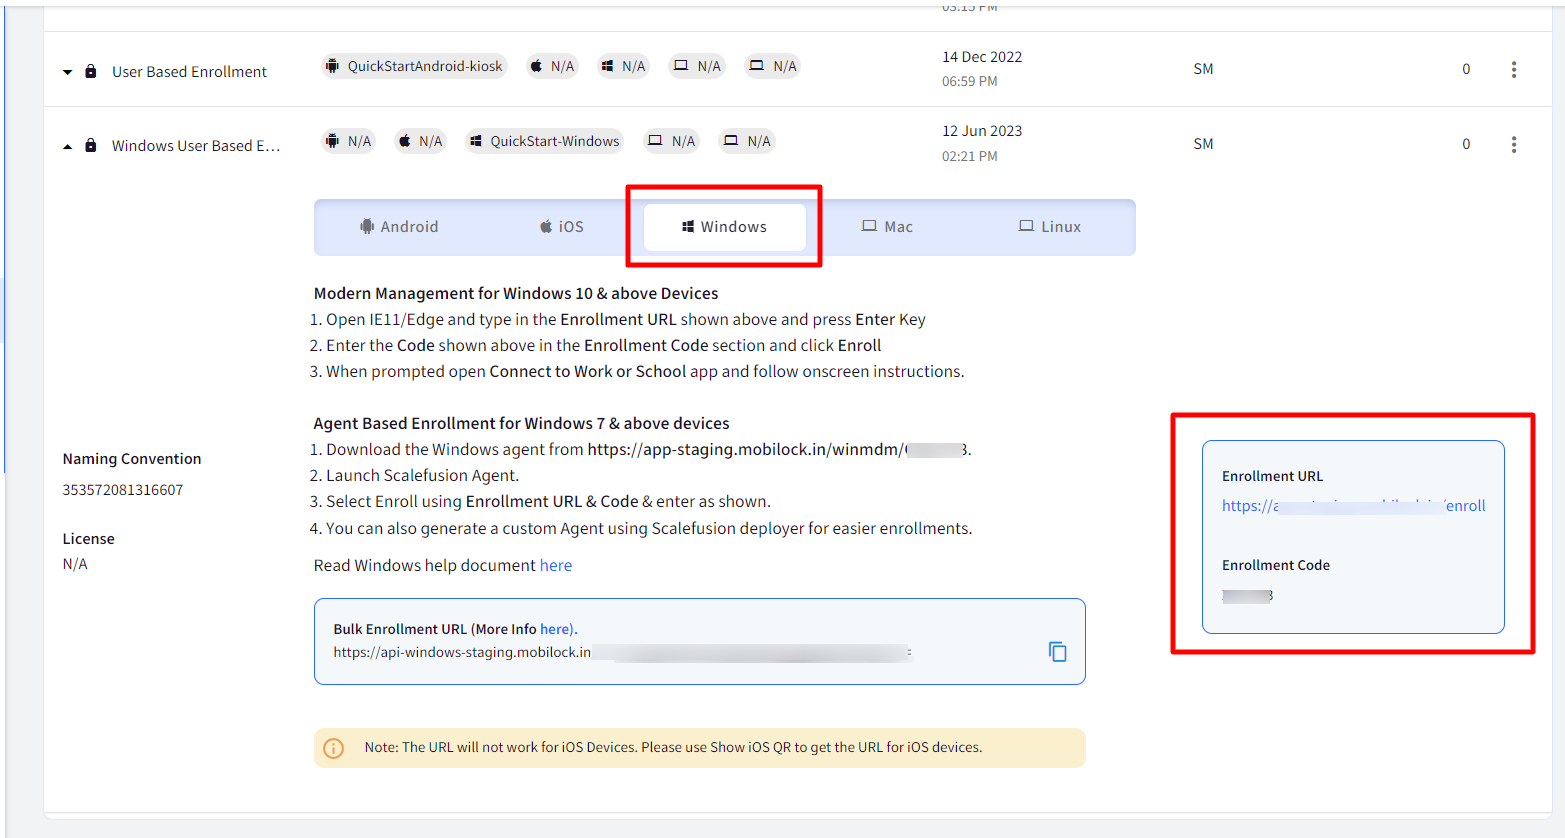
- To enroll your Windows 10 and 11 devices, you would need the enrollment URL. To get the enrollment URL, expand the same configuration (created in Step 1 above) from the list and click on Windows. This shows the Enrollment URL and Enrollment Code.

- On your Windows device, open IE11/Edge and type in the Enrollment URL shown and press Enter.
.png)
- A new window Kiosk Device Enrollment will open. Enter the Code you have received (from the Enrollment Configuration created in Step 1), in the Enrollment Code section and click Enroll.
.png)
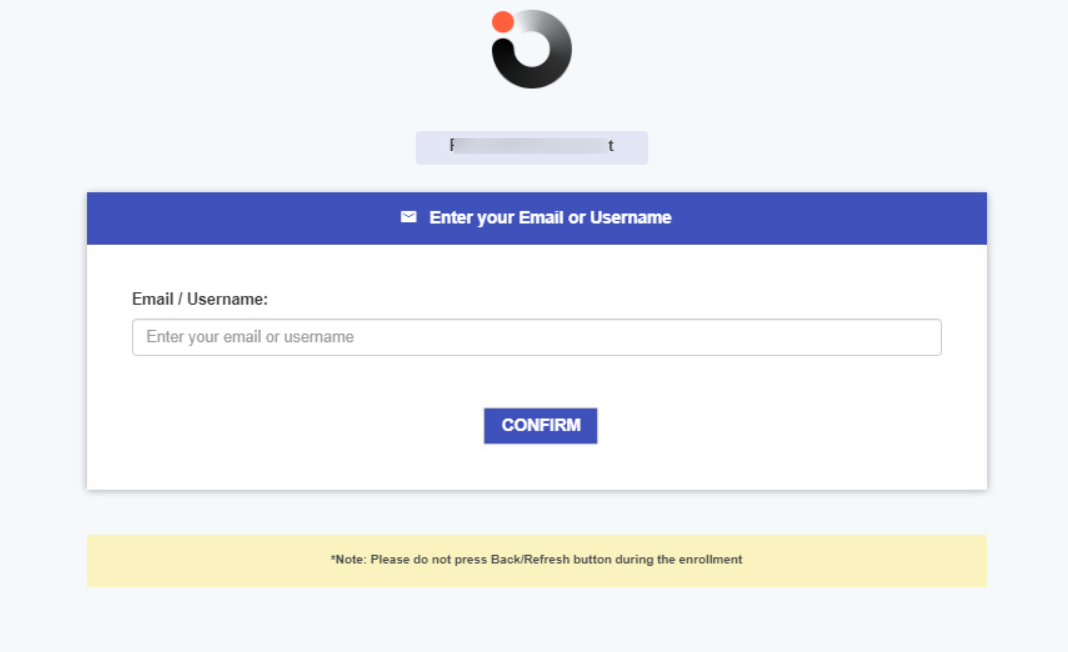
- Next, enter the email id or username of the user you have added in User Enrollment section on Dashboard. The OTP for authentication will be sent on this email id. Click Confirm.

- You will get a confirmation screen as below. Click Confirm.
.png)
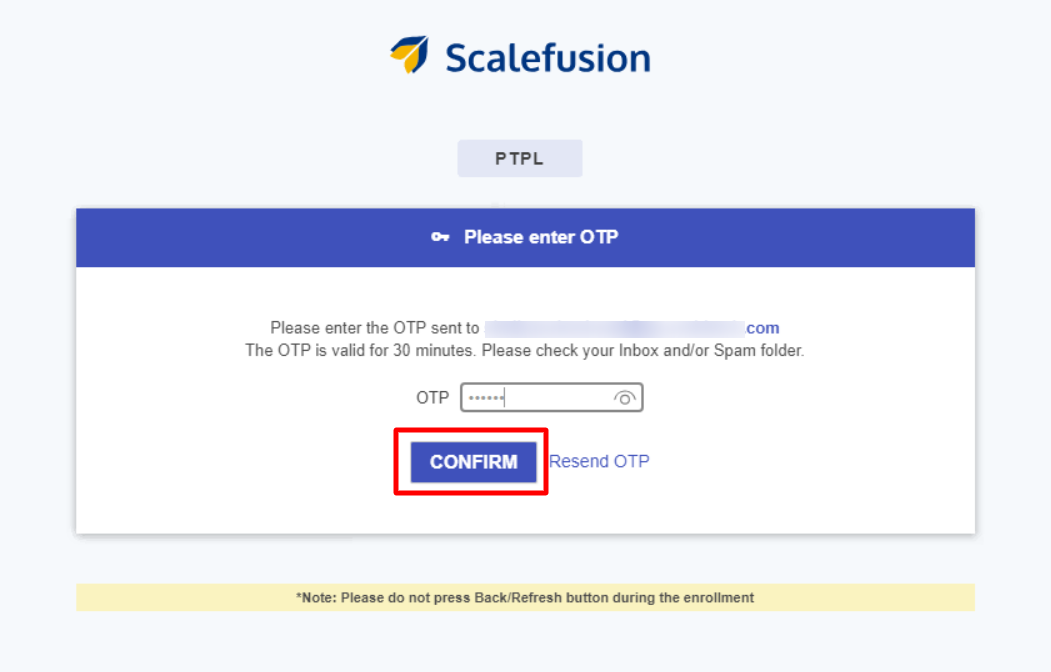
- On the next screen, enter the OTP you received on the email id and click Confirm. The OTP is valid for 30 minutes.

- The Terms of Service page will be displayed. Review the terms of service and click Accept.
.png) GSuite / O365 / SAML users who have the setting Enforce Users to sign in using GSuite/O365/SAML SSO enabled in User Management on Dashboard, will be asked to authenticate by signing in with their GSuite/O365/SAML credentials. Hence, step #4, #5 and #6 (OTP flow) will not come up. Once authenticated, Terms of Service will reflect.
GSuite / O365 / SAML users who have the setting Enforce Users to sign in using GSuite/O365/SAML SSO enabled in User Management on Dashboard, will be asked to authenticate by signing in with their GSuite/O365/SAML credentials. Hence, step #4, #5 and #6 (OTP flow) will not come up. Once authenticated, Terms of Service will reflect. - This will start the enrollment process and show you the first below screen. Do not edit any fields and click NEXT
.png)
- At this point the enrollment of the device will start and you will see some progress screens as shown below.
.png)
- On a stable internet connection, it should take around a couple of minutes to complete registration. Click Got It when you see this screen.
.png)
- This completes the enrolling. At this point the device will start communicating with ScaleFusion Dashboard and will take about another couple of minutes for the policies to be applied.
Validating the Enrollment
- Once the device is successfully enrolled, it will start appearing on ScaleFusion Dashboard under Devices section as a Managed device.
- On the enrolled Windows device if you open the Connect to work or school application, it will now display the device management state.
.png)
- Clicking on the Info button in the above screen, will show you that the device is managed by Scalefusion and will show you the Device sync status.

If you see that the device is not syncing the latest policies, you can use the Sync button in the above screen to initiate a manual sync with Scalefusion Dashboard.
User Authenticated Enrollment is not supported in Windows Autopilot mode.
Note:
It has been observed at times that enrollement into Scalefusion MDM is blocked by Antivirus programs hence an exception is required to be added for Scalefusion in the program. If you utilize an antivirus service, kindly include the Scalefusion folderin the exception list of your antivirus program.
Here is the path of the Scalefusion folder that will need to be allowed in the antivirus program: C:\Program Files (x86)\Scalefusion
Was this article helpful?


.png)
.png)
.png)
.png)


.png)
.png)

.png)

.png)
.png)
.png)
.png)
.png)

