- 04 Mar 2025
- 3 Minutes to read
- Print
- PDF
Supervise iOS Devices without Data Loss (Backup & Supervise)
- Updated on 04 Mar 2025
- 3 Minutes to read
- Print
- PDF
If you are planning on supervising existing iOS devices that are in the field, then one of the challenges is to retain the data that is already present in the iOS device. A normal backup and restore on the iOS device causes the Supervision settings to be lost, and the device becomes unmanaged.
There are some special steps required to backup and restore while supervising the device. This document outlines the steps to back up the iOS device that you want to supervise and then restore it before supervising it and hence avoid Data Loss.
Prerequisites
- Target iOS Device (e.g. Device A): This is the iOS device that you want to Supervise and enroll in Scalefusion.
- Temporary iOS Device (e.g. Device B): You would need an additional iOS device that will act as a temporary device to hold the backup.
- The OS version of Device A and Device B should be exactly the same, i.e. if Device A is on 13.3, then you would need the Device B to be on 13.3
- macOS Machine: You would need one MacBook to take the backups and restore
- Apple Configurator 2 (AC2): Download and install the latest version of AC2 on the MacBook.
- Lightning Cable
Step 1: Backup Target Device - Device A
The first step is to take a backup of the target device.
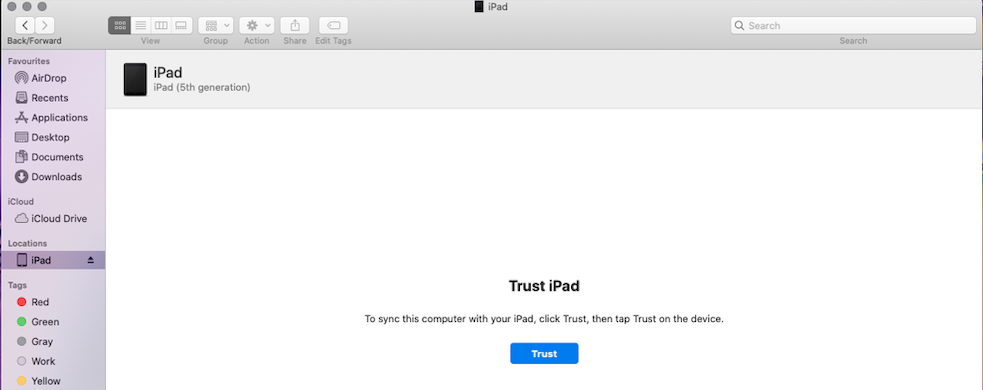
- Connect Device A to the MacBook and Open the Finder App, In the Finder app, under locations, you will see the iOS Devices. When prompted, accept the Trust prompts that will be shown on the MacBook and iOS devices.
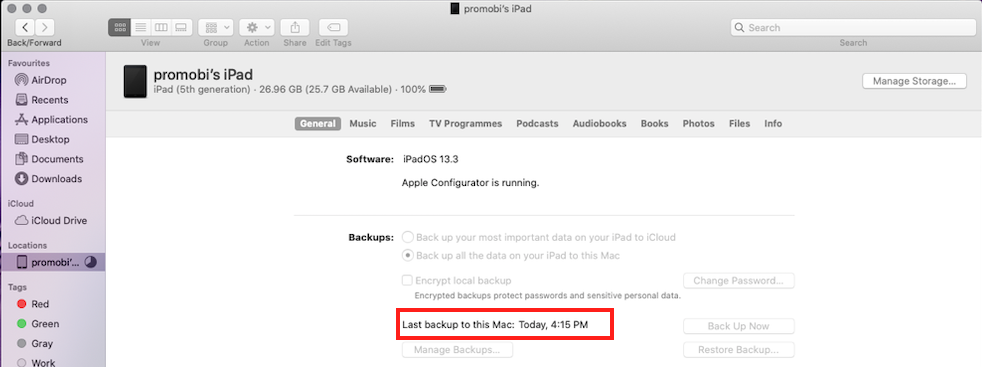
- Once trusted, the device details of the connected iOS device will be shown. In Device details, click General > Backup NowThe Backup may also start automatically.

- Once the backup is complete, note down the timestamp that will be used in the next step.
Step 2: Restore the Backup to Temporary Device - Device B
In this step, we will restore the backup of the target device to the temporary device.
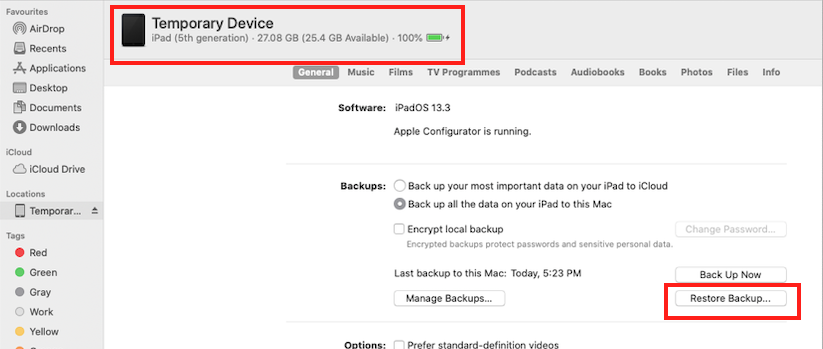
- Now connect the temporary device i.e. Device B, to the MacBook. Open the Finder App and accept the Trust prompts.
- Under Device details, Click General > Restore Backup...
- From the list of backups, select the backup that you took in Step 1.You can identify the backup using the timestamp
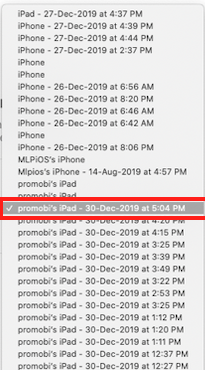
- This will restore the backup of Device A to Device B
Step 3: Backup Temporary Device - Device B
Now that Device B has the restored data from Device A, it is time to back up the Device B.
- Connect the Device B to the MacBook if not connected already. Open the Finder App and accept the Trust prompts.
- Under Device details, Click General > Back Up Now.
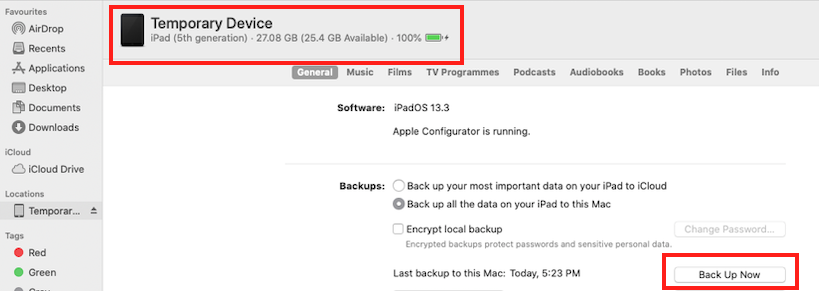
- Wait for the Backup to be complete. Note down the timestamp of the backup.
Step 4: Restoring the Data and Supervising Target Device - Device A
This is the final step that involves a multi-step process whereby we restore the data and Supervise Device A simultaneously.
- Connect the Device A to the MacBook. Open the Finder App and click on the connected iOS device.
- Under Device detailsClick Next, Click General > Restore Backup... From the list of backups, select the backup that you took in Step 3 i.e. Backup of Device BYou can identify the backup using the timestamp
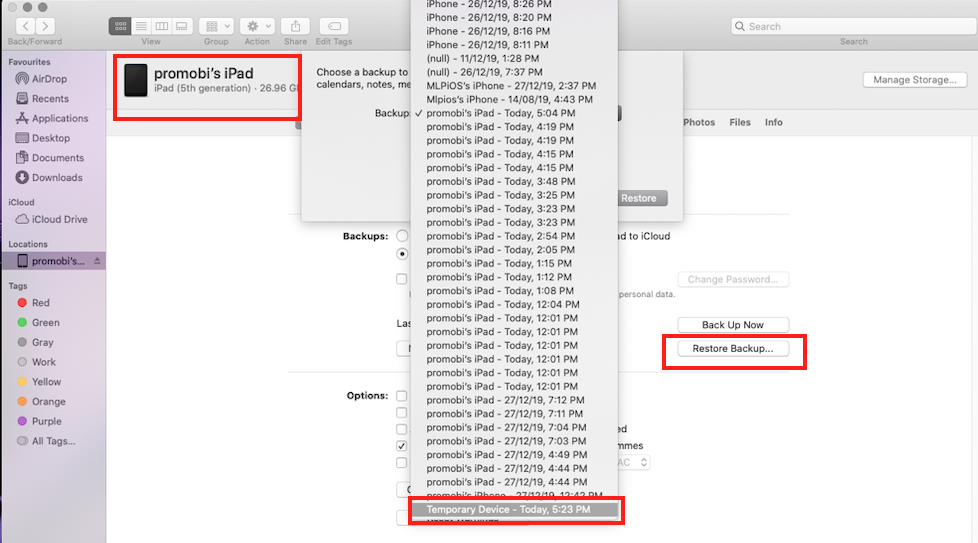
- The Device A will now show a message, Restore In Progress, and will turn off and reboot to the Hello screen. DO NOT perform any action on the device once it reaches the Hello screen.
- At this point, open Apple Configurator 2 on the Macbook and it will display the connected device.
- Right/Secondary click on the device frame that you see in AC2 to see the menu options.
- Select Prepare.
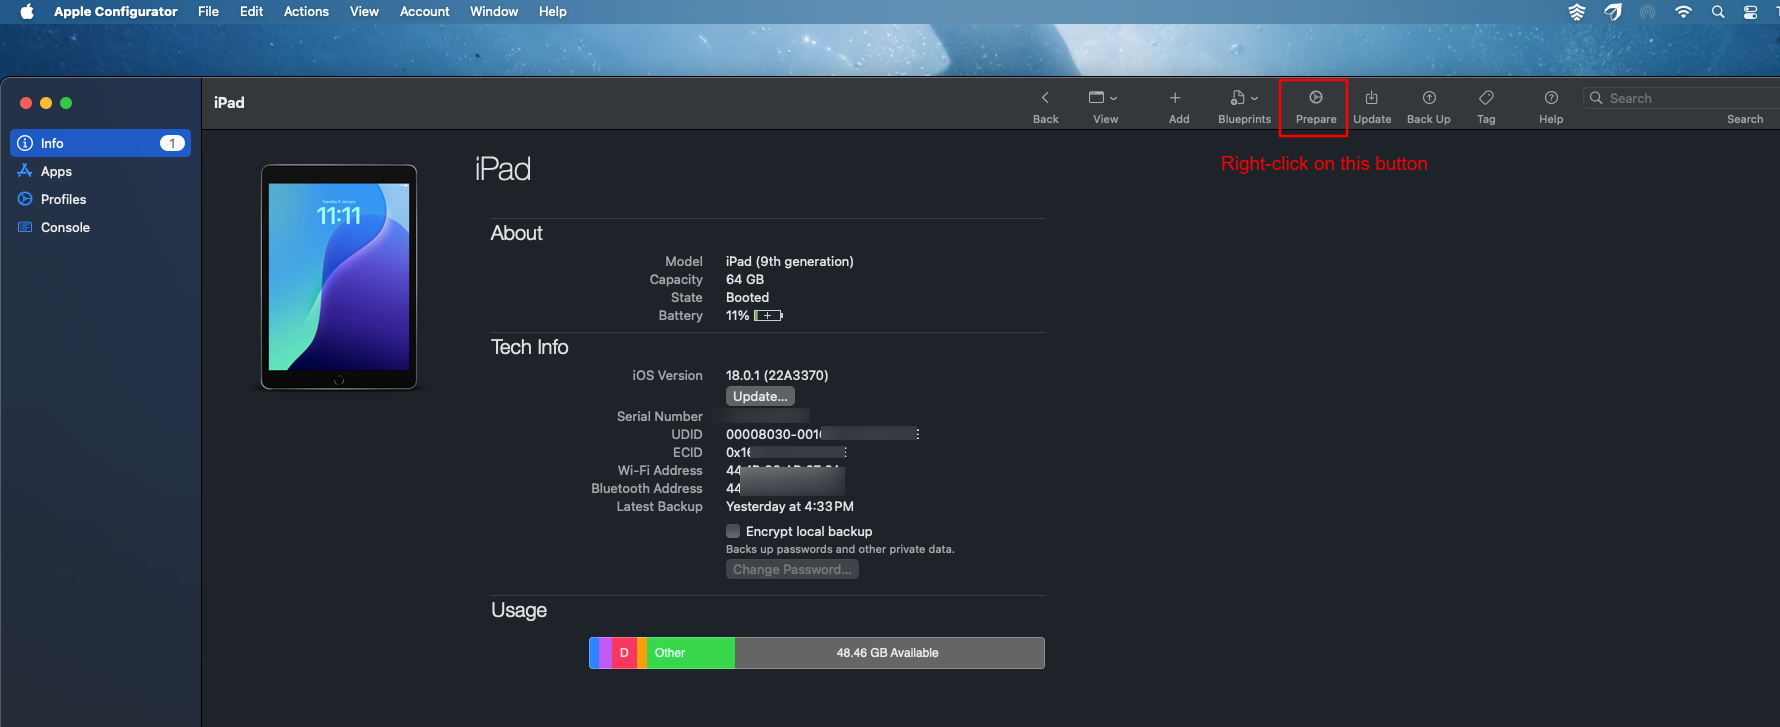
- You will see a screen with the following options, make sure you have selected the following options,
- From the Prepare With dropdown, select Manual Configuration.
- Un-select/Uncheck Add to Device Enrollment Program.
- Select/Check Supervise Devices.
- Select/Check Allow Devices to Pair with other computers.
- Uncheck Enable Shared iPad.
- Click Next
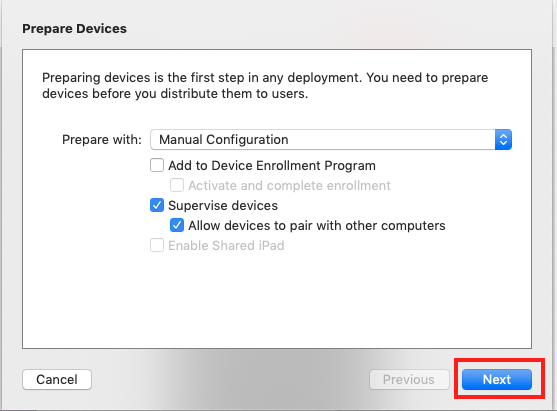
- In this screen, when prompted for a Server, select Do not enroll in MDM. Click Next
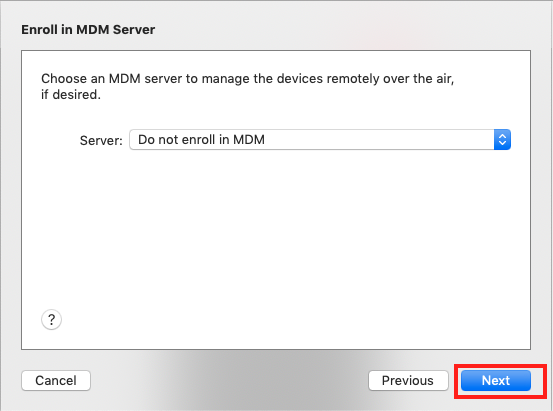
- Select an Organization and click Next
- Select the iOS Setup Assistant options to Skip or Show. Click Prepare to start the supervision process.

- Select Prepare.
- The Supervision process will start, and once the Supervision is complete, you can Enroll the device using a QR Code.
Frequently Asked Questions
Question: Can we restore the backup of Temporary devices to multiple Target devices during Supervision?
Answer: Yes. Once you have created a master backup at Step 3, you can use the same backup on multiple devices as long as the iOS version of the target device is the same. You just need to follow Step 4 to Restore and Supervise the device.


