- 23 Sep 2025
- 5 Minutes to read
- Print
- PDF
Configuring Veltar VPN Server
- Updated on 23 Sep 2025
- 5 Minutes to read
- Print
- PDF
The first step to allow managed devices to access internal resources is to set up a VPN server. To setup VPN server,
On Scalefusion Dashboard, navigate to Veltar > VPN Tunnel and click on Setup VPN Server

In the next window, perform the following steps
Download and install the Veltar VPN server and its dependencies
Install Veltar VPN server
Configure the Veltar VPN API server that is bundled in the solution and generate the required API keys
Complete setup and make it available on a public IP.

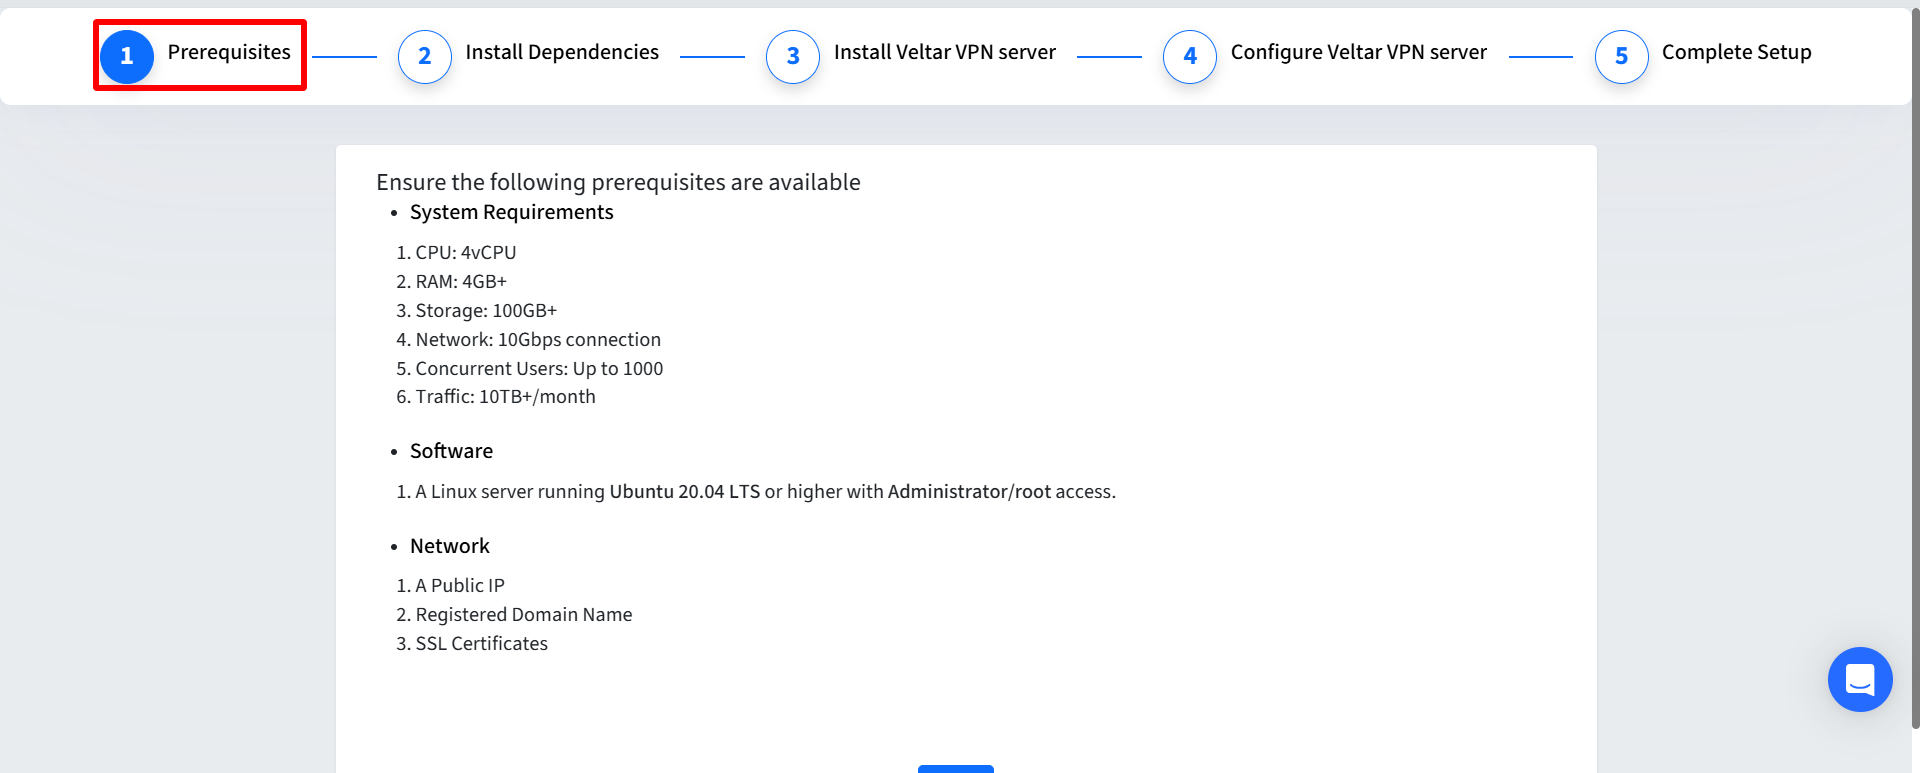
Prerequisites
Hardware & Software
A server running a compatible Linux distribution (e.g., Ubuntu 20.04 LTS or later) with the following configuration,
CPU: 4vCPU
RAM: 4GB+
Storage: 100GB+
Network: 10Gbps connection
Concurrent Users: Up to 500
Traffic: 10 TB+/month
Administrator (root) access to the the server machine
Network Requirements
Static Public IP Address
Registered domain name (optional)
SSL Certificate Requirements
Domain Certificate
Intermediate Certificate
Private Key

Install Dependencies
Open a terminal on your server and run the following commands to install required tools:
sudo apt-get update
sudo apt-get install wireguard wireguard-tools
Example output:
Reading package lists... Done
Building dependency tree
Reading state information... Done
wireguard-tools is already the newest version (1.0.20200513-1~18.04.1).
0 upgraded, 0 newly installed, 0 to remove and 0 not upgraded.
Install Veltar VPN Server
Download Veltar VPN Server
Click on the Download button to download the Veltar VPN package to your server. The file name will look like veltar-vpn_X.X.X_amd64.deb, where X.X.X is the version number.
Run command to Install Veltar VPN server
In the terminal, navigate to the directory where you downloaded the package and run the following command:
Note: Currently, the installation process is manual. Automated installation via dashboard script (similar to Tux Agent) will be available soon.
sudo dpkg -i veltar-vpn_X.X.X_amd64.debReplace X.X.X with the actual version number of your downloaded package.
Example output:
Selecting previously unselected package veltar-vpn.
(Reading database ... 72591 files and directories currently installed.)
Preparing to unpack veltar-vpn_1.2.3_amd64.deb ...
Unpacking veltar-vpn (1.2.3) ...
Setting up veltar-vpn (1.2.3) ...
Configuring Veltar VPN for Scalefusion MDM Integration
To configure Veltar VPN for integration with Scalefusion MDM, use the following command:
sudo veltar-vpn-ctl setupThis command will guide you through the configuration process. See the detailed Setup Instructions below:
Running the Setup Script
To begin the setup process, run:
sudo veltar-vpn-ctl setupStep-by-Step Configuration Process
Domain/IP Configuration
Enter the domain or public IP for integrating Veltar VPN with Scalefusion MDM.
Example:
Enter the domain or Public IP for integrating Veltar VPN with Scalefusion MDM: example.com
Protocol Selection
Choose between HTTP and HTTPS (HTTPS is strongly recommended for production).
Which schema would you like to use?
1. HTTP (not recommended for production)
2. HTTPS
Enter your choice (1 or 2):
Port Configuration a. For HTTP:
Enter the internal port number:
Enter the internal port number for Veltar VPN:Enter the external port number:
Enter the external port number (or press Enter if same as internal):
b. For HTTPS:
Enter the HTTPS port number:
Enter the HTTPS port number:
SSL Certificate Configuration (HTTPS only)
Choose how to provide certificates:
How would you like to provide the certificates and key?
Enter 'F' to provide file paths, or 'P' to paste the content directly:
Provide the Domain SSL Certificate, Intermediate SSL Certificate (optional), and SSL Private Key.

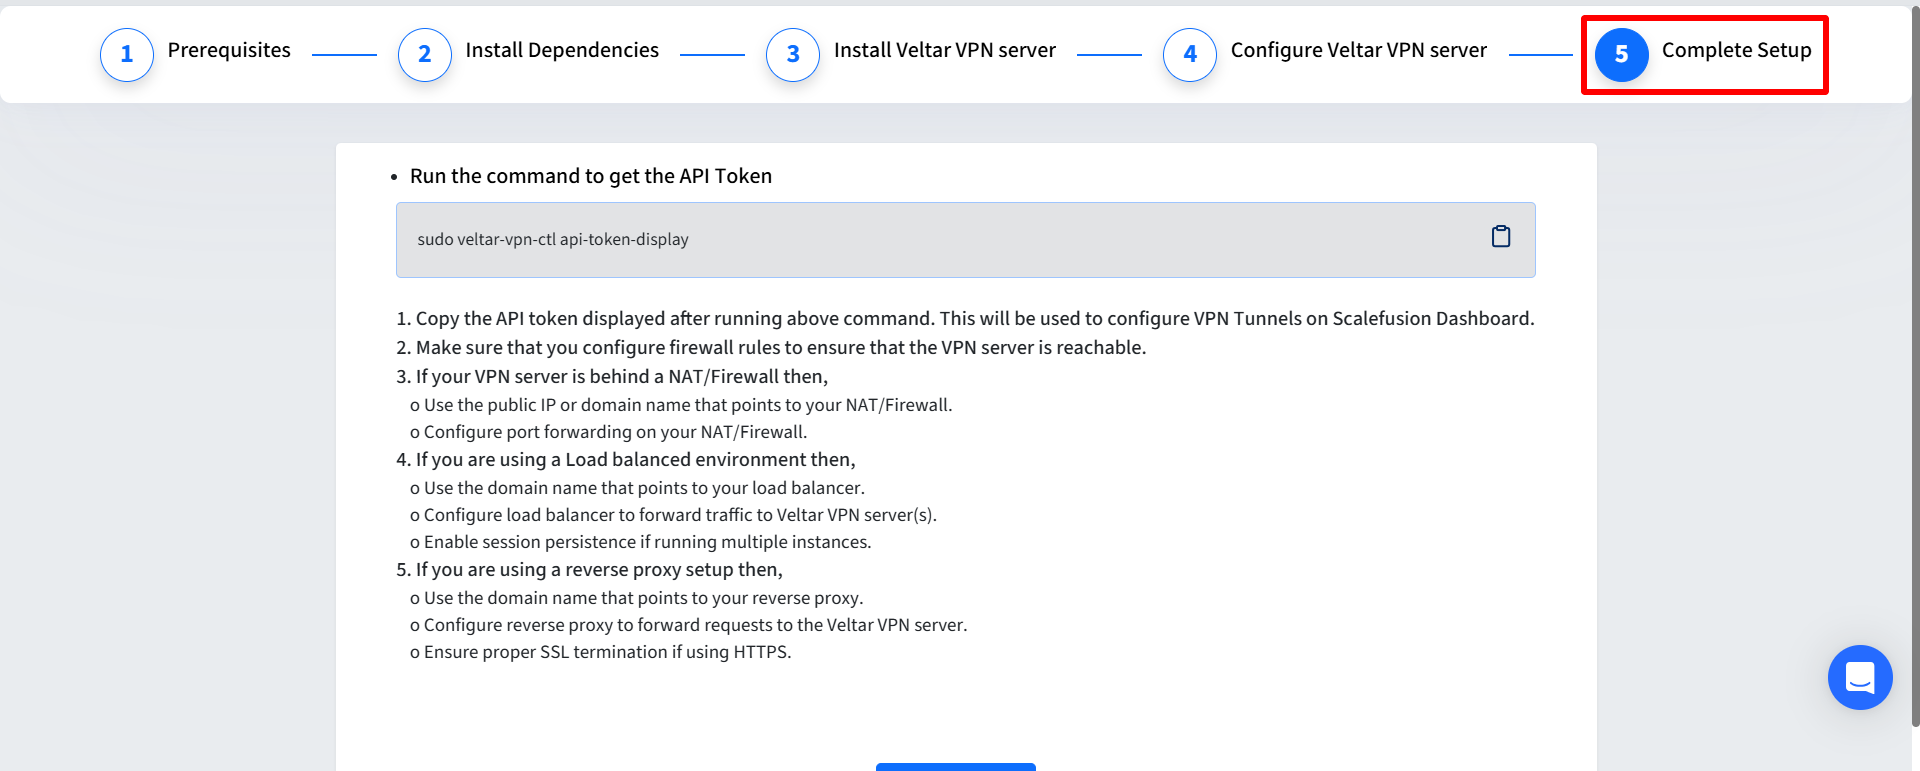
Complete Setup
Display the API Bearer Token (for Scalefusion MDM integration):
Run the following command to get the API Token:
sudo veltar-vpn-ctl api-token-displayExample output:
API Bearer Token: eyJhbGciOiJIUzI1NiIsInR5cCI6IkpXVCJ9...
Keep this token safe and do not share it!
Network Architecture Considerations
Direct Internet Connection
Use the public IP or domain name of your server.
Ensure configured ports are open and accessible from the internet.
Behind a NAT/Firewall
Use the public IP or domain name that points to your NAT/Firewall.
Configure port forwarding on your NAT/Firewall.
Load Balanced Environment
Use the domain name that points to your load balancer.
Configure load balancer to forward traffic to Veltar VPN server(s).
Enable session persistence if running multiple instances.
Reverse Proxy Setup
Use the domain name that points to your reverse proxy.
Configure reverse proxy to forward requests to the Veltar VPN server.
Ensure proper SSL termination if using HTTPS.

Now that you have completed the VPN server setup, please proceed to configure a VPN Tunnel that will allow access to the resources via this VPN server.
Basic Usage
After installation, you can use the following commands to manage Veltar VPN:
Check Veltar VPN status:
sudo veltar-vpn-ctl statusExample output:
run: haproxy: (pid 12345) 134s; run: log: (pid 12346) 134s
run: postgresql: (pid 12347) 134s; run: log: (pid 12348) 134s
run: veltar-vpn: (pid 12349) 134s; run: log: (pid 12350) 134s
View Veltar VPN logs:
sudo veltar-vpn-ctl tailExample output:
2024-10-11_09:15:23.12345 [INFO] Veltar VPN started successfully
2024-10-11_09:15:24.67890 [INFO] Listening on port 80
Advanced Configuration
Rotating the API Bearer Token
To change the API Bearer Token:
sudo veltar-vpn-ctl api-token-rotateExample output:
Security Warning: Rotating the API Bearer Token will invalidate the current one. Ensure any dependent systems are updated with the new token!
Rotating API Bearer Token...
Rotated API Bearer Token successfully. New token: eyJhbGciOiJIUzI1NiIsInR5cCI6IkpXVCJ9...
Keep this token safe and do not share it!
Important: After rotation, immediately update the token in your Scalefusion MDM integration to maintain connectivity.
Update VPN Build on VPN Server
Here are the step-by-step instructions to update the existing VPN build on the VPN server:
Prerequisites
Access to the VPN server via SSH.
Root or sudo privileges on the VPN server.
The latest
.debbuild file available locally.
Steps to Update the VPN Build
1. Copy the New Build to the VPN Server
From your local machine, copy the latest build file to the VPN server:
scp veltar-vpn_<latest_version>.deb user@<vpn-server>:~/
This will place the .deb file in the user’s home directory on the server. Replace:
<latest_version> → version string of the new build (e.g., 2.0.0~20250912051708-0_amd64)
2. Install the New Build
Log in to the VPN server and install the package:
dpkg -i veltar-vpn_<latest_version>.deb
This installs the new VPN package over the existing one.
3. Restart the VPN Service
Restart the service to apply the new build:
systemctl restart veltar-vpn-runsvdir.serviceFrequently Asked Questions (FAQ)
Q: How often should I rotate the API Bearer Token?
A: It is recommended to rotate the token every 90 days or immediately if you suspect it has been compromised.
Q: Can I use Veltar VPN without Scalefusion MDM?
A: No, Veltar VPN is designed to work seamlessly with Scalefusion MDM only.
Q: What should I do if I forget to update the API Bearer Token in Scalefusion after rotation?
A: If this happens, your devices will not lose the connection. However, you will not be able to create new tunnels or publish VPN on devices. Simply update the token in Scalefusion as soon as possible to restore full functionality.
Q: How can I check if Veltar VPN is running correctly?
A: Use the following command to check the status of all Veltar VPN services:
sudo veltar-vpn-ctl statusThis will show the status of HAProxy, PostgreSQL, and the main Veltar VPN service.
Q: What ports do I need to open for Veltar VPN?
A: You need to open:
The port configured for the web interface (HTTP or HTTPS)
UDP port(s) for VPN tunnels (e.g., 51820-51830) Always ensure these ports are properly secured and only accessible as needed.


