- 12 Dec 2024
- 5 Minutes to read
- Print
- PDF
All Utilities
- Updated on 12 Dec 2024
- 5 Minutes to read
- Print
- PDF
This section is a collection of nifty utilities to make your device management even more easy. Send Broadcasts, take actions on devices in bulk, clear files on SD cards, and more, all from one place.
Security Incident Settings
Enable Security Incidents
This setting will let you know when someone tries to forcefully exit the Scalefusion app (failed unlock attempts) and other intrusions related to SIM swaps. This option is for Android only.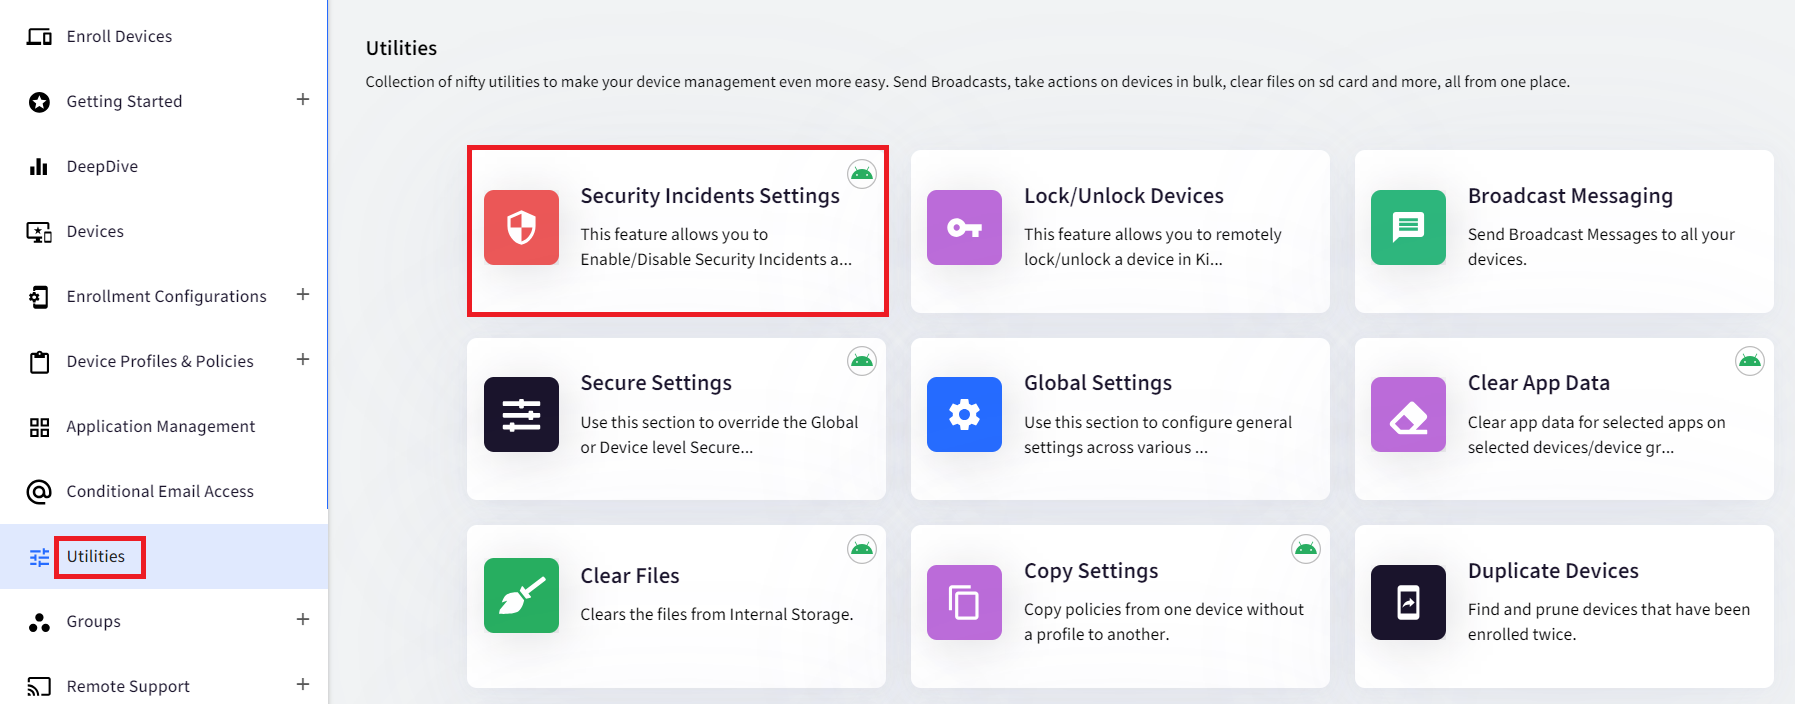
- Unlock Attempt count: This lets you set up the number of failed attempts after which the Unlock Attempts should be captured. The minimum is 1, and the maximum is 5.
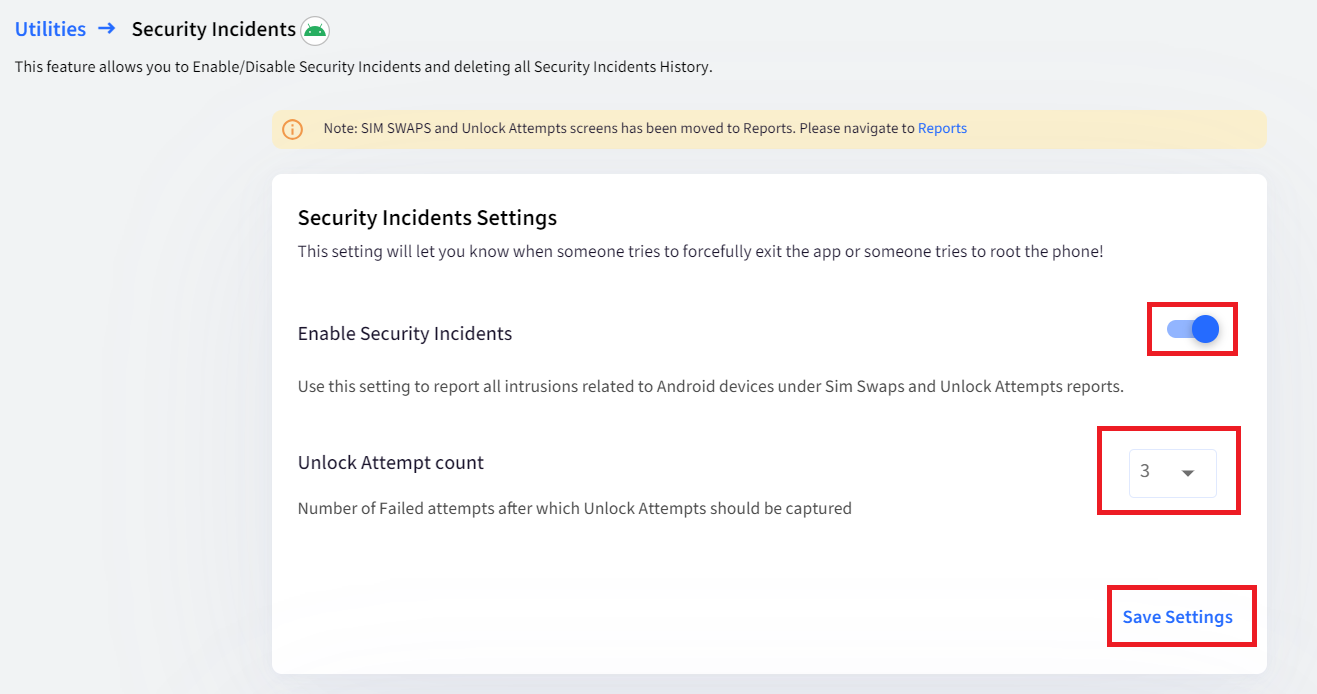
- Delete Security Incidents History:This will allow you to delete all security incidents- failed unlock attempts and SIM swaps. Please note there is no undo for this hence it is recommended to use this option with caution.NoteYou will be able to see all the failed unlock attempts and SIM swaps in the Reports & Workflows > Reports > Unlock Attempts and Sim Swaps.

Lock/Unlock Devices
This will allow you to remotely lock or unlock your Android, iOS, and macOS devices in Kiosk mode.
- You can lock or unlock the devices from the list of devices shown under the Devices tab.

- Or, you can lock or unlock all the devices that are added to a Device group in one go from the Device Groups tab.

- You can also filter out the devices based on Locked or Unlocked devices or All.

Secure Settings
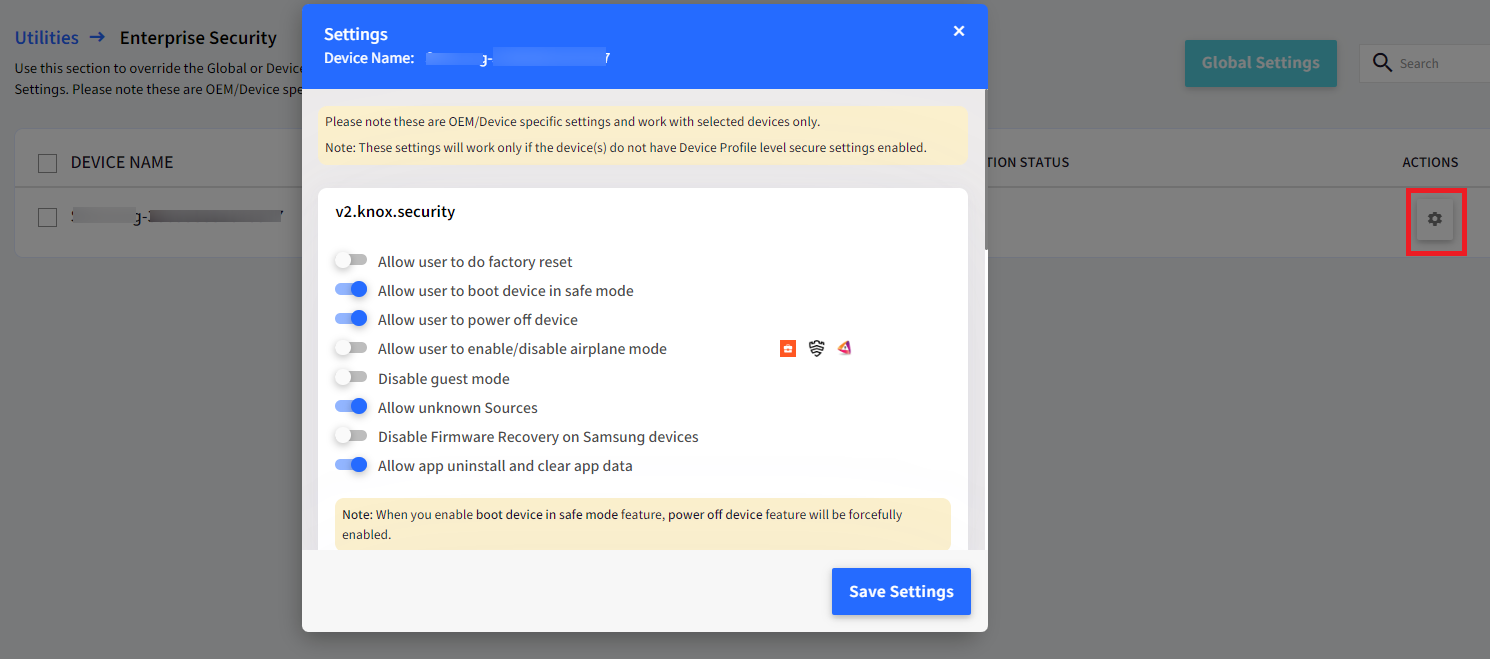
Use these settings to configure the Secure settings for the devices that are not added to a Device Group on which no Device Profile is applied or on devices on which Device Profile-level secure settings are not enabled. This option is for Android only.

- Global Settings: This will apply the same set of settings on all the devices showing up in the Secure Settings section.


- Device level settings: This will configure the settings for a single device. Click on the gear icon under the ACTIONS column for a particular device.
Clear App Data
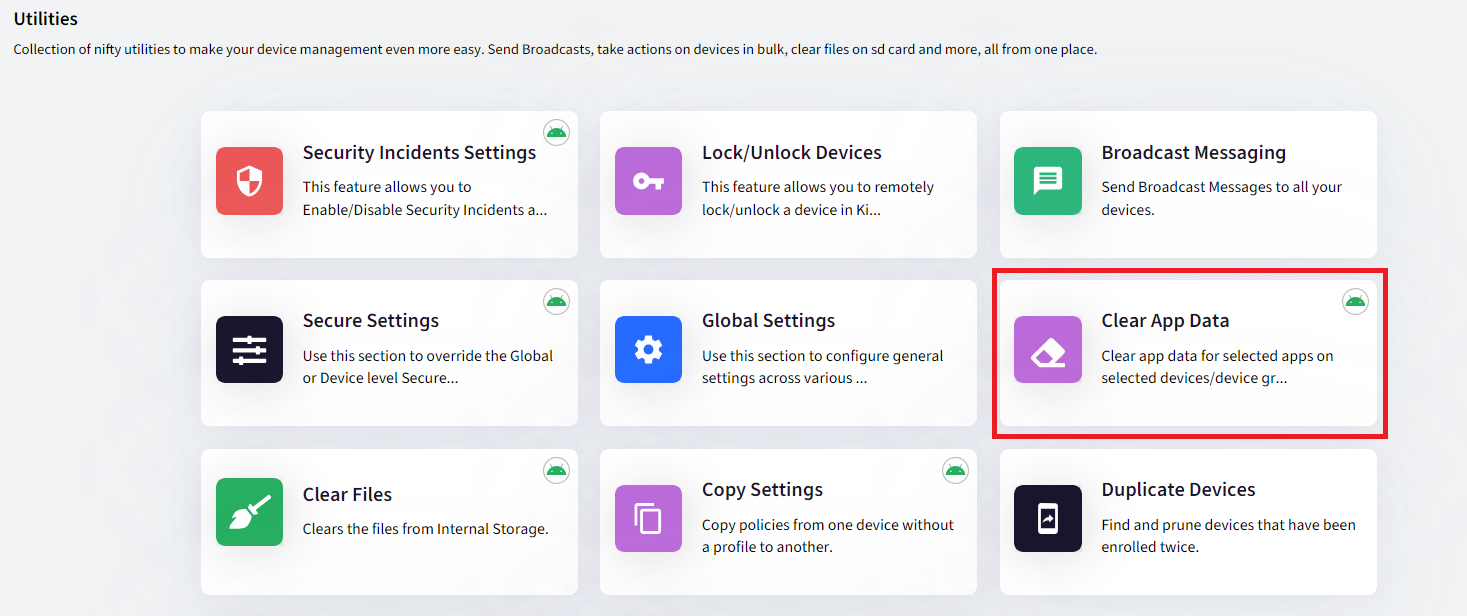
This section allows you to clear the app data for selected apps on selected devices or Device groups. This option is for Android only.
- Select Devices/Device Groups: You can select Device Groups to send the clear app data push to all the devices that are part of that specific group. Or you can select Device(s).
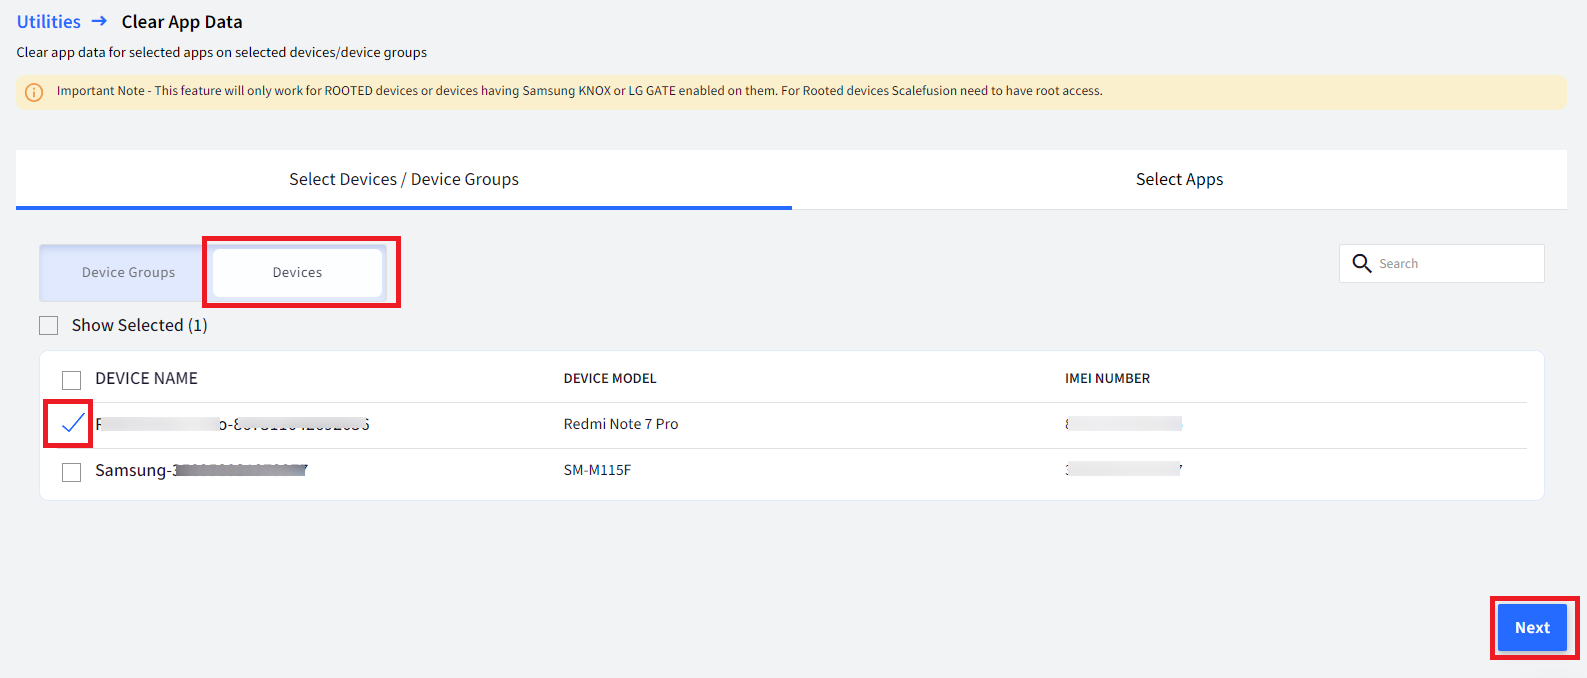
- Select Apps: Next, select the app(s) for which you would like to clear app data. The apps showing in this tab will be the apps that have been allowed in the Select Apps section in the Device Profile.
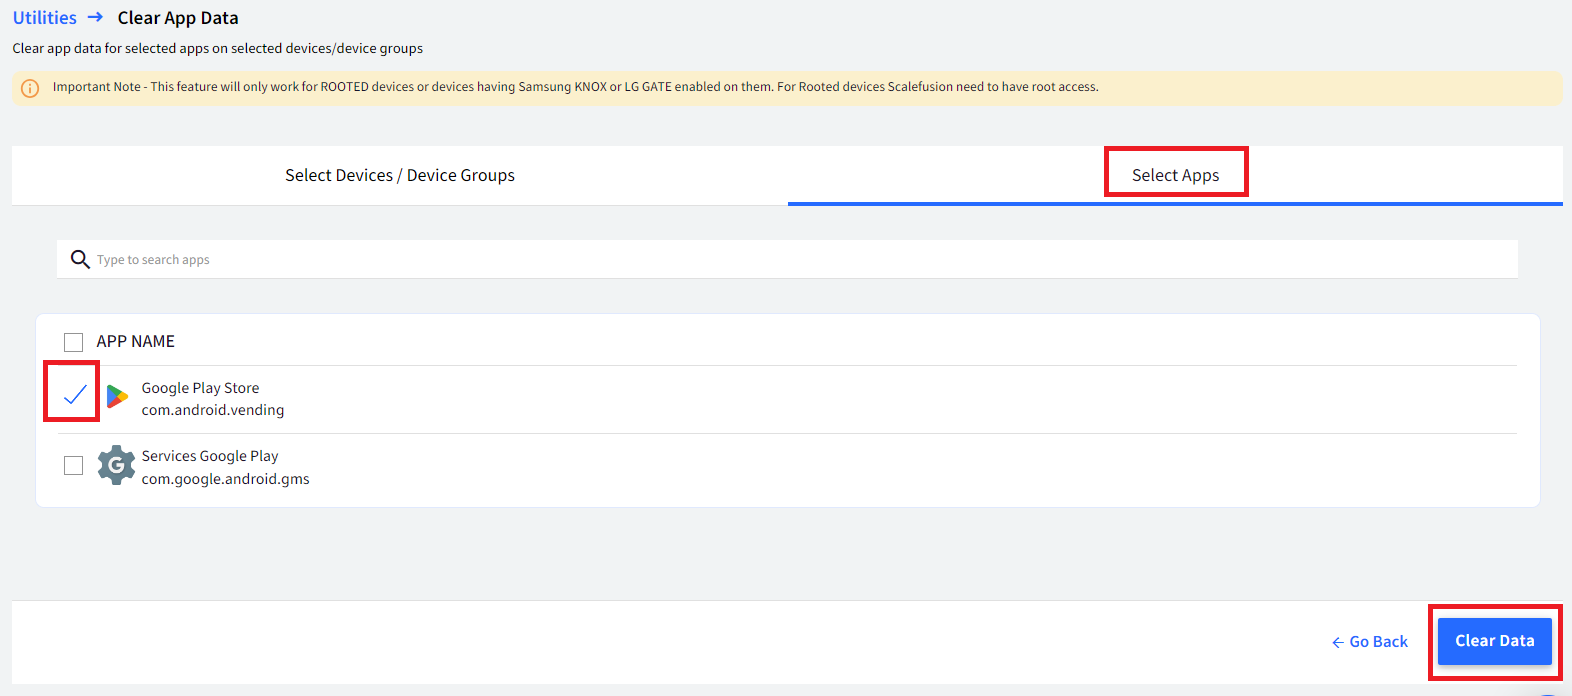
- Click on the Clear Data button.
Clear Files
This will clear files from the internal storage on all the devices. This option is for Android only.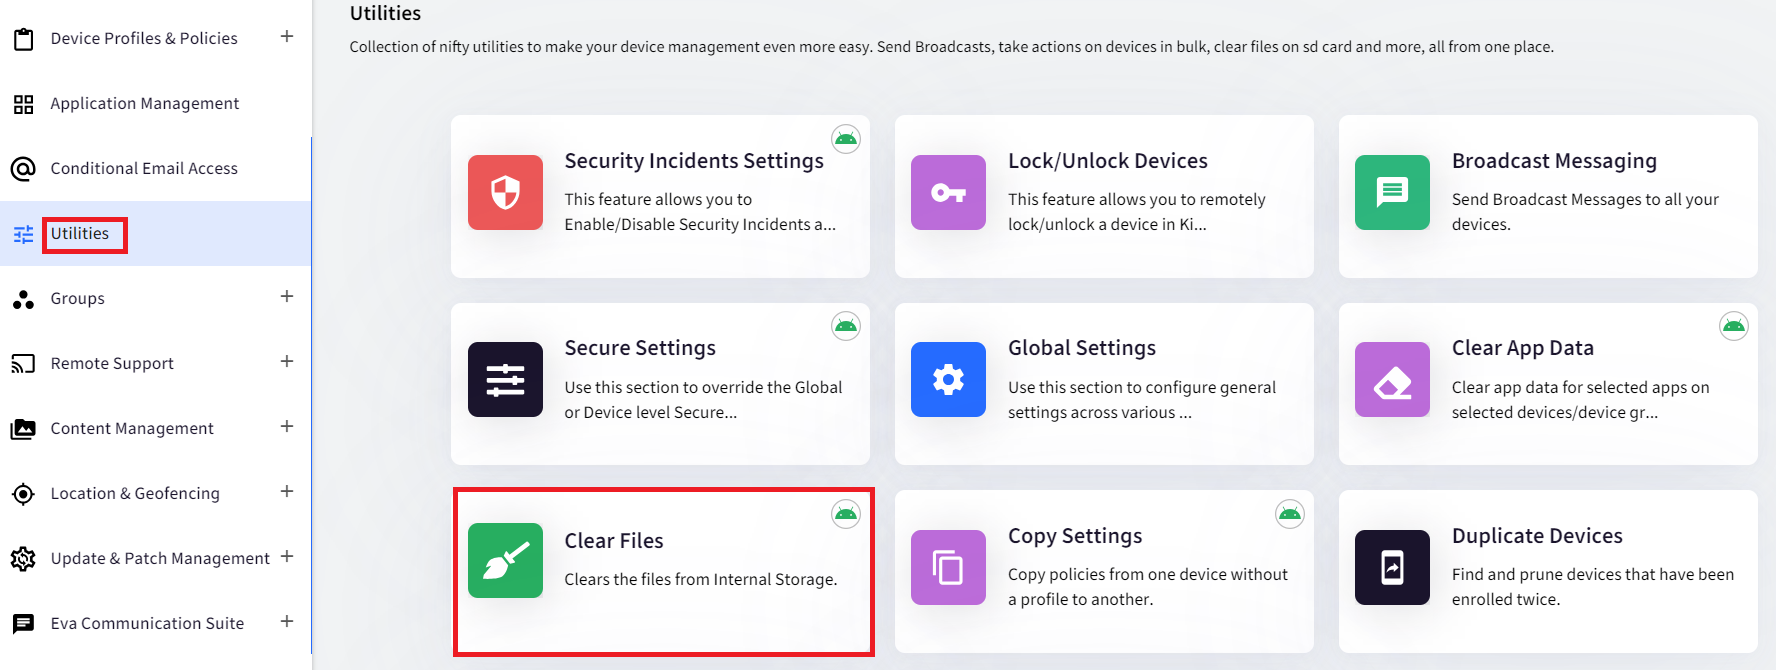
The following items will be deleted:
- Photos and images that are stored in the Gallery.
- Video and audio files that are stored in the Gallery.
- Clear Broadcast Messages: Enabling this option will delete all the broadcast messages sent to the devices.

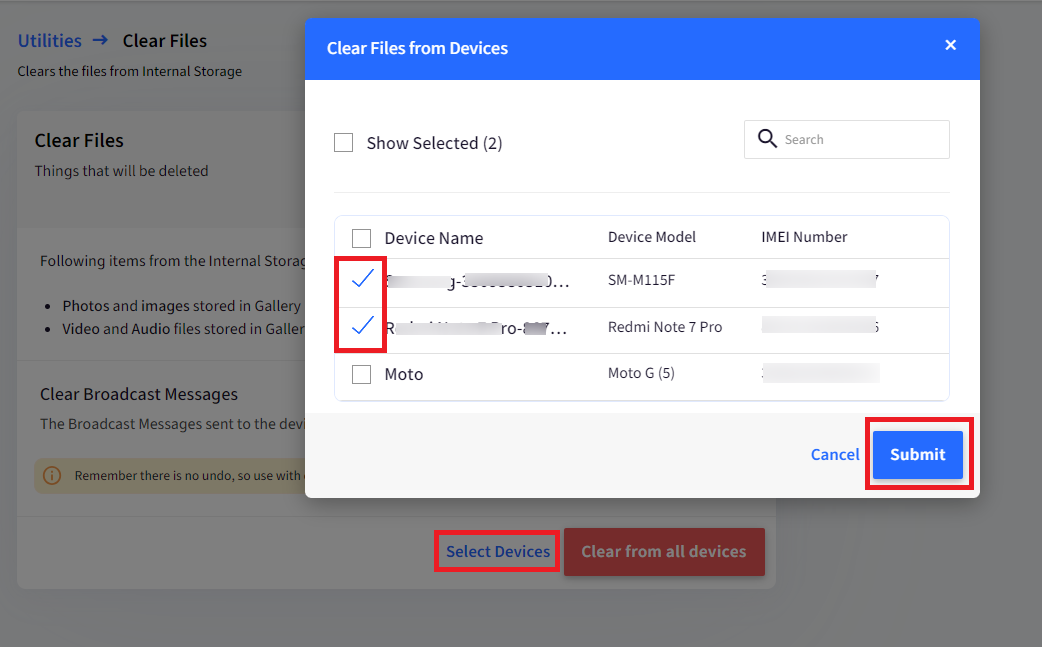
- Select Devices:You can select the device(s) from which Files and Broadcast messages can be deleted.Please note that there is no undo for this hence it is recommended to use this option with caution.
Copy Settings
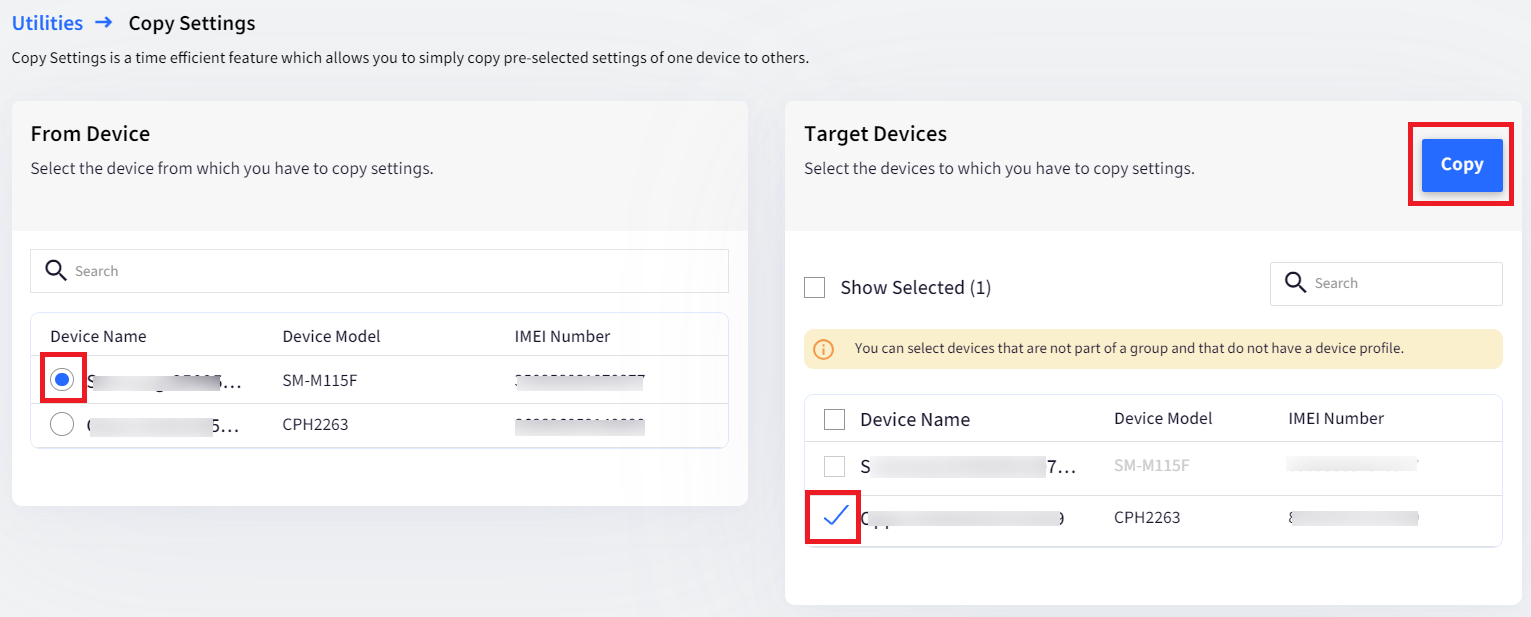
This allows you to copy the pre-selected settings of one device to other devices. This is for the devices that are not part of any Device Profile or Device Group. This option is for Android only.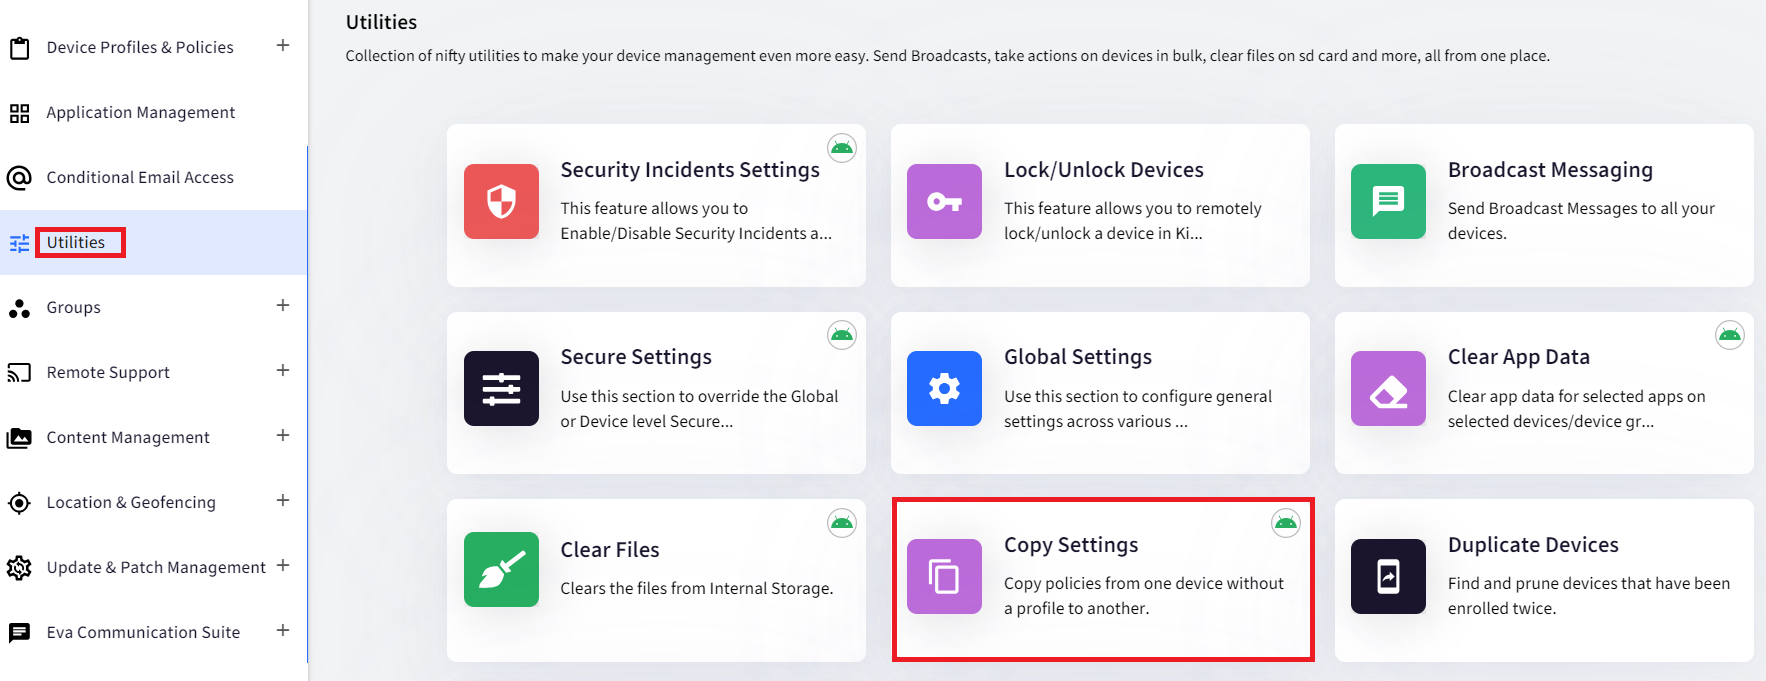
- From Device: Select the device from which you would like to copy the settings.
- Target Devices: Select the device(s) to which you would like to copy the settings.
- Click on the Copy button.
- The target device will show the app and policies similar to the initial device.
Duplicate Devices
This section helps IT Admins to check if they have enrolled the same device twice. This option works for Android, iOS, and macOS. Duplicate device entries may happen in the following scenarios:
- If the device is factory reset or re-enrolled via Zero-Touch, or DEP.
- If the user locally removes the MDM Profile on Mac devices or re-enrolls the device.
- Admin is enrolling the device as EMM-managed. However, the device does not enroll as a managed device. So admin might reset the device(s) and re-enroll.
- In all the above cases, if the previous device entry has not been deleted from the dashboard, then re-enrollment creates a duplicate device.

How to remove duplicates
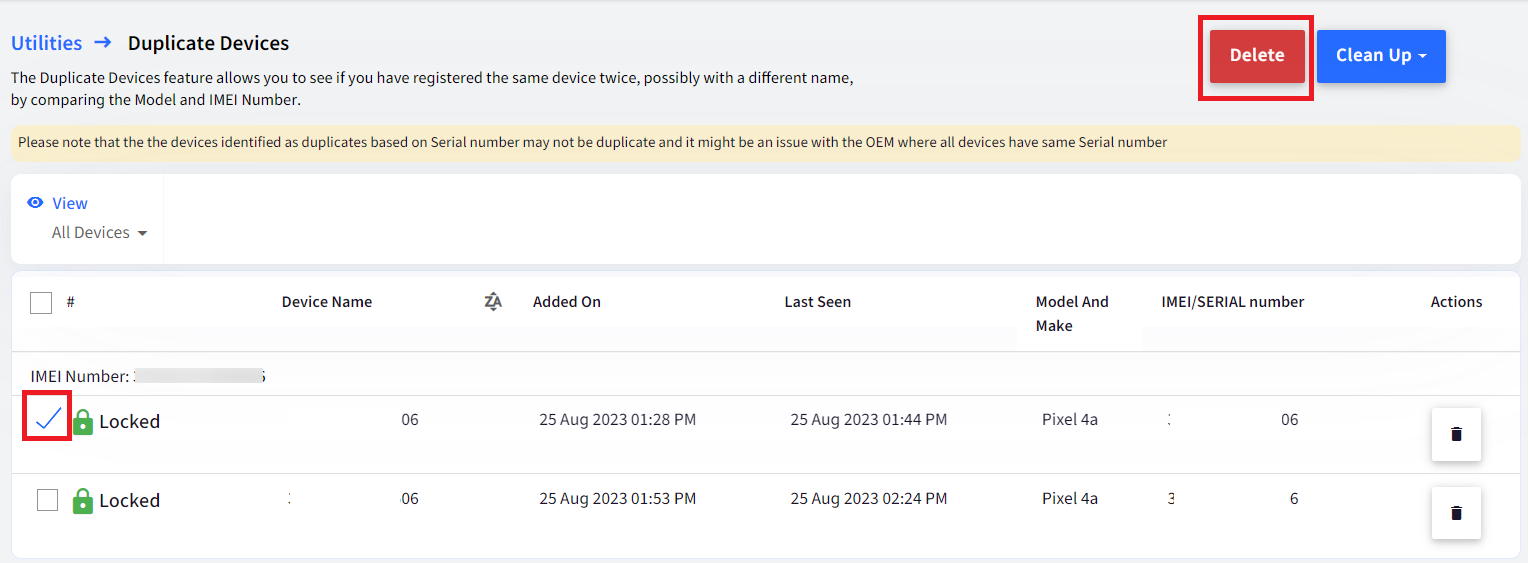
- Select Devices: You have the option to manually select the duplicate device (based on the last seen time stamp) and delete the device. Put a check in front of the device (the one with the earlier timestamp) and click on the Delete button on top.
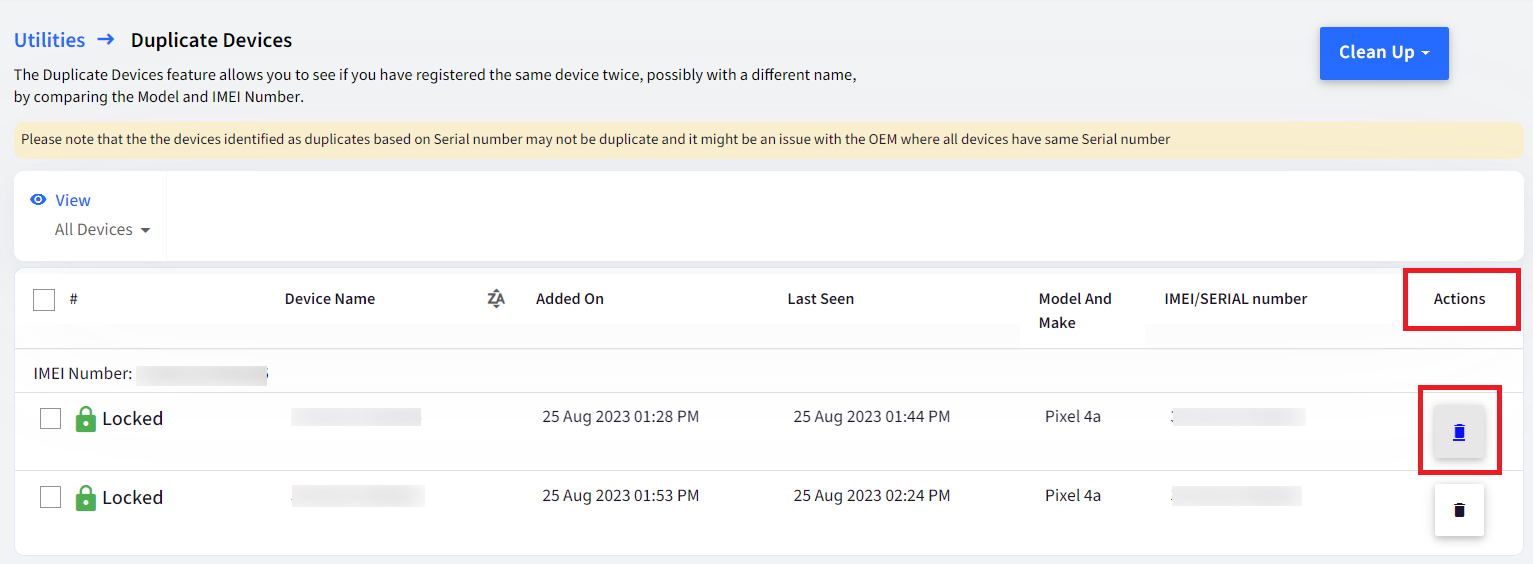
- Actions: Click on the delete icon under Actions to delete the duplicate device.
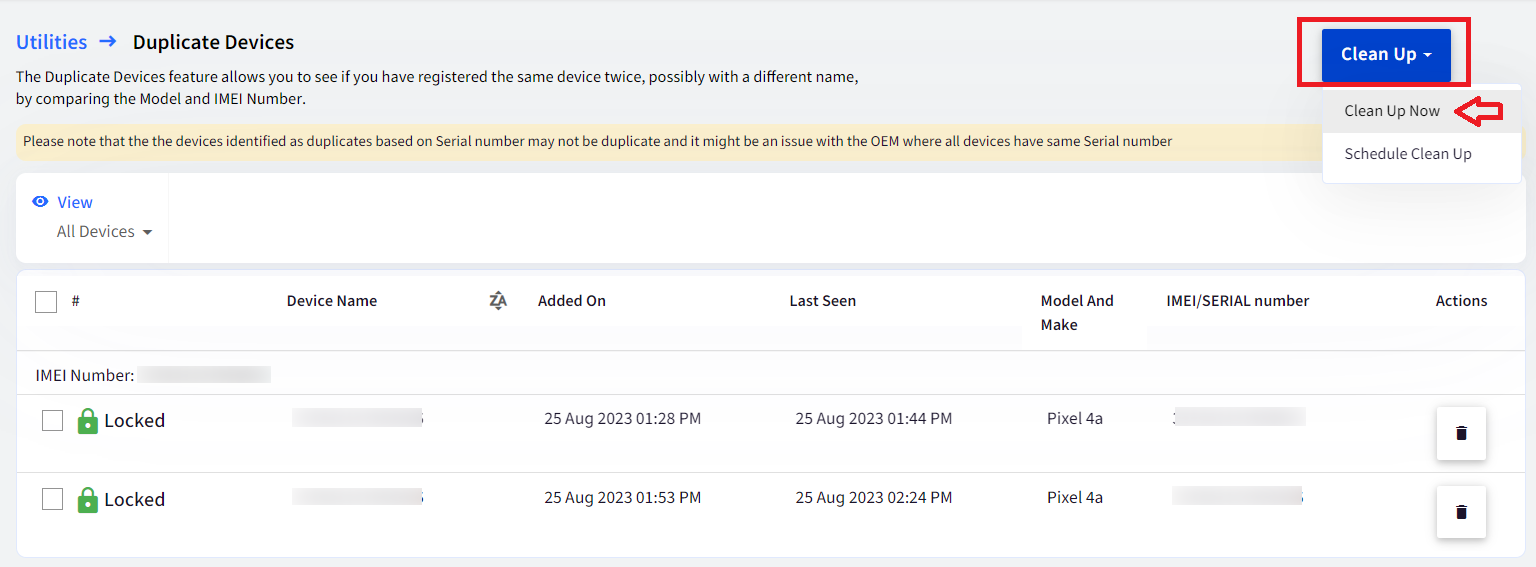
- Clean up: If there are a large number of duplicates, you can use the Clean Up utility to remove duplicates in one go. Click on the Clean Up button on the top right. There will be two options displayed in drop-down:
- Clean Up Now: This will clean up the duplicate device entries based on the last seen time stamp.
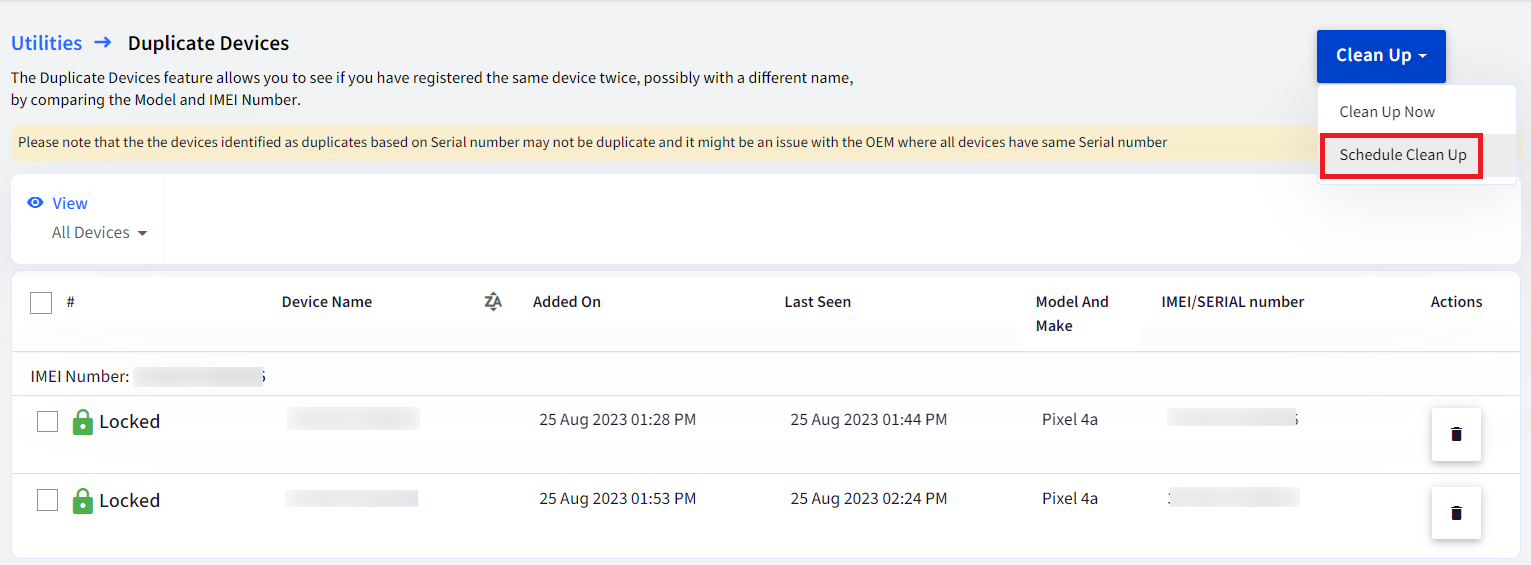
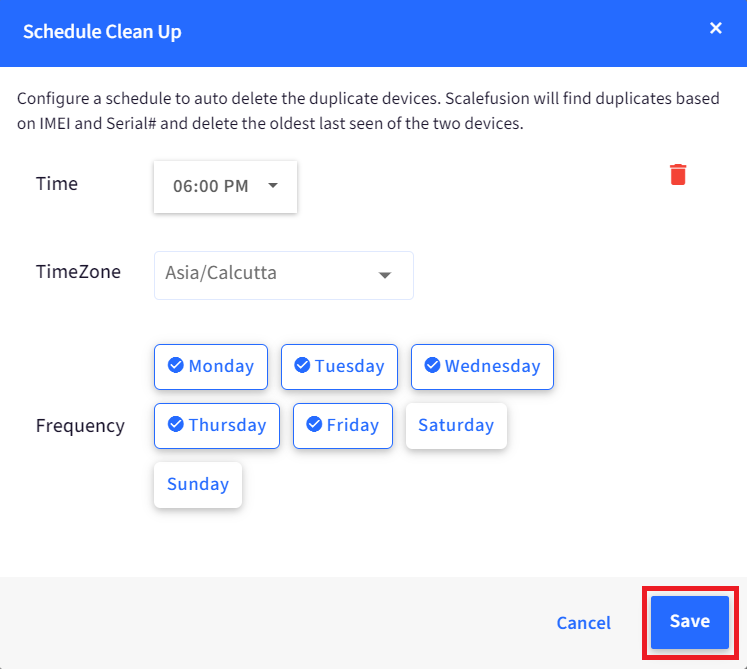
- Schedule Clean Up: You can schedule the time and frequency to auto-delete the duplicate devices. Clicking on Schedule Clean Up will open up a dialog where you can set the Time, TimeZone and frequency at which the clean-up should take place.
 Please note that the devices identified as duplicates based on Serial number may not be duplicates, and it might be an issue with the OEM where all devices have the same Serial number.NoteTo avoid the creation of duplicate devices, please enable the Re-enrollment Settings in Utilities > Global Settings > General Settings. Refer to our guide here.
- Clean Up Now: This will clean up the duplicate device entries based on the last seen time stamp.
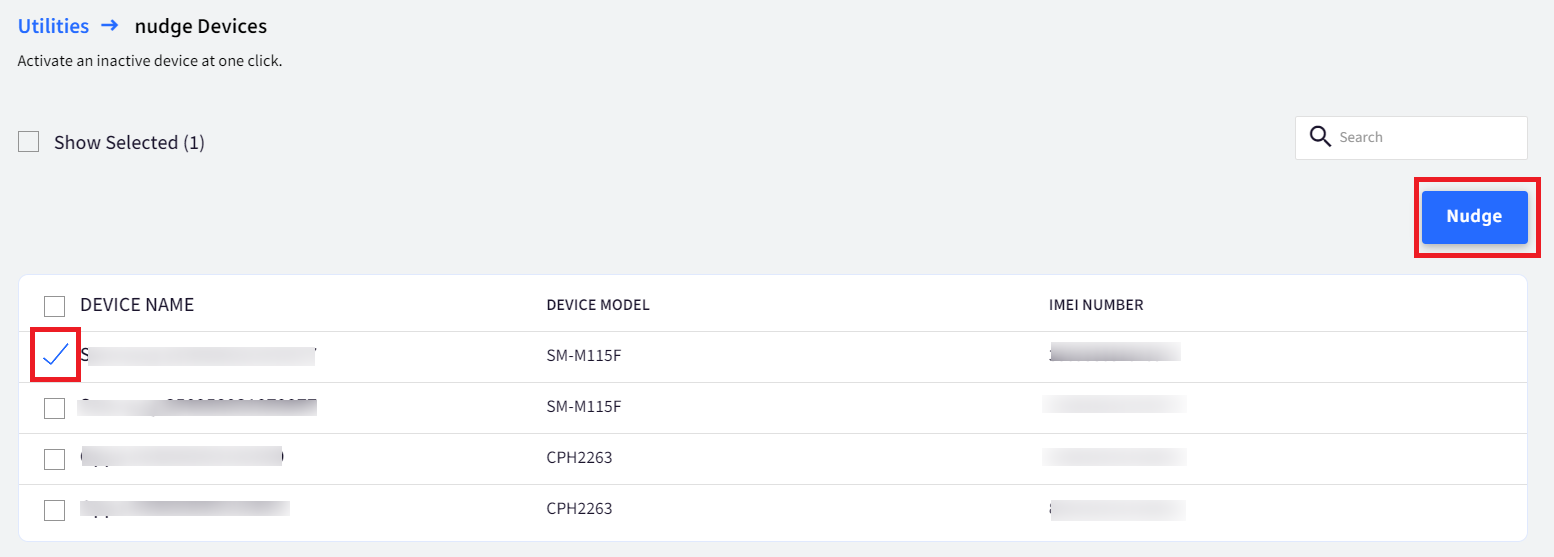
Nudge Inactive Device
This option helps the IT Admins to send a nudge to devices that might be sitting ideal.
Buzz Devices
This option allows IT Admins to play a short notification sound on any device while it is locked in Scalefusion.

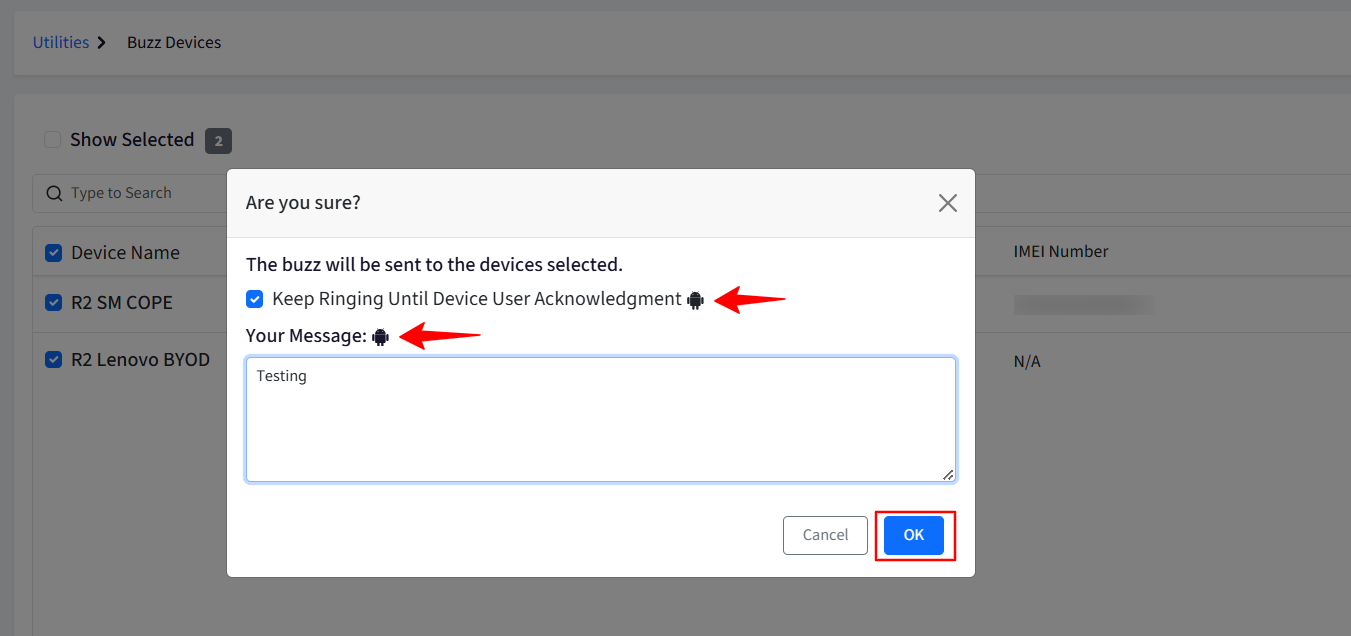
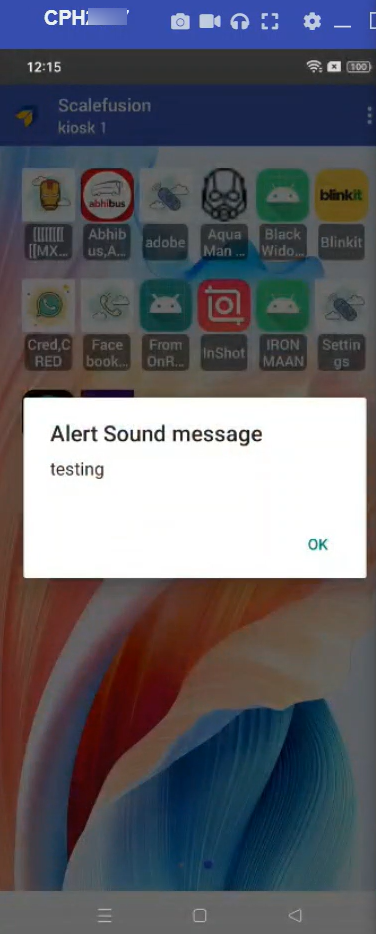
- Once you select the device(s) and click on Buzz button, you will see a pop-up window where you can select "Keep ringing until device user acknowledgement" option to keep it ringing until the user clicks on Ok on the message dialog box on the device.
- You can also add a message to be sent along with the Buzz device push.
- The character limit for the message is 1000 characters.
- The keep ringing option and message option is supported on Android Company-owned (EMM-managed), BYOD and COPE devices.
- If "Keep ringing" option is not selected and the message is not added, then the sound will ring for 8 seconds on the device.
- When "Keep ringing" option is selected and the message is added, if the user does not click on Ok in the message dialog box on the device, the ringing time will be 5 minutes. After 5 minutes the ringing will stop, and message dialog box will also disappear.
Broadcast Messaging
This option allows IT Admins to send messages to the users' Android, iOS, Mac, and Windows 10 devices from Scalefusion. These messages are displayed as a pop-up and will be saved on the device for future reference.
Please refer to our guide here for more information.
Global Settings
Through the Global settings, IT admins can configure general settings across various platforms like Android, iOS, Windows, and macOS.
Please refer to our guide here for more information.


