- 11 Oct 2024
- 4 Minutes to read
- Print
- PDF
Configure Advanced Home Screen Layout
- Updated on 11 Oct 2024
- 4 Minutes to read
- Print
- PDF
Introducing the new "Configure Advanced Home Screen Layout" feature, which empowers admins to meticulously organize app positions on a device's home screen. This feature allows the creation of new pages, grouping of apps into folders, and customization of rows and columns for an optimized layout. With this enhanced control, admins can tailor the home screen to meet specific organizational needs and improve user experience.
Configuring Advanced Home screen Settings
Navigate to Device Profile & Policies > Device Profile.
Select the Device Profile where you would like to configure these settings and click on Edit.
Go to Select Brand/App Order section.
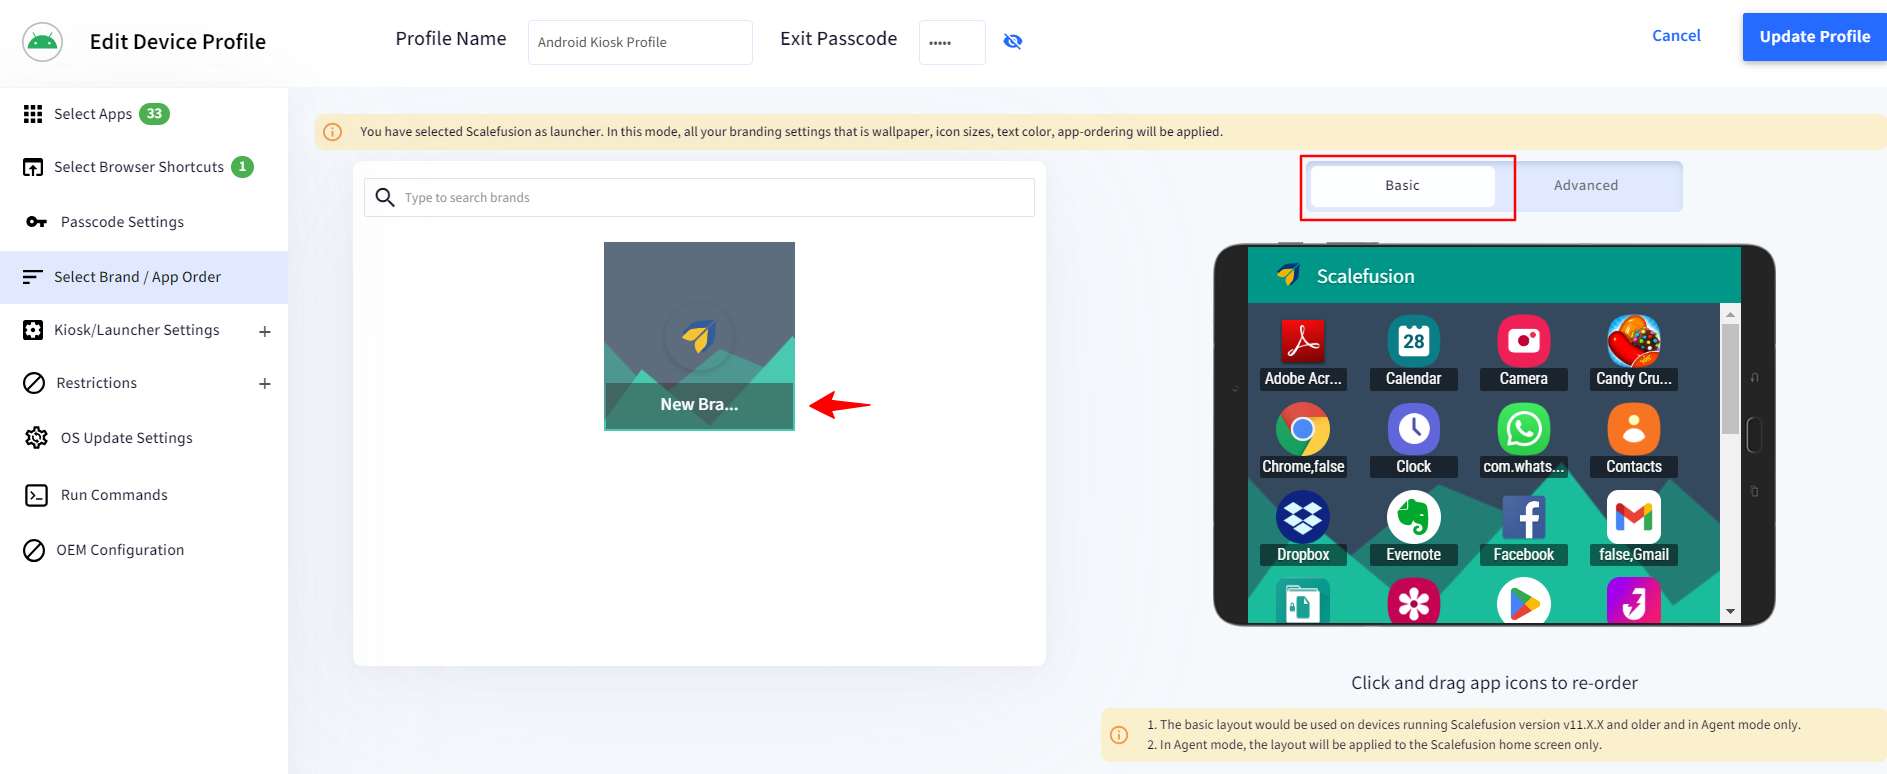
Here you will find two tabs in the virtual mobile screen preview showing the Basic and Advanced sections.
A. Basic
In this section, you can select a brand theme from the list. You can also reorder the apps by dragging the app or website icon on the virtual mobile screen preview.
Note:
Application ordering applies only when Scalefusion is Set as Launcher. When Scalefusion is Set as Agent, then the app-ordering does not apply to the native launcher.
B. Advanced
When you click on Advanced, a Configure button will appear, allowing you to begin setting up the advanced configurations.
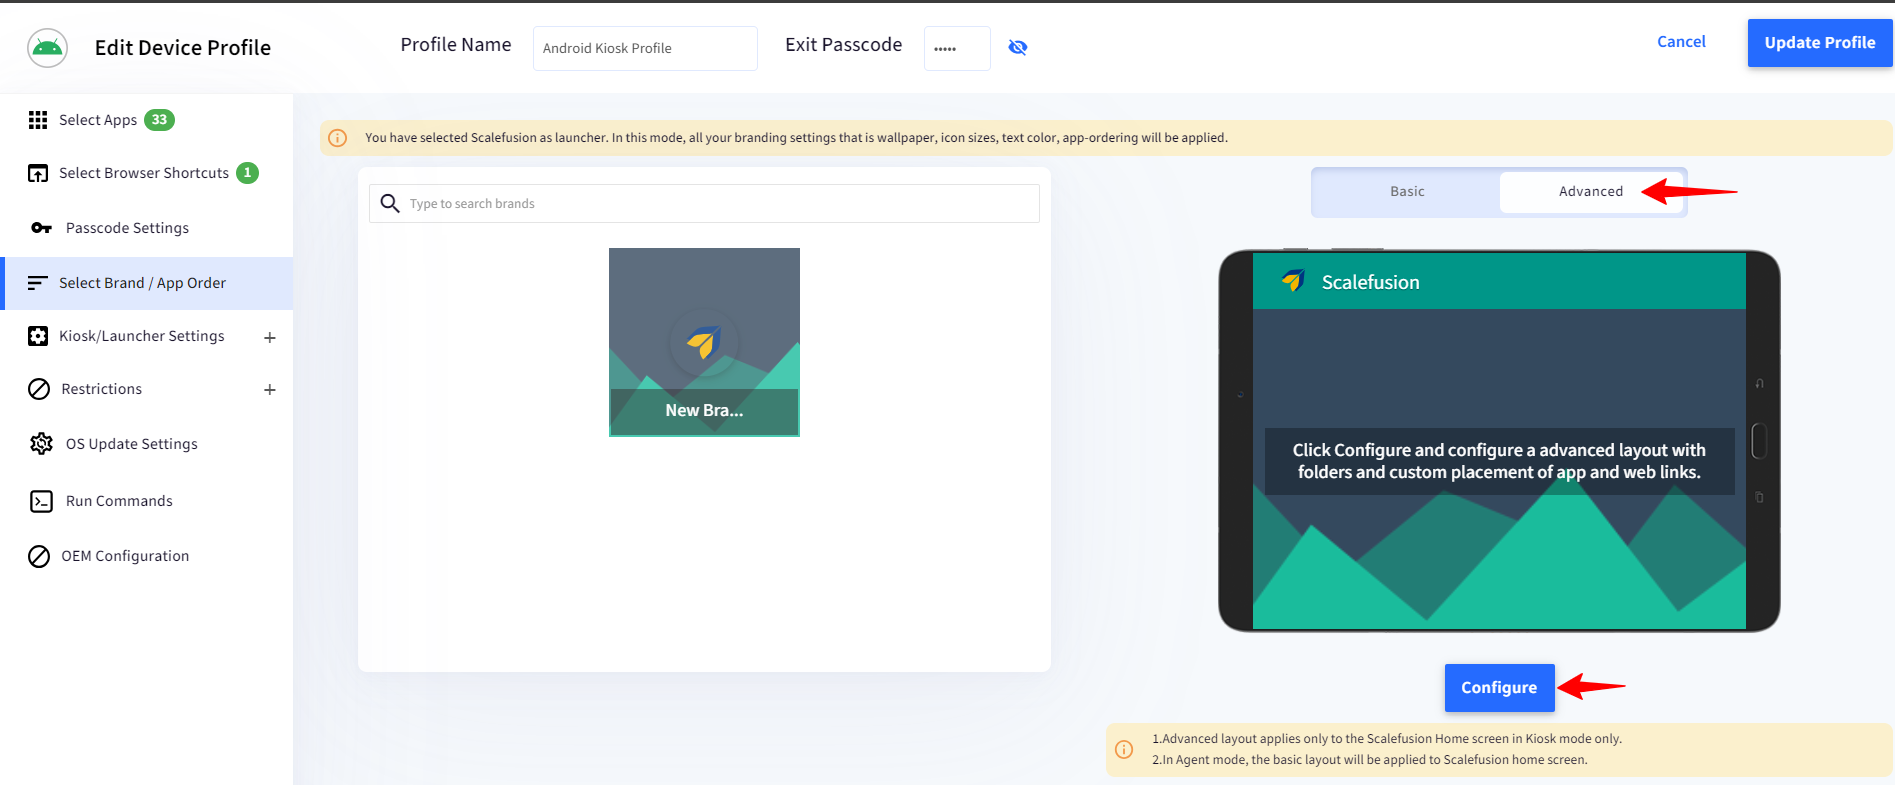
Once you click on Configure button, you will see a new screen containing 3 columns. Each of these columns are important to creating an effective home screen layout.
Select & Drag: In this column, you will see the list of all the apps that you have enabled in the Select apps section along with the Browser shortcuts.
You will be able to drag the app icons to the Configure a Cell section in the second column once you start configuring the layout.
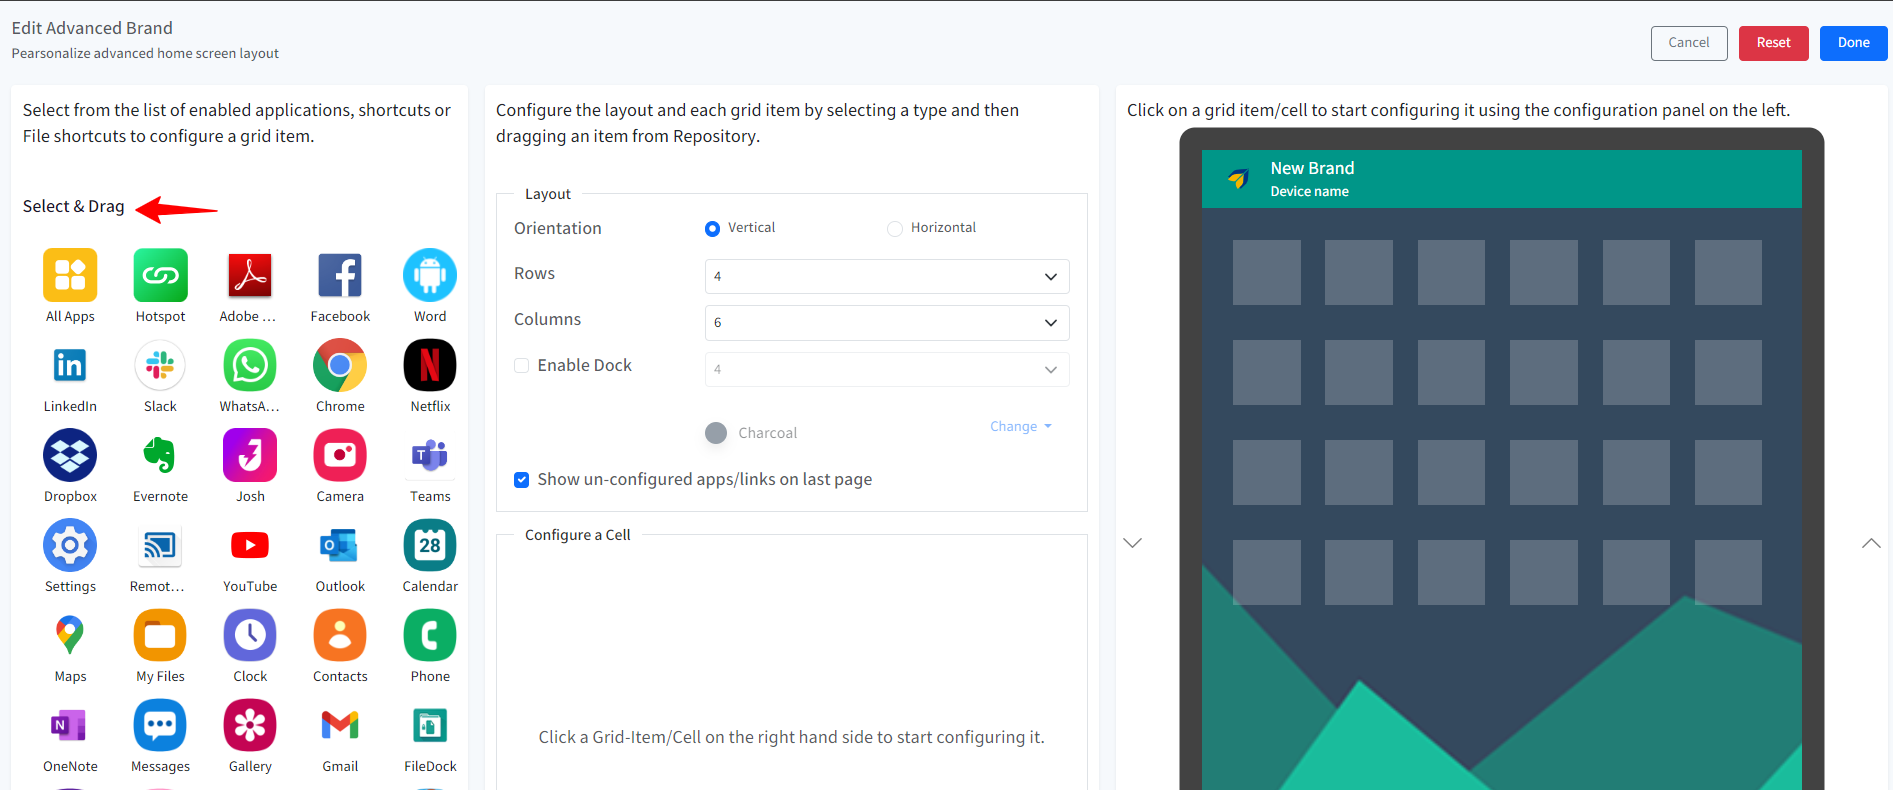
Layout/Configure a Cell: In this column, you can configure the layout of the home screen and drag & drop the app icon from the Select & Drag column.
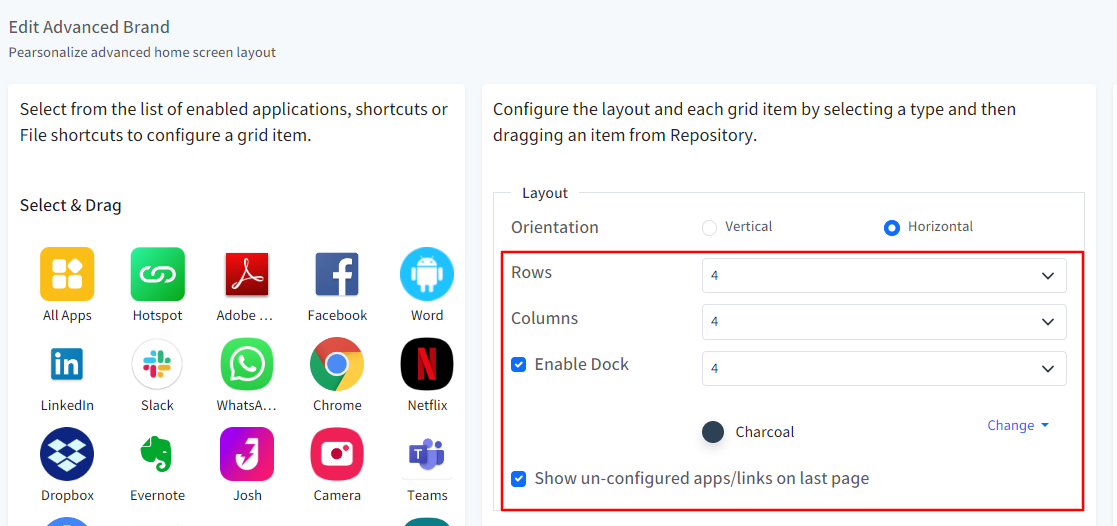
Layout: In this section you can,
Orientation: Choose the scrolling direction for the pages, either vertical or horizontal. This will be represented by arrows in the third column, which displays a preview of the mobile screen on the right-hand side.
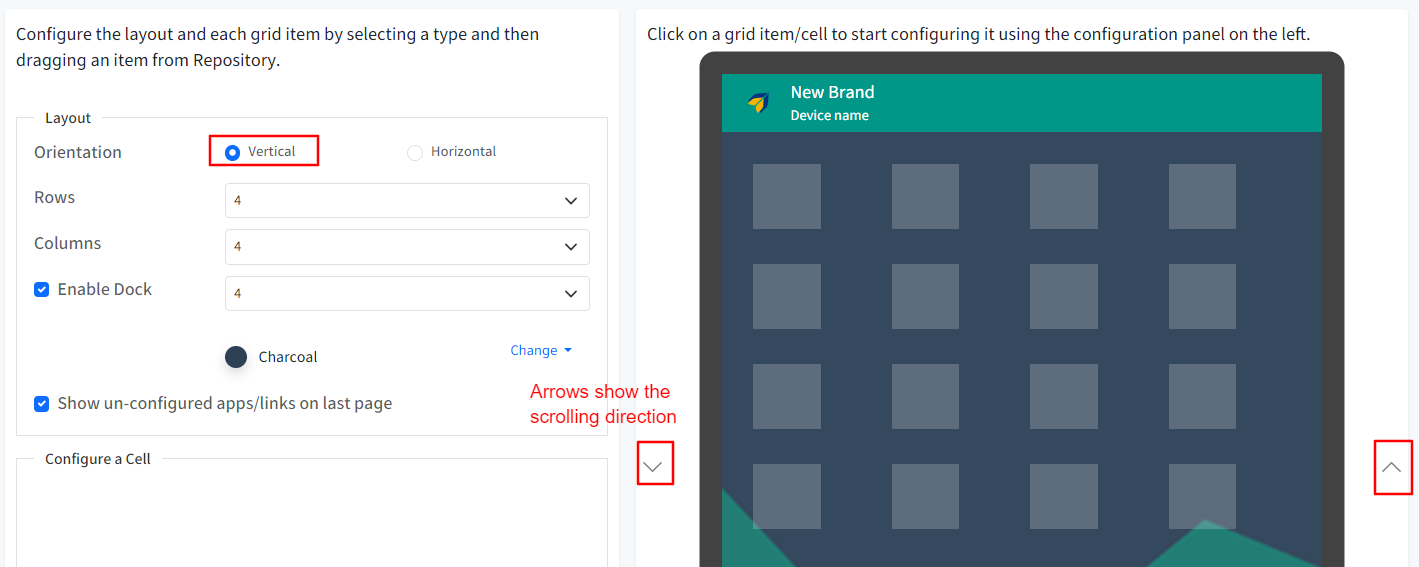

Rows: Choose the number of rows of apps on the home screen. You can choose from between 2 to 6. You will be able to preview the changes in the mobile screen in the third column on the right-hand side.
Columns: Choose the number of columns of apps on the home screen. You can choose from between 2 to 6. You will be able to preview the changes in the mobile screen in the third column on the right-hand side.
Enable Dock: This will enable a dock on the home screen, and you can also decide the number of apps that should show in the dock. You can choose from between 2 to 6. You will be able to preview the changes in the mobile screen in the third column on the right-hand side.
You can choose a color for the dock from the default colors, or you can use a Hex Code to get a custom color.
Show un-configured apps/links on the last page: Check this option to show all the remaining apps that have not been configured on the last page on the home screen.
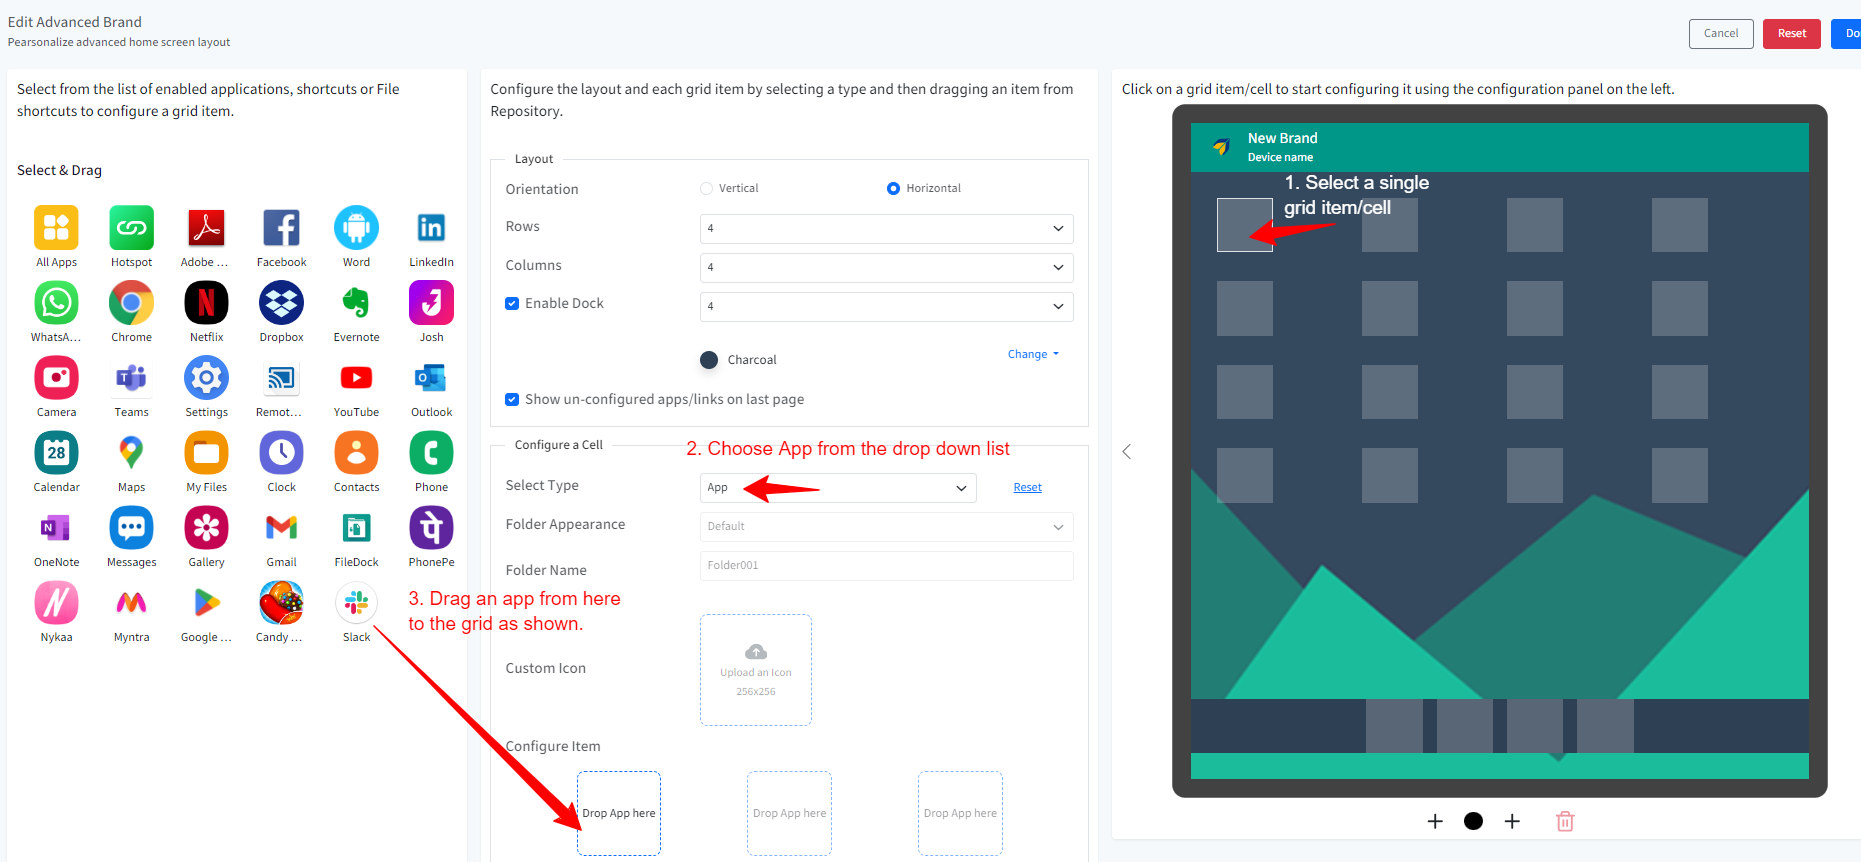
Configure a Cell: Once you select a single grid/cell item in the mobile screen in the third column on the right-hand side, you get the option to configure following settings:
Select Type: For that single selected grid/cell item, you can decide whether this should be an App, Link, File or Folder.
If you choose an App, then you can drag & drop an app icon from the Select & Drag column on the left-hand side. You can click on the red cross icon that shows on top if the grid to choose a different app, if needed.
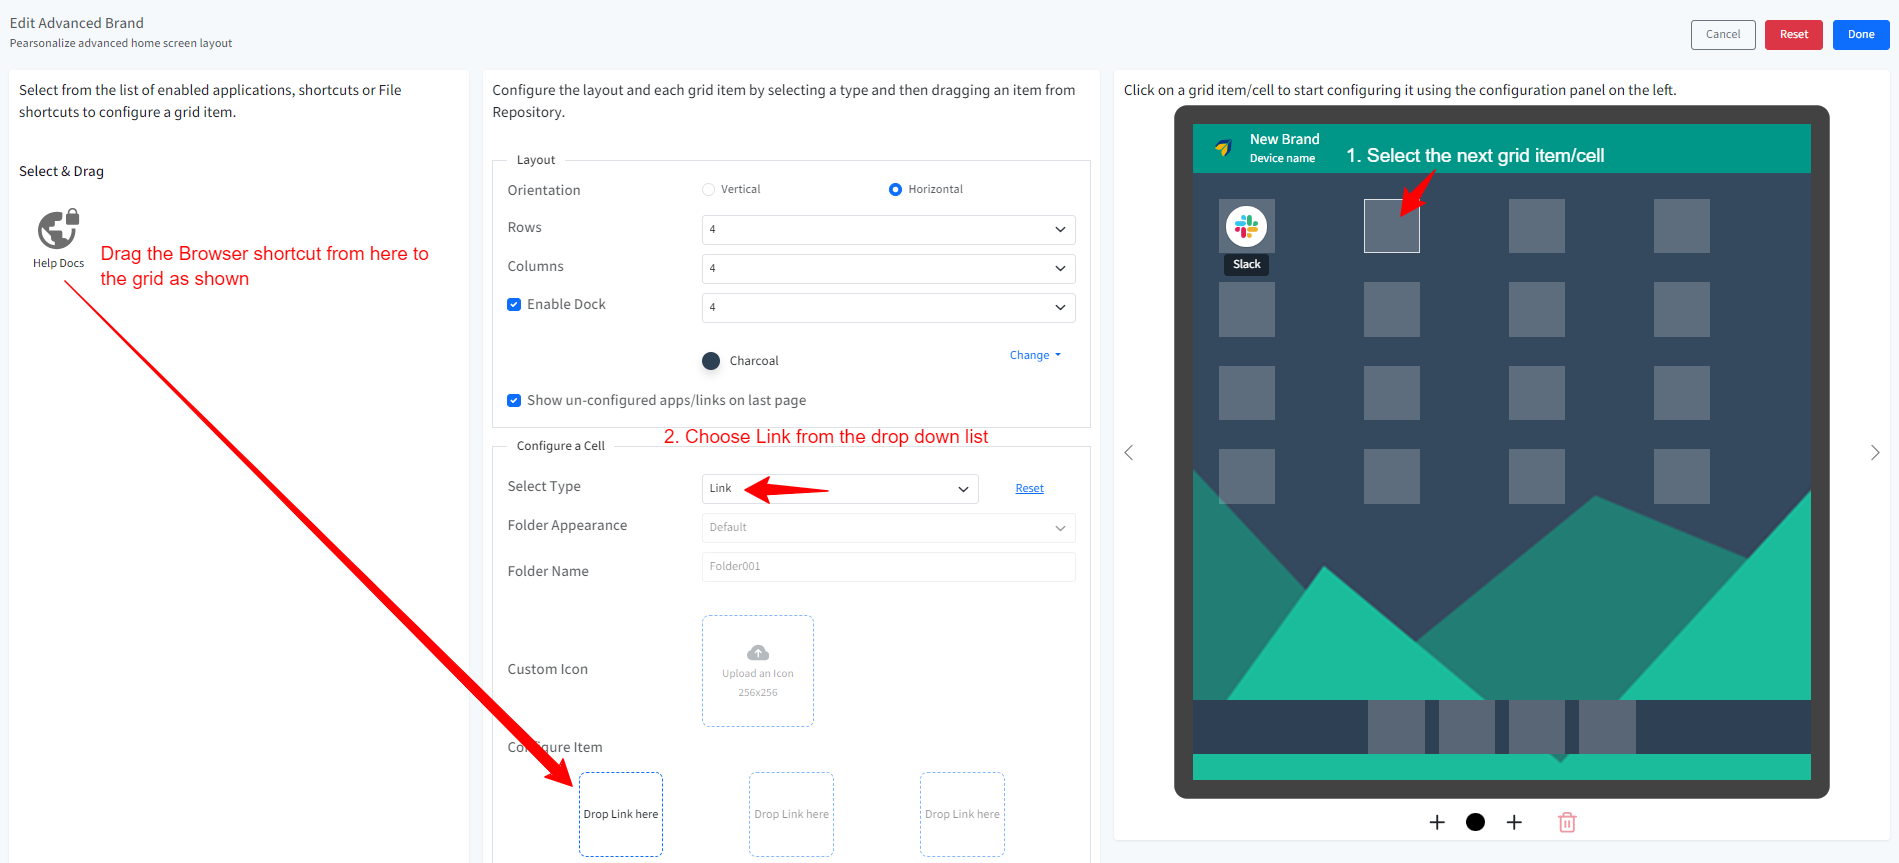
If you choose Link, then you can drag & drop the Browser shortcut icon from the Select & Drag column on the left-hand side. You can click on the red cross icon that shows on top if the grid to choose a different app, if needed.
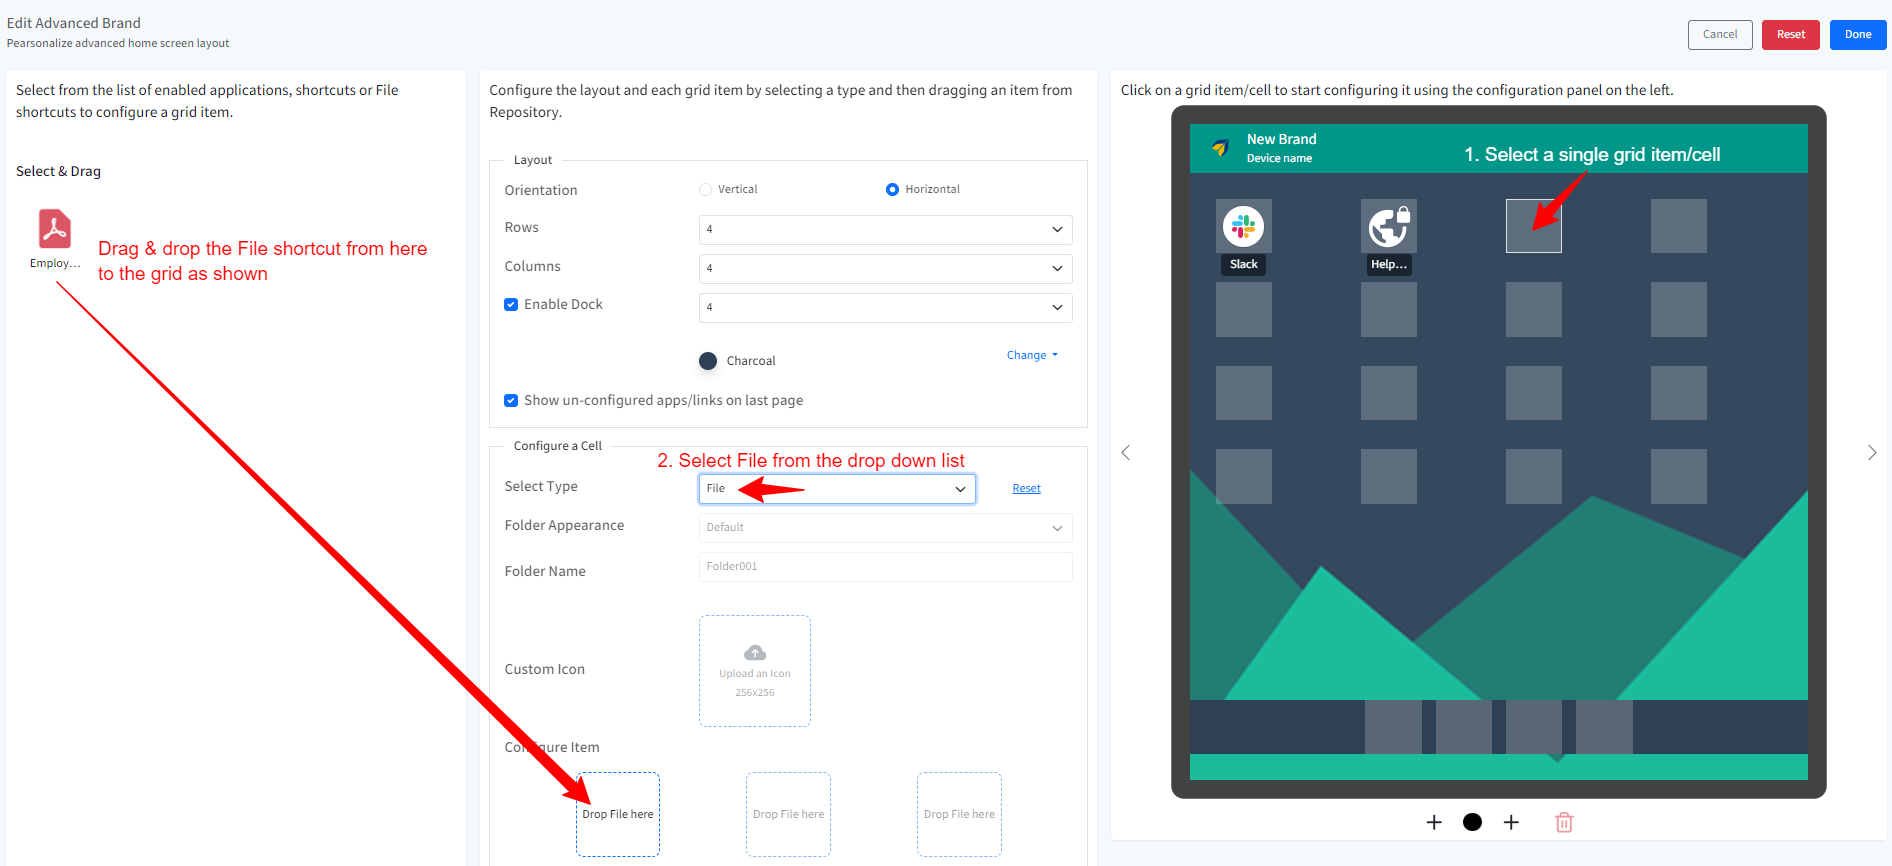
If you choose File, then this will allow you to drag & drop the File shortcut icon from the Select & Drag column on the left-hand side. This is the content (a file, video, audio, etc.) that you would have published and created shortcut for it from the Content Management section on the dashboard. You can click on the red cross icon that shows on top if the grid to choose a different app, if needed.
The files for which shortcut from Content Management has been created, will be visible.
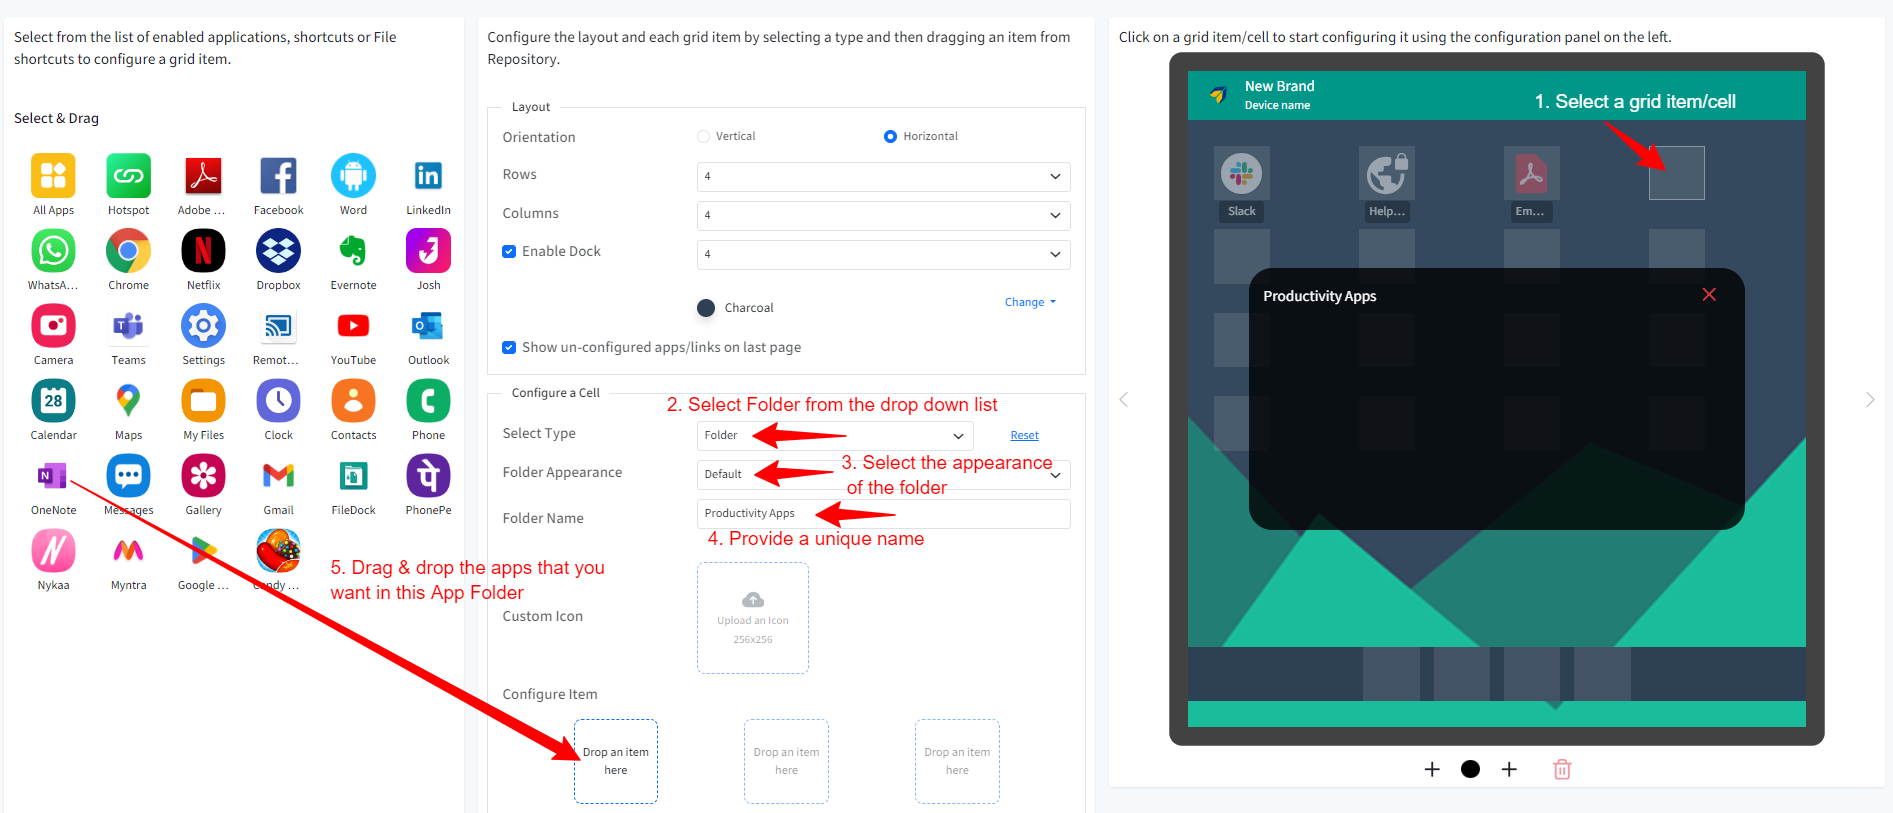
If you choose Folder, you get the option to create an app folder to group the apps as needed.
You can select the Folder Appearance as Default or Folder icon.
Provide a unique name to this folder for easy identification.
If you have selected Folder icon in the Appearance, then you can upload an image for the folder icon. The image should be 256×256 px.
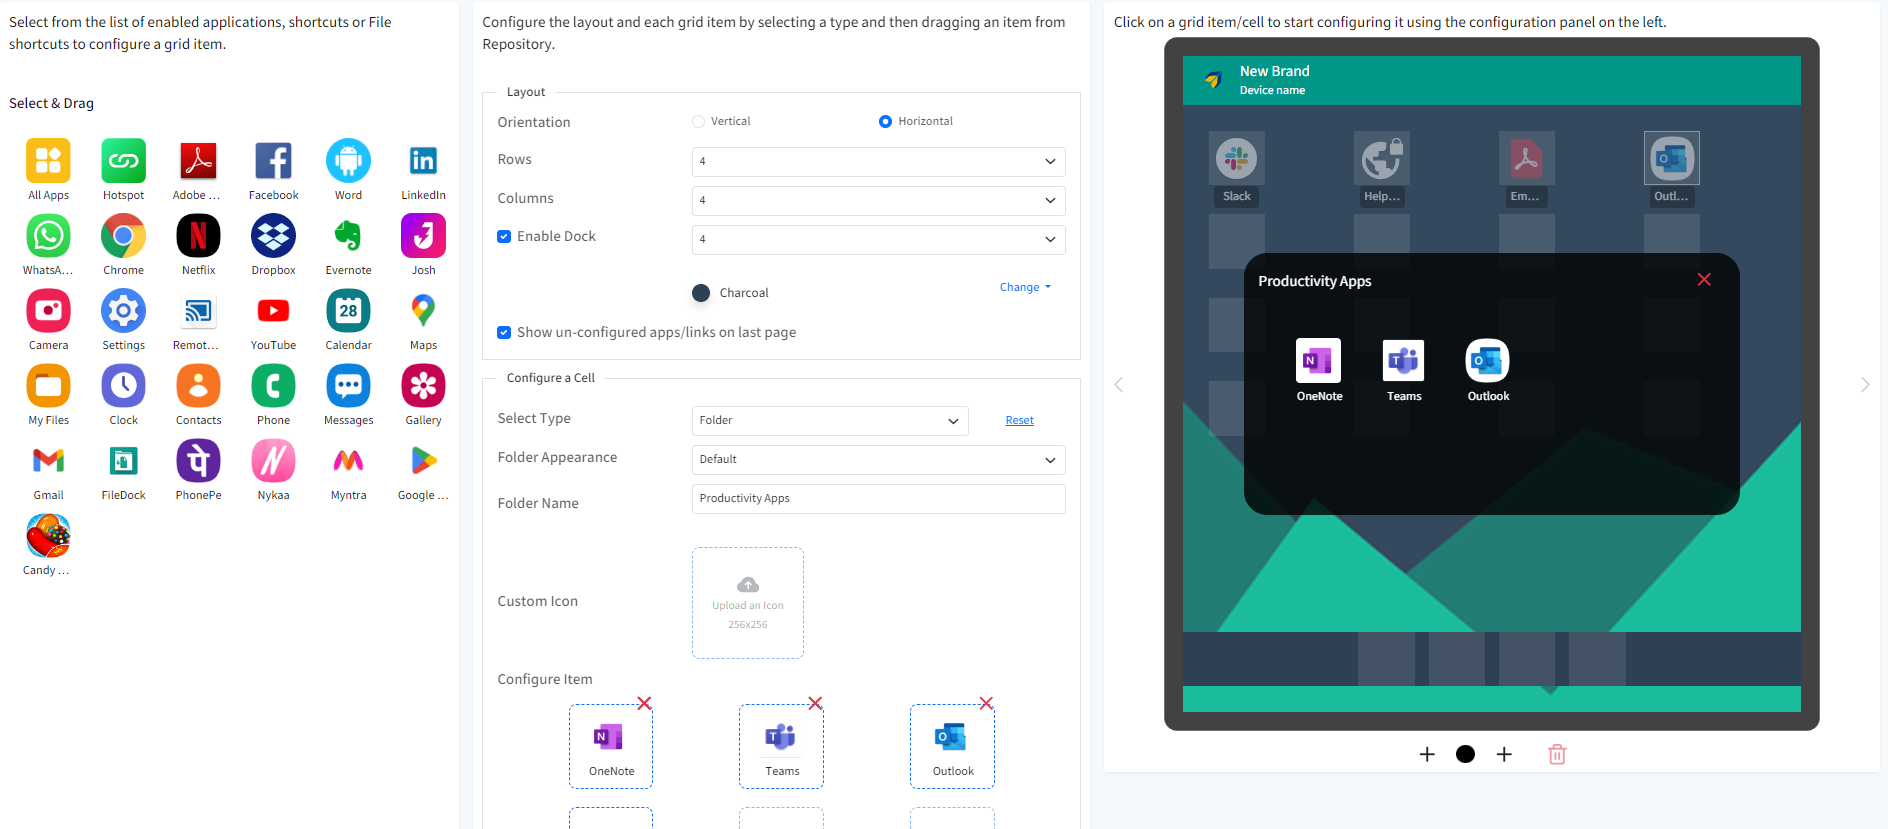
Dock: You can customize the dock in the similar manner as shown above and choose either App, Link, File or folder in each single grid item/cell that is present on the dock.
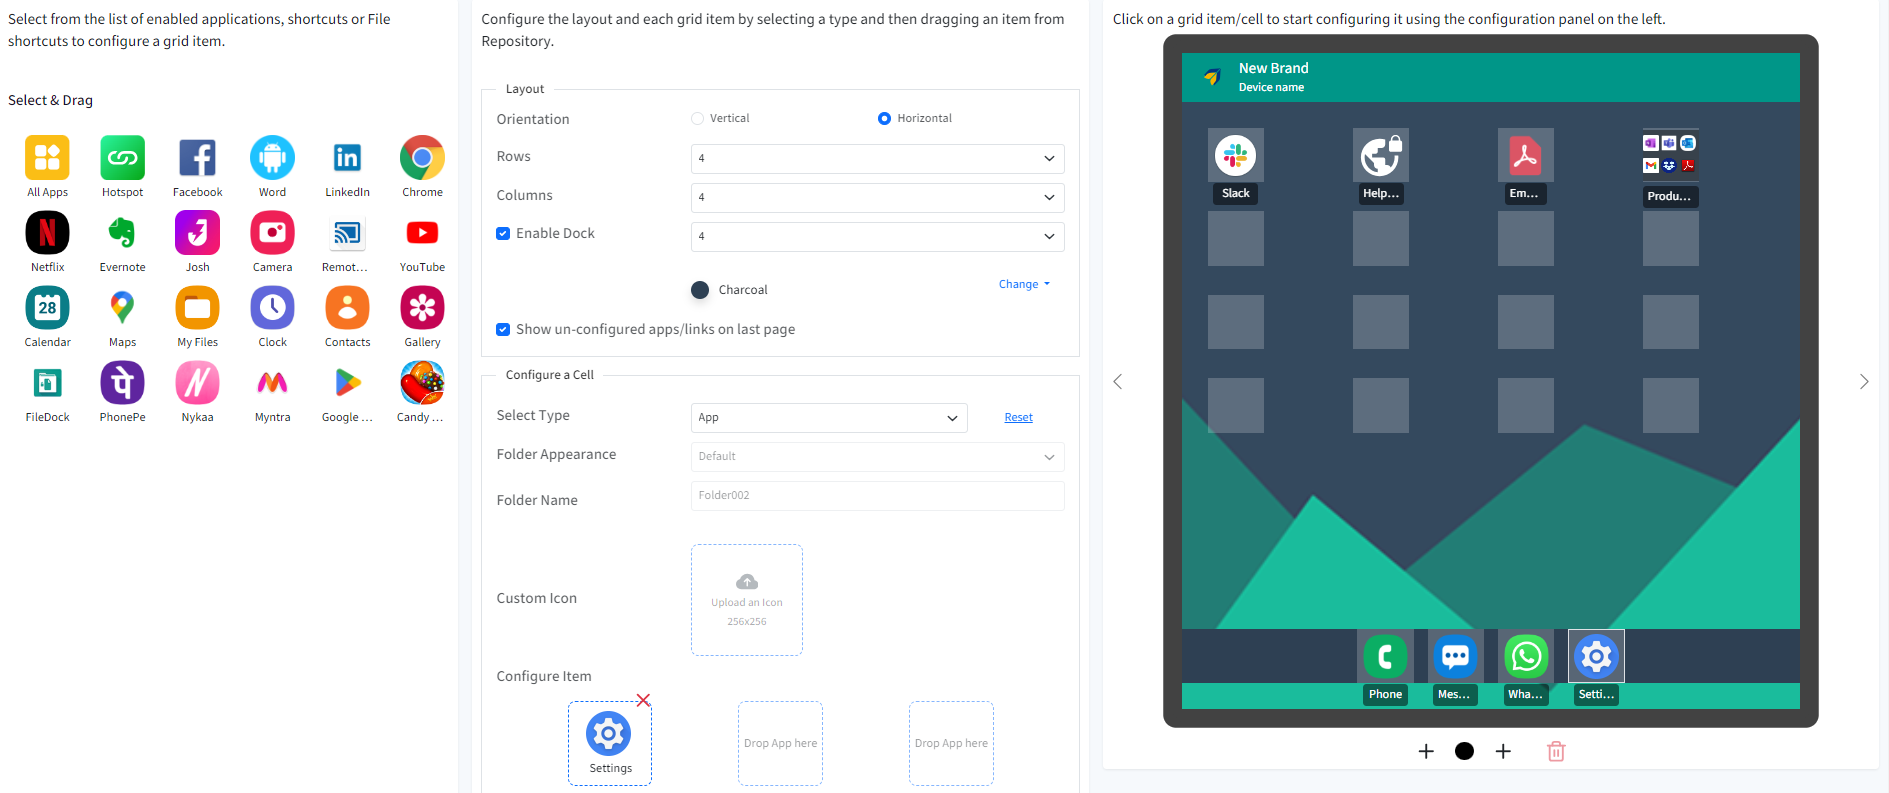
Mobile screen preview: In this column, you select a single grid item/cell so that you can configure the home screen layout and the Dock in the Configure a Cell section on the left-hand side.
Here you can add new pages by clicking on the plus icon and then customizing their layout.
Once you have completed the set up click on Done button at top right-hand side and then click on Update Profile button.
On the device
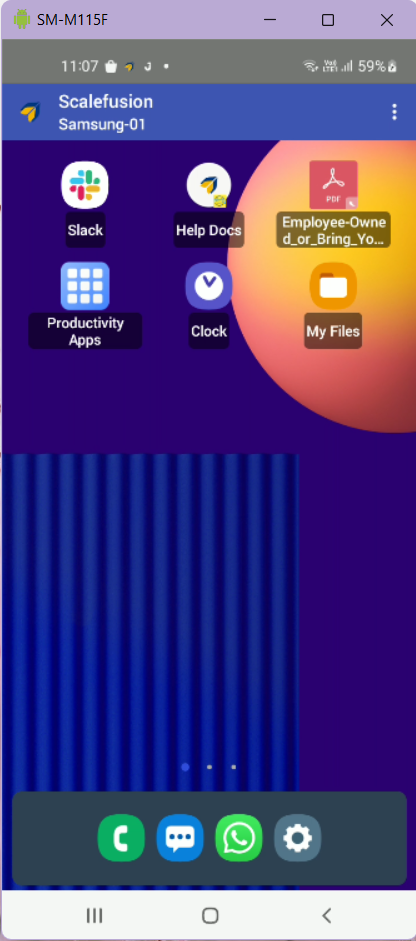
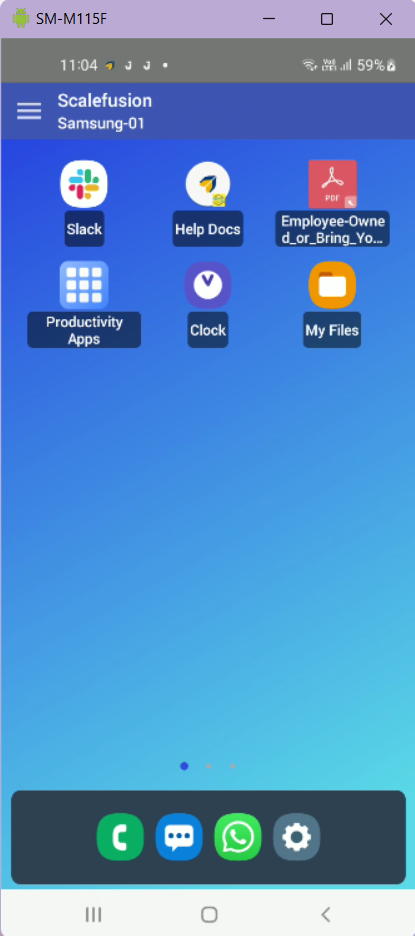
The home screen on the device will show the layout as configured in the profile.
Note:
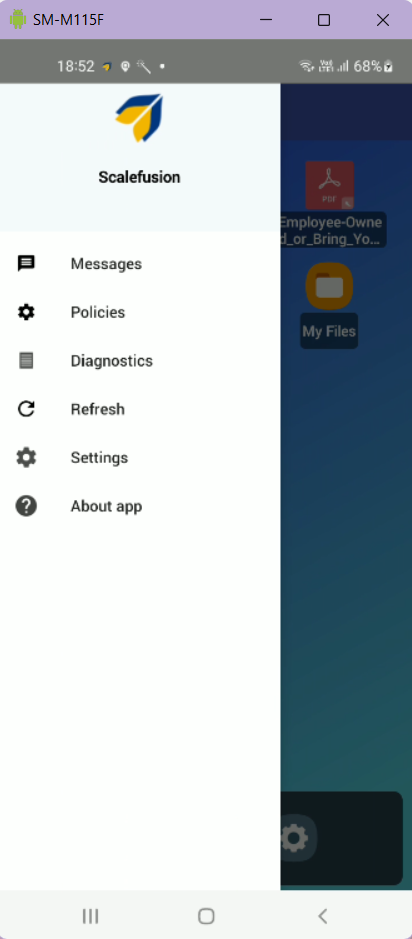
The above Advanced settings will be applicable in Agent mode as well with slight changes in the UI as the Messages and Policies move to the hamburg section on the left-hand side, as shown in the image below.
The Advanced settings feature is available in Legacy Enterprise License plan and Modern Enterprise License plan.


