Dynamic Groups, as the name indicates, are dynamic in nature, where the admin can define a set of rules, and when those rules or conditions are met, the devices get added to the groups. This allows IT Admins the flexibility to auto-adjust the profiles/policies based on certain conditions where if the devices meet those conditions, the groups are auto-assigned to them. In other words, the set of rules acts as device collectors periodically.
Let us understand how you can create rules to move the devices automatically.
Before you Begin
- Have a valid Scalefusion Dashboard account.
- Device Groups should exist in the Scalefusion Dashboard.
- Access to Device Groups.
- Users should be subscribed to the Modern Enterprise Plan to use this feature.
How to Access
The conditions for Dynamic Groups can be defined through the Automation feature under Device Groups. To access:
- On the Scalefusion Dashboard, navigate to Groups > Device Groups.
- Click on View Details on the Group in which you have to define rules for adding devices. The group under which you are defining rules becomes the target group. So those devices belonging to other groups or not belonging to any group get moved to this group if they meet the conditions defined herein.
- Navigate to the Automation tab. Click on Create, which opens the rule wizard

Create New Rule
The rule wizard opens in which you can define the rules. This involves the following steps:
Step 1: Configure the conditions by creating condition groups and define the rules for automation.
Step 2: Choose a schedule to run this rule and configure the email alerts to finish creating the rule.
Step 3: Save the Rule
Step 1: Configure Conditions
Select Properties
Select Properties from the Property section
The first step to configure conditions is to select properties over which you can define rules. To do so,
- Navigate to Configure Conditions
- Go to the Property section on the left. The properties are divided and listed under different categories. To add a property, click on the arrow next to the category that expands it.
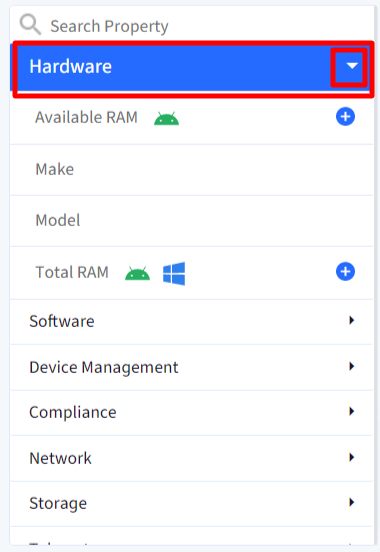
- Here is a list of categories and properties under each:
Category Property Hardware - Make
- Model
- Total RAM
- Available RAM
Software - Any application
- MDM agent version
- Build Version
- OS Type
- OS Version
- Firmware
Device management - ADE Server
- Device Name
- Enrollment Date
- Enrollment Method
- Management Mode
- Management state
- Management type
Compliance - AntiSpyware
- Antivirus
- Device Encrypted
- Fire Vault
- Firmware password
- Jailbroken/Rooted
- Password
Network - Bluetooth mac address
- Connection status
- Connection type
- Ethernet Mac address carrier
- Firewall
- IP Address
- Wifi SSID
- Wifi mac address
Storage - Device storage
- External storage
Telemetry - Battery level
- Battery temperature
- CPU temperature
- Screen temperature
Custom Fields - Select one or more properties (by clicking on the + sign). It is displayed on the right side section under Condition Group 1.
- Define rule(s) for the selected property.
Add Conditions
Add conditions for the property to create a rule
The next step is to add conditions over the selected properties to define the rule. To do so:
- Add a property by clicking on the + sign next to the property.

- You will see it displayed on the right section as Condition Group 1 (if it is the first condition).
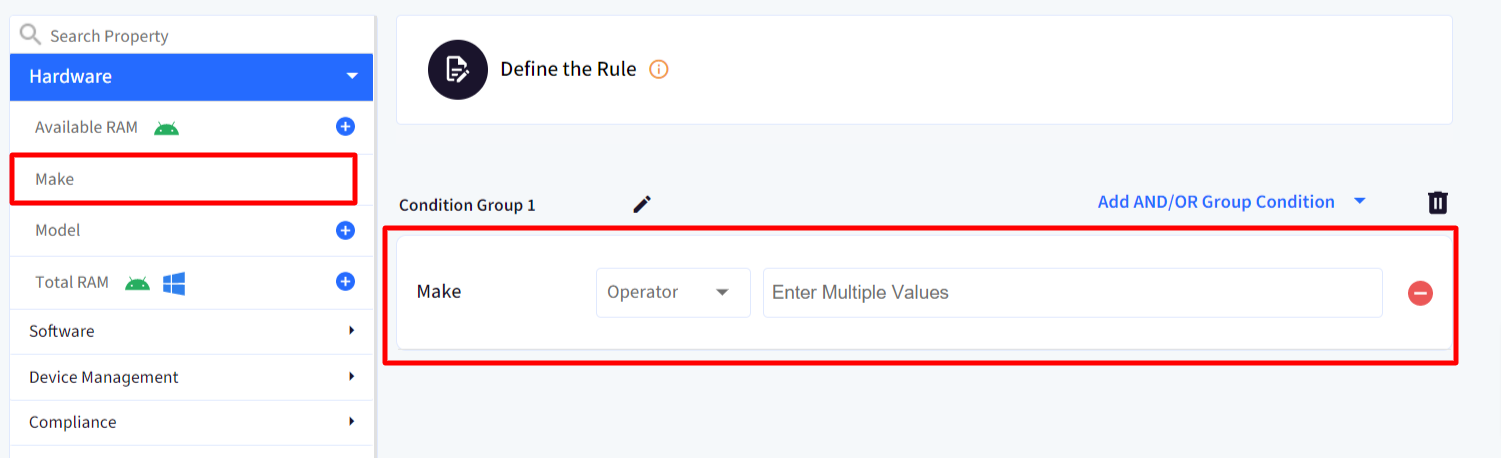 The Condition Group names can be renamed by clicking on the edit (pencil) icon next to it.
 - For the added property, select the operator from the drop-down. Here, the values are based on the property type. For example, for Available RAM, the operators are Less or equal, Greater or equal
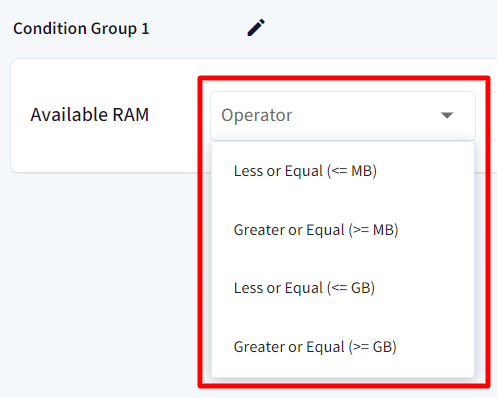
- Add values - To complete defining the rule, add values for the property. This can be an input area drop-down or date widget depending upon property type.

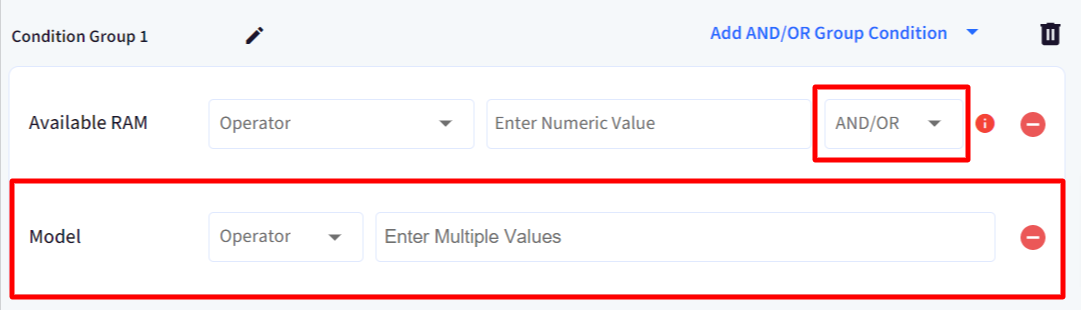
- To add another condition in the same group, select one more property from the properties on the left.
- The same steps (#1 to #4) need to be repeated to add the next rule in the condition group. In between the conditions, select an And/OR.
- After defining the rules, click the Next button on top.
Important Points
- There can be multiple condition Groups. To add another condition group:
- Add And/OR group condition from the top (right of condition group name) and select an operator.

- A new condition group will be displayed in which you can define properties and create rules in a similar way.

- Add And/OR group condition from the top (right of condition group name) and select an operator.
- Each condition group can have multiple conditions separated by And/OR

- An AND condition would mean that all the conditions should be satisfied, and an OR condition would require any one of them to be true.
- Users can delete a Rule by using the delete icon next to the rule

- Users can delete a Condition Group using the bin icon.

- Some properties can be selected multiple times within a condition group. They are:
- Any Application
- MDM Agent Version
- Management State
- Management Type
- OS Type
- OS Version
- When creating an automation rule for a user group, if a device is moved from one group to another and the user associated with the original group is deleted afterward, the device will be removed from both the original and the new groups.
Example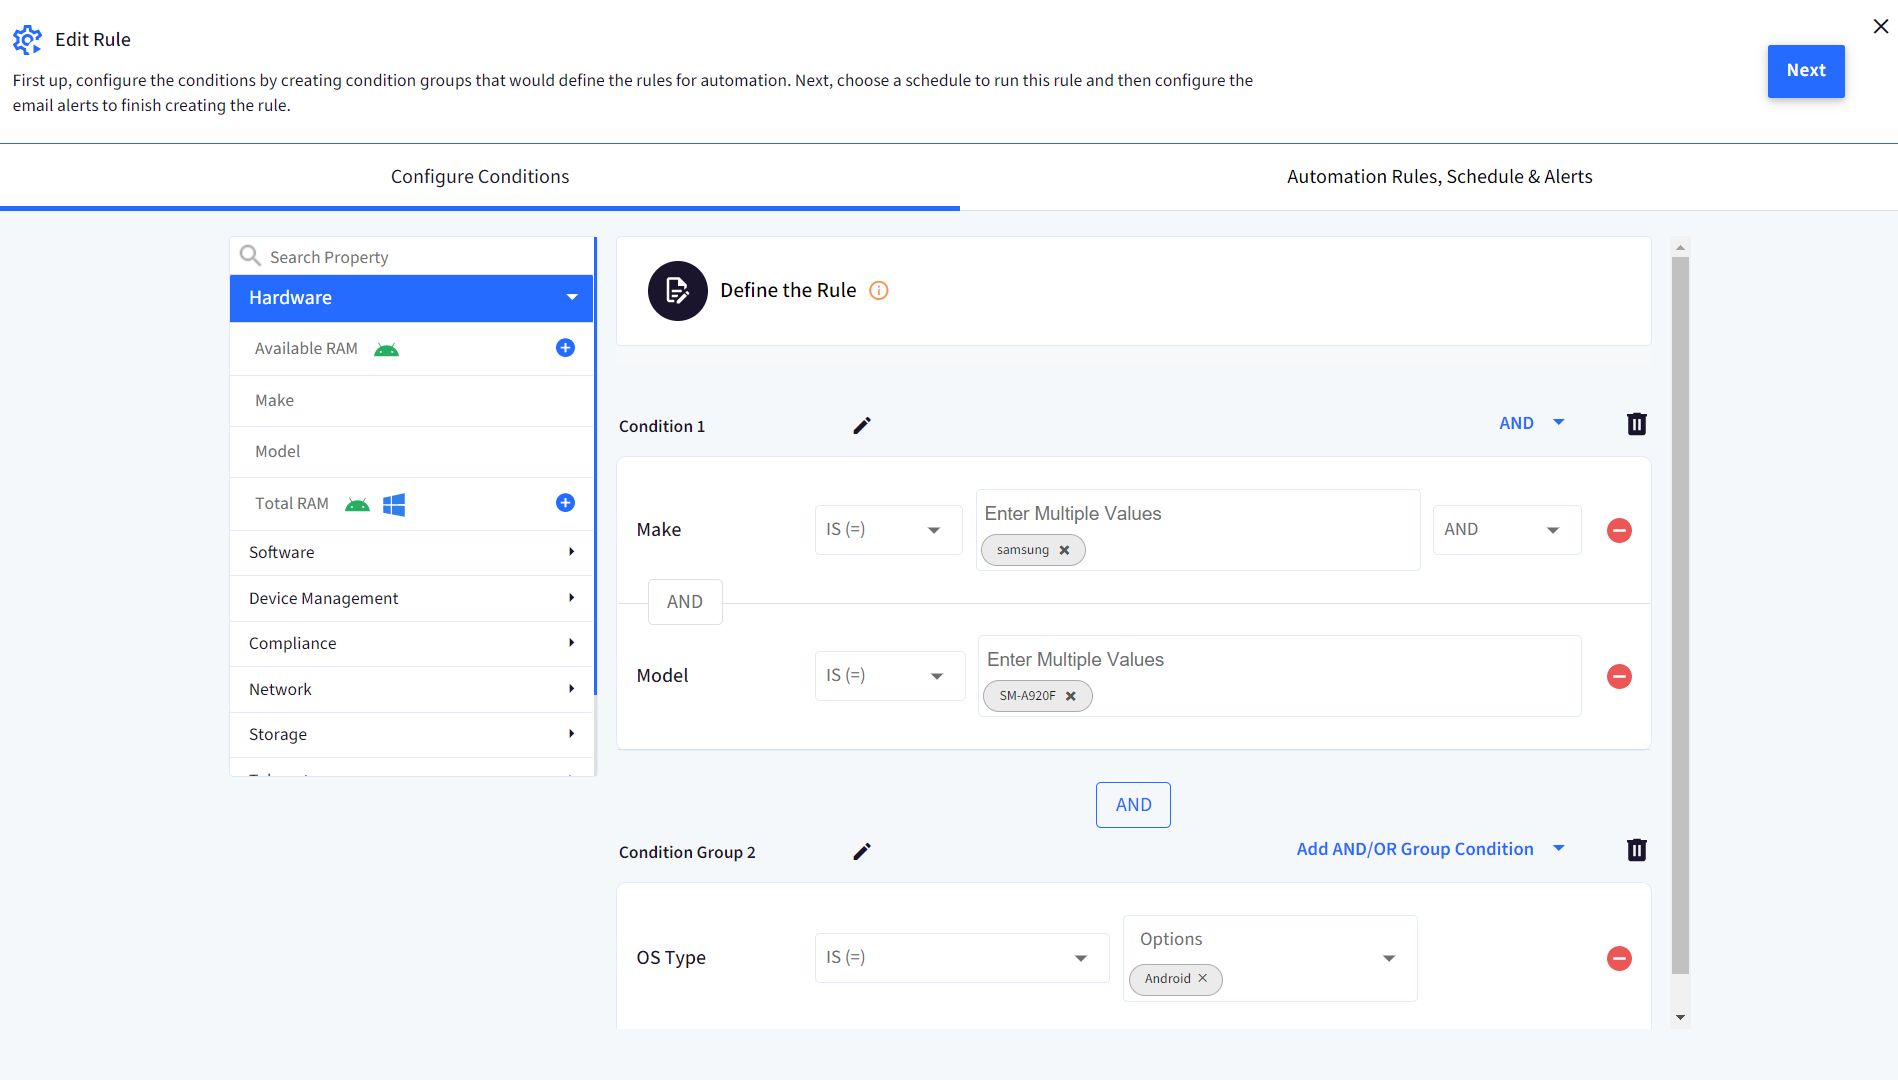
To explain with an example, in the above screenshot, we have defined a rule where:
- Condition Group 1 has two properties viz Make AND Model
- Condition Group 2 has one property viz OS type
So it will look for devices of OS type Android having Make Samsung and Model SM-A920F. Where all three conditions are met, such devices will be added to this Group.
Step 2: Set Automation rules, Schedule and Alerts
Automation Rules
Move the devices out of this group or to their last known group if they no longer meet the rules
This setting becomes effective if you are editing the already-defined rules. If this setting is enabled and case rules are updated,
- It removes the devices that do not meet the conditions as per the updated rules from this group and/or
- moves the devices to their known group if they meet all the conditions.
If disabled, it would not automatically move the devices that are already added to this group. Instead, you will need to manually move them by removing them from this group.
Configure Schedule
You can configure the schedule for running this rule and alerts that are triggered after this rule is executed.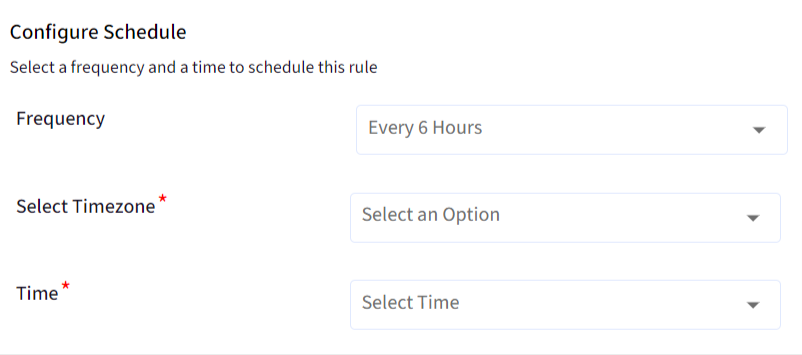
| Setting | Description |
| Frequency | Select how frequently the rules should be run and executed from the following options:
|
| Timezone | Select the timezone which has to be followed for the rules to be run from the drop-down |
| Time | Allows you to select a time when this rule will be run. The drop-down shows time in 15-minute intervals. |
Configure Email Alerts
You can also configure to whom the Email alerts should be sent once the rule is executed and devices meet the conditions. Following are the options. Select any one:
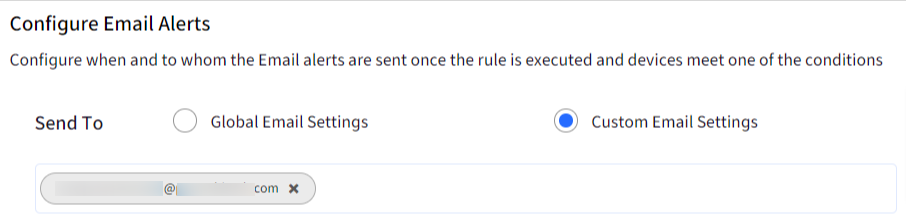
- Global Email Settings: Sends emails as per global email settings configured under Workflows
- Custom Email Settings: Enter email IDs (separated by a comma) to whom the email should be sent.
The email provides a summary of the number of devices added and removed from the group based on the conditions defined. It also has a csv attached, which contains information on all the devices (moved and removed).

Step 3: Save the rule
- Once rules are defined and schedules and email alerts are configured, click Create Rule on top.

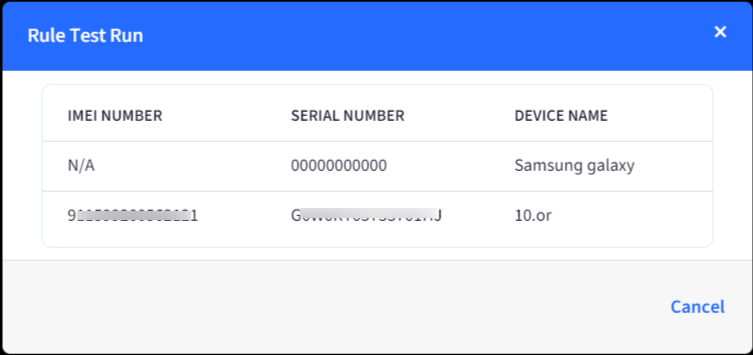
- Test Run: Indicates devices that will be moved once the rule is executed. The device details are displayed in a dialog box that opens when you click on the button Test Run
- On clicking Create Rule, the automation rule gets created and displayed under the Automation tab with the logs as shown below:
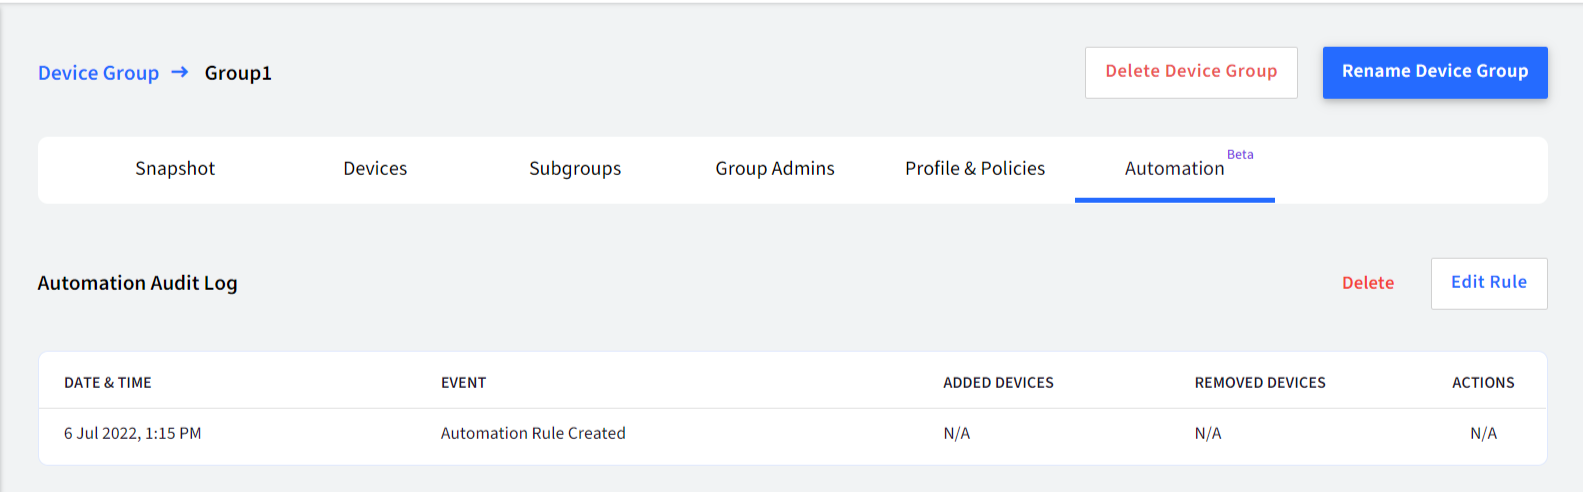
- When the rule is executed as per schedule, the logs will reflect the same. From Actions, you can also download the automation rule execution report in csv format.
- At any point, you can edit a rule by clicking on the Edit Rule button on the top right. Click Delete to remove the automation rule.
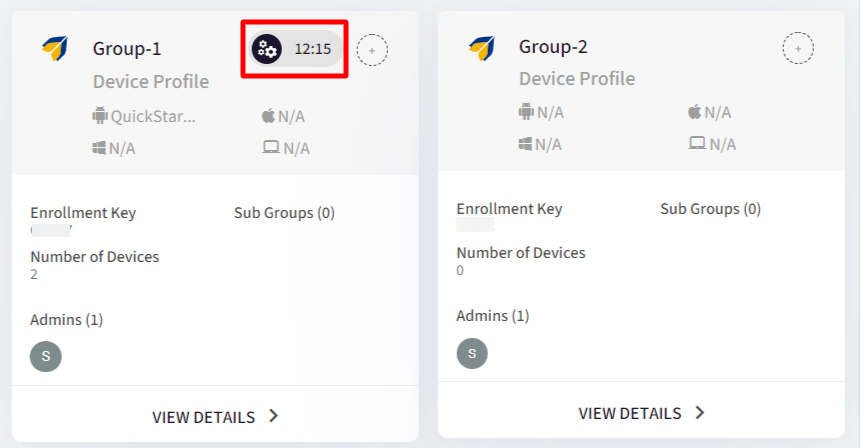
- On the main device groups page where all groups are listed, note that the group over which automation rules are defined is marked with an icon and the time at which it is scheduled to execute.
Frequently Asked Questions
Question: Can the automation rules be defined for User Groups also?
Answer: Yes. Automation rules can be defined for User groups as well. At execution, it moves users along with their devices that meet the conditions.
Question: From where can we define automation rules for User groups?
Answer: The conditions for Dynamic Groups can be defined through the Automation feature under User Groups. To access:
On the Scalefusion Dashboard, navigate to Groups > User Groups.
Click on View Details on the Group in which you have to define rules for adding users' devices. The group under which you are defining rules becomes the target group. So those devices belonging to other groups or not belonging to any group get moved to this group if they meet the conditions defined herein.
Navigate to the Automation tab. Click on Create