This section gives you the details on the various device-level actions that can be performed.
All of these options can be accessed by clicking on the Gear icon next to the Device in Device Information Card on the Device Details page..png)
The options are:
- Change Device Name -This allows you to change the device name that is used to identify the device in the Scalefusion Dashboard.
- Set this as Device Name on Mac/iOS Device: Having this flag checked, admins also have the option to change the device name on the device itself in addition to changing it from the Dashboard. The flag is visible in the Change Device name dialog box.This flag is only visible on iOS devices which are Supervised
.png) For older iOS versions (12 and below), to set the device name from the Dashboard on the device, in addition to checking this flag while renaming the device from the dashboard, the setting "Allow Device Name Modification" in the device profile restriction should be allowed (enabled). This is a known OS limitation.
For older iOS versions (12 and below), to set the device name from the Dashboard on the device, in addition to checking this flag while renaming the device from the dashboard, the setting "Allow Device Name Modification" in the device profile restriction should be allowed (enabled). This is a known OS limitation.
- Set this as Device Name on Mac/iOS Device: Having this flag checked, admins also have the option to change the device name on the device itself in addition to changing it from the Dashboard. The flag is visible in the Change Device name dialog box.
- Full Device Information - Displays additional granular device information retrieved from the device.
- Lock/Unlock - For iOS devices, Lock/Unlock means Apply the Device Profile or Relax/Remove the profile. Unlocking means the user is allowed to use the device freely, and Locking means the profile policies will be applied. Once you Lock/Unlock the device, please refresh the page to see if the command has been executed and if the icon has been updated or not.
- Refresh Device - If you observe that the device does not have the latest changes that you have applied in the Device Profile, then you can use this option to apply the latest policies on the device. Note that this option works only when the device is Locked.
- Add Notes - Using this option, you can add additional custom Notes to the device that can be viewed in Full Device Information.
- Assign User: Assign a user to iOS devices using this option. This enables IT Admins to pre-enroll and distribute devices to users/employees, and assign a user for internal tracking. It also makes it easier to identify the device ownership in cases where a large number of devices are distributed among employees. A few pre-requisites to assign a user:
- User(s) should be added/imported in User Enrollment section.
- The iOS device should be enrolled in user agnostic method (Userless Enrollment).
- The user should belong to a user group with a iOS Device Profile applied to the User Group.
To assign a user, - If all pre-requisites are fulfilled, clicking on Assign User will bring up Assign User to device dialog box listing all the users of the user group which the device is part of.
- Select a user and click on Save

- Note that in Device Details, the Enrollment Email will reflect the user's email id whom you have assigned the device.
- The Add to Group option will not be shown under gear icon once device is assigned to a user.
- Reboot Device - Reboots the device and works only on Supervised devices. This option is available only if the device is enrolled as a Corporate device and not as a User device.
- Reset Device -Factory resets the device and works on any enrolled device. This option is available only if the device is enrolled as a Corporate device and not as a User device.
- Preserve Data Plan - Users can retain their data plan activated with eSIM when a device is factory reset or erased. This ensures that users don't accidentally remove their eSIM. When you factory reset the device from the dashboard, there will be a prompt to Preserve the Data plan. Check this option, and it will retain the existing data plan.
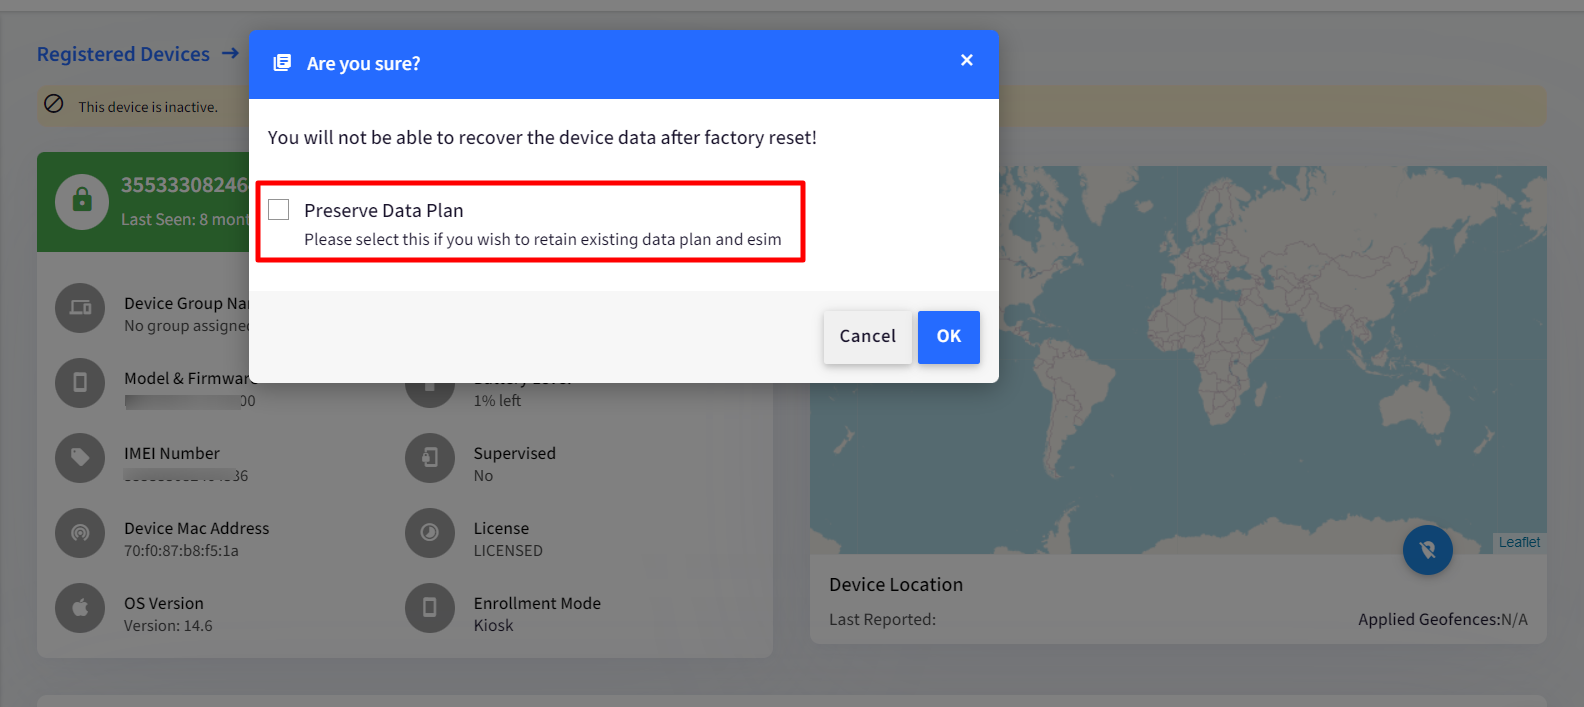
- Preserve Data Plan - Users can retain their data plan activated with eSIM when a device is factory reset or erased. This ensures that users don't accidentally remove their eSIM. When you factory reset the device from the dashboard, there will be a prompt to Preserve the Data plan. Check this option, and it will retain the existing data plan.
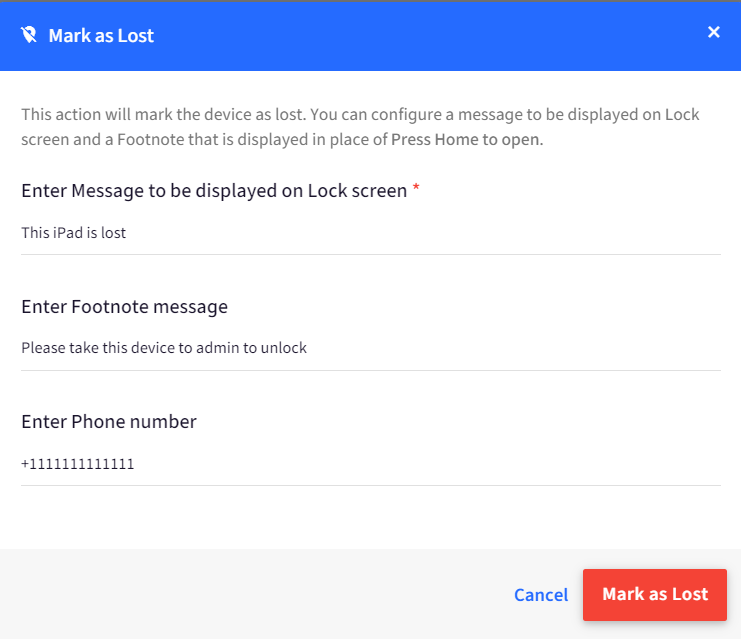
- Mark the Device as Lost -A special feature where the device can be marked as lost, preventing further usage of the device even on restart. At the time of marking the device in lost mode, the admins can also specify a message to be displayed on the lock screen, a footnote message and a phone number to appear on the device.An iOS device can be marked as Lost only when it is Supervised
- Play a Sound when in Lost Mode -When the device is in Lost mode, a sound can be played to locate the device or alert/alarm.
- Auto Location gathering in Lost Mode - We start collecting location from a device once the device is marked as lost. This is done without a Scalefusion client on the device, as it can be done only in lost mode. The Locations are collected every 15 minutes.
- UnMark the device as Lost - Admins can mark the device as Un-lost.
- Delete Device - Completely deletes the device and removes management from the device. The device needs to be re-enrolled to start managing it.The option to Reboot the device and/or Reset the device is not available for Devices managed via User Enrollment.
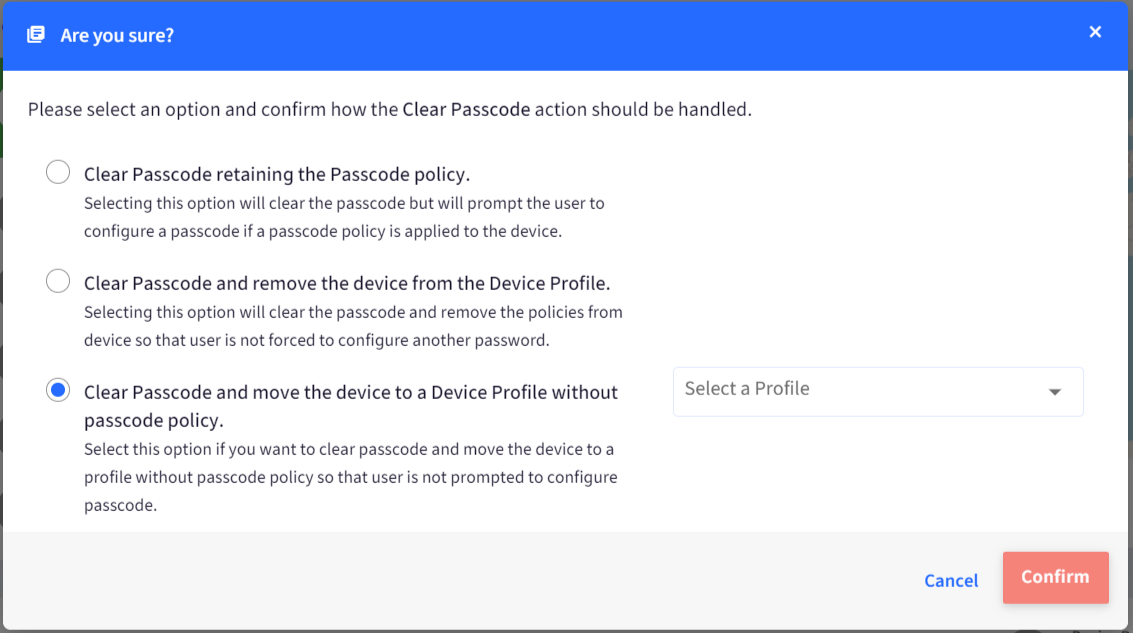
- Clear Passcode -Clears the passcode applied on the device. Clicking on this brings up a dialog box allowing you to choose one action from the following, which would apply on the device after clearing the passcode:
Action Description Clear Passcode retaining the Passcode policy Clears the passcode from the device, but if a passcode policy is applied to the device, the user will be prompted to configure a new passcode. Clear the Passcode and remove the device from the Device Profile Clears the passcode from the device and removes the policies applied on the device, that is, removes the device profile applied on the device, so that the user is not forced to configure another password Clear the Passcode and move the device to a Device Profile without a passcode policy Clears passcode and moves the device to a profile without passcode policy so that the user is not prompted to configure the passcode.
Selecting this option will list down the device profiles that do not have a passcode policy applied to them. Choose one profile to which the device has to be moved.
- Lock Screen - Locks the device's screen. Clicking on the lock screen option brings up a confirmation dialog box. Once you confirm, the device's screen gets locked.
- Turn Off Device: Turns off the device. This option is only visible and works on iOS devices which are Supervised.