Device Grouping is an exceptionally useful functional feature that can be used to group devices that belong to the same organizational unit or classroom. Device Groups give you the following features,
- Group devices of Android, Windows, Mac & iOS types
- Reboot all devices in the group.
- Refresh all devices in the group, which will reapply all the policies on the device.
- Set or Change Profiles on all your devices.
- Create & Assign Group Administrators.
- Create Subgroups
This document explains in detail how device groups can be created and all other features associated with Device Groups.
Before You Begin
- Have a valid Scalefusion Dashboard account
- Access to Device Groups
Create a Device Group
- There are two ways you can create groups, viz.:
- Add one group at a time: To create a single group at a time, follow the steps below.
- Add Groups in bulk: To learn how to create groups in bulk, please visit here.
- Log in to Scalefusion Dashboard.
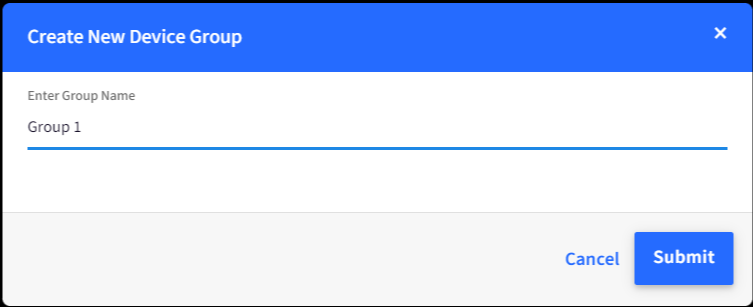
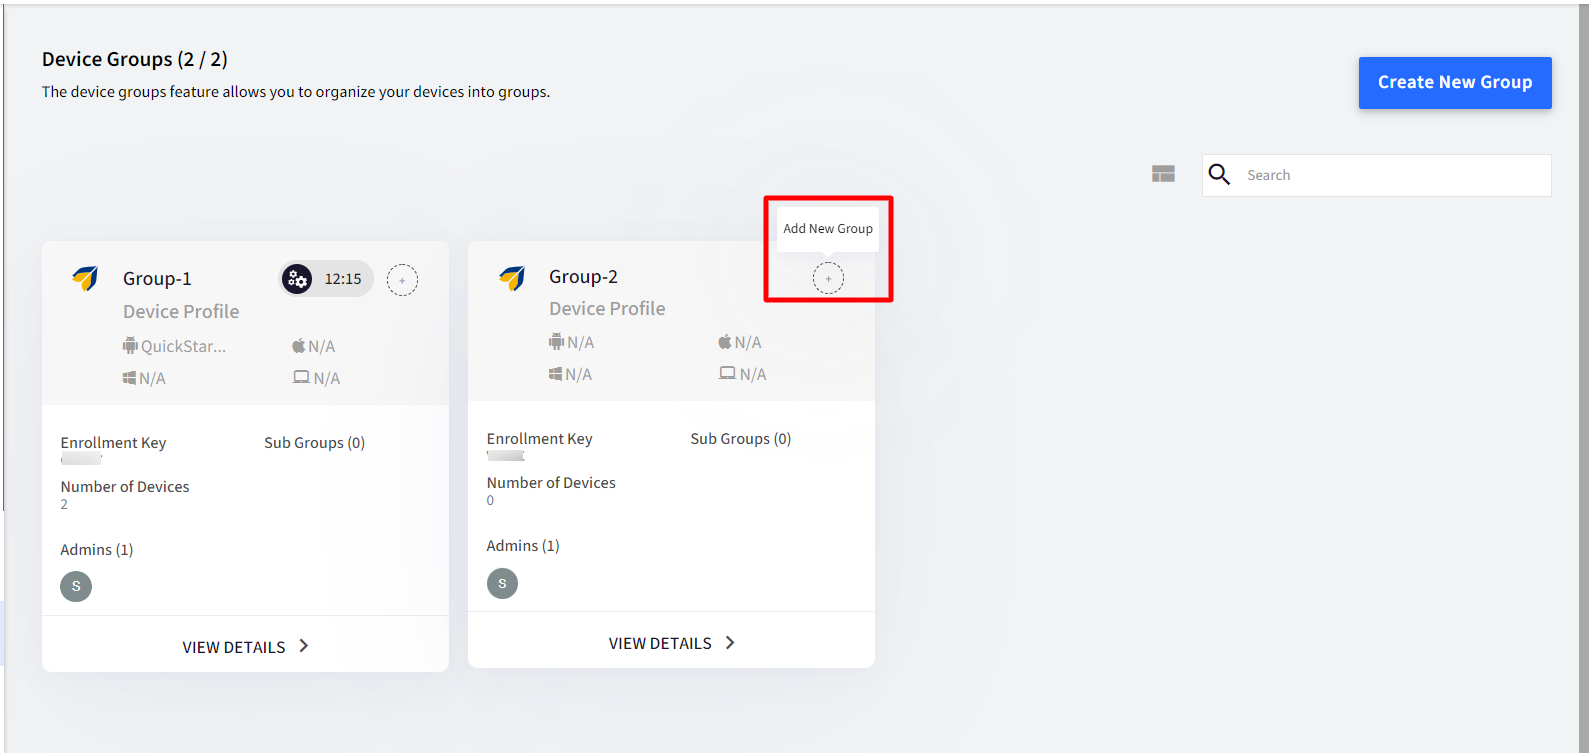
- Navigate to Groups > Device Groups. Click on CREATE NEW GROUP drop-down and on Create New Group under it.

- Enter a Name for your group. Click on SUBMIT.
- You will be shown a page with the following options,
- SELECT DEVICES - Only the devices that don’t belong to any group will be shown. Select the devices that you want to add and Click NEXT.
- CHOOSE ANDROID DEVICE PROFILE - Select a default device profile for all your Android devices. Select the device profile that you want to apply and Click NEXT.
- CHOOSE iOS DEVICE PROFILE - Select a default device profile for all your iOS devices. Select the device profile that you want to apply and Click NEXT.
- CHOOSE WINDOWS PROFILE - Select a default device profile for all your Windows devices. Select the device profile that you want to apply and Click NEXT.
- CHOOSE MAC DEVICE PROFILE - Select a default device profile for all your Mac devices. Select the device profile that you want to apply and Click NEXT.
- ADD ADMIN - You can choose Group Administrators for the newly created Group.

- Click CREATE DEVICE GROUP to create the device group.
- Once the Group is created, it will be displayed under the Device Groups section.
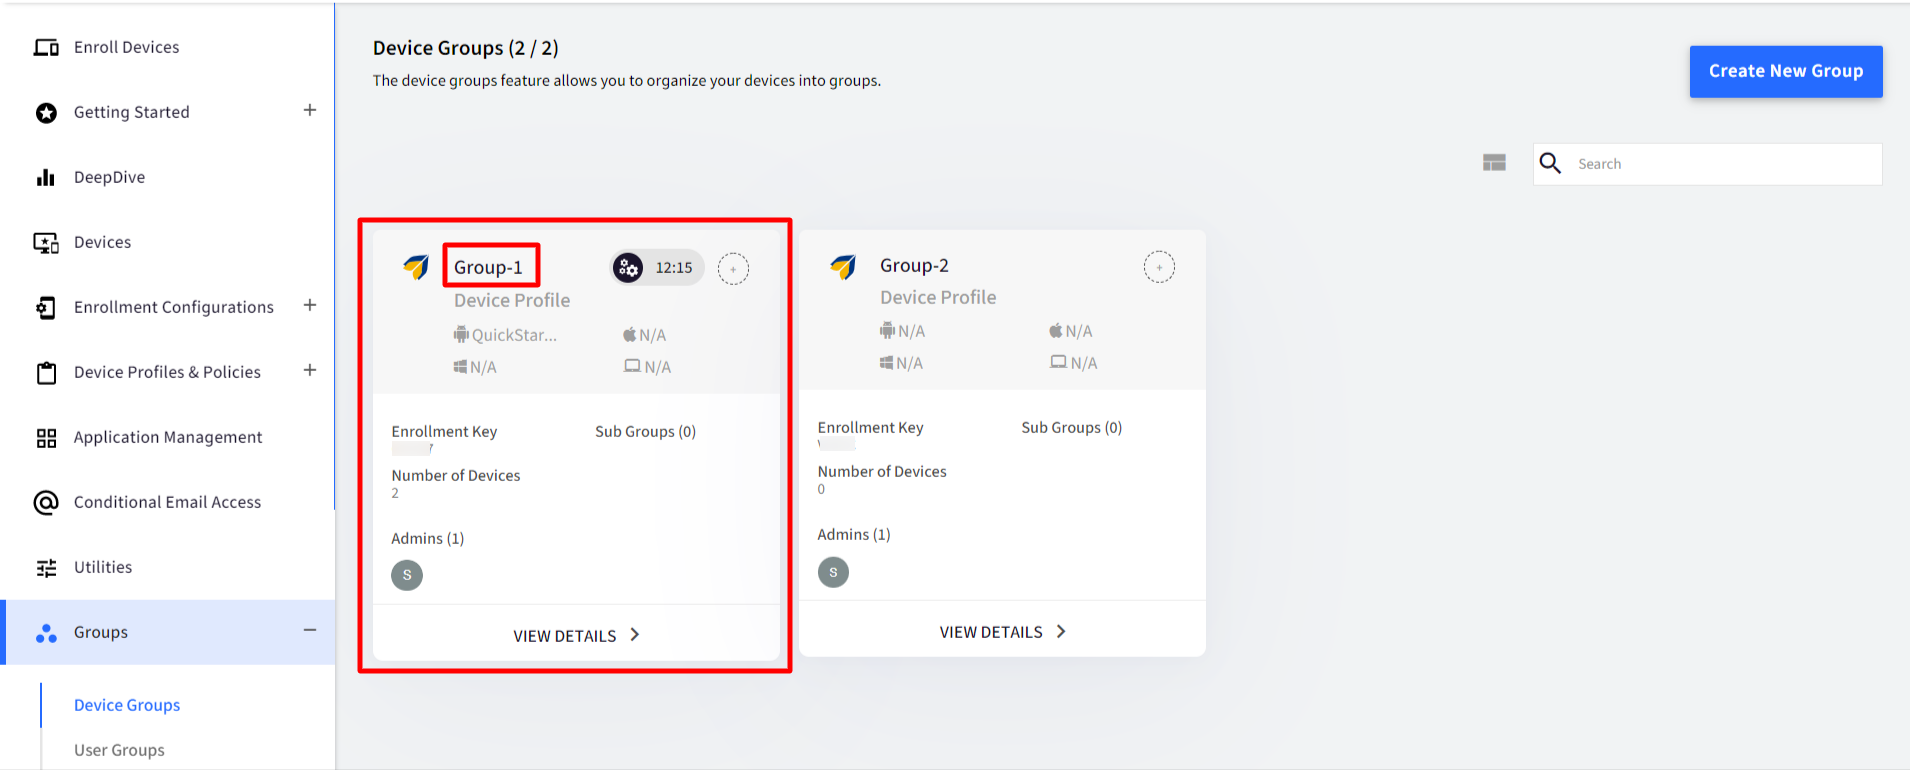
- You have the option to see a Compact View or a Detailed View.
Points to Note on creating Groups and Subgroups
- You can create groups with same names at different levels of groups
- The group or subgroup's name cannot be same at the same level
- Two sub-groups in two different groups can have same names
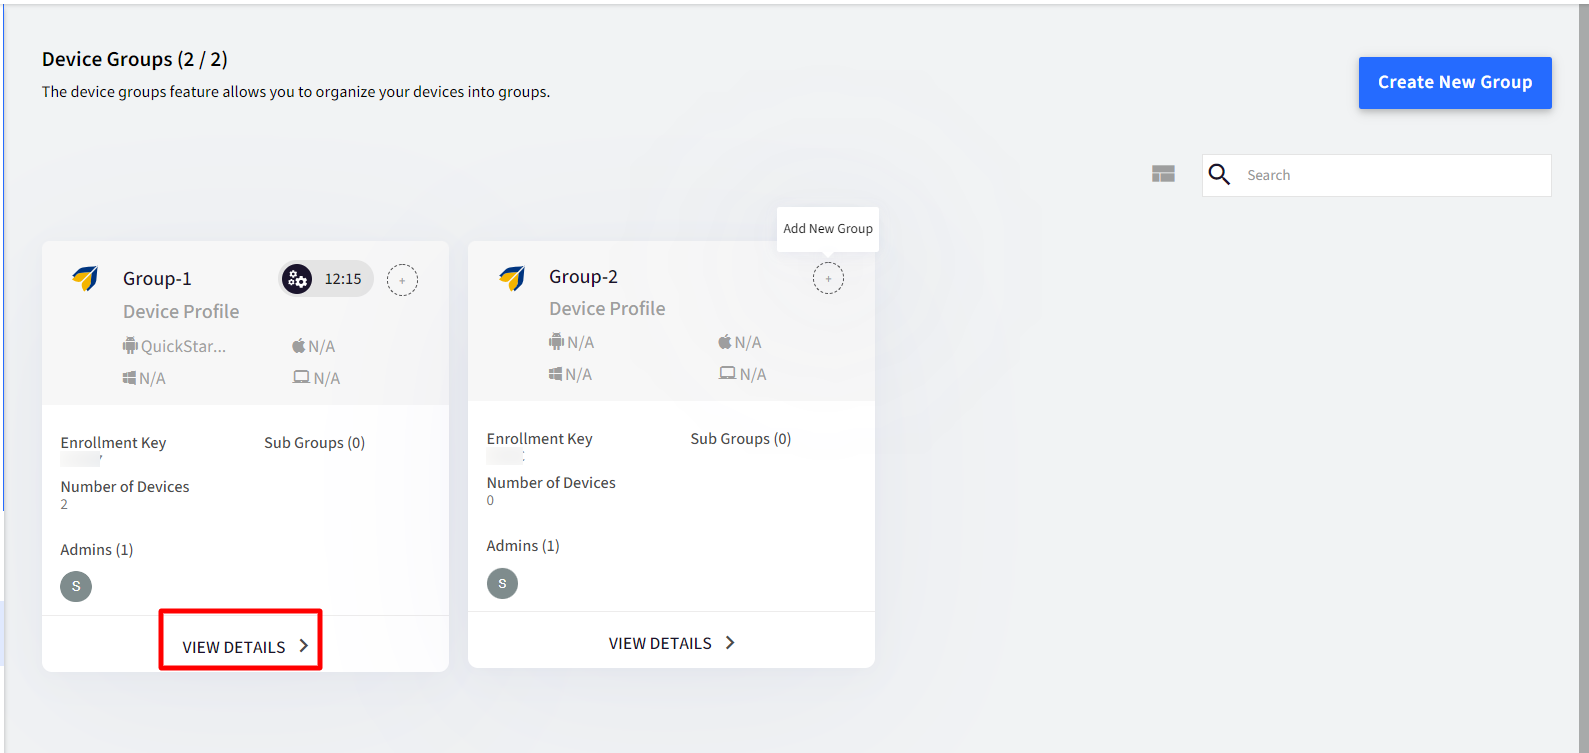
View Group Details
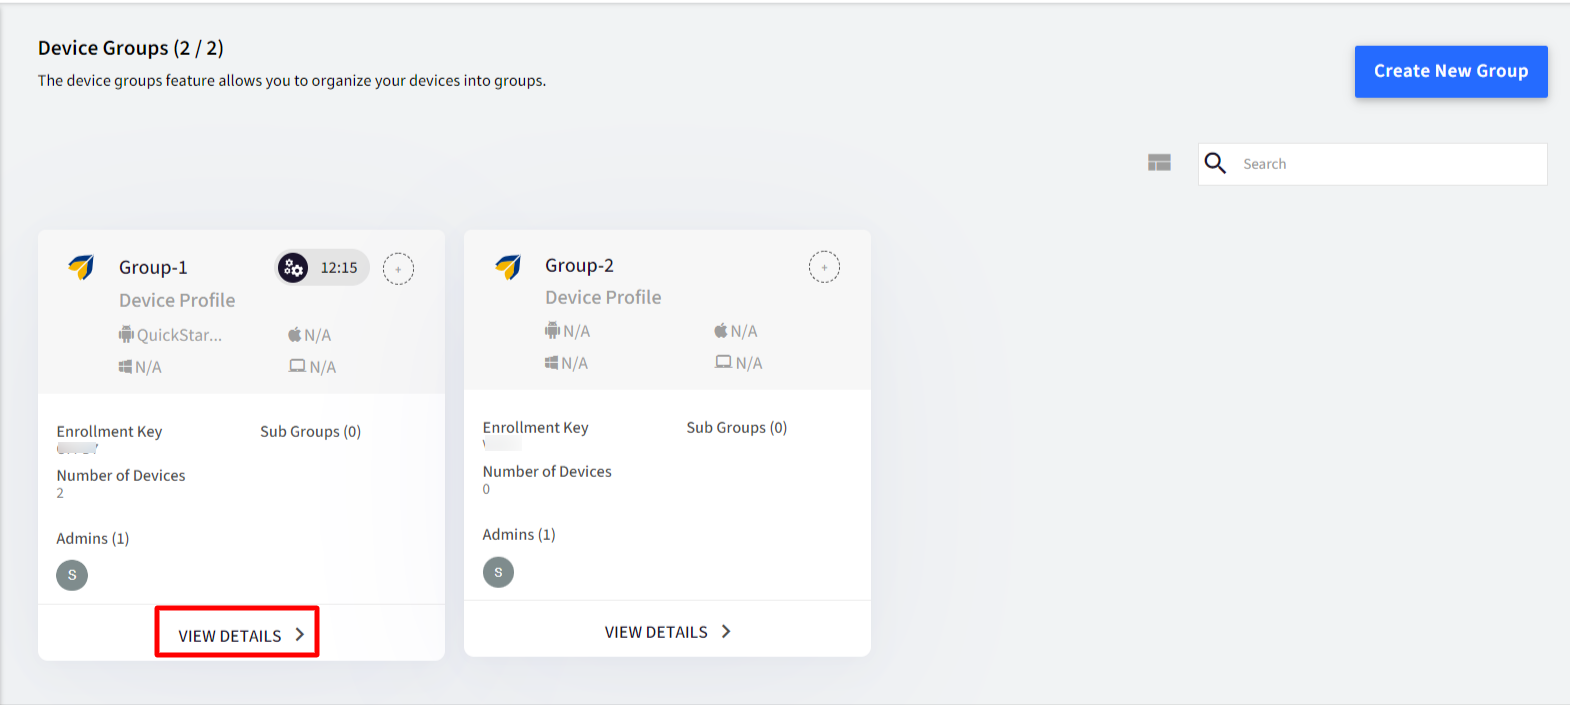
Groups created are displayed on the dashboard as shown. To view details and perform other actions, click on View Details. The View Details page shows details under the following headings:
- Snapshot
- Devices: Lists the devices which are part of the group. New devices can also be added from here
- Subgroups: View and manage subgroups
- Group Admins: View, add & remove Group Admins
- Profile & Policies: View the device profile and policy applied to the group and change it.
- Automation: Define automation rules by defining certain conditions to automatically move devices to groups. This feature will be available only for subscribers to the Enterprise Plan.
Snapshot
Snapshot shows the information of the devices in a specific group in a graphical and summarized form, when there are devices in the group. It displays information like:
- Enrollment Key: The key used at the time of group enrollment (if the option to enter group code in QR code configuration is enabled)
- Total Subgroups
- Inventory Snapshot
- Device Activities
- Device Type Available
- Device Make
- Available Storage
- Available Battery
- Compliance Violations
- Violations Overview
- Data usage
- Last connected
Devices
From here, you can add or remove devices from the device group, move device(s) from one group to another and perform additional actions as well.
Adding Devices to an existing Device Group
- You can add devices to an existing group. To do this, navigate to Groups > Device Groups.
- From the list of groups, click on View Details on the Group in which you want to add devices.
- Under the Devices tab, click on ADD DEVICES.
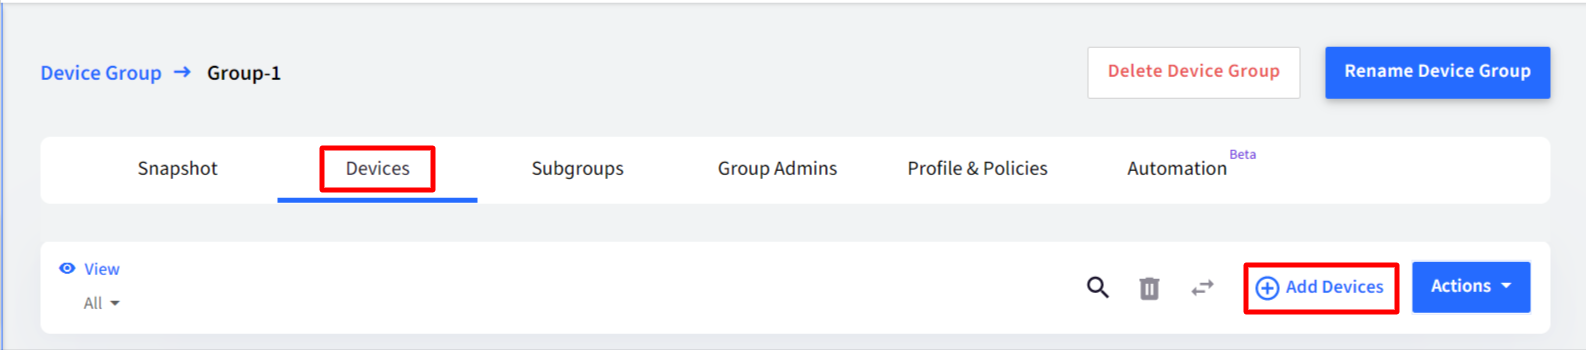
- This will open up a dialog that displays all the devices that are not associated with any Groups so far. Select the Devices that you want to add and click on Submit.
Moving Devices from one group to another
- To move the devices, navigate to Groups > Device Groups.
- From the list of groups, click on View Details on the Group from which you want to move the device.
- Under the Devices tab, select the device(s) to be moved.
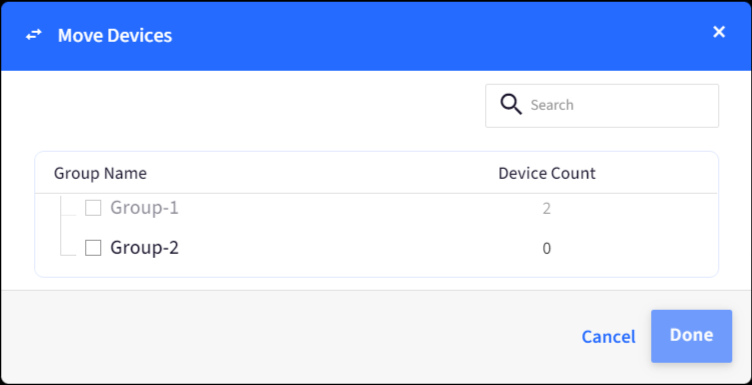
- Click on the icon (with arrows) on the top to move the device from this group.

- You will get the Move Devices dialog box. Select the group to which the device has to be moved and click Done.
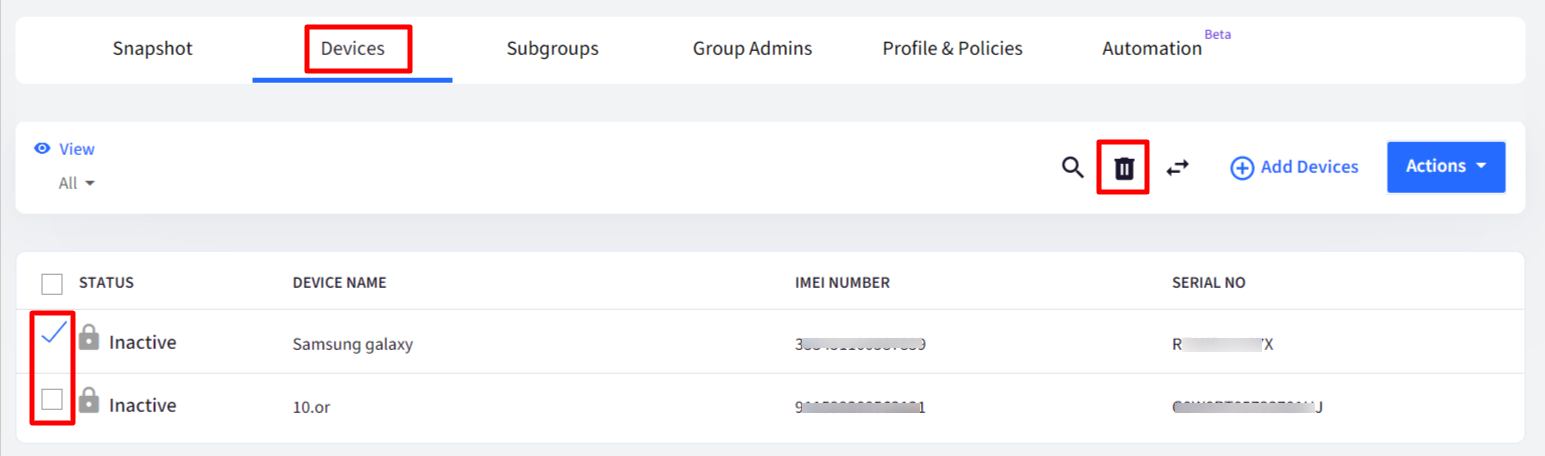
Removing a Device from a Group
- To Remove a device from a group, navigate to Groups > Device Groups.
- From the list of groups, click on View Details on the Group from which you want to remove the device.
- Under the Devices tab, select the device(s) to be removed.
- Click on the Bin icon on the top to remove the device from this group.
- Note that removing a device does not remove the last applied policy on the device. The device is still locked so that you can safely move it to a different group without the device having to be Unlocked.
Device Group Level Actions
Scalefusion offers group-level actions that can be used to perform quick actions across the devices in the group. The options can be accessed on the Group Details page under Devices tab > Actions menu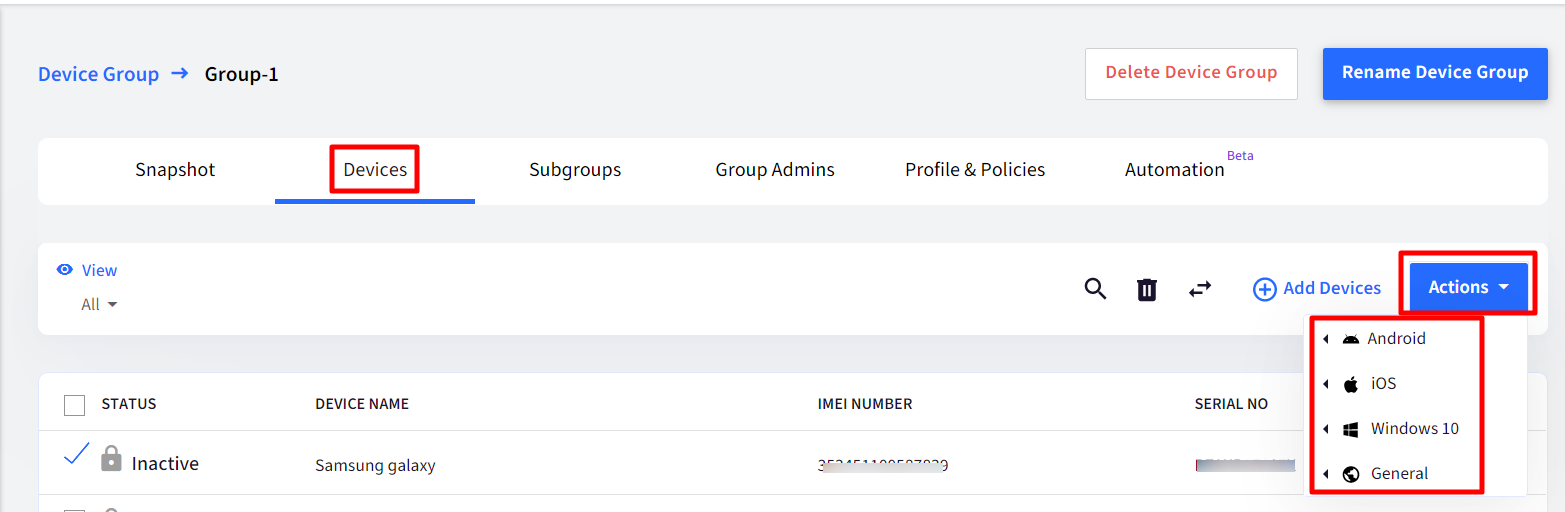
The actions vary platform-wise.
Android
Set Install Window: For Android devices, you can set an install window for the applications that you push to this device group from the enterprise store. Not Applicable to iOS devices.
iOS
Check Update Status: Checks the status of OS updates for the iOS devices in the group
Windows
View Updates: Checks if there are any updates available for the Windows devices and lists them
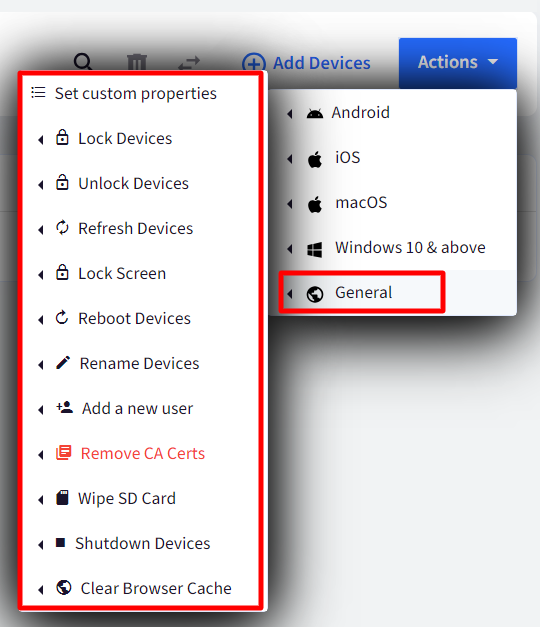
General
- Set Custom Properties: Define the value(s) of custom fields that get applied to all devices in the group. Clicking on Set Custom Properties opens a dialog box displaying the custom fields created. Enter values against each field.
Use this value for direct & indirect sub-groups: If this is checked, the value defined for that custom field will get applied to all sub-groups under it.
These values can then be used in various configurations like:- Default URL in Android/iOS/Windows
- Allow Websites: Define an Allowed Website using $group property and publish it to devices from the Allowed Websites section
- Email and Exchange Configurations
- PFW Configurations (Chrome)
- iOS App Configurations
- Branding - Lock screen message for iOS
- Reboot devices: Sends a Reboot push to all devices in the group.
- Refresh devices: Sends a push to all devices enforcing all the current policies that should be there on the device.
- Clear Browser Cache: This will clear the Browser Cache for Scalefusion Android Browser and ProSurf iOS Browser.
- Lock Devices: Locks the devices in the group/subgroup
- Unlock Devices: Unlocks the devices in the group/subgroup
- Remove CA Certs: Removes all user installed CA certificates from devices in the group/subgroup
- Lock Screen: Locks the screen of devices in group/subgroup
- Shutdown devices
When you click on an action, a dialog box comes up displaying the number of devices on which the action will impact bifurcated platform-wise. Click OK for the action to be implemented.
Subgroups
You can also create sub-groups under Device Groups. Sub-groups can be created in any of the following two ways:
Create a SubGroup on the Group Listing Page
- Log in to Scalefusion Dashboard.
- Navigate to Groups > Device Groups
- In the group listing page, click on the widget over the group under which the sub-group has to be created.
- This takes you to the Sub-group creation flow (explained below)
Create a SubGroup at the Group Details Page
- Log in to Scalefusion Dashboard.
- Navigate to Groups > Device Groups
- Click on View Details of the device group under which Subgroup has to be created
- On this page (Group Details), under the Subgroups tab, you will find a button New SUB GROUP. Click on it
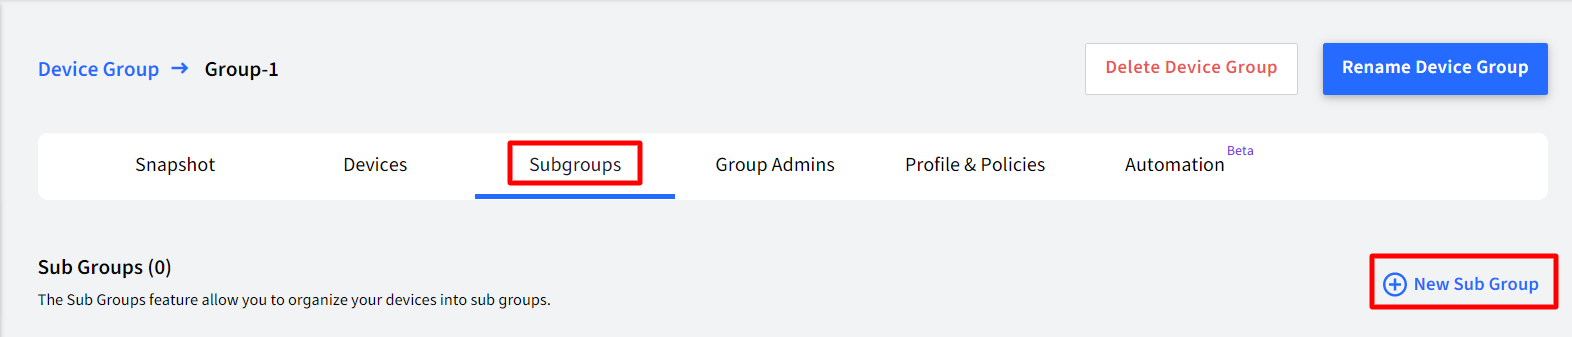
- This takes you to the Sub-group creation flow (explained below)
Subgroup Creation
- Enter a Name for the subgroup. Click on SUBMIT.
- Clicking on Submittakes the user to the Sub-Group Creation page, which is similar to the usual group creation flow,
- Select Devices: The devices that don’t belong to any group will be shownSub-groups are entities that have their own devices. Hence, only those devices can be added that are not part of any other device group.
- Select Android Profile
- Select iOS Profile
- Select macOS Profile
- Select Windows ProfileOn all the above platforms, by default, parent profiles are inherited unless they are assigned with a new device profile.
- Select Admins: Only the Admins that are not the admins of the parent group are listed here.The Subgroups also inherit all the admins from the parent device group. More Admins can be added after Subgroup creation
- Select Devices: The devices that don’t belong to any group will be shown
- Click CREATE DEVICE GROUP to create the Subgroup.
- Once a Subgroup is created, it is listed in the Group Details view, just like a Device Group
Clicking on View Details opens the Subgroup details view and has similar features that exist in a device group
Important points on Subgroups
- A Device group can have unlimited Subgroups
- A Subgroup can have unlimited Subgroups under it
Group Admins
In this section, you can add group administrators and view and manage them.
To add group admin
- Navigate to Groups > Device Groups.
- From the list of groups, click on View Details on the Group in which you have to add group admins
- Navigate to the Group Admins tab and click on Add New Admin
- A dialog box opens. Here select the admins by putting a check in front of the admin name and clicking Submit.
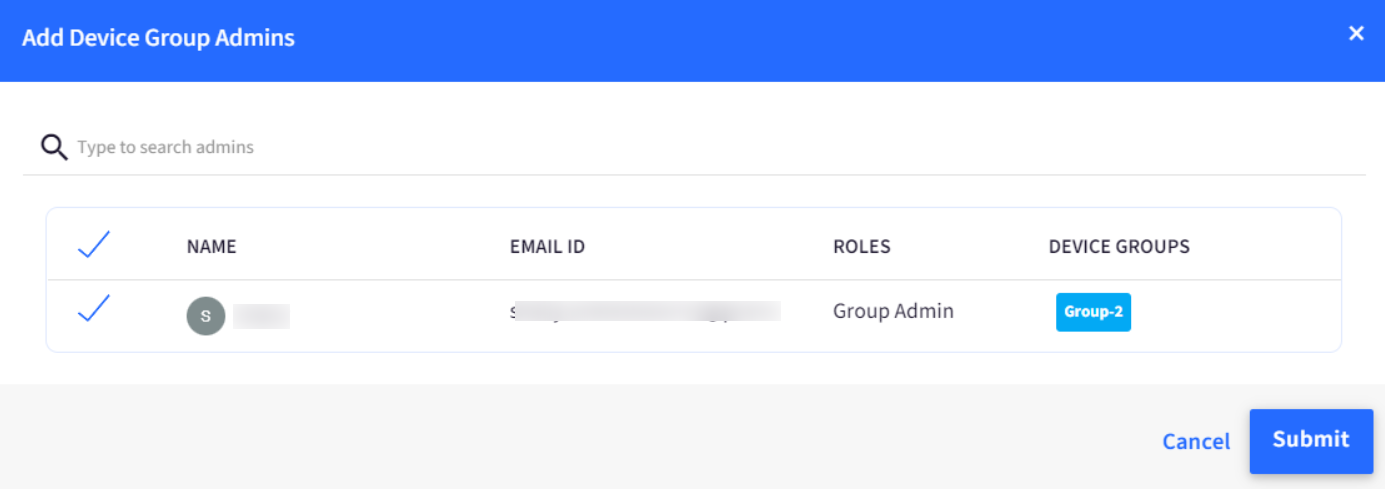
- The group admin will be added and displayed along with the email ID and role. At any point, you can remove the group admin from the group by clicking on the delete icon in front of the admin name.

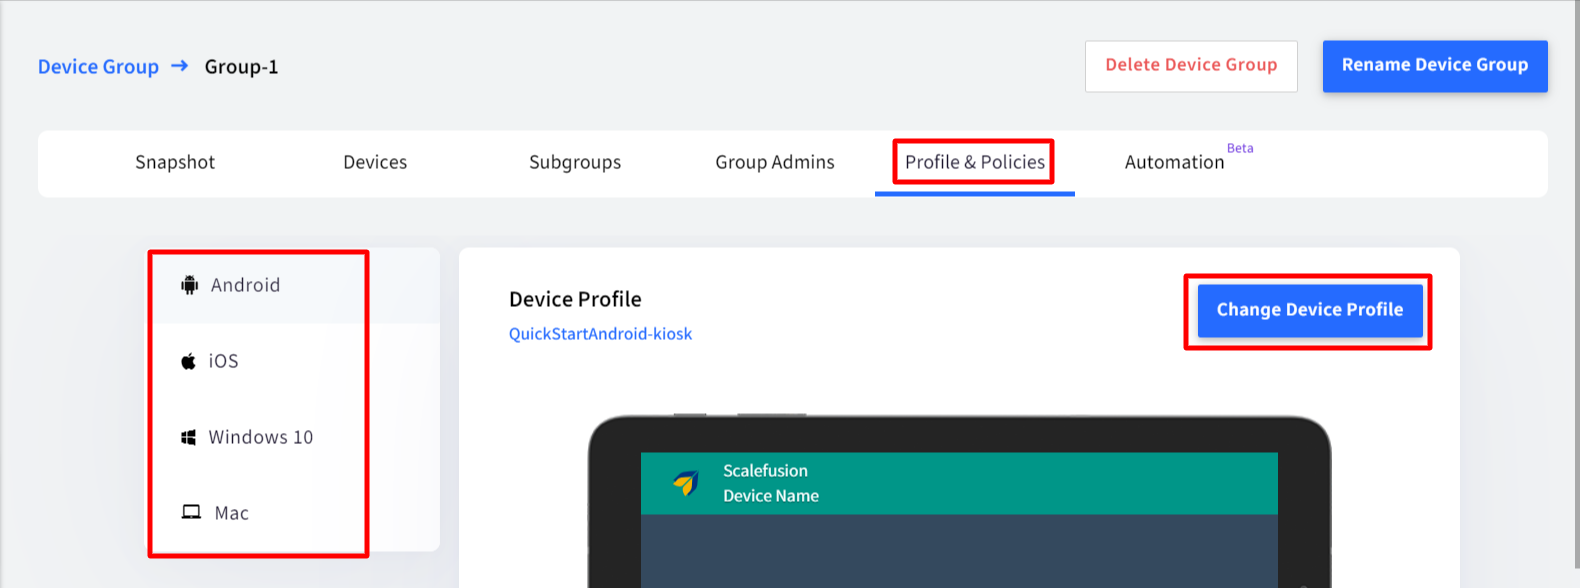
Profiles & Policies
Changing the Device Profile of a Device Group
You can use this feature to change the Device Profile on all your devices in the group in one shot. To do this, follow the below steps,
- Navigate to Groups > Device Groups.
- From the list of groups, click on View Details on the Group where you want to change your profile.
- Click on Android/iOS/Windows/Mac, for which you want to change your profile.
- Click on the Change Device Profile button.
- You will see a dialog that shows all the Device Profiles that have been created till now (Since the above screenshot shows Android as selected, all Android device profiles will be displayed). Select the Profile that you want to apply and click Submit.
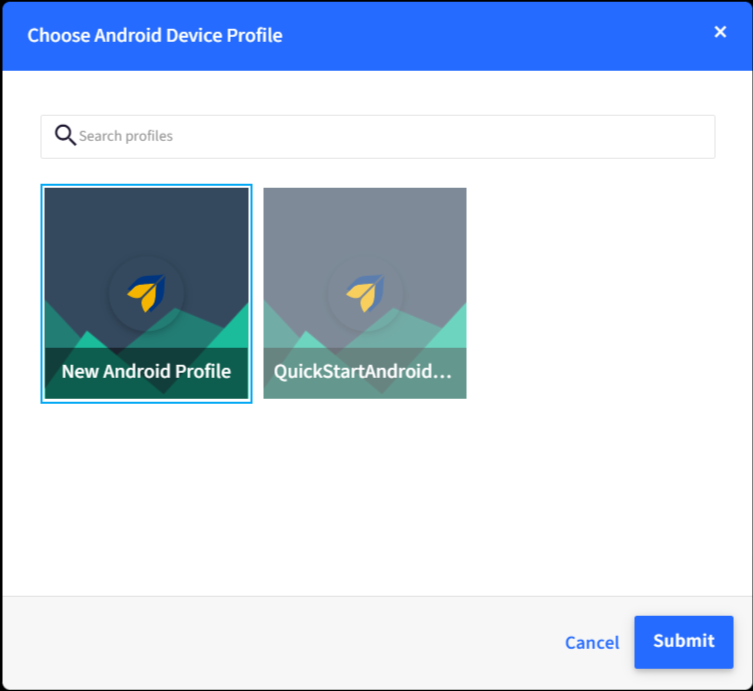
- You will be shown a preview of how the new Profile will look with options to APPLY or CHANGE.

- To confirm the change, click on APPLY.
- All the devices in this group will be sent a push to update to the new settings.