With Domain Policy Controller, we can deploy Scalefusion MDM agent application for Windows from the server to all domain-joined client machines. The devices can then be automatically enrolled in Scalefusion. This allows you to easily enroll Windows devices into Scalefusion.
You can first deploy the agent and subsequently auto-enroll the devices into Scalefusion silently.
This document describes the process to deploy Scalefusion Windows MDM Agent on remote devices using domain group policy in a local/on-premise Active Directory environment.
Pre-requisites
- Server Machine (OS-Windows server 2016/19 etc)
- Client devices (Windows 10/11) should be domain joined.
- Group policy should work from server to client machine.
Overview
Following is an overview of steps involved in deploying Scalefusion MDM Agent Application on domain joined devices. These are explained in detail in later sections:
- Create Windows Installer Setup Transform (MST) from Agent MSI using Microsoft Orca Tool
- Deploy MSI from Domain Controller Machine
- Create a distribution point
- Create a Group Policy Object
- Assign an MSI package
Step 1: Create Windows Installer Setup Transform (MST) from Agent MSI using Microsoft Orca Tool
- Log on to a Windows device with Admin credentials.
- Extract Orca_Installer.zip (https://learn.microsoft.com/en-us/windows/win32/msi/orca-exe) in a folder.
- Install Orca by double clicking on Orca-x86_en-us.msi file in the extracted folder
- Once Orca is installed, launch it with Run As Administrator
- Copy Scalefusion Windows Agent MSI to the device. The Agent MSI can be downloaded from https://scalefusion.com/winmdm
- Inside Orca tool, Click on the File -> Open menu and select Agent MSI to open it.
- Click on the Transform -> New Transform menu.
- In the Left side Tables pane, select Property and then on the right side pane, click on the Property column to sort all installer properties.
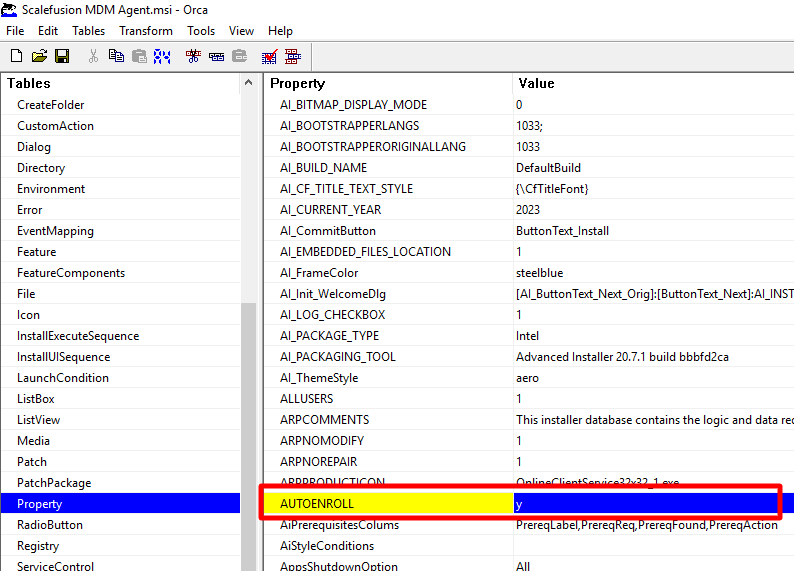
- Agent currently provides two kinds of enrollment options viz. (a) Autoenrollment using Serial No. and (b) Enrollment using URL and Code. Follow (a) OR (b) as per requirement.
- For Auto-enrollment using Serial No., double-click on Value column against AUTOENROLL property and change the value from n to ySerial No. has to be pre-uploaded
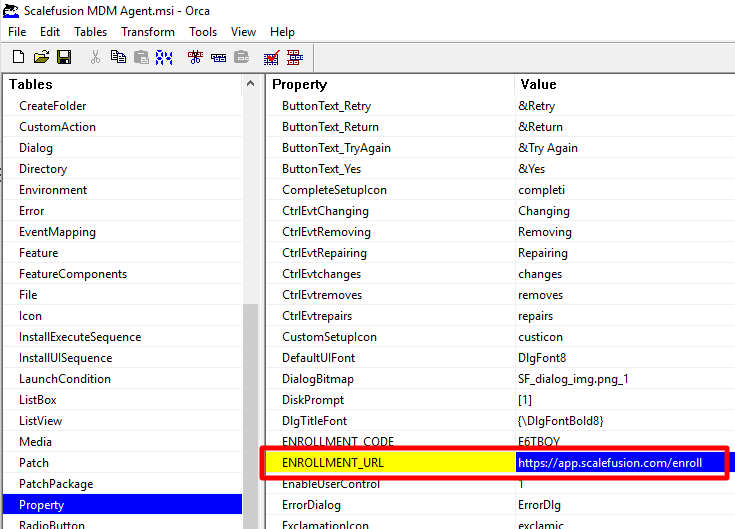
- For Enrollment using URL & Code, double click on the Value column against ENROLLMENT_CODE and ENROLLMENT_URL properties and update the values accordingly. Refer below screenshot.
- For Auto-enrollment using Serial No., double-click on Value column against AUTOENROLL property and change the value from n to y
- Click on the Transform -> Generate Transform menu and save the file as Scalefusion_MDM_Agent.mst.
Step 2: Deploy MSI from Domain Controller Machine
Step 2.1: Create a distribution point
The first step in deploying an MSI through GPO is to create a distribution point on the publishing server. This can be done by following these steps:
- Log on to the Windows Domain Controller/AD server as an Administrator user
- Create a shared network folder (this folder will contain the Agent MSI package) e.g. \\WIN-I1BU5UFKVQE\Agent-MSI
- Set Read permission for Everyone on this folder in order to allow access to the distribution package from remote devices.
- Copy the Agent MSI in the shared folder. If the MST file is also created as part of Step 1 then copy the MST file also in the shared folder.
Step 2.2: Create a Group Policy Object
An MSI package is deployed (distributed) through GPO as a Group Policy Object. In order to create an object for your package, you can follow these steps:
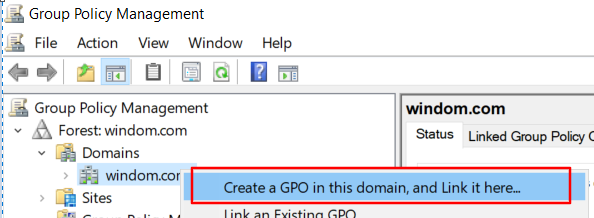
- Click on the Start button and open Group Policy Management under Windows Administrative Tools.
- Expand Forest (your forest) > Domains (your domain)
- Right click on the domain and then click on Create a GPO in this domain, and Link it here….
- Enter a name for your policy (e.g. SF_Agent_MSI_Deployment) and leave Source Starter GPO as (none)
Step 2.3: Assign an MSI package
Once the package is assigned, it will automatically be installed silently. In order to assign a package, follow these steps:
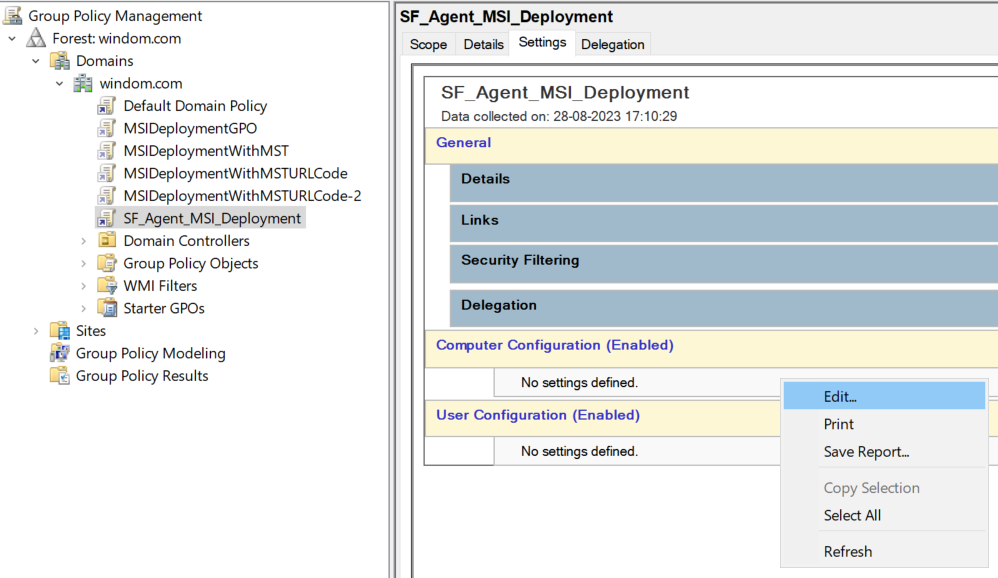
- Click on your previously created policy (e.g. SF_Agent_MSI_Deployment)
- In the right panel click on the Settings tab
- You should see Computer Configuration, right-click anywhere in the empty area and select Edit. This will launch Group Policy Management Editor.
- In the Group Policy Management Editor, expand Computer Configuration -> Policies -> Administrative Templates -> System -> Group Policy.
- Double-click on Specify startup policy processing wait time policy. Select Enabled and update the value to 120. Press OK to close the dialog.

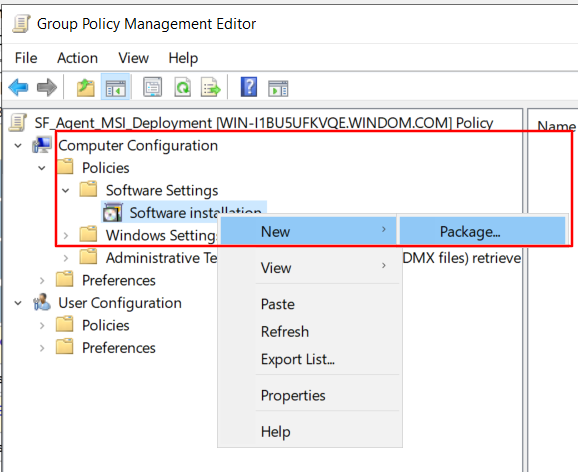
- In the Group Policy Management Editor, expand Computer Configuration -> Policies -> Software Settings -> Software Installation.
- Right-click Software Installation and select New > Package. Refer below screenshot.
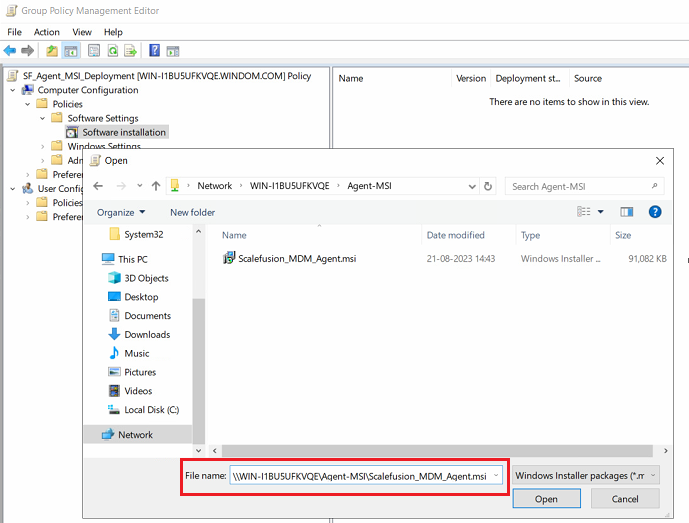
- Select MSI from the previously configured network share.Do not use the Browse button in the Open dialog to access the UNC location. Make sure that you copy the UNC path to the shared package and then click on Open. E.g. \\WIN-I1BU5UFKVQE\Agent-MSI\Scalefusion_MDM_Agent.msi
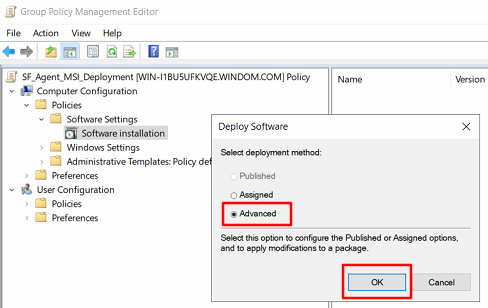
- In the dialog that appears select Advanced and click OK.
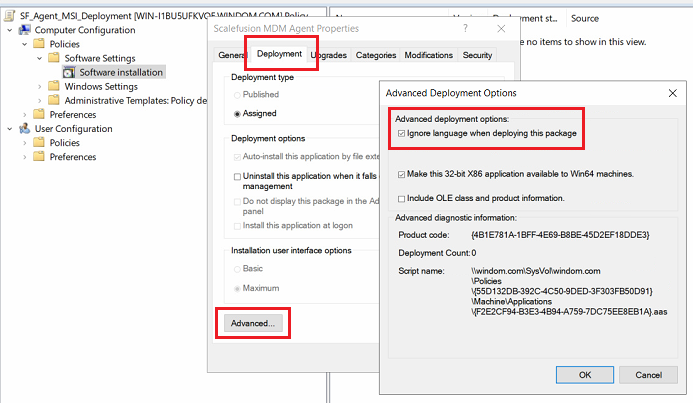
- Clicking on OK will open package properties. If not opened, manually double click on the package to open its properties.
- Select the Deployment tab, click on Advanced button and Enable the checkbox Ignore language when deploying this package. Press OK to close the Advanced Deployment Options dialog box.
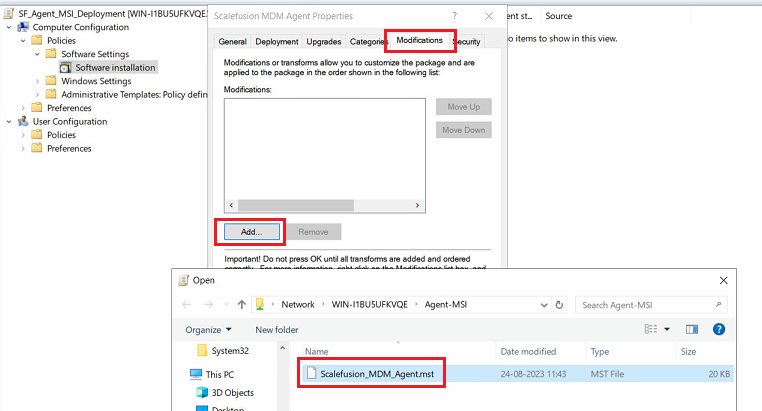
- In case Step 1 was performed, Select the Modifications tab , click on the Add button, select the MST file and press Open. Refer below screenshot.
- Press OK to close Properties dialog.
- Close Group Policy Management Editor.
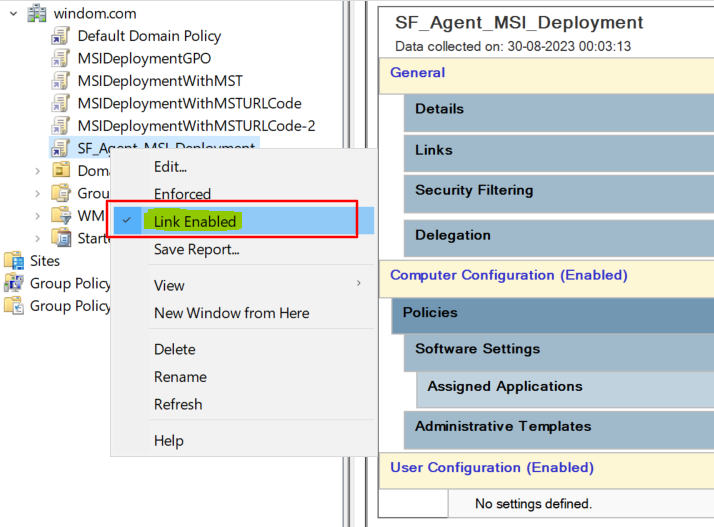
- Right click on the newly created GPO and make sure Link Enabled is checked. Refer below screenshot.
- Make sure remote device(s) are switched on. Wait for 15-20 mins after GPO for MSI deployment is created.
- Reboot the remote device(s). Post reboot and login to the device, you will observe that Scalefusion Windows MDM Agent is installed.
- If the agent installation is not triggered on client device(s) for a long time, launch command prompt as an Administrator on client device and run command gpupdate /force and restart the device.
- If MST file is added (Point #12 above) then the device should be auto-enrolled to Scalefusion as well (as per configuration of MST).