Scalefusion and Android for Work make it easy for you to configure Palo Alto VPN on your managed Android devices. Follow the guide below to configure Palo Alto.
Before you Begin
- Complete Android for Work Setup in Scalefusion Dashboard.
- Enroll your corporate-owned devices using afw#mobilock
- Invite your Employees to enroll their personal devices.
The following feature works only for devices enrolled via afw#mobilock and where Scalefusion application is set as a Device Owner or employee-owned devices where Scalefusion creates a Work Profile. It will not work if you are using legacy methods to enroll the devices.
Search and Approve GlobalConnect
The first step is to search and approve GlobalConnect for your organization. The steps are,
- Sign In Scalefusion Dashboard.
- Navigate to Application Management > Play For Work Apps.
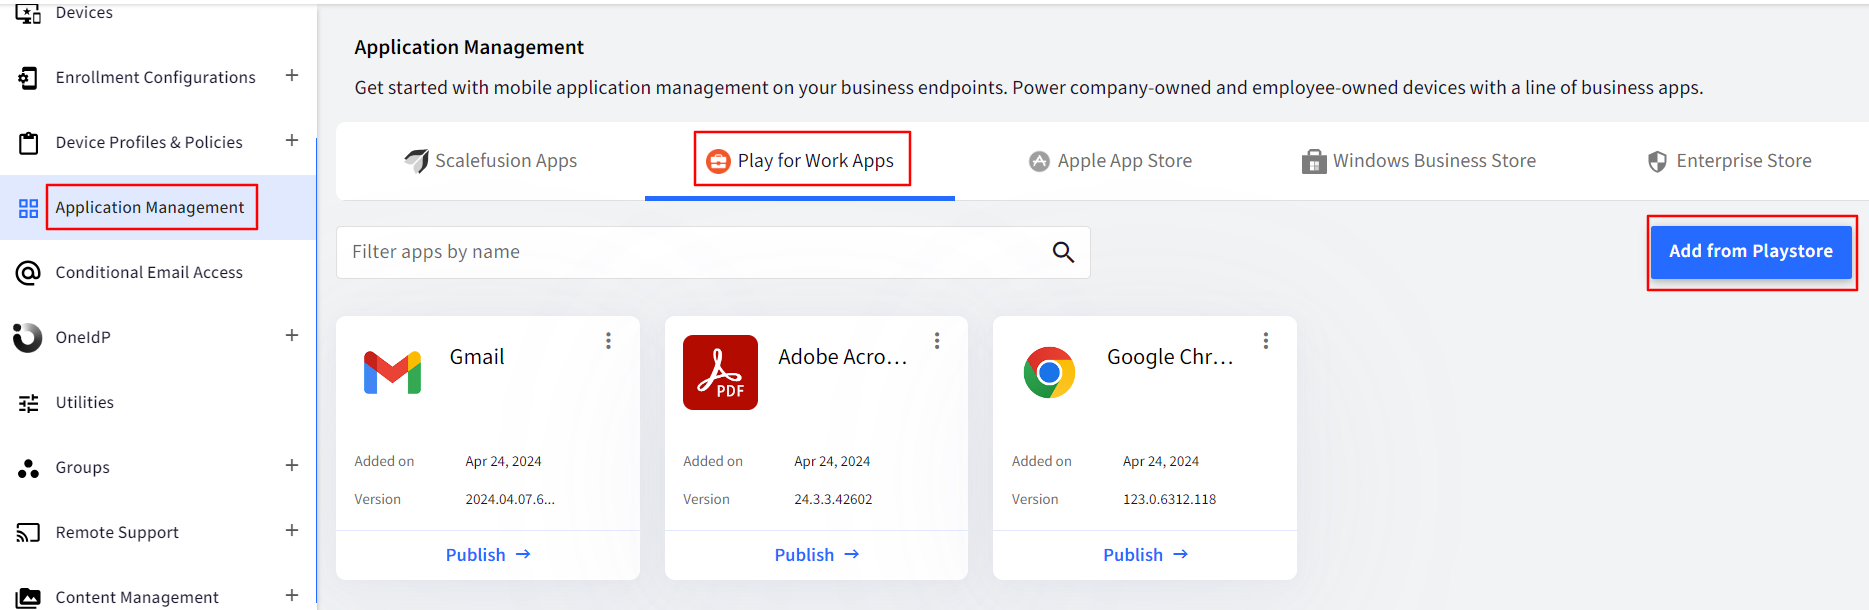
- Click on the Add from Playstore button to see the Google Play dialog.
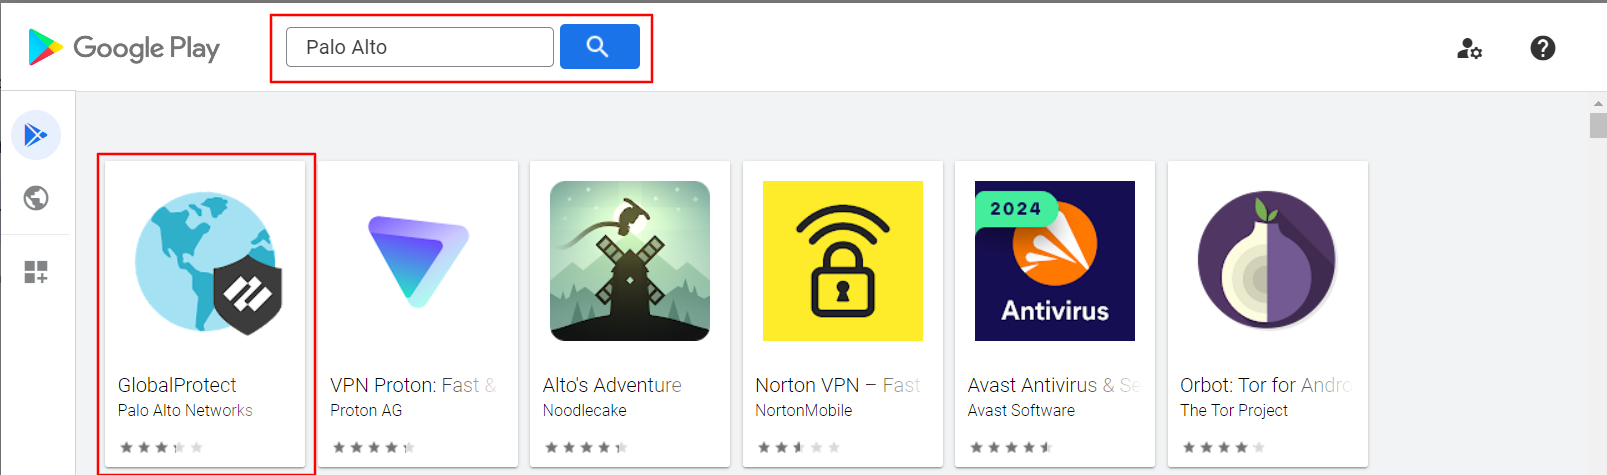
- In the Google Play dialog, search for Palo Alto's GlobalProtect.
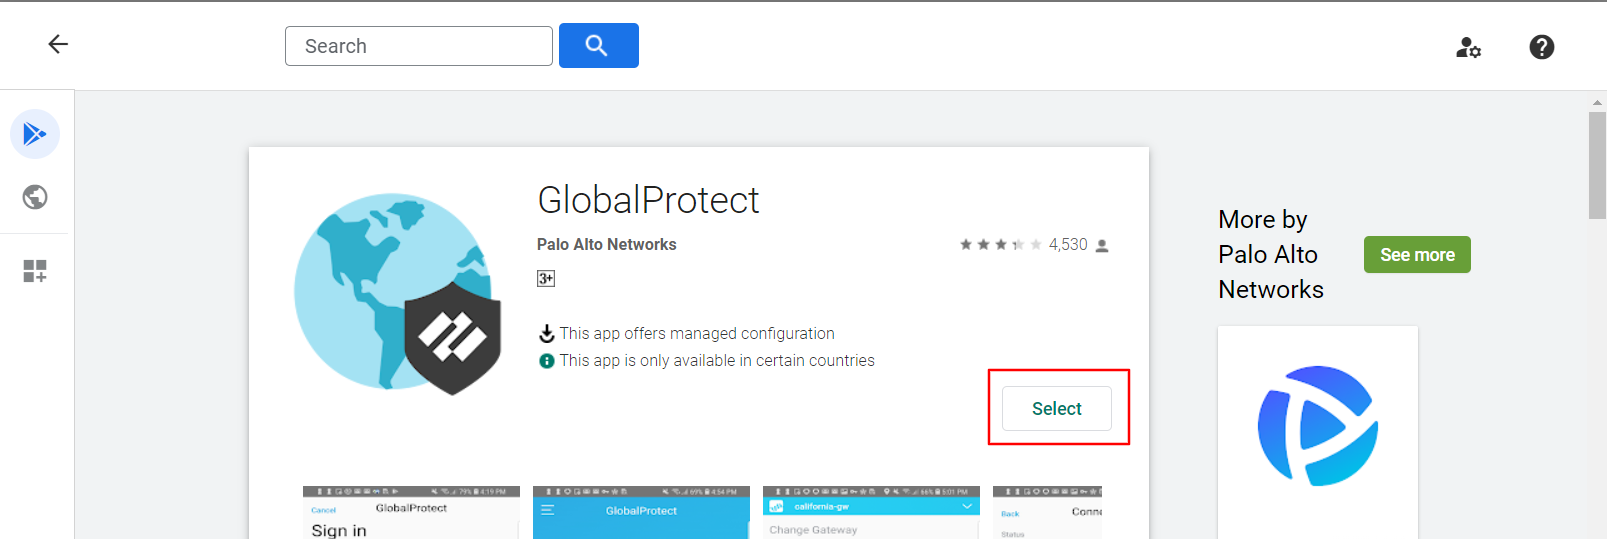
- Click on the GlobalConnect app and click on Select button.
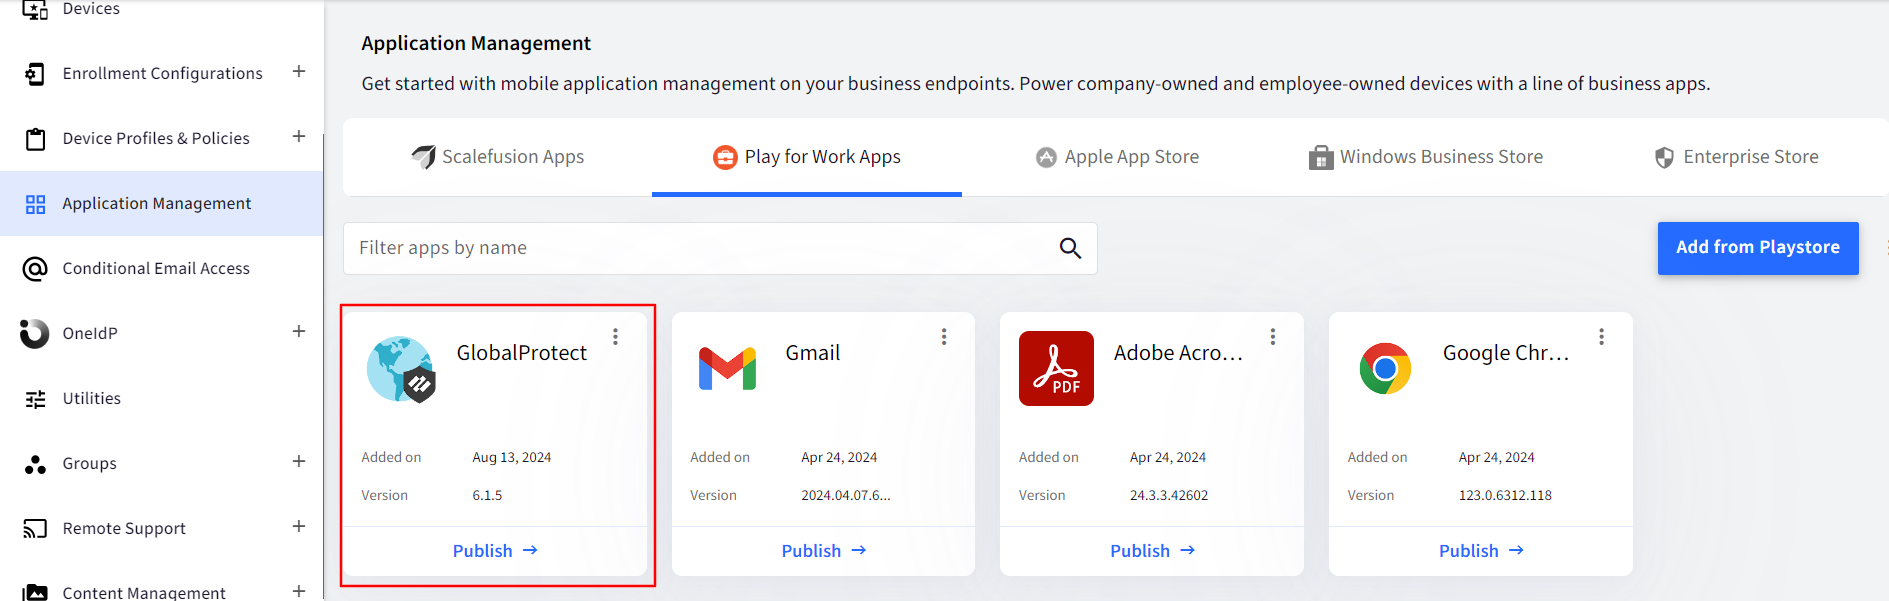
- The app will start appearing on the Scalefusion Dashboard.
Configuring GlobalConnect Settings
Once you have the GlobalConnect app, the next step is to configure the application. The steps are,
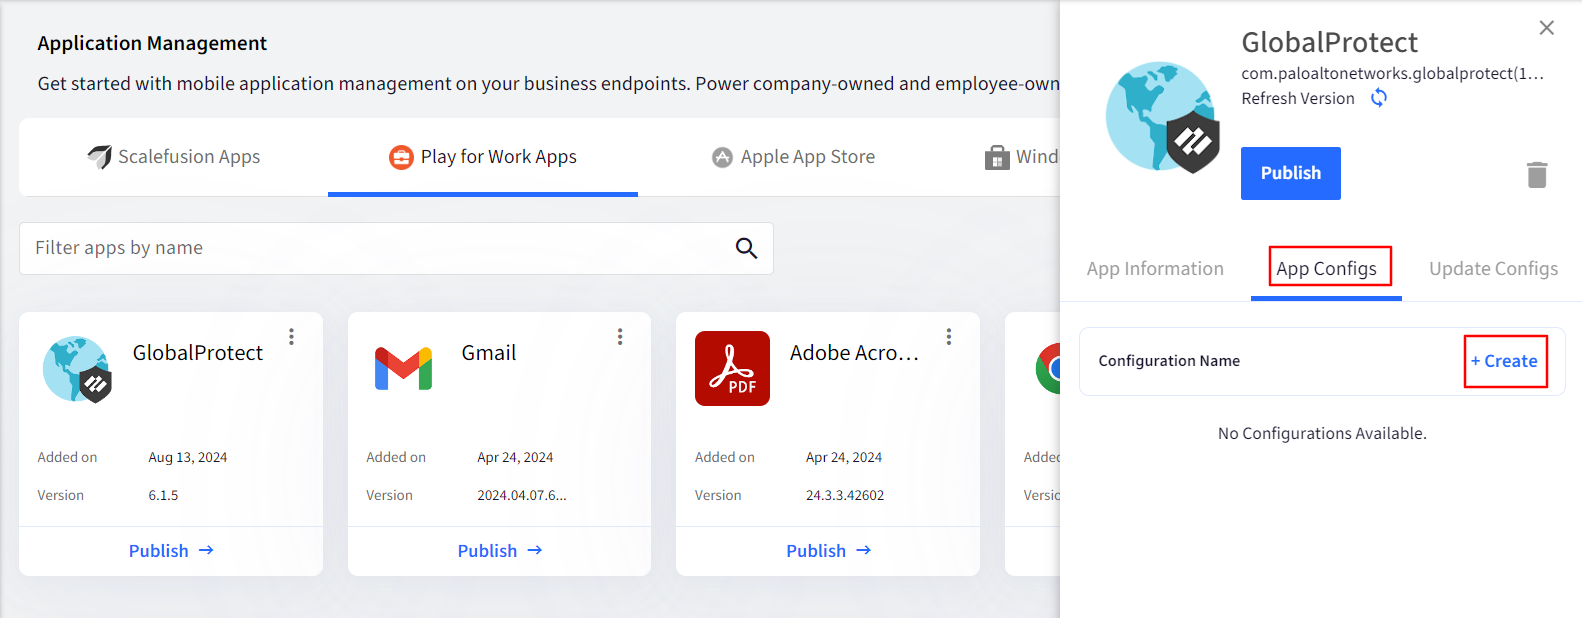
- Click on the GlobalConnect application to see the details card.
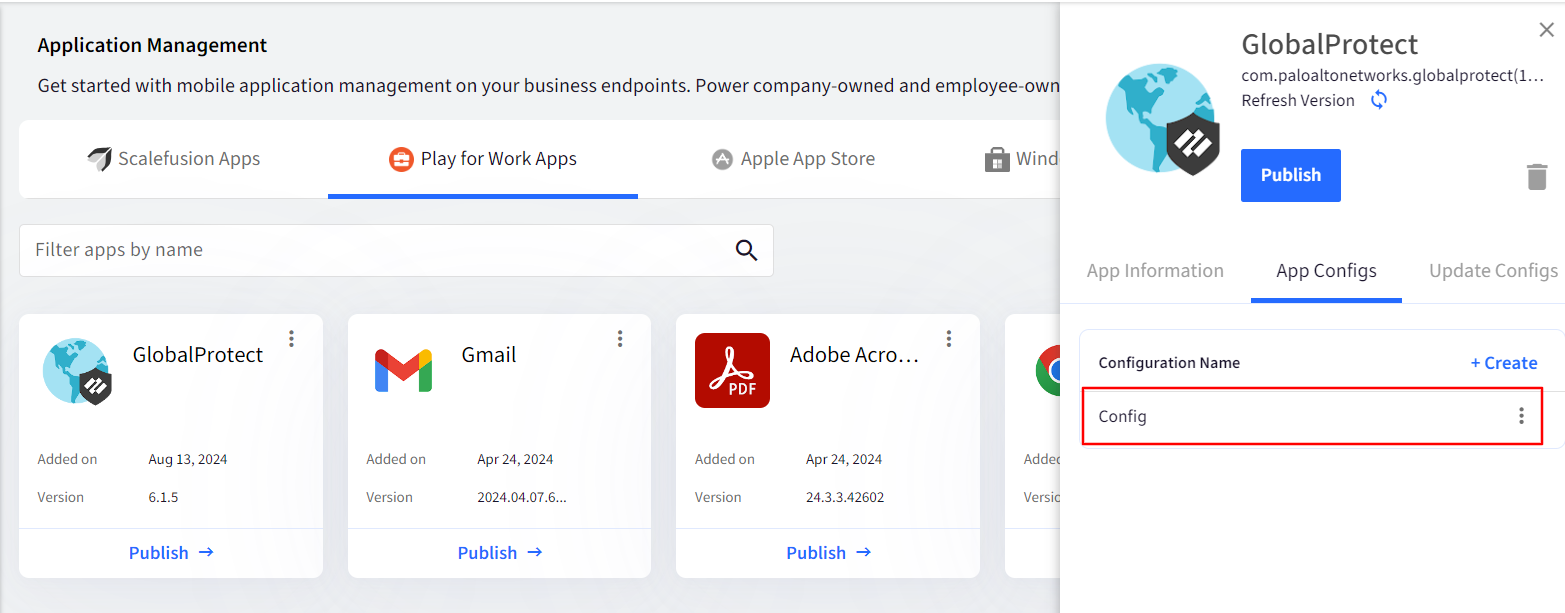
- Click on the App Configs tab and click CREATE to see the configuration options.
- GlobalConnect gives you the following configuration options,
| Portal | The portal address or the server URL of the GlobalConnect VPN server. |
| Username | The username to be used or blank. You can use custom properties for a dynamic configuration, like $device.<customproperty> or $user.email |
| Password | Optional field to specify the password for the VPN connection. |
| Client Certificate | The client certificate is to be used for logging in to Portal. |
| Client Certificate Passphrase | The passphrase for the client certificate is if the certificate is passphrase protected. |
| AppList | Comma-separated list of apps that need to be blocked or allowed for VPN. |
| Connection Method | The VPN Connection method to be used. |
| Remove VPN Configuration Flag | Flag to remove VPN configuration. Set this flag to true to remove the VPN configuration |
| Mobile ID | A unique identifier for the device. You can use the $device.customproperty. |
| Allow Network Bypass | Choose if you want to allow the VPN to be bypassed by applications. |
| Cert Alias | The Alias of the client certificate, if any. |
4. Once you have entered the values, click on SAVE to save the configuration. All the saved configurations appear in the list.
Publishing the Application and Configuration
Once you have created the configuration, the next step is to publish the application and then the configuration. The steps are,
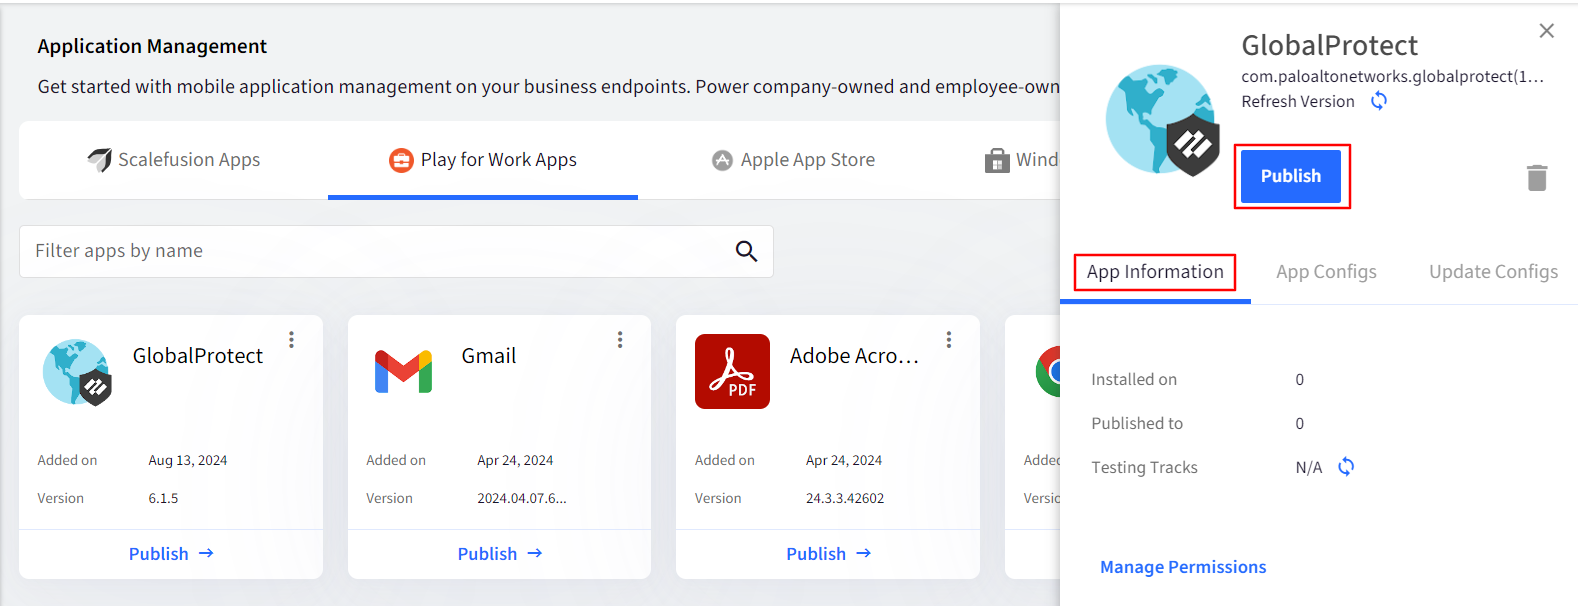
- From the App Details card, click on the App Information tab and click on PUBLISH.
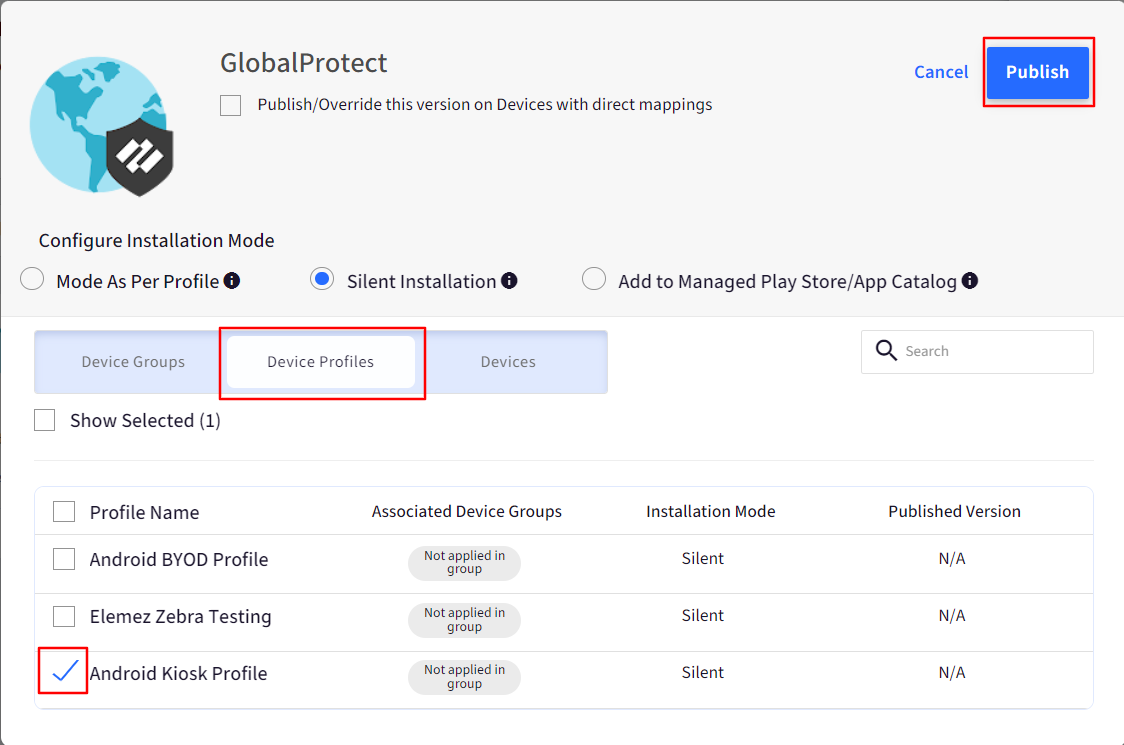
- Select the Android Device Groups/Profiles/Devices where you want to publish the application and click PUBLISH.
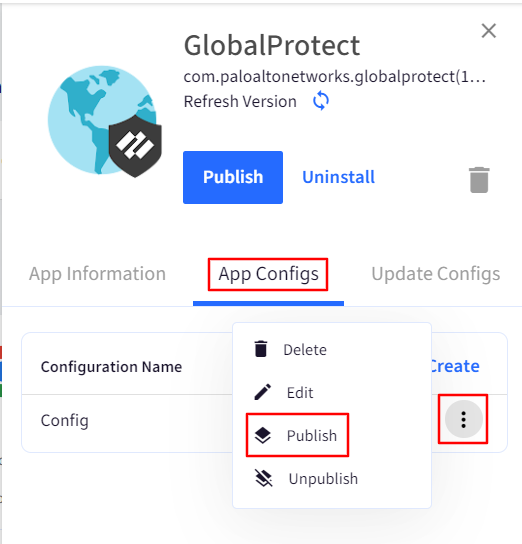
- Now click on the App Configs tab. Click on the 3-dots > click on Publish.
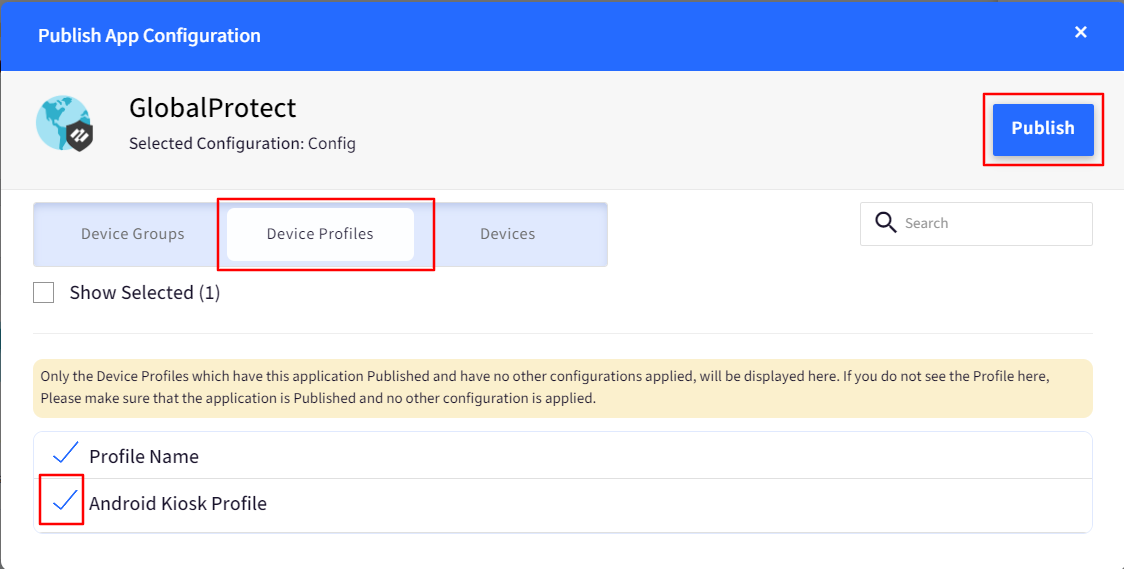
- Select the Android Device Groups/Profiles/Devices where you have published the application in Step 3, and click PUBLISH.
- This will cause the applications to be installed on the devices and then configured based on the configuration.
Please contact your VPN Service provider in case you need details on how to use a particular setting and the accepted values.