Many enterprise applications need users to enter URL, port, email address, and other similar configurations as a one-time setup of an application. An app configuration is an easy way to configure a large number of devices with custom settings such as email, network, and so on. Scalefusion now allows you to customize the configuration settings of your iOS apps.
Before You Begin
- You must have a Scalefusion Dashboard account.
- You have created an iOS Device Profile and enrolled an iOS Device.
- You have published an application from the Apple App Store or Enterprise Store that accepts App Configurations.
Creating an App Configuration
Follow these steps to create an app configuration:
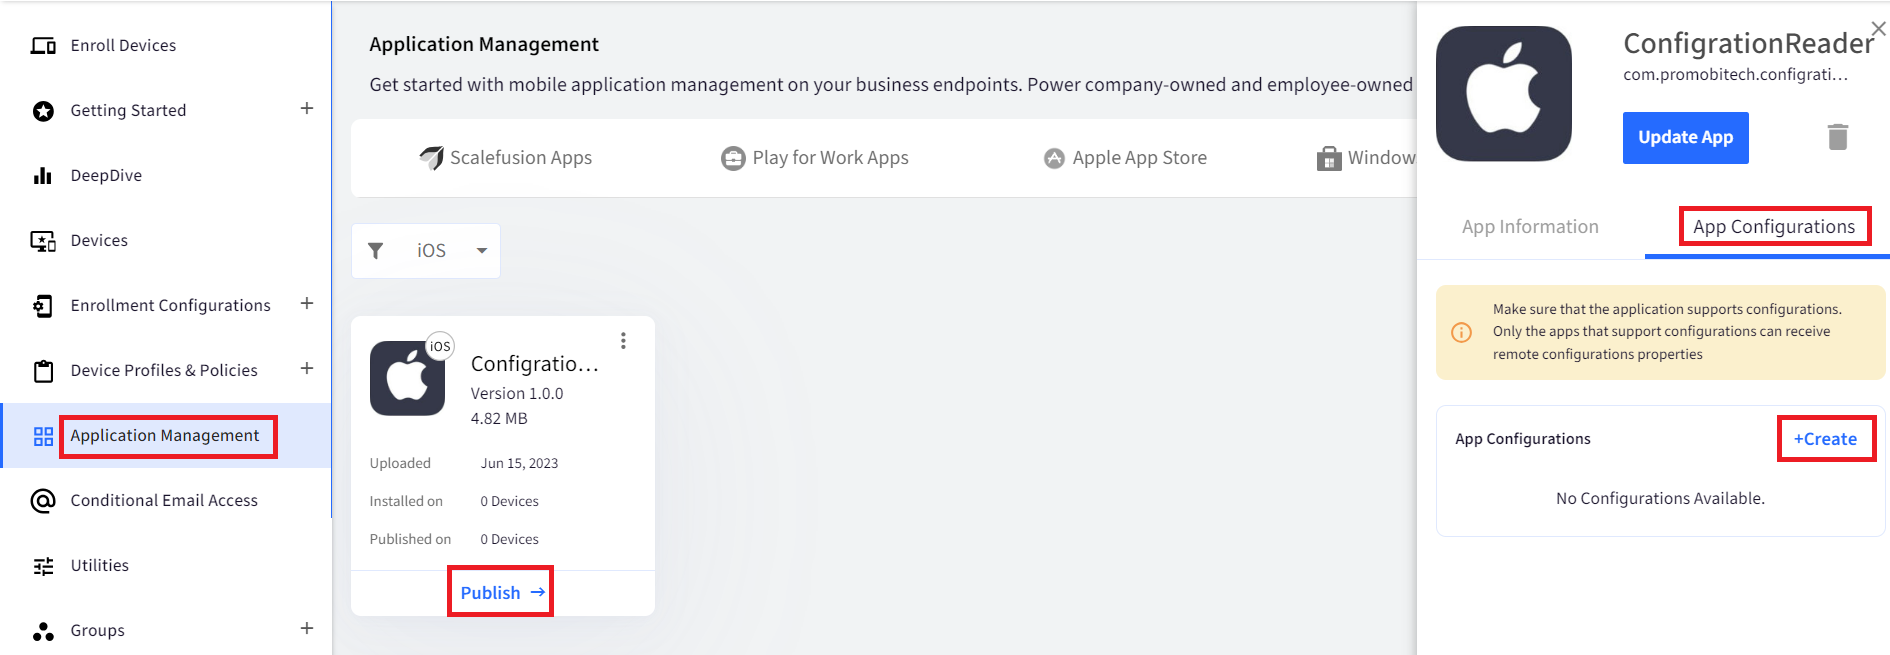
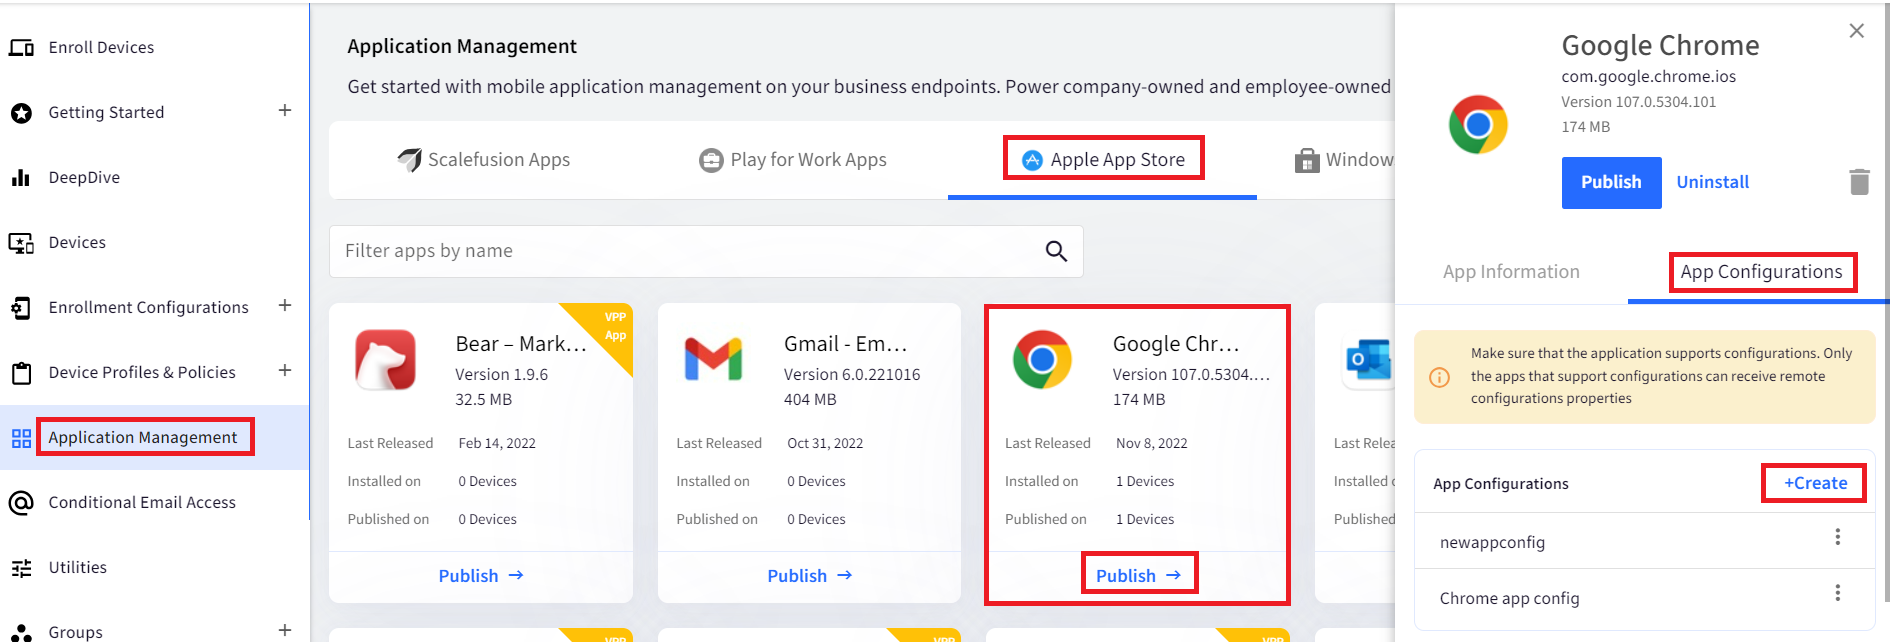
- From your dashboard, go to Application Management > Apple App Store Or Enterprise Store.
- Select a new iOS application (from the Apple App Store or Enterprise Store) or select the one that you might have previously published/installed and click on Publish.
- Select the App Configurations tab and click on the Create button. The Create App Configuration window will appear.
- In the configuration creator window, start entering the details of the configuration: The following table explains the data types available for app configuration.
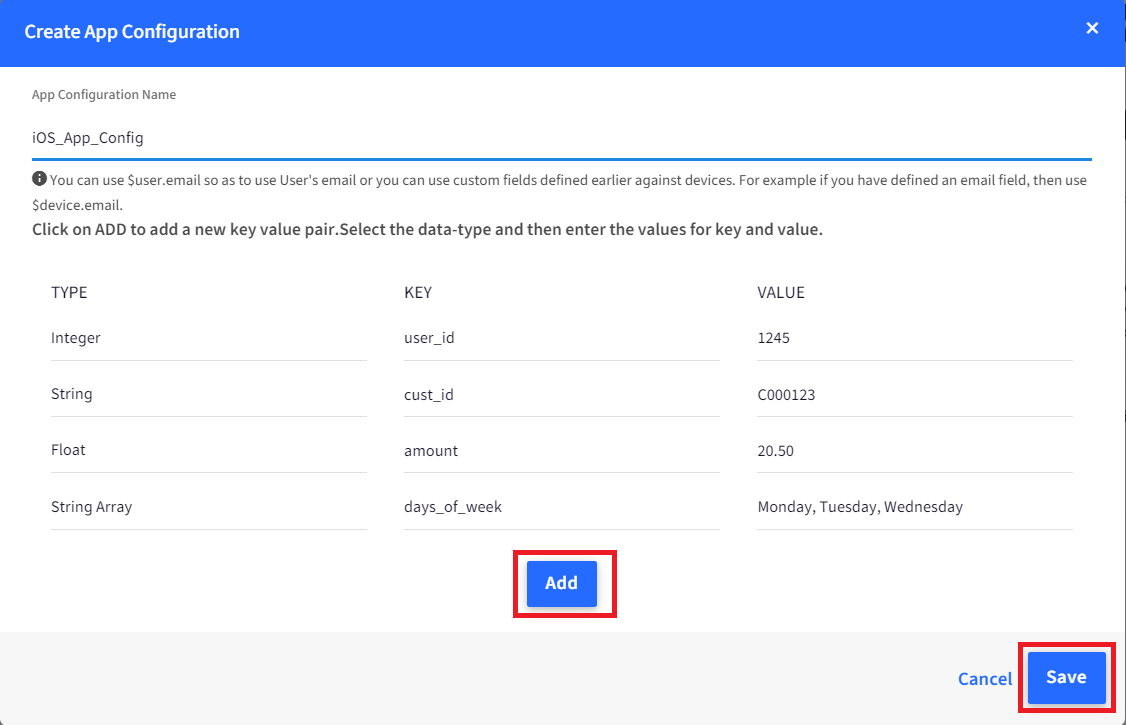
- Enter a name for this configuration.
- Click on the Add button to add a key-value pair. Each key-value pair has the following fields,
- Data Type: Choose a data type for your configuration from the dropdown under the Type field.
- Key field: Enter the name of the configuration under the Key field.
- Value field: Enter the value for the configuration under the Value field.
Data Type Description String Allows you to define a key as alphanumeric characters.
For example: email id, user_name.
String Array Allows you to define a key as an array of strings.
For example: Usernames and model names.
Boolean Allows you to define a key as a logical expression that has True and False as values. Integer Allows you to add a key as whole numbers.
For example: Store_id, user_id.
Integer Array Allows you to add an array of integers as a key value.
For example, model_ids customer_ids.
Float Allows you to add decimal numbers as the key value.
For example: amount, currency, and measurement.
Float Array Allows you to add an array of decimal numbers as the key value.
For example: floor dimensions.
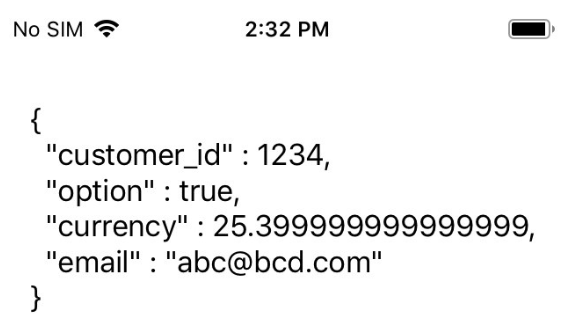
- Once you have added all the keys and values, Click on Save to save the configuration. The image below illustrates a sample configuration.
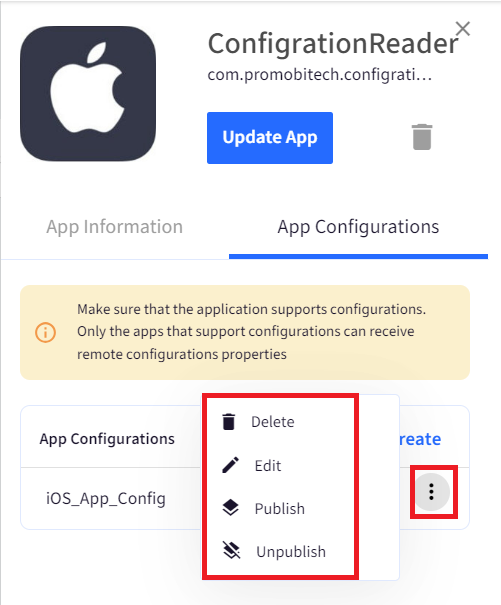
- All the saved configurations appear in the App Configurations list. Each configuration offers the following actions:
- Publish: Use this option to publish the configuration to the iOS Device Profiles.
- UnPublish: Use this option to unpublish the configuration to iOS Device Profiles
- Edit: Edit a configuration using this option. Any changes to the published configuration will automatically be pushed to the devices.
- Delete: Delete the configuration. This will remove the configuration from existing devices and stop publishing it for future devices.
Publishing an App Configuration
- From your dashboard, go to Application Management > Apple App Store Or Enterprise Store.
- Select an iOS application from the Apple App Store tab or Enterprise Store tab, where you have created a configuration as described in the earlier section.
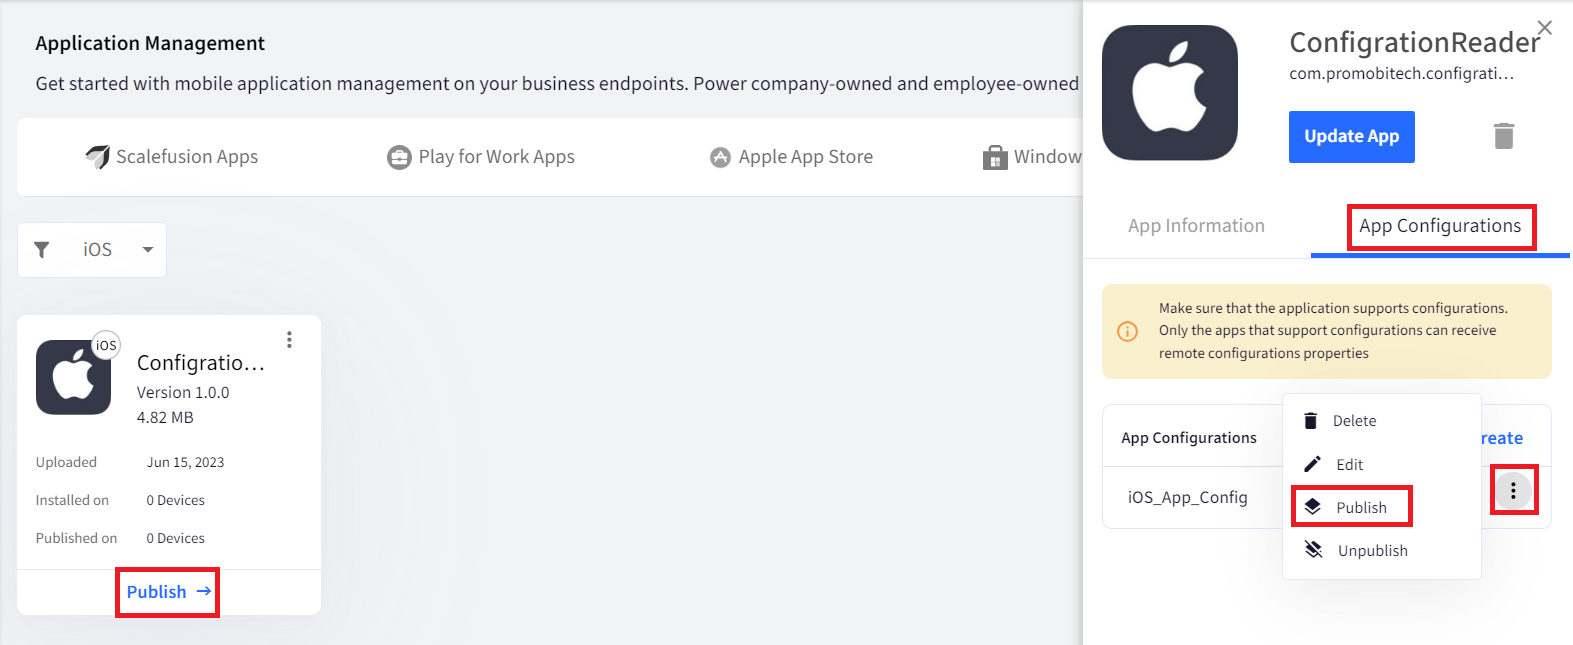
- Navigate to the App Configurations tab > click on 3-dots > click on Publish.
- Select the Device Profiles and click PUBLISH. The configuration will be published to the devices, and depending upon the application, it will use the configuration.

- In the illustration below, we have used our in-house app to print the values received via configuration.
Viewing App Config Status
You can view the current status of installation of app configuration across devices where it was applied.
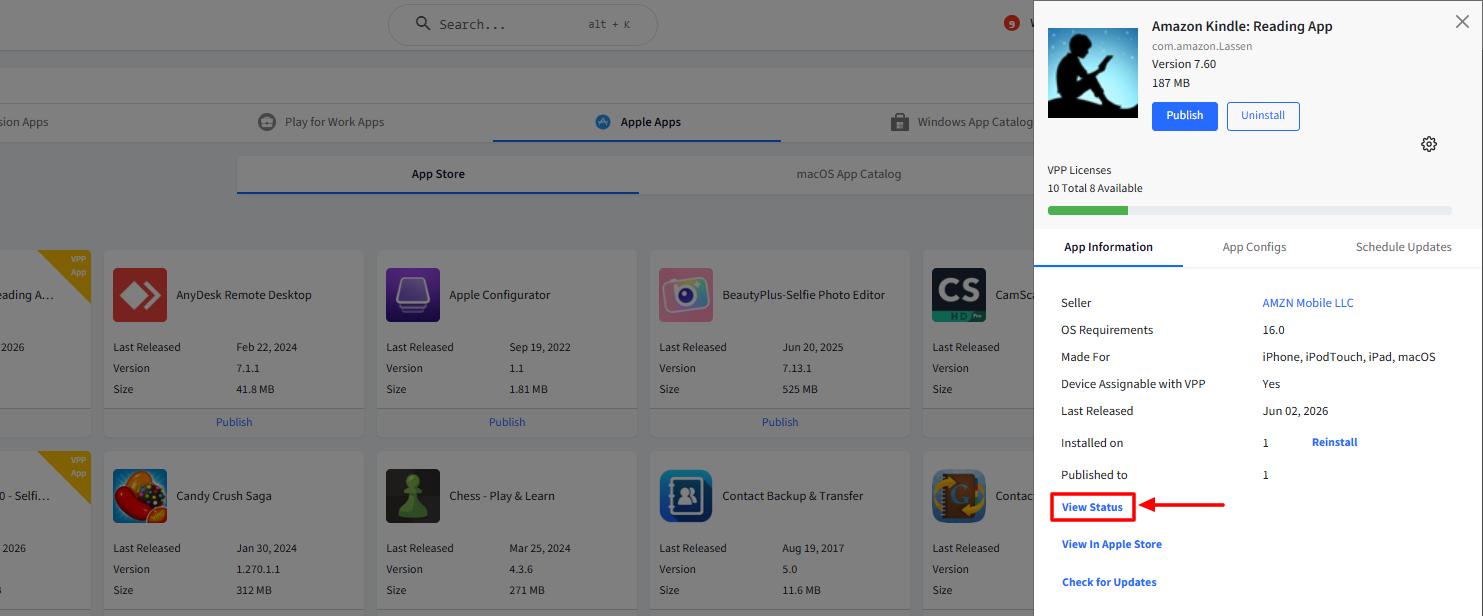
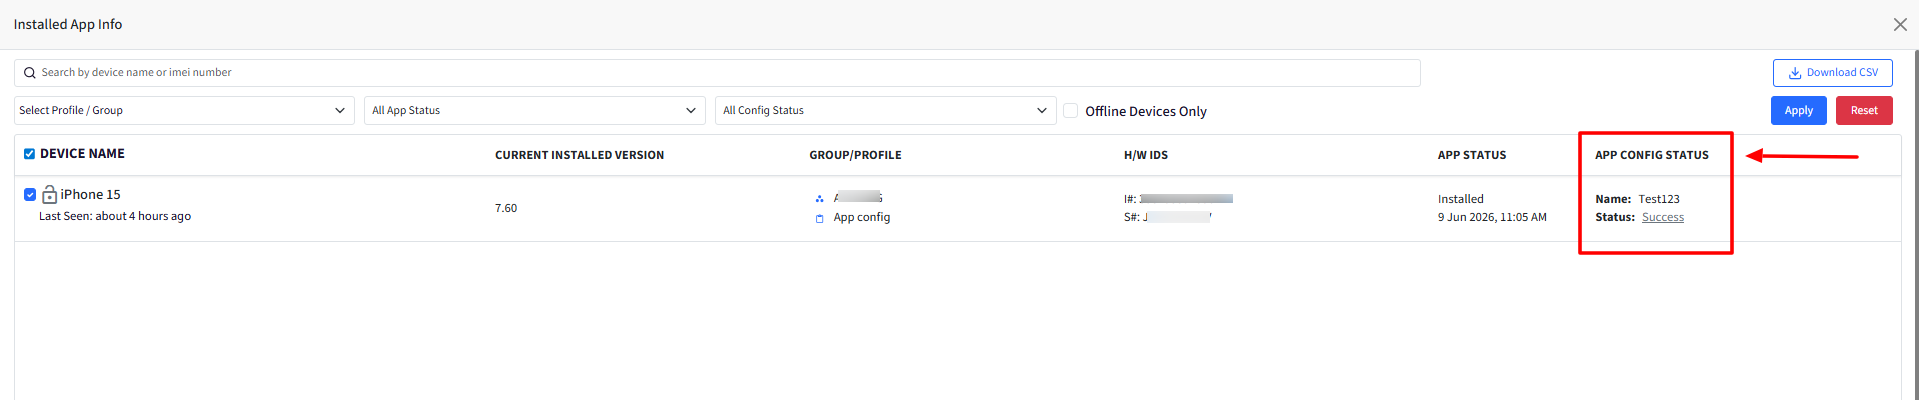
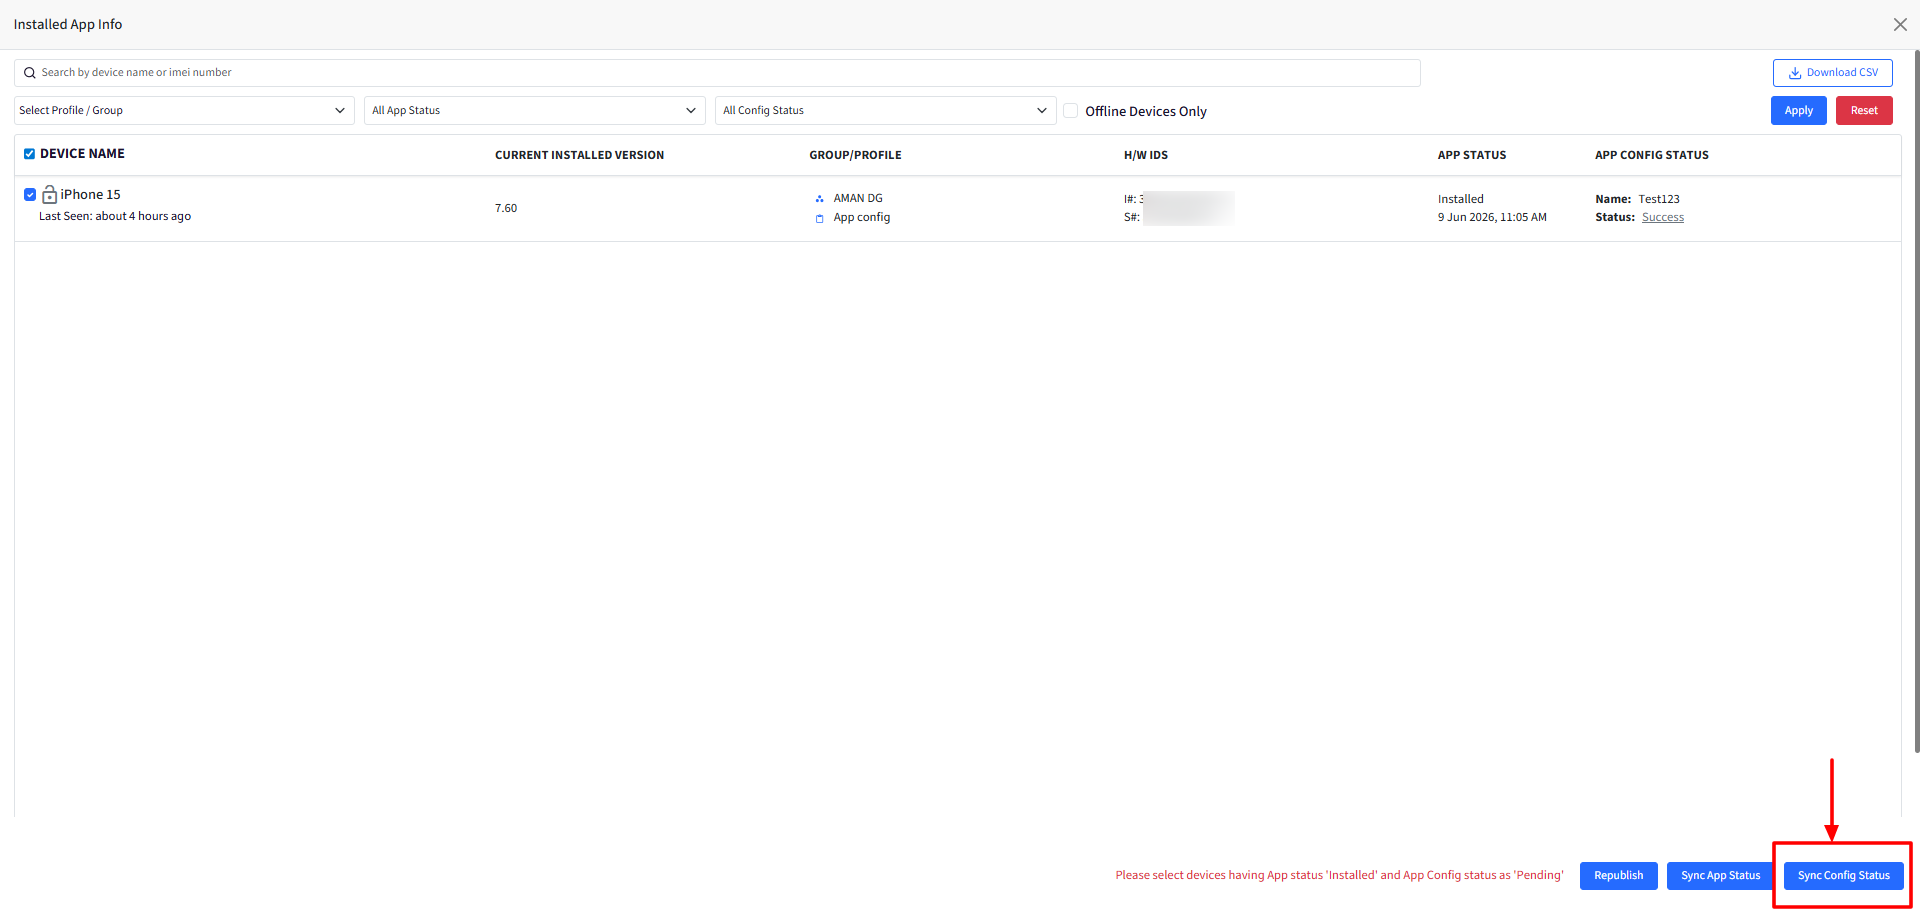
- Clicking on View Status opens the Installed App info box where you can check the status and other details.
- The status is displayed under App Config Status column. The status can be one of the following:
- Pending
- Delivered
- Failed
- Success
Sync Config Status: This is used to synchronize the configuration status for selected devices. You can perform this action on devices with:
- App Status: Installed
- App Config Status: Pending
If any selected device does not meet these requirements, the following message is displayed:
Please select devices with App Status 'Installed' and App Config Status 'Pending'.
Additional Features for App Config Status
- Filter: You can also filter the devices on the basis of app config status
- App Config Status in CSV: When you download the csv using Download CSV, that also displays the App Config Status.

Chrome Browser Cloud Management
Google's Chrome Browser Cloud Management (CBCM) is a service that allows centralized control over Chrome browser settings and policies on enterprise devices.
You can use Chrome application configuration to push browser settings to your iOS devices with the help of Chrome Browser Cloud Management (CBCM).
- Navigate to Application Management > Apple App Store.
- Add the Chrome app to the App Store by clicking on the Add from App Store button.
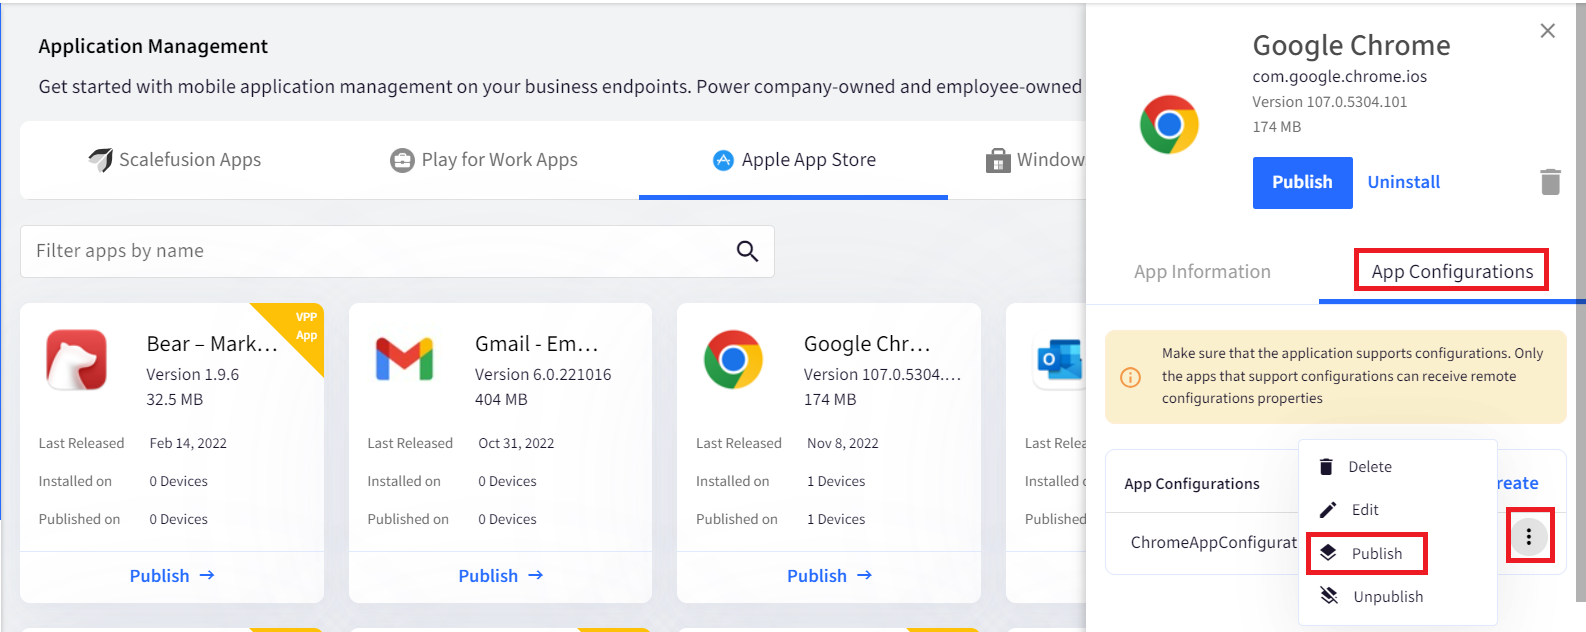
- Once the Chrome app is added, click on Publish to go to the App Configurations tab and click on Create.
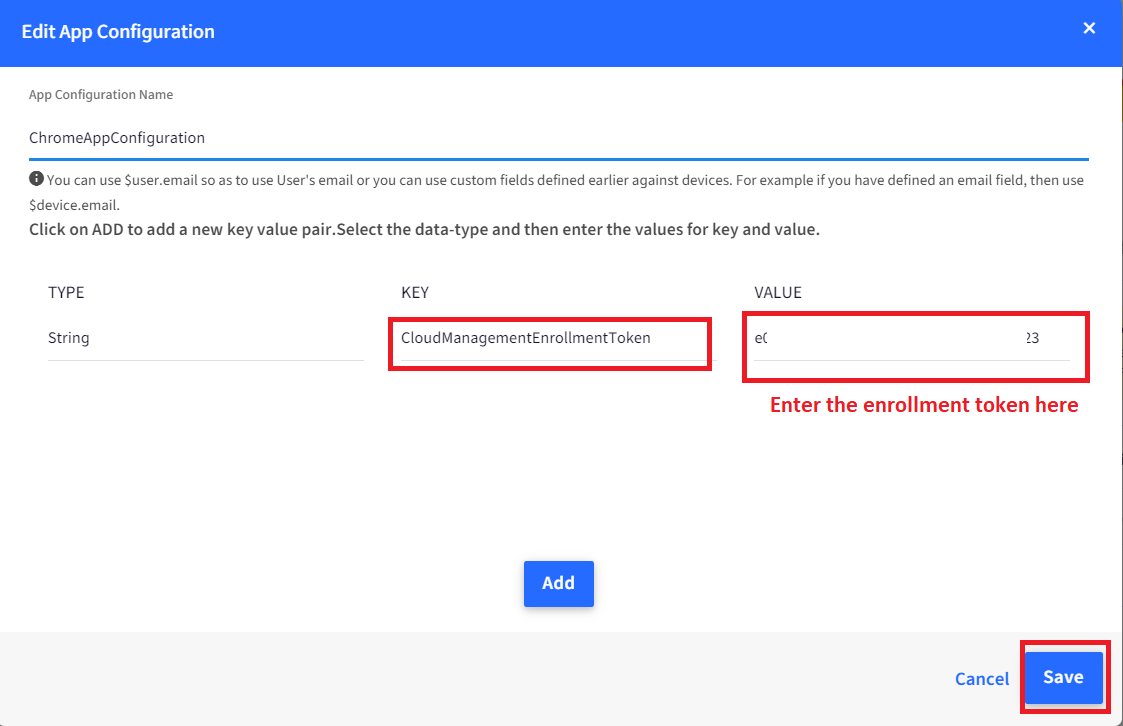
- In the new window, give the configuration a name, click on the Add button and add the Key-Value pair data in the configuration.
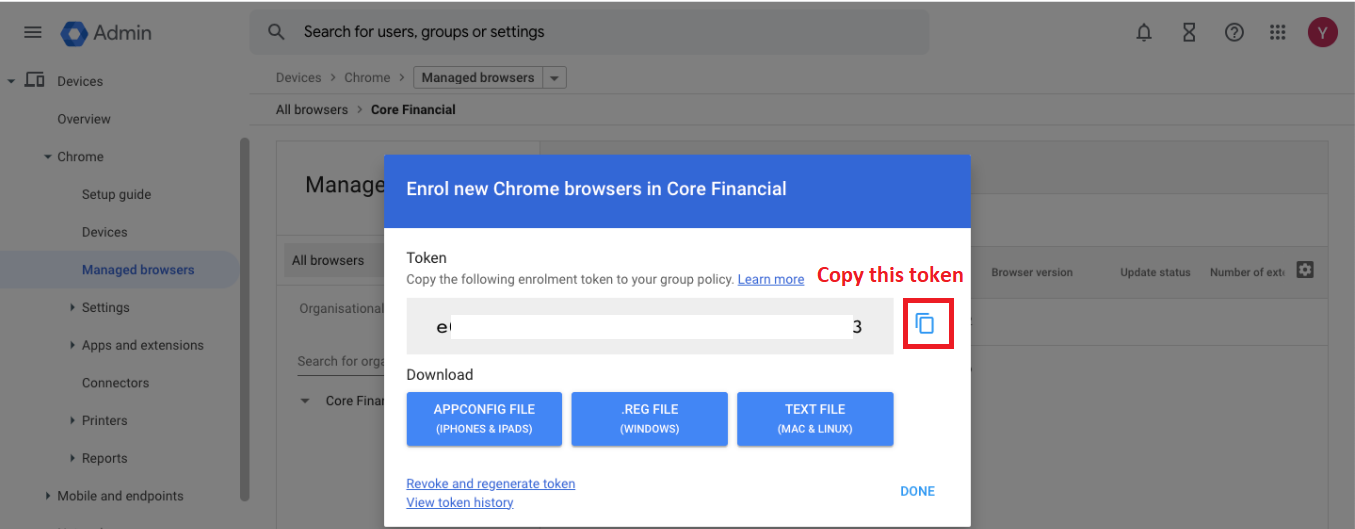
- In the KEY tab, enter CloudManagementEnrollmentToken
- In the VALUE tab, enter the enrollment token that you will get from your Google Workspace Admin Console.
- In your Google Workspace Admin Console, navigate to Devices > Chrome > Managed Browsers > click on Enroll.
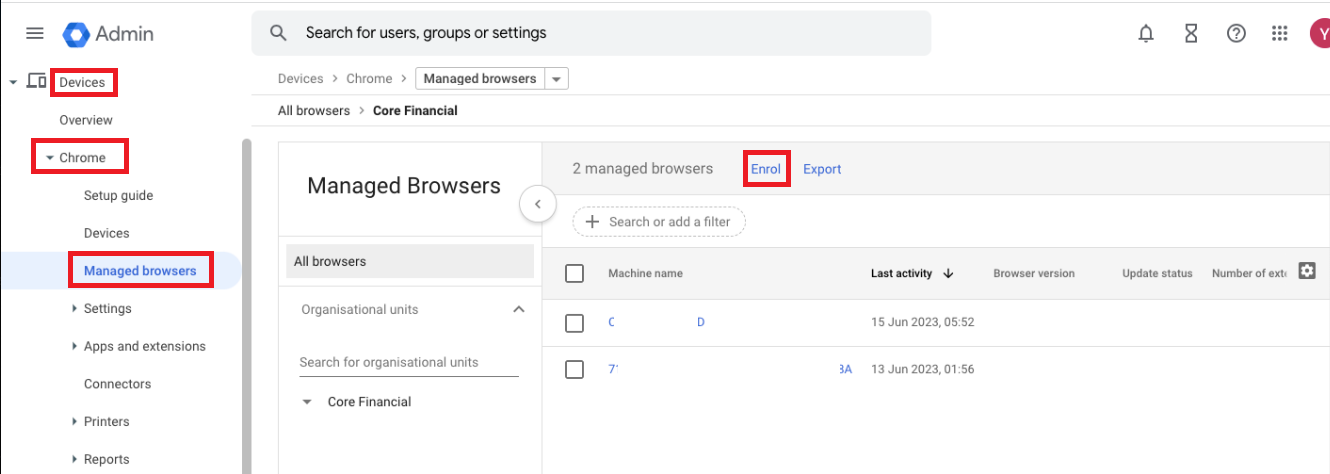
- This will show the Token that you will need to enter in the Chrome app configuration on the Scalefusion dashboard.
- In your Google Workspace Admin Console, navigate to Devices > Chrome > Managed Browsers > click on Enroll.
- Click on Save to save the configuration.
- Click on 3-dots > click on Publish to publish the app configuration on the Device Profile.
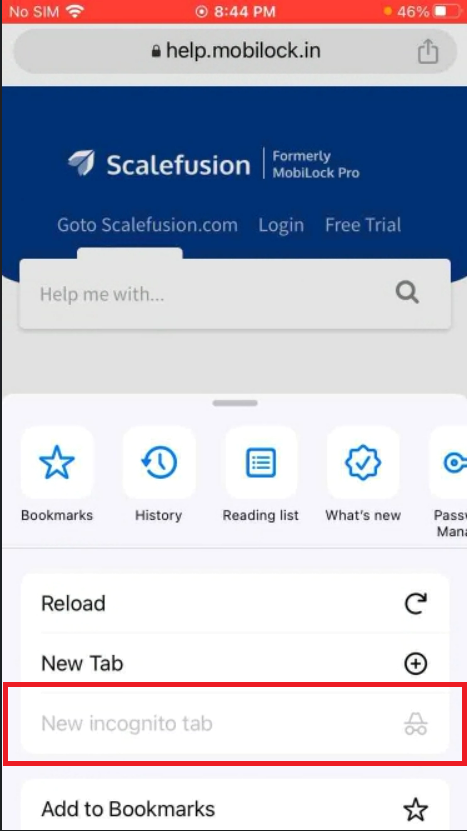
- Once the app configuration is successfully applied, the Chrome browser will show the browser settings as set by you in your Google Workspace Admin Console. For example, if you have selected the "Disallow Incognito mode" option in the User and browser settings, then the users will not be able to open an Incognito Windows in Chrome browser.