Windows Autopilot streamlines the way Windows devices get deployed, reset and repurposed with an experience that is zero-touch for IT. Once you have setup Windows Autopilot, the new Windows 10 and above devices that you procure can be directly shipped to users with an assurance that they will be enrolled to Scalefusion on first boot.
Windows Autopilot enables you to:
- Automatically join devices to Microsoft Entra ID (Azure AD previously).
- Auto-enroll devices into Scalefusion.
- Restrict the Administrator account creation.
- Create and auto-assign devices to configuration groups based on a device's profile.
- Customize OOBE content specific to the organization.
Prerequisites
Microsoft Entra ID portal with Intune License.
- Microsoft 365 E5
- Microsoft 365 E3
- Enterprise Mobility + Security E5
- Enterprise Mobility + Security E3
- Microsoft 365 Business Premium
- Microsoft 365 F1
- Microsoft 365 F3
- Microsoft 365 Government G5
- Microsoft 365 Government G3
- Microsoft Intune for Education
Overview
Setting up Windows Autopilot requires the following steps to be done before the devices can be enrolled:
- Setup Microsoft Entra ID Join in Scalefusion.
- Create a Deployment Profile in Microsoft Entra portal.
- Generate the Hardware IDs of the Windows devices.
- Upload the Hardware IDs of the Windows devices in Microsoft Entra portal.
- Assign Users to these Hardware IDs
This document guides you on how to setup Microsoft Entra ID to enable Windows Autopilot.
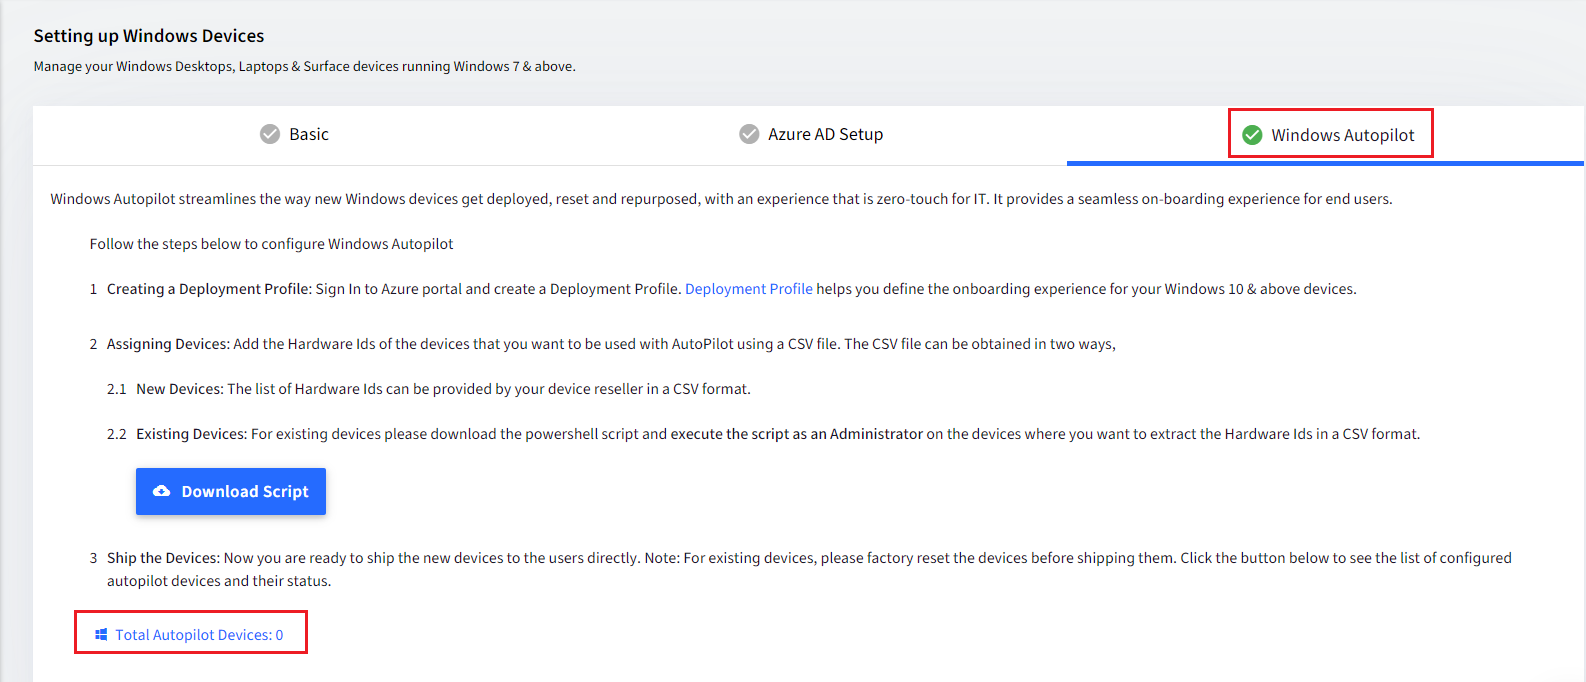
Step 1: Setup Azure AD an Autopilot in Scalefusion
- Please refer to our Microsoft Entra ID setup to enable Azure AD based enrollment.
- Once the above setup is done the Windows Autopilot section gets enabled. This section helps you in the following:
- Download Script: You can download a script that can be used to extract hardware ids from your existing devices.
- Windows Autopilot Devices: This section displays the autopilot devices that Scalefusion retrieves from Windows Autopilot service.

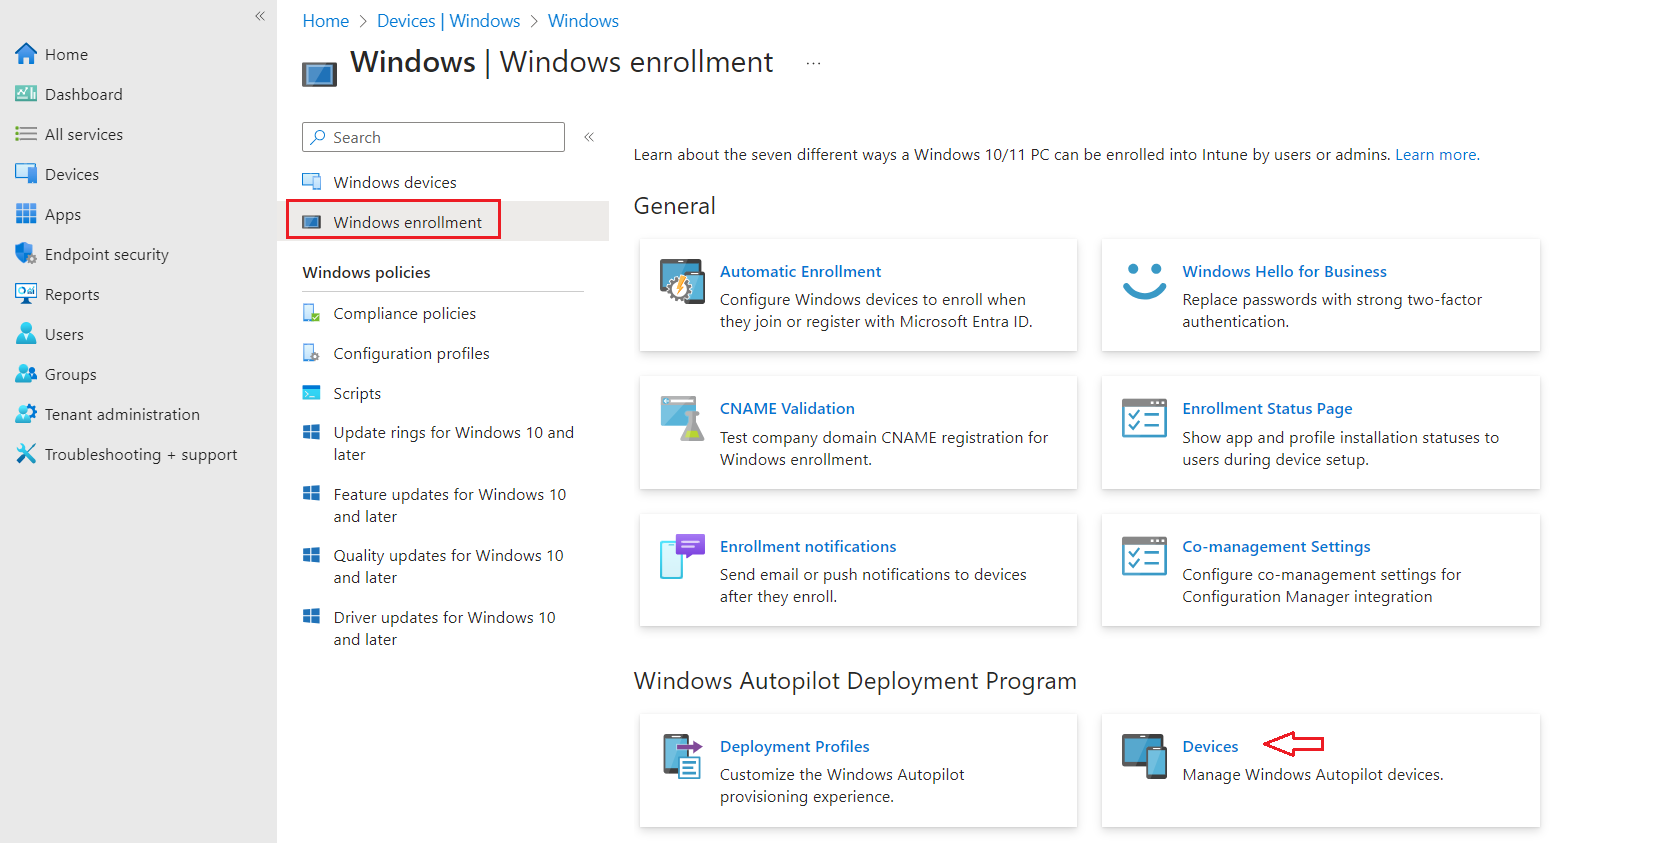
Step 2: Creating a Deployment Profile in Microsoft Entra ID portal
The Deployment Profile controls the OOBE experience for your end users. You can select the defaults for every device and make sure that the on-boarding experience is same across users.
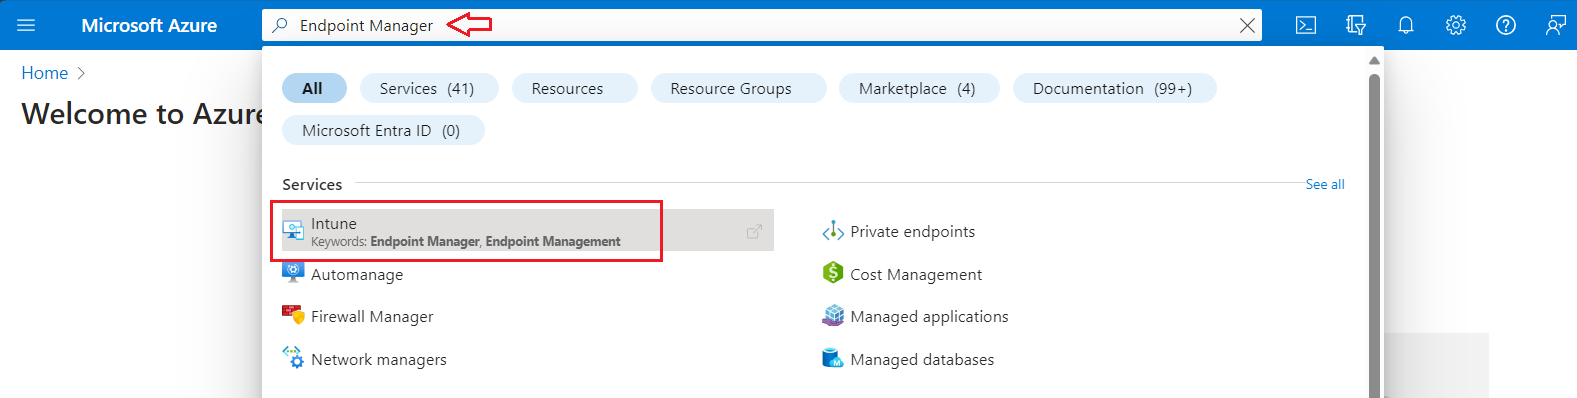
- Sign into Azure portal
- Search for Endpoint Manager and click on Intune. This will open the Microsoft Intune admin center.
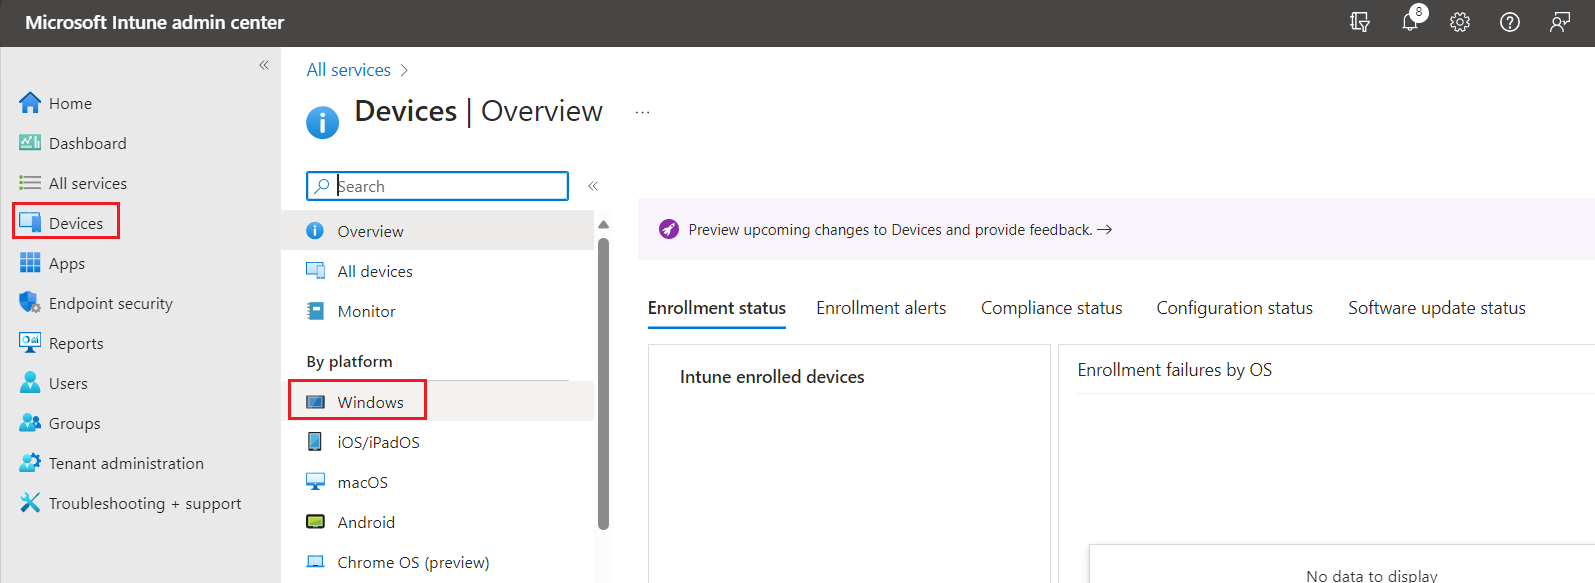
- Navigate to Devices > Windows.
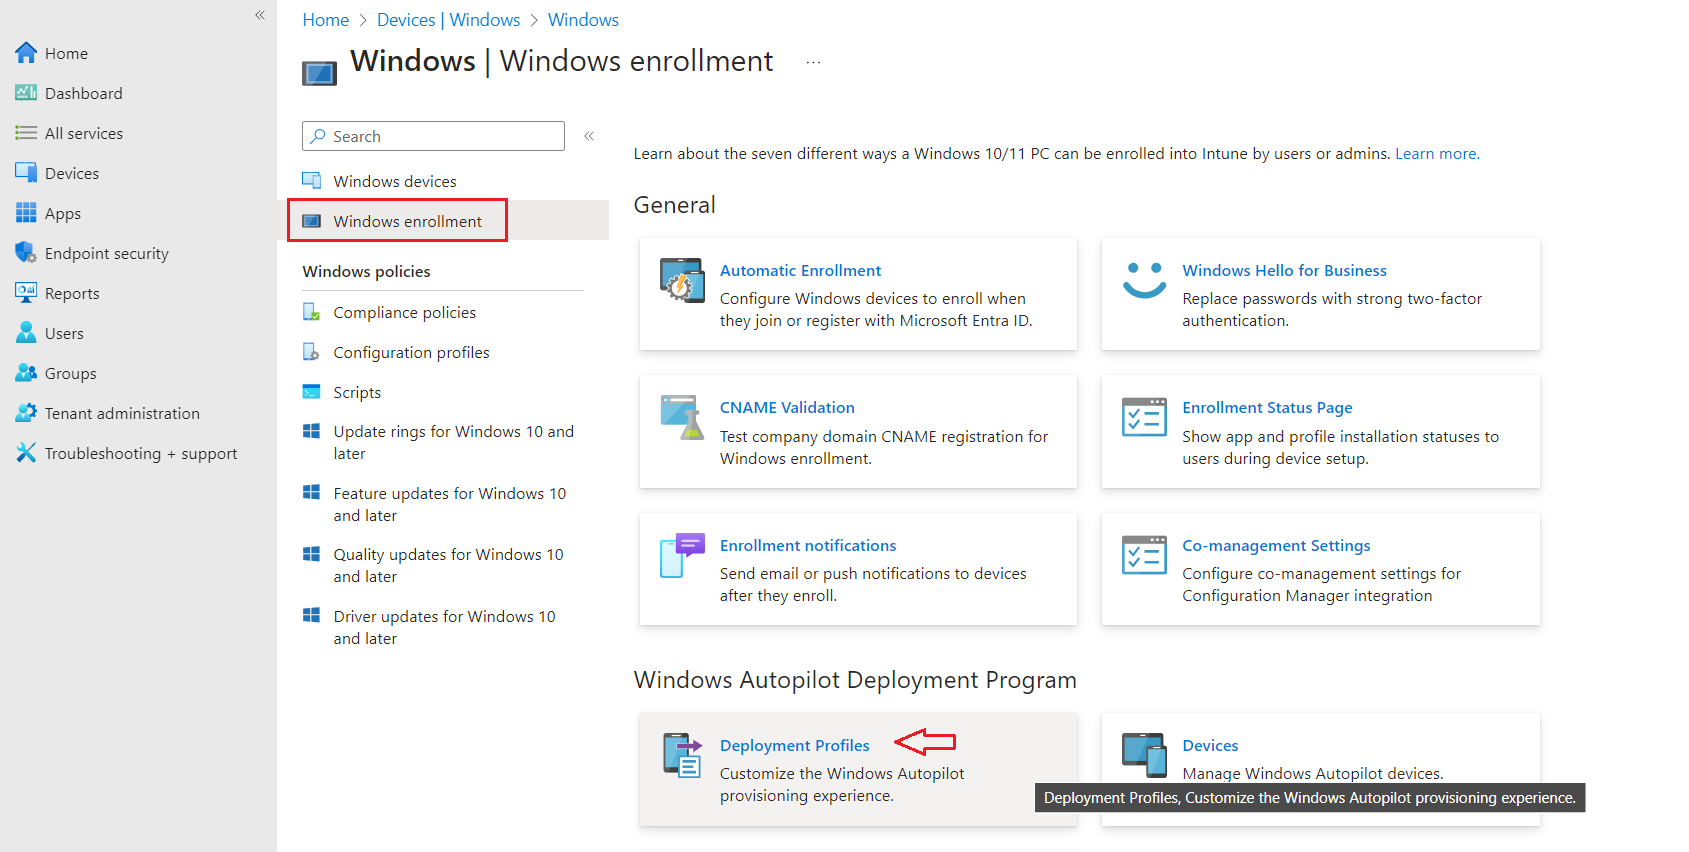
- Next click on Windows Enrollment.
- From the options, click on Deployment Profiles to create a default deployment profile.
- Click on Create Profile to create a new profile.

- In the Basics section enter the following details and click Next
- Name: A name for the profile
- Convert all targeted devices to Autopilot:Enable this If you want all devices in the assigned groups to automatically convert to Autopilot. Allow 48 hours for the registration to be processed. When the device is unenrolled and reset, Autopilot will enroll it.

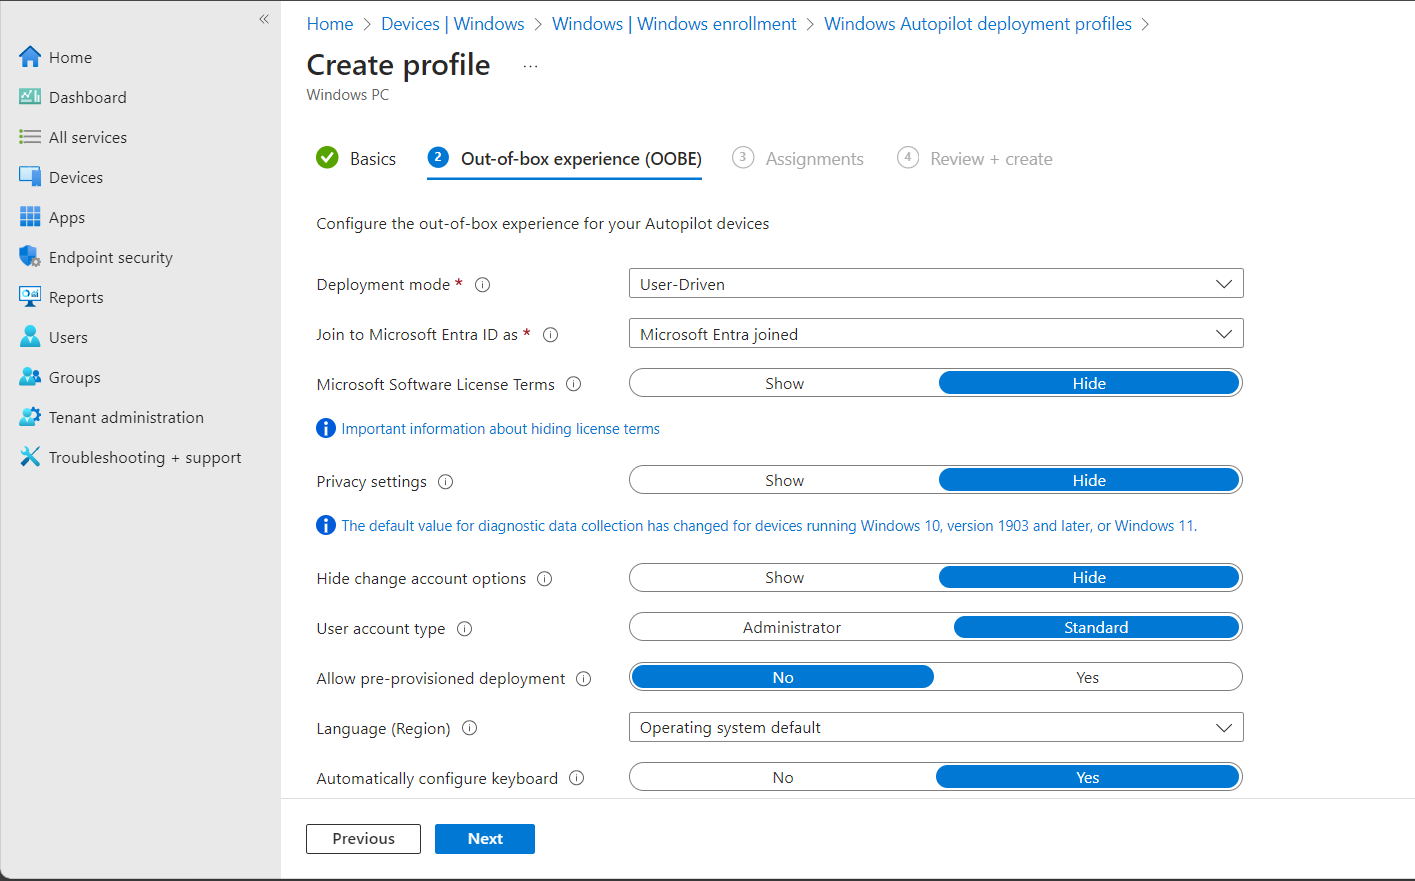
- Configure Out of the box experience (OOBE) as per your requirements and click Next,
- Deployment Mode: To enforce user credentials to enroll the device select User Driven.
- Join to Azure AD as: Select Azure AD joined
- Microsoft Software License Terms: (Windows 10, version 1709 or later) Choose if you want to show the EULA to users.
- Privacy settings: Choose if you want to show privacy settings to users.
- Hide change account options (requires Windows 10, version 1809 or later): Choose Hide to prevent change account options from displaying on the company sign-in and domain error pages.
- User account type: Choose the user's account type Administrator or Standard user.
- Allow White Glove OOBE (requires Windows 10, version 1903 or later): Choose Yes to allow white glove support.
- Apply device name template: Choose Yes to create a template to use when naming a device during enrollment. Names must be 15 characters or less, and can have letters, numbers, and hyphens. Names can't be all numbers. Use the %SERIAL% macro to add a hardware-specific serial number. Or, use the %RAND:x% macro to add a random string of numbers, where x equals the number of digits to add.
- Language (Region)*: Choose the language to use for the device. This option is only available if you chose Self-deploying for Deployment mode.
- Automatically configure keyboard*: If a Language (Region) is selected, choose Yes to skip the keyboard selection page. This option is only available if you chose Self-deploying for Deployment mode.
- In the Assignments tab you can choose to associate this profile with all devices or selected groups. Click Next.

- In the last section review the settings and click Create to save the profile.
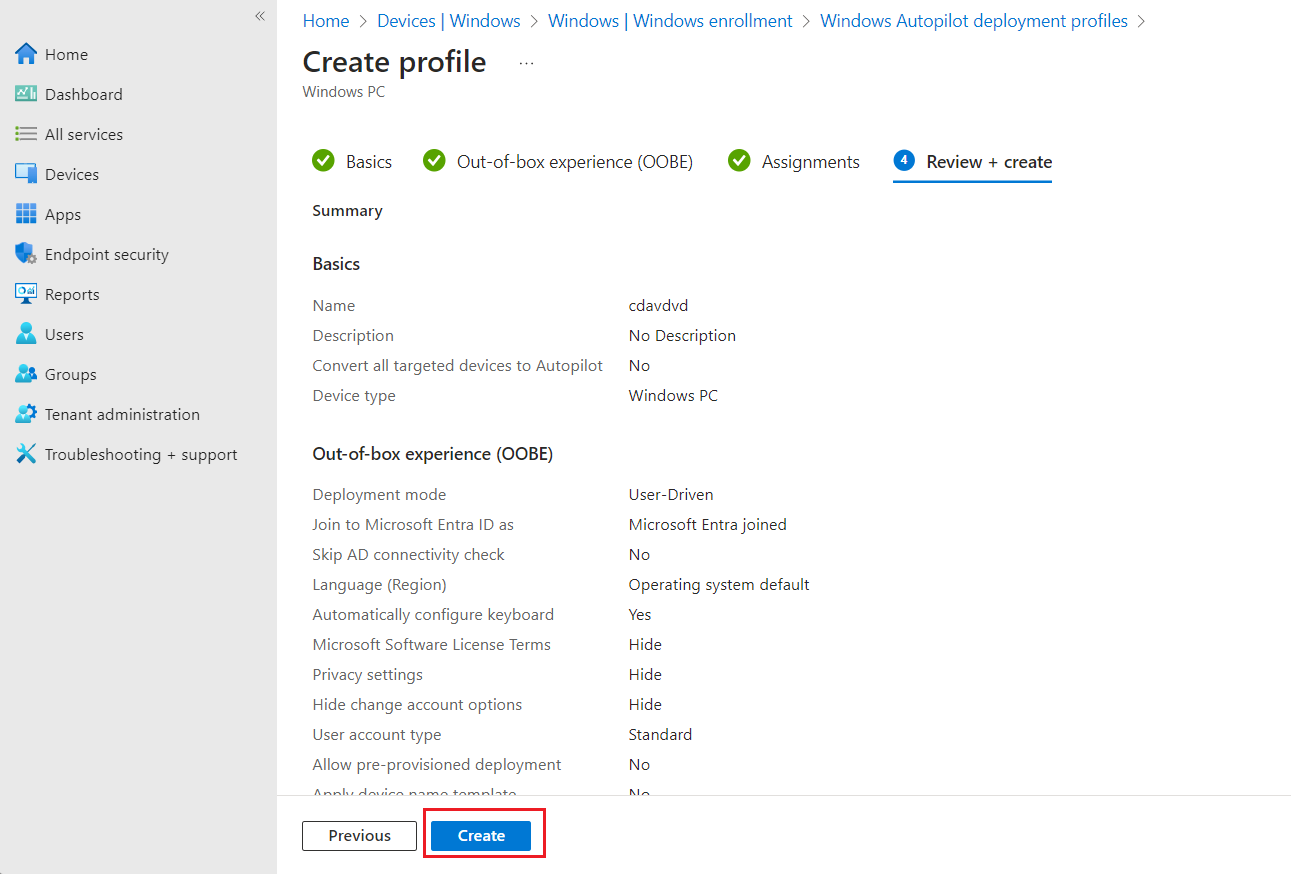
- Once the Deployment Profile is saved it will get displayed in the list of profiles.

Step 3: Generating the Hardware IDs of the Windows 10 devices
Now that you have created the Deployment Profile, the next step is to upload the Hardware IDs of the devices. You can obtain the Hardware IDs of the devices in the following two ways,
- From Vendor: The Hardware IDs can be obtained by the vendor or reseller from where you have procured the Windows 10 devices. Typically the vendor provides you a CSV file that can be uploaded to Azure AD portal.
- Extract Hardware ID using Script:If you want to enroll your existing devices to Autopilot then you can use the script provided by Scalefusion. Please follow the steps below to extract the HW-Id.
- Sign In to Scalefusion Dashboard. Navigate to Mission Control > Windows Setup > Windows Autopilot. Click on Download Scriptand download the script.
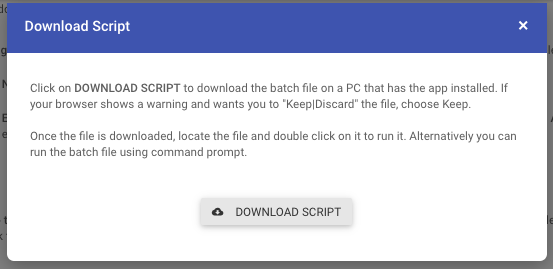
- Copy this Script file to the PC for which you want to extract the Hardware Id.
- Once copied, on the target machine open the command prompt with administrator privileges and execute the batch file.You can also right click on the batch file and run it as an administrator.
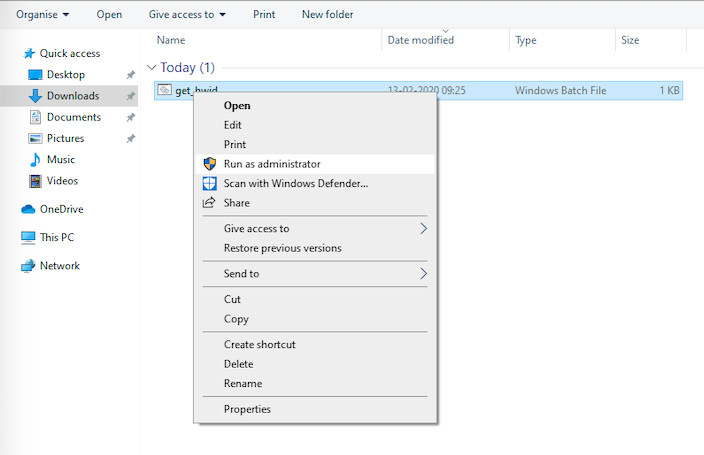 You will be shown a warning asking you to confirm if you want to execute this file. Choose Run Anyway
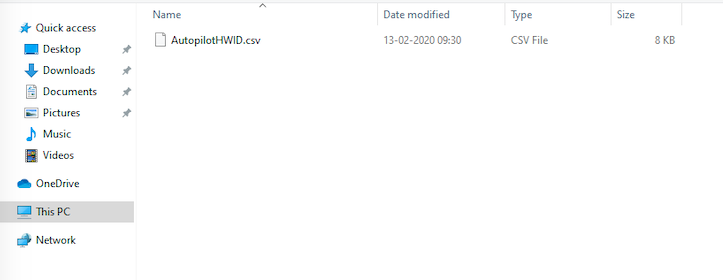
 - Once the batch file is executed, it generates a CSV file with name AutopilotHWID.csv,that is copied to the current directory where the batch file was executed.

- Sign In to Scalefusion Dashboard. Navigate to Mission Control > Windows Setup > Windows Autopilot. Click on Download Scriptand download the script.
Irrespective of how you obtained the CSV file, it typically has 3 columns:
- Device Serial Number
- Windows Product ID
- Hardware Hash

Step 4: Uploading the Hardware IDs to Azure AD Portal
Once you have the CSV file, the next step is to update it to Azure AD portal. Follow the steps below,
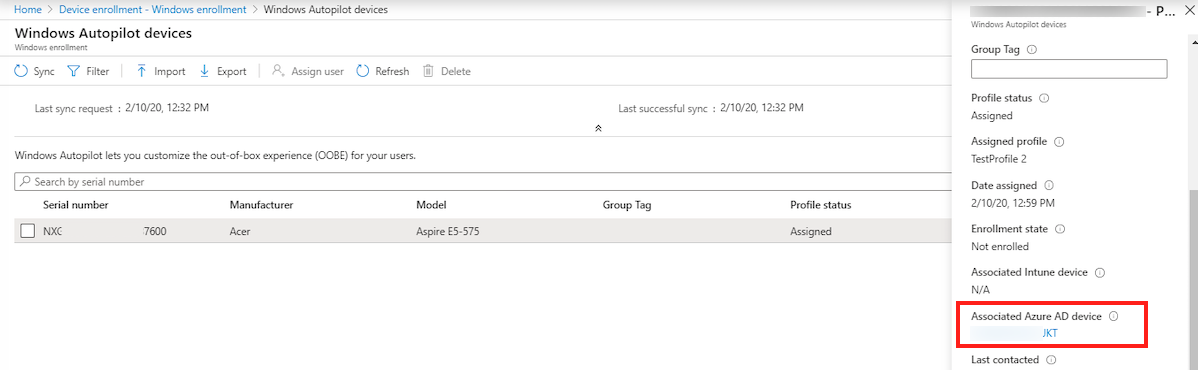
- Navigate to Devices > Windows > Windows Enrollment. Click on Devices under Windows Autopilot Deployment Program.
- Click on Import

- Upload the CSV file that you obtained in Step 3 and click Import.
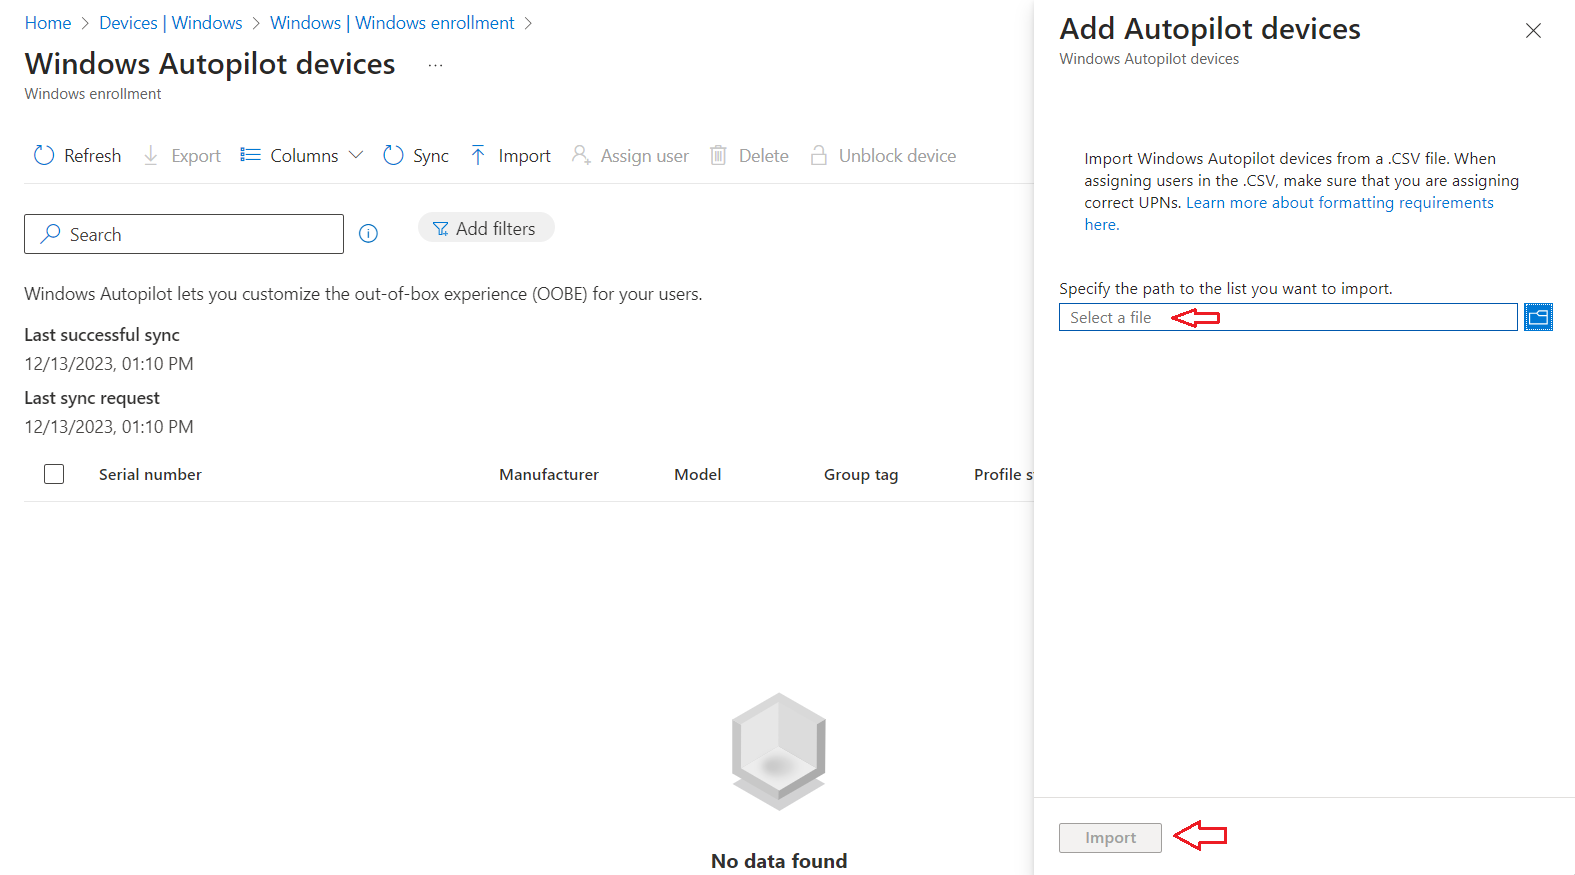
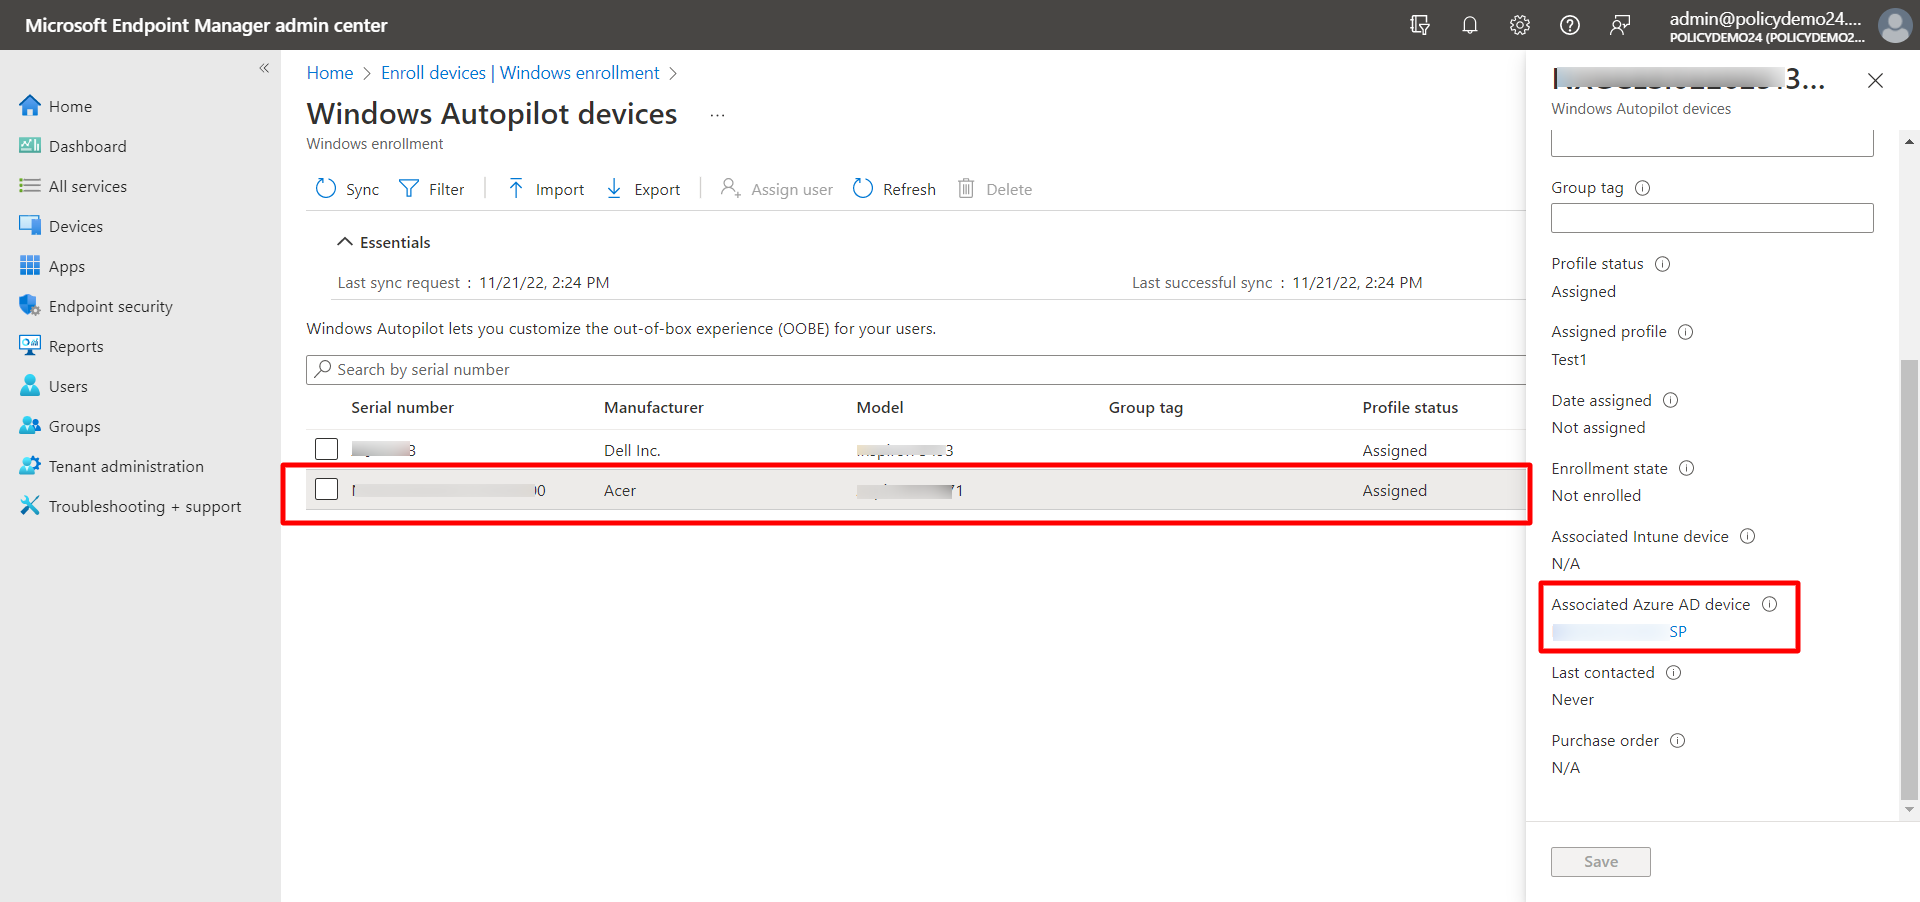
- Once the CSV is imported, the screen will be updated to show the devices that are imported from the CSV.
- Profile Status: Shows that a Profile has been assigned to the device.
- Associated Azure AD Device:This displays the serial number of device. Once the device is enrolled this will display the name of the device.
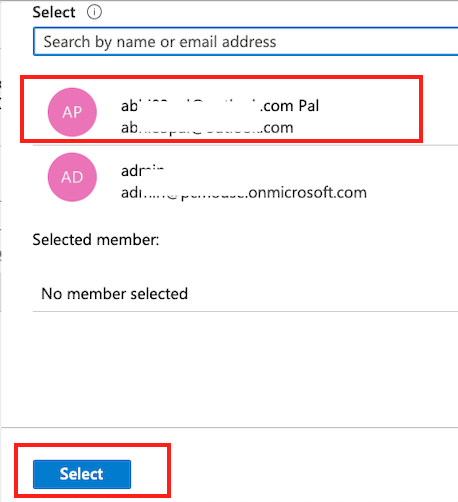
Step 5: Assign Users to Hardware IDs
Once you have uploaded the Hardware IDs, you can optional assign them to users. This will make sure that only the assigned user can complete the enrollment on the Windows 10 device using their credentials.
If you are not sure which user will receive this machine, you can choose to skip this step.However if you choose to assign the user, you need to make sure that the user is assigned a InTune license.
Follow the steps below to assign a user,
- Select the Device click Assign user

- From the list of Users select the user and click Select
Checking the Autopilot Devices in Scalefusion Dashboard
- Once the above steps are complete, you can navigate to Scalefusion Dashboard and navigate to Mission Control > Windows Setup > Windows Autopilot
- Once you click on the Total devices, you will be shown the details of the devices that have been synced with Scalefusion Dashboard.

Frequently Asked Questions
Questions: How do we confirm that the Windows device has enrolled?
Answer: The enrollment status can be checked at two places,
- Scalefusion Dashboard
- Microsoft Entra ID Portal: Navigating to Devices > All Devices. It will display all the enrolled devices.

- Intune portal: Navigate to Device Enrollment > Windows Enrollment > Devices, click on the device name to see the associated Microsoft Entra ID.
Questions: Would deleting an enrolled device from Scalefusion delete it from Autopilot service?
Answer: No. To remove a device from Autopilot, you would have to delete it from the Azure portal.