Digital Certificates simplify the IT team’s task to authenticate devices and check for security when operating in unknown networks.
Utilizing a Mobile Device Management (MDM) or Enterprise Mobility Management (EMM) platform can further enhance the deployment experience of Digital Certificates on devices, as well as provide enterprises with additional features and benefits of implementing security across devices.
Scalefusion, through Certificate Management, helps enterprises streamline the process of deploying Digital Certificates to end users' devices by automatically provisioning digital identities onto devices without end-user interaction. You can enable authentication on managed Windows 10 and iOS devices using Scalefusion.
The document describes certificate management and how Standalone certificates can be applied on managed devices.
Types of Certificates
- Identity Certificate: These are the certificates that apps/browsers can use to identify the user and use for CBA (Cert Based Authentication). These are of typical .p12, .pfx formats
- CA Certificate: These are the certificates that verify the Trust of the certificate being presented. Can be of .cer, .pem and .der formats.
- Chained Certificates: Both 1 & 2 can contain a chain of certificates leading to a Leaf Node. That is, the certificate payload/body can contain leaf certificates and the chain of issuing certificates.
Scalefusion Supported Certificates
The following types of certificates are supported under Scalefusion:
- PKCS12(.p12)
- PKCS1(cer, pem)
Supported Platforms
Configure Certificate Settings
Step 1: Upload a certificate to the Dashboard
To configure certificates that can be deployed to devices, follow these steps:
- On Scalefusion Dashboard, navigate to Device Profiles & Policies > Certificate Management and click on UPLOAD CERTIFICATE
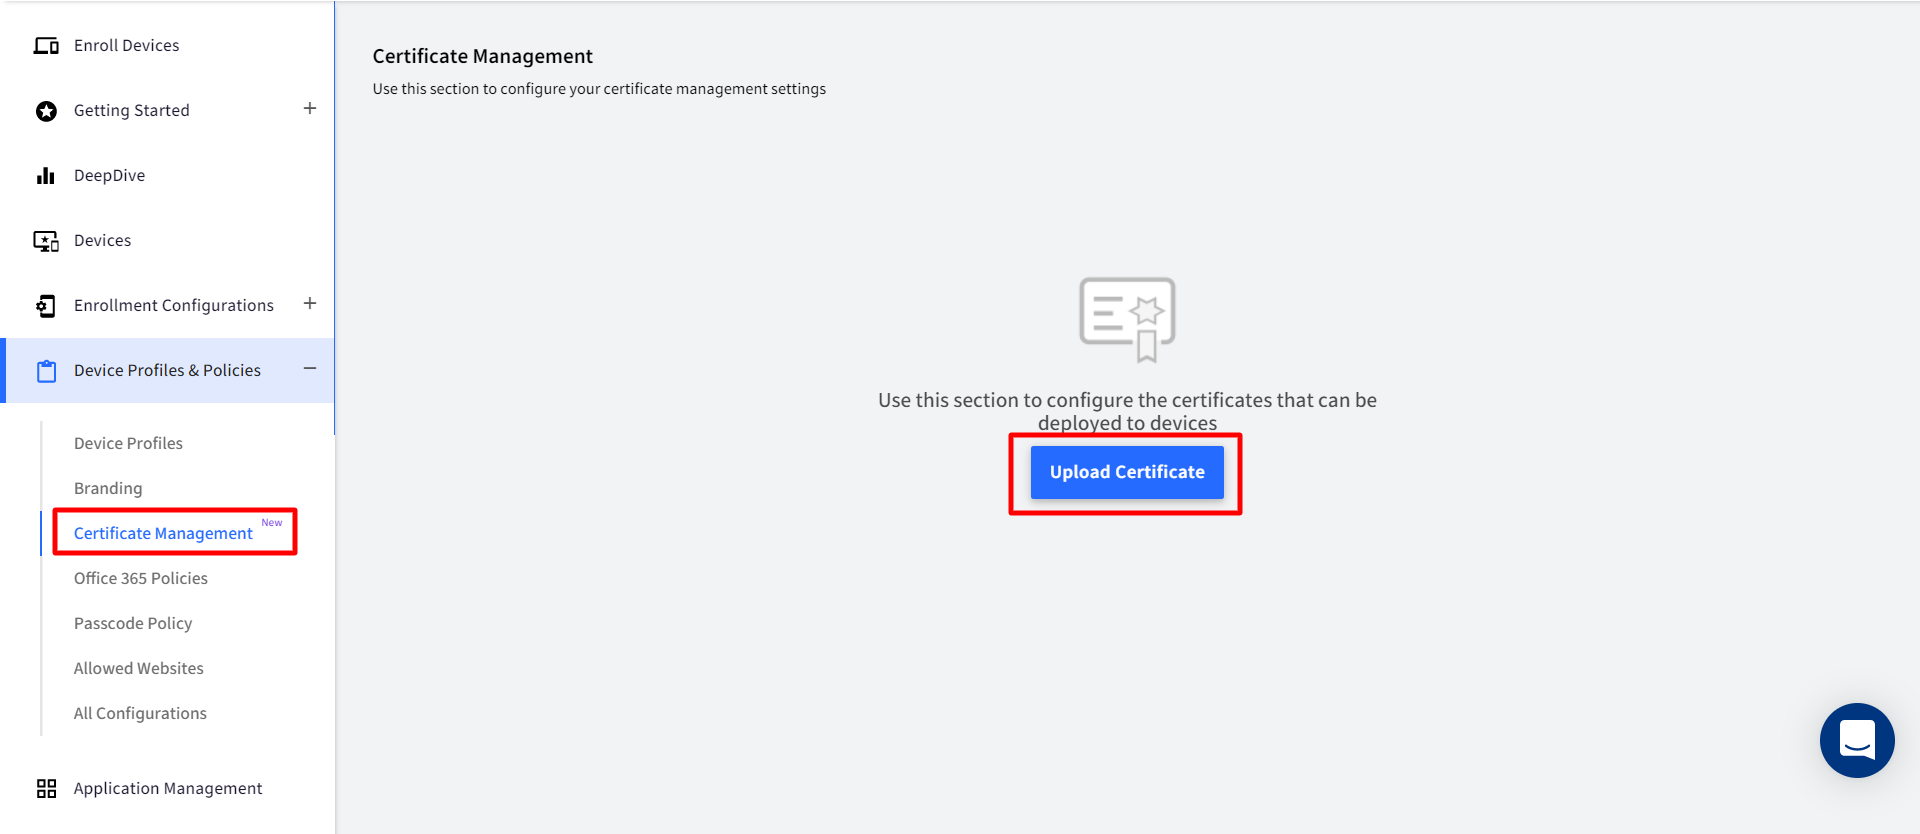
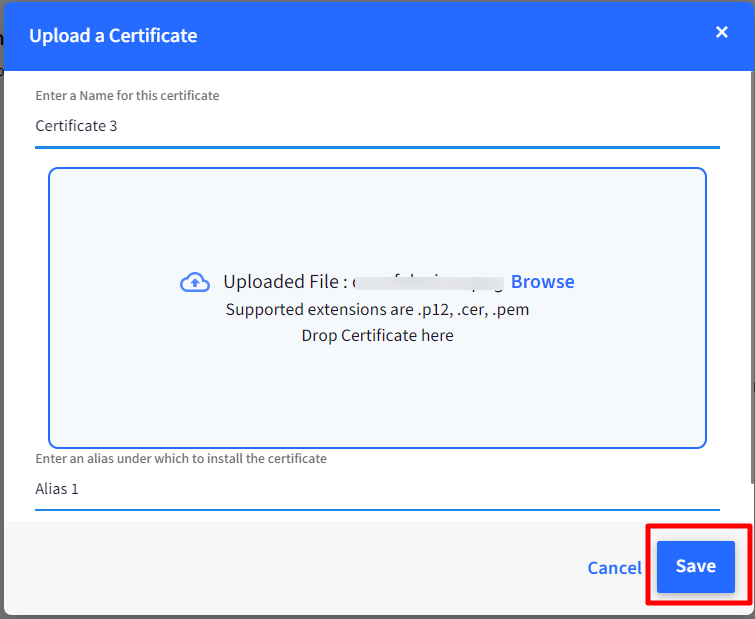
- This opens a new window Upload a Certificate
- Enter a name for the Certificate: Enter a display name for Identification purposes
- Upload Certificate file: Browse for the file and upload. Only .p12, .cer or .pem file formats are supported
If the uploaded certificate happens to be .p12 or pfx is an Identity certificate, the following additional details need to be entered:
Enter a Password for the file: A key that encrypts the certificate
- Click SAVE after entering all details.
The uploaded certificate with details will be displayed on the Certificate Management screen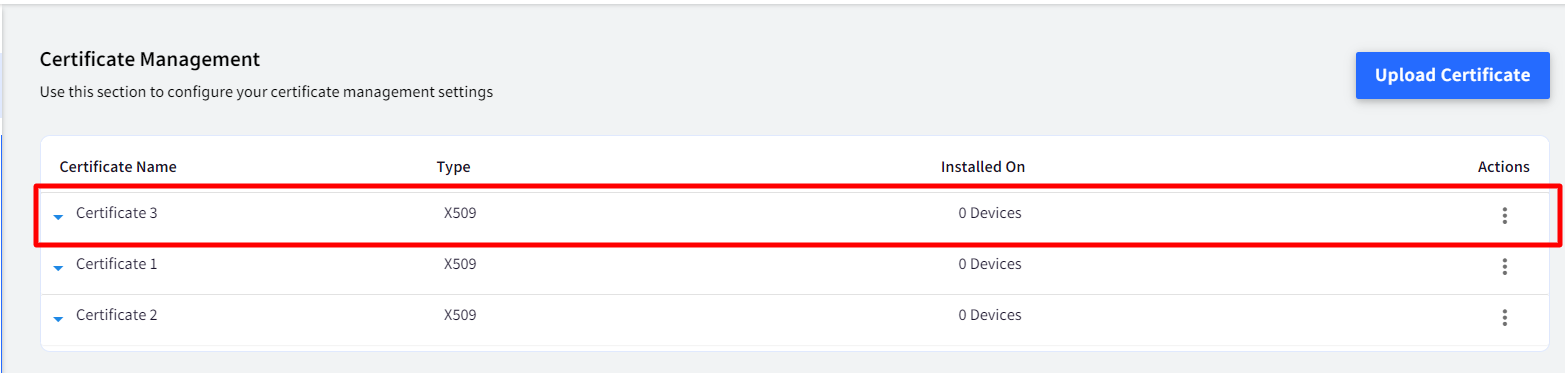
Step 2: Apply Certificates to Device profiles/devices
Once certificates are uploaded, they need to be pushed to device profiles/devices. This is done through Publish under Actions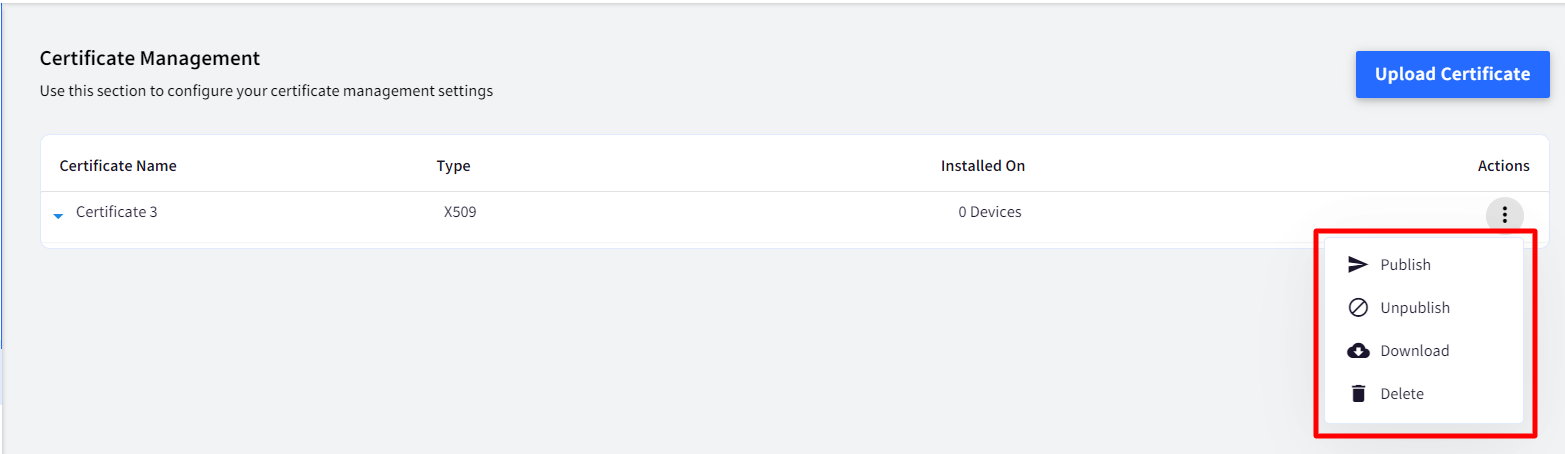
Publish Publishes certificate on selected device profile(s) / device(s). To publish,
- Click on Publish under Actions in front of the certificate that has to be published. This opens a new window containing a list of iOS and Windows device profiles and devices configured on the Dashboard.
- Select the device profiles/devices on which the certificate has to be published and click PUBLISH.
The certificate will be associated with the device profile/device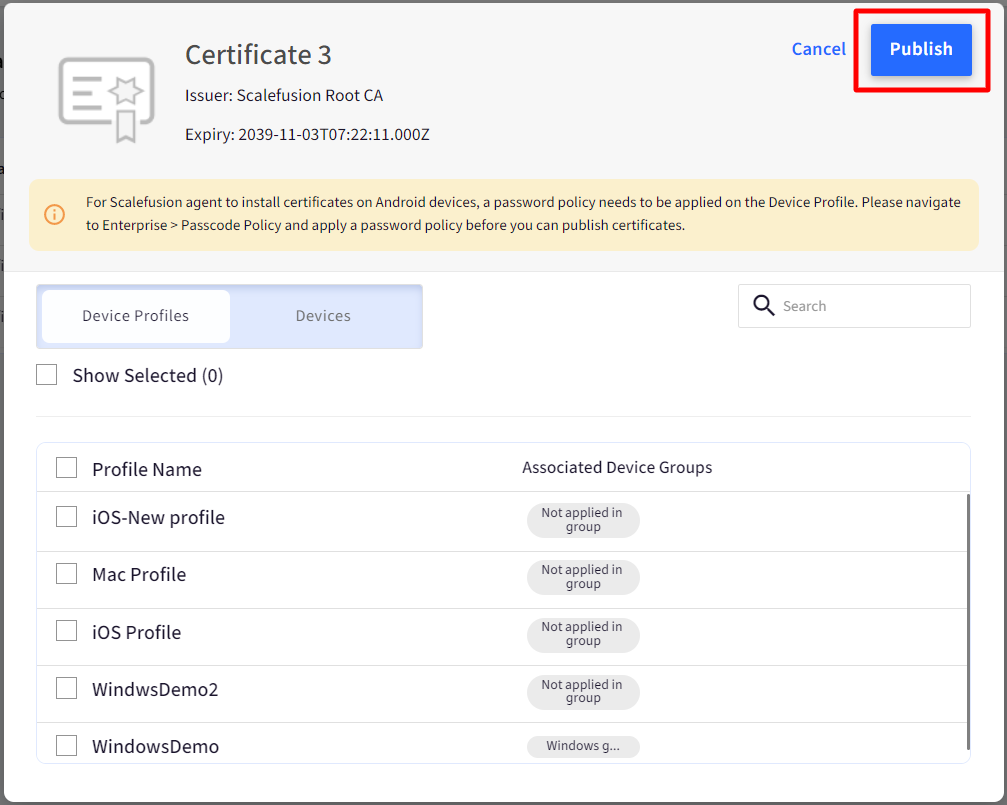
When a certificate is installed on the device, the count of devices (for the certificate that is published) reflects under the Installed Onheading on the Certificate Management screen
Other Actions on Uploaded Certificates
- Unpublish: Unpublishes certificate from the device profiles/devices. To Unpublish,
- Click on Unpublish under Actions in front of the certificate that has to be unpublished. This opens a window containing a list of all the device profiles and devices on which the certificate is already published.
- Unselect the profiles and devices and click the button UNPUBLISH. The certificate will get uninstalled from the device(s) / device profiles.If a certificate has been published to Device Profile and Device separately and if it is unpublished from the device profile, then the certificate is still retained on the device as it has been installed on Device also.
- Delete: Deleting a certificate will uninstall the certificate from all devices and delete the stored certificate. Clicking Delete will show a Dialog for Confirmation "This Certificate is currently installed on the XX Device Profiles and used in XX Wifi Configurations. Are you sure you want to delete?"
The confirmation dialog appears only if the certificate is pushed a simple confirm dialog box appears.
Additional Features
Expanded view of a Certificate
Clicking on the down arrow before the certificate name shows the expanded view of it. A certificate payload/file can be a single certificate or a chained certificate. Depending upon the same, the expanded view shows up:
- Single Certificate: Shows the Issued By, Expiry and Key Usage
.png)
- Chained Certificate: Expanded view displays a List view, and selecting each certificate displays its properties. A certificate in the chain can be,
- Root CA Certificate (is usually self-signed and hence no Issued By information is available)
- Intermediate CA Certificate (there can be n number of Intermediate CAs in a Certificate Hierarchy, usually, it’s just one. Displays Issued By, as the intermediate CA certificate can be issued by another intermediate CA in the chain above or Root CA)
- Leaf Node Certificate (Displays Issued By which can be an Intermediate CA and extremely rarely the Root CA)
.png)
Where are the Certificates stored after installation
On iOS devices, Certificates are stored in Settings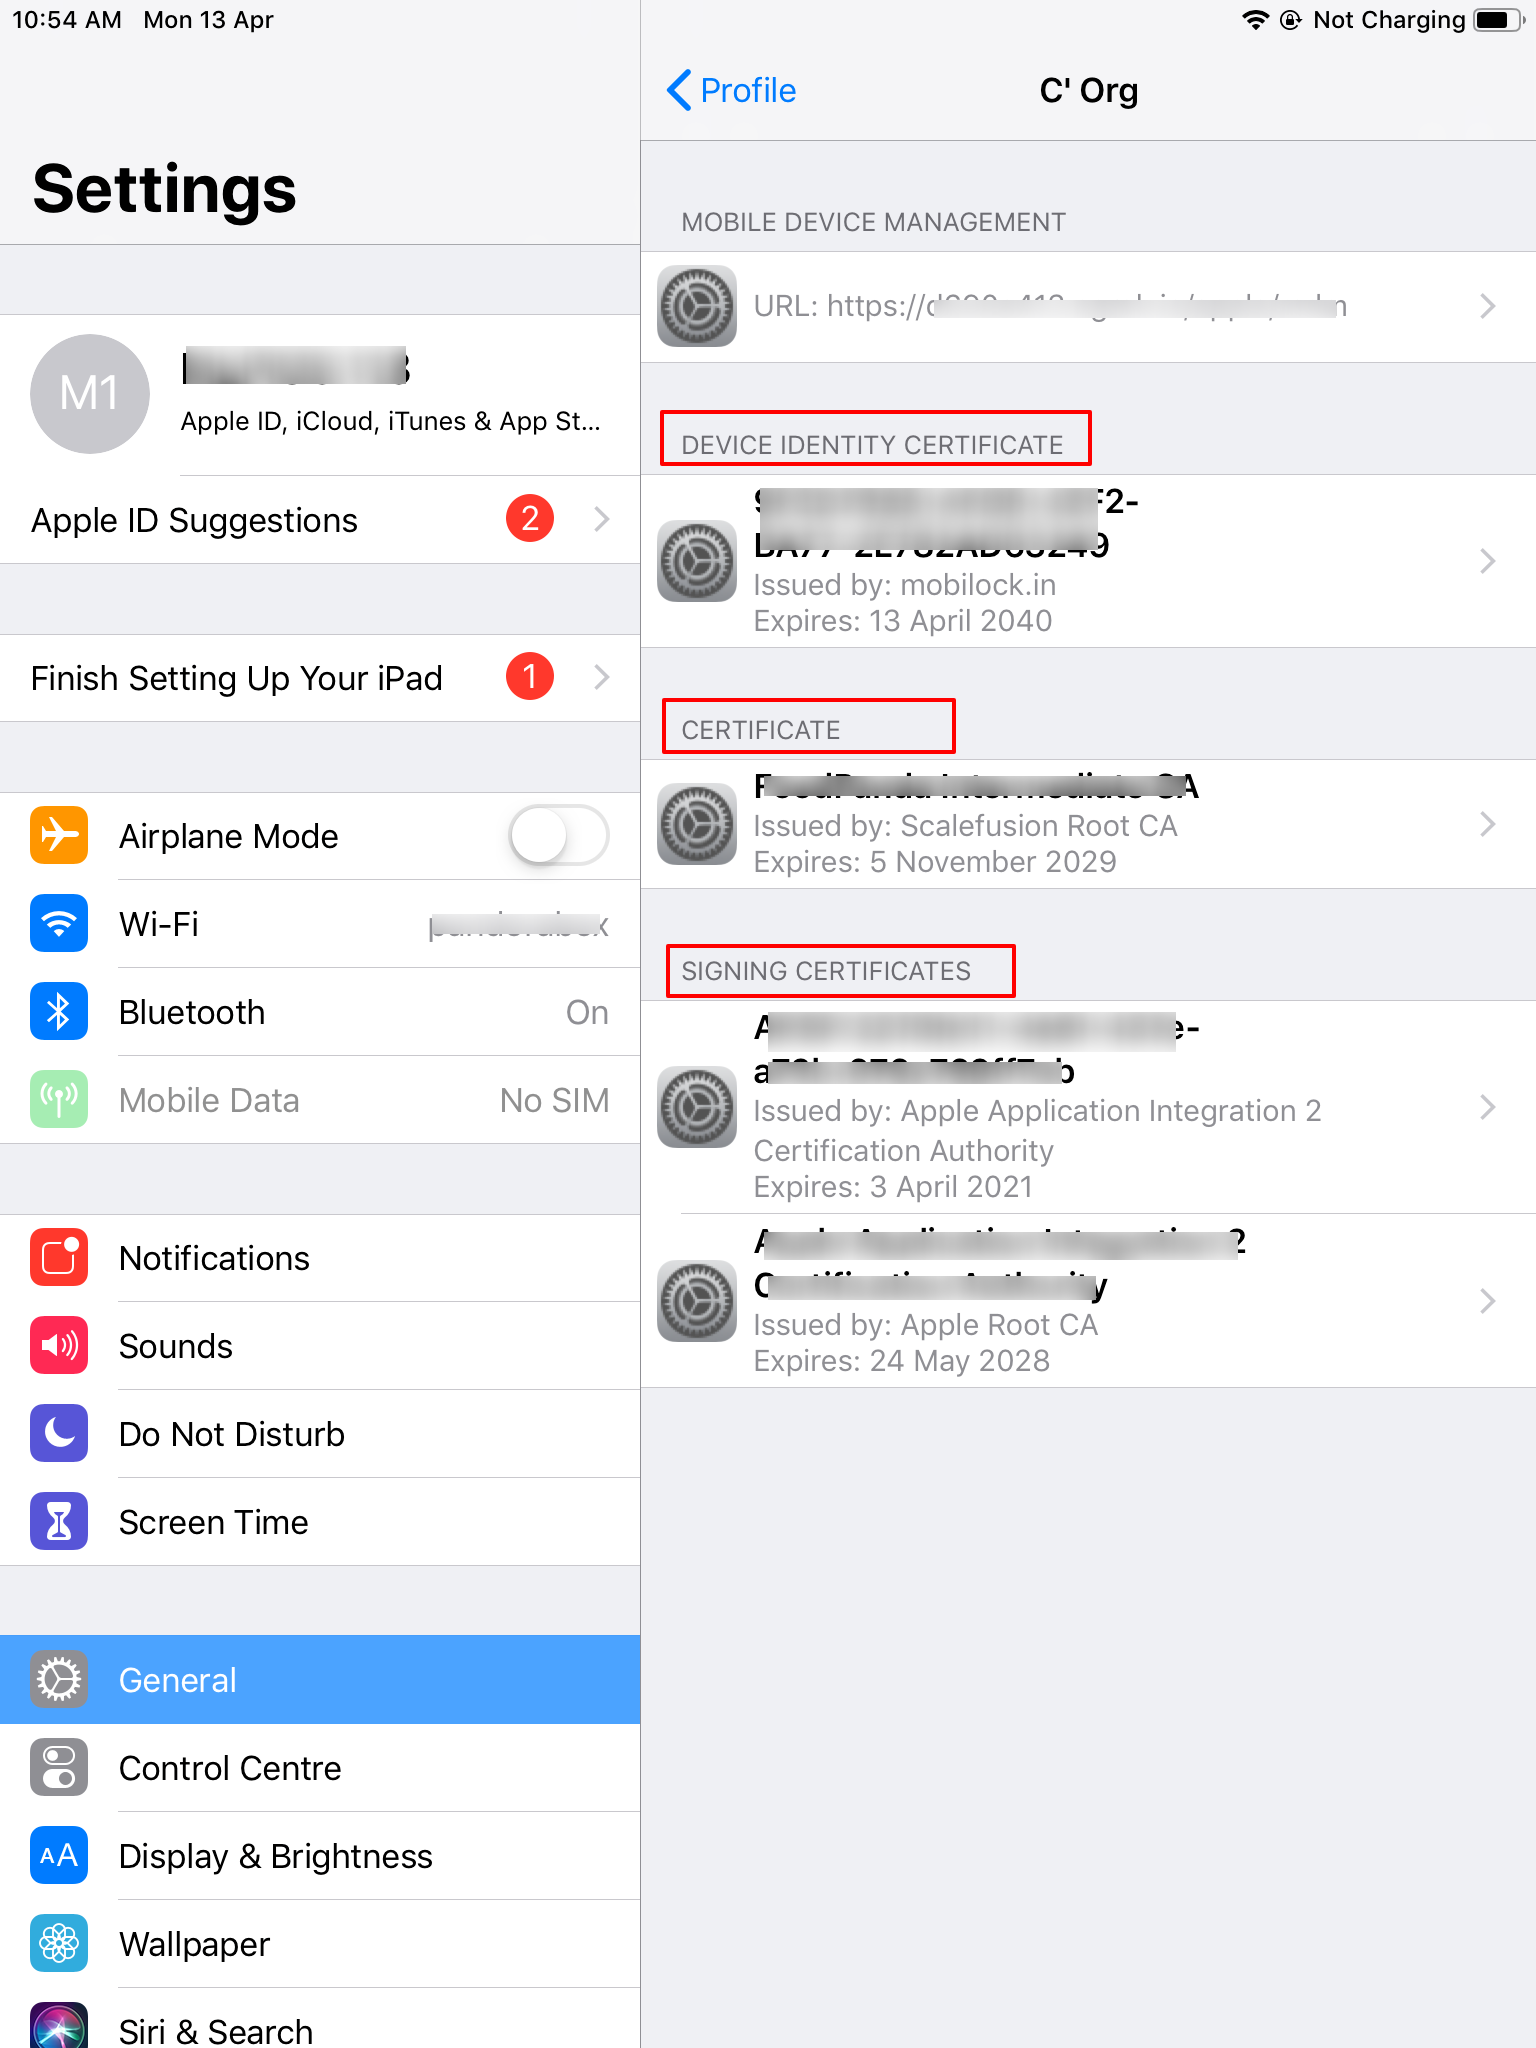
Certificate-based Enterprise Wifi Profile
On iOS devices, certificates can be associated with Enterprise Wi-Fi configurations. As a result, all the devices where this Wi-Fi has been published, as well as Wi-Fi being pushed on new Profiles, will be sent with the Certificate payload.
Scalefusion supports Enterprise Wifi for iOS in two modes, viz LEAP and PEAP. The certificate option is there for PEAP mode.
- On the Dashboard, Navigate to Device Profiles & Policies > All Configurations > Global Settings > Wifi Settings
- Click on Create New > Enterprise for iOS or Edit an existing Wi-Fi configuration created for iOS

- In the Wifi Configuration window, once you select the PEAP checkbox, there will be an option (drop-down) to select a certificate (Identity and Trusted) that was previously uploaded
.png)
- Select certificates that need to be associated with the Wifi configuration, and click Submit
The certificate will be associated with the Wi-Fi configuration.
If a Certificate is deleted from the Certificate screen:
- The association between the Wifi and Certificate will be removed, and a new payload of Wifi will be sent.
- The Certificate will get uninstalled from devices.
Known Behavior
In iOS, Certificates are accessible and used under the Safari browser only. Other browsers (Firefox and Chrome) fail to access the installed URLs.