Application Configurations, also known as Managed Configurations, provide enterprises with a convenient way to remotely configure apps directly from the Scalefusion Dashboard. These configurations act like login credentials or setup parameters that are passed to the app, allowing it to be automatically set up with little to no user input.
With this, you can also restrict Outlook on Android and iOS devices to use only corporate email accounts. This ensures that users are automatically signed out of any personal accounts already logged in and are restricted from adding non-corporate accounts. Only a single, approved corporate account will be allowed.
Objective:
Enforce login with only a corporate email address in the Outlook app on Android and iOS devices.
Prevent users from adding additional or secondary accounts.
This document describes the App Configurations that make it easier to configure Outlook on Scalefusion-managed Android and iOS devices, which are employee-owned (BYOD) and the devices that have been enrolled using User Authenticated Enrollment for Android and iOS.
Before you begin
For Android devices, search for and install the Outlook application from Play for Work apps as described here.
For iOS devices, search for and install Outlook from Apple App Store as described here.
Outlook application configuration for Android devices
Navigate to Application Management > Play for Work Apps.
Click on the Outlook app.
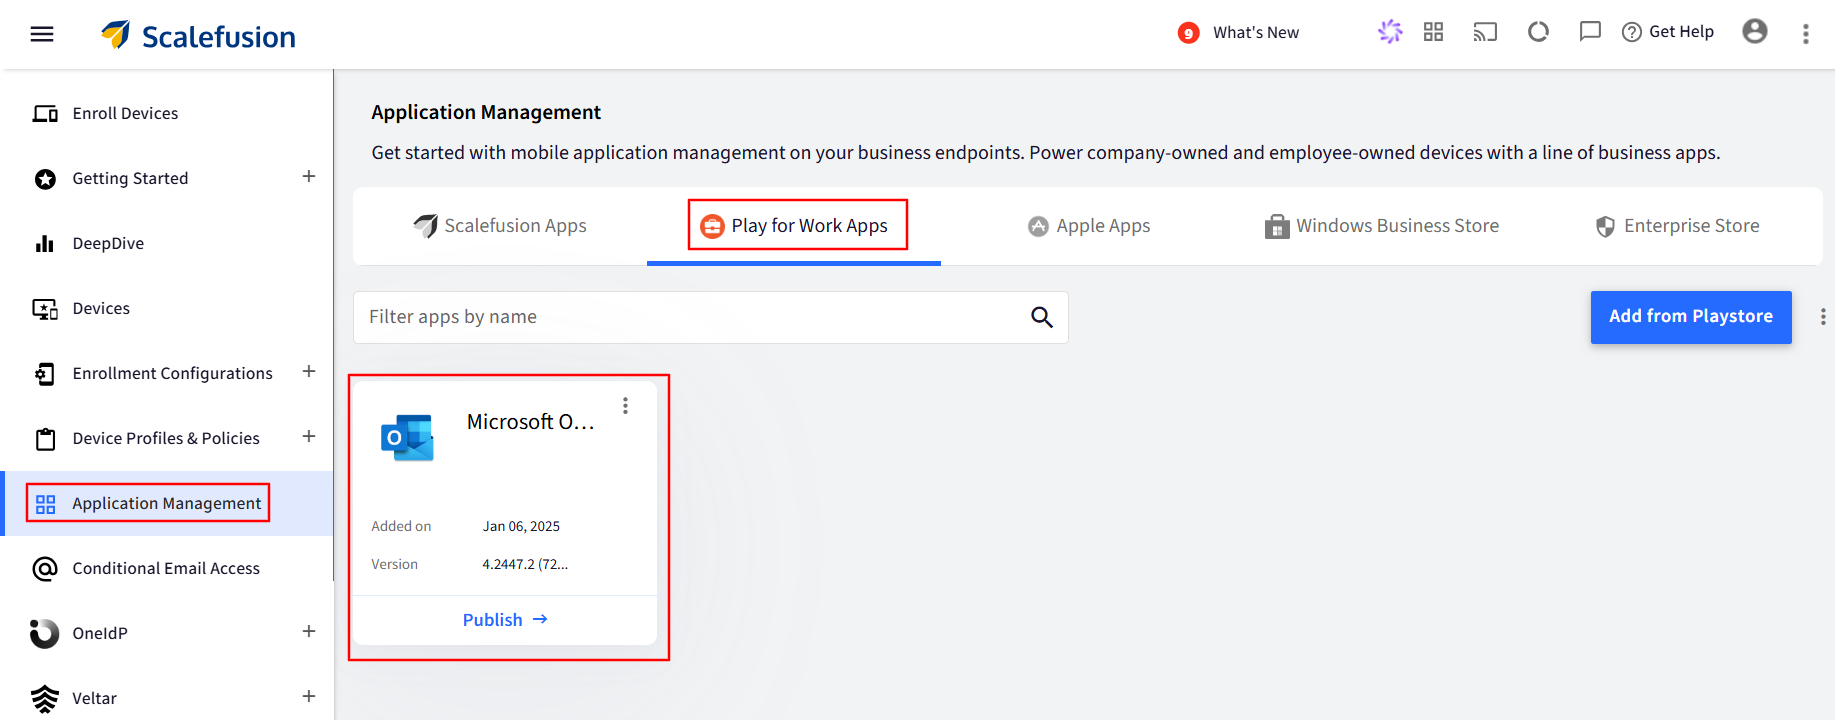
From the wizard on the right-hand side, click on the App Configurations tab and click CREATE.
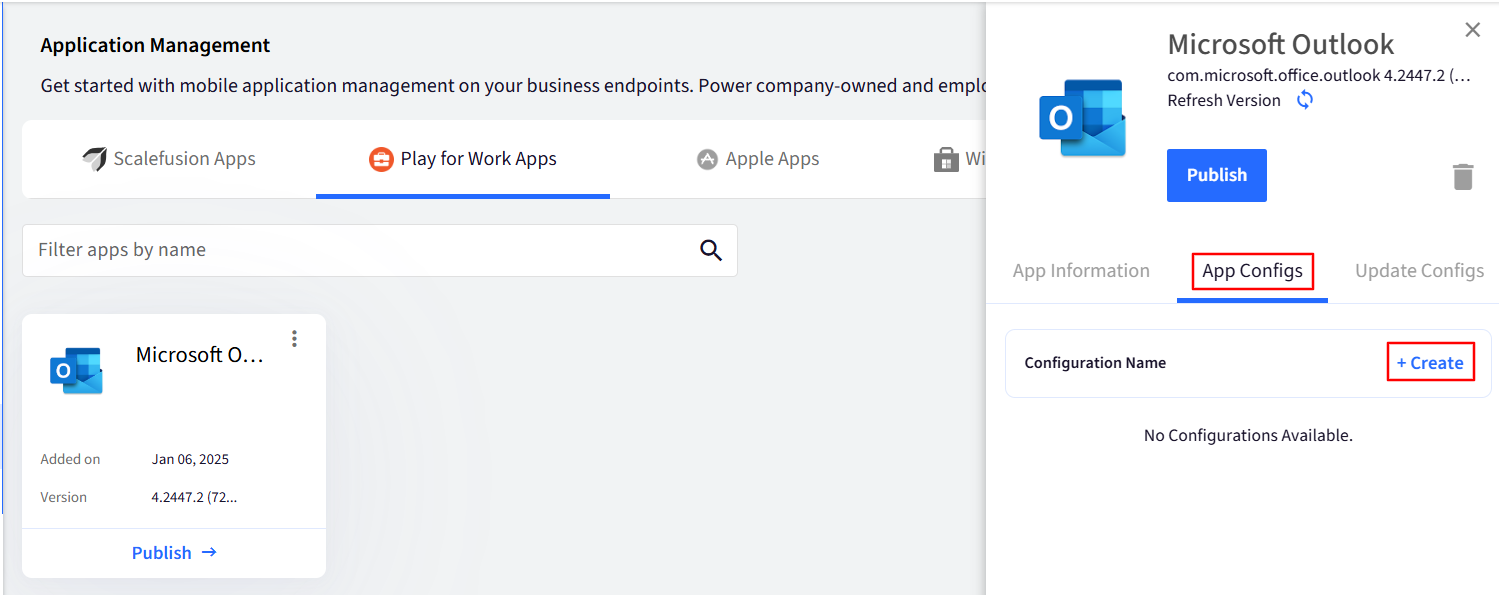
The App Configuration wizard will be shown. Enter the details in the wizard as provided below:
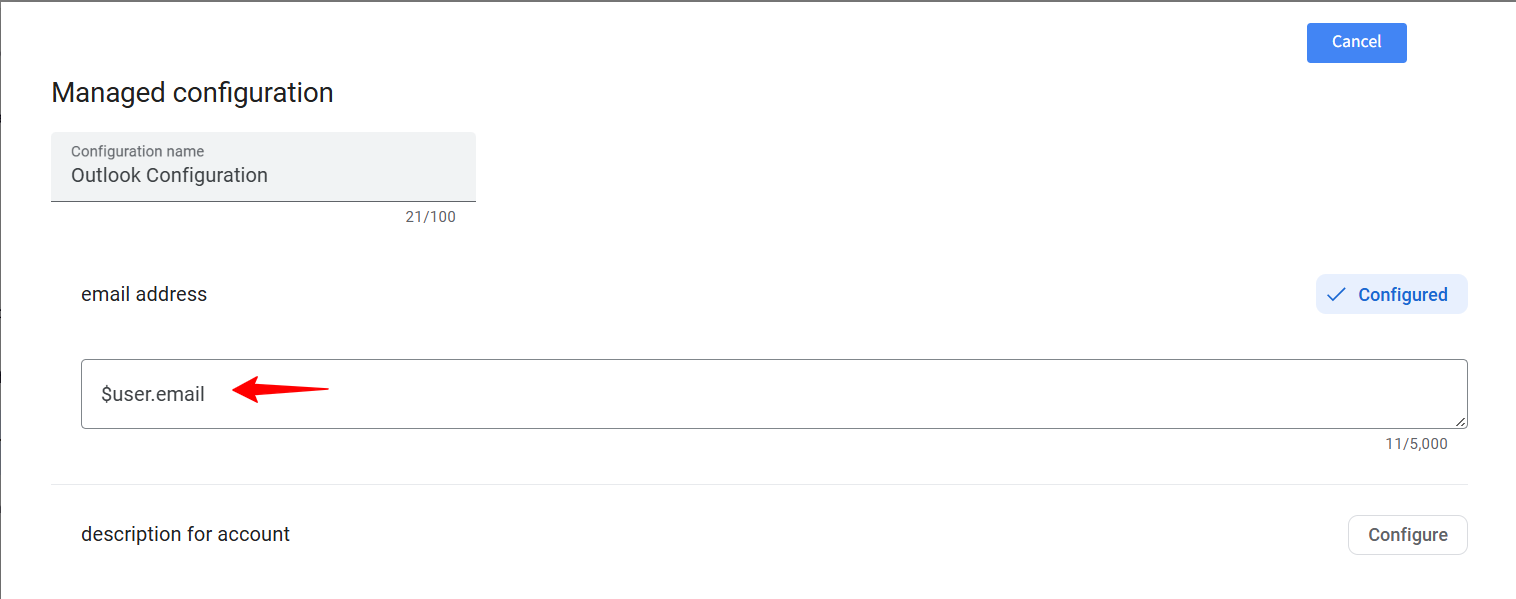
Enter Configuration name. For eg. Outlook Configuration
Enter the following:
In the Email Address field, click on Configure and enter $user.email
In the Exchange Server URL field, click on Configure and enter https://outlook.office365.com

In the Allowed Accounts field, click on Configure and enter $user.email
All other text fields should be left blank and to their defaults.
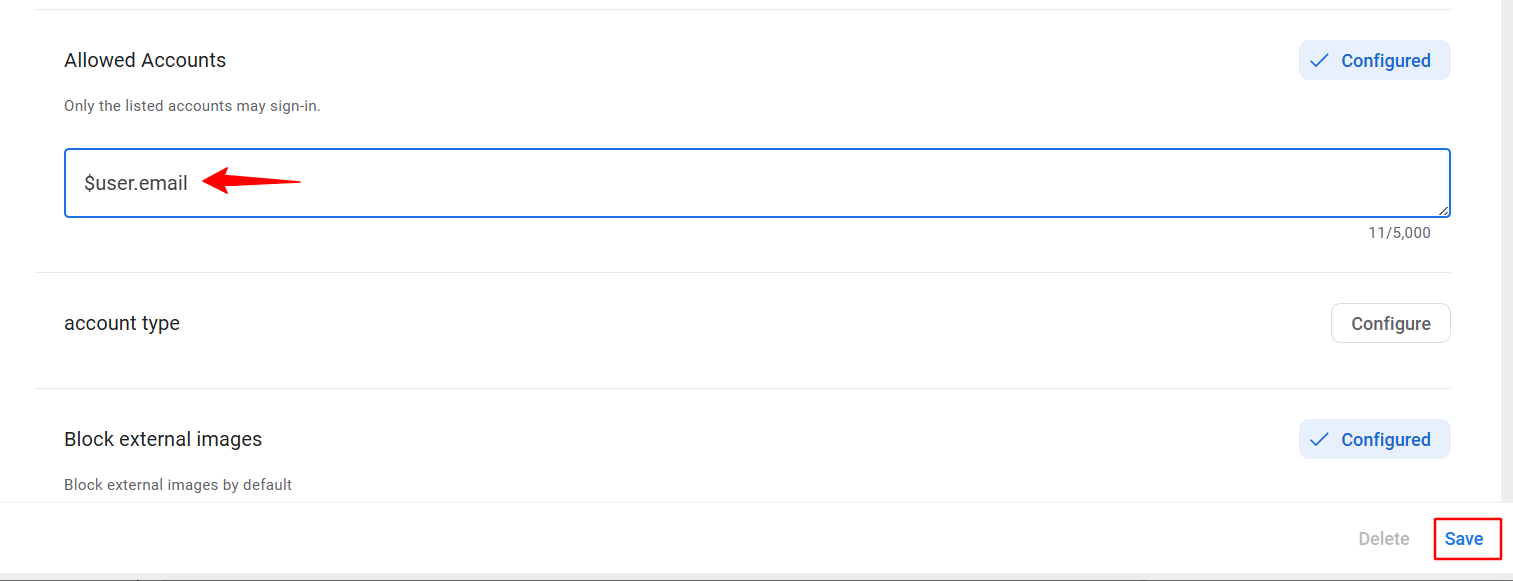
SAVE: Click Save to save the configuration.
Once the configuration is saved, it will reflect on the Dashboard under App Configurations.
Effect on the Device
Once the device receives and acknowledges the configuration:
Only the corporate email / assigned email will be available for sign-in.
The user will be prevented from manually adding additional accounts.
Any previously logged-in personal email accounts will be inaccessible.
Outlook application configuration for iOS devices
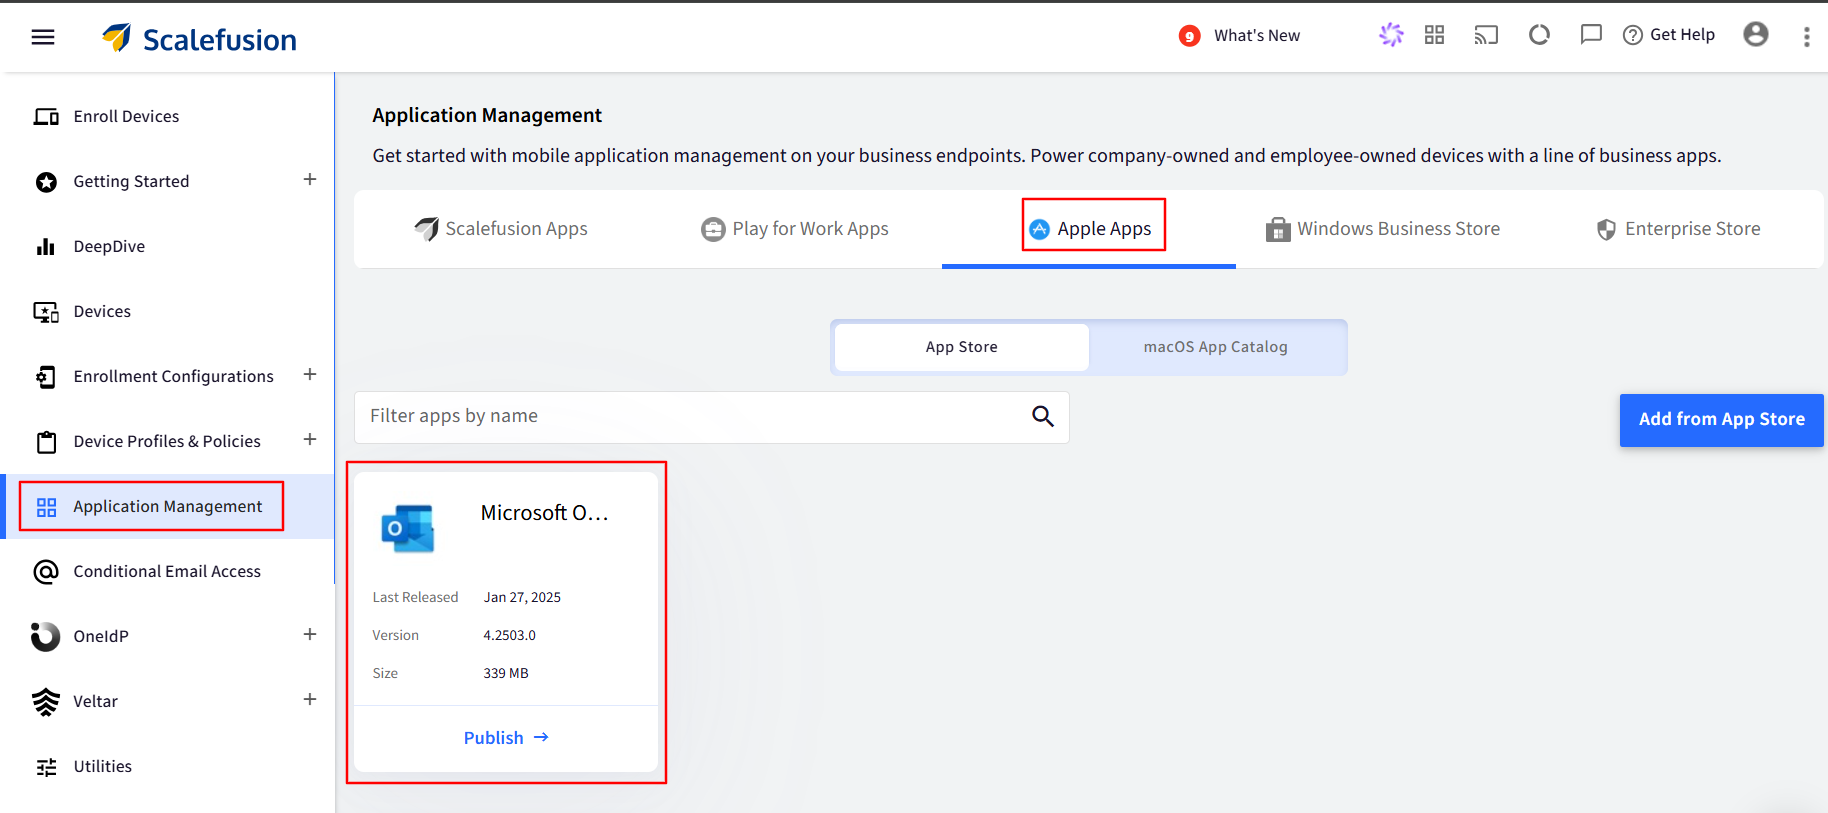
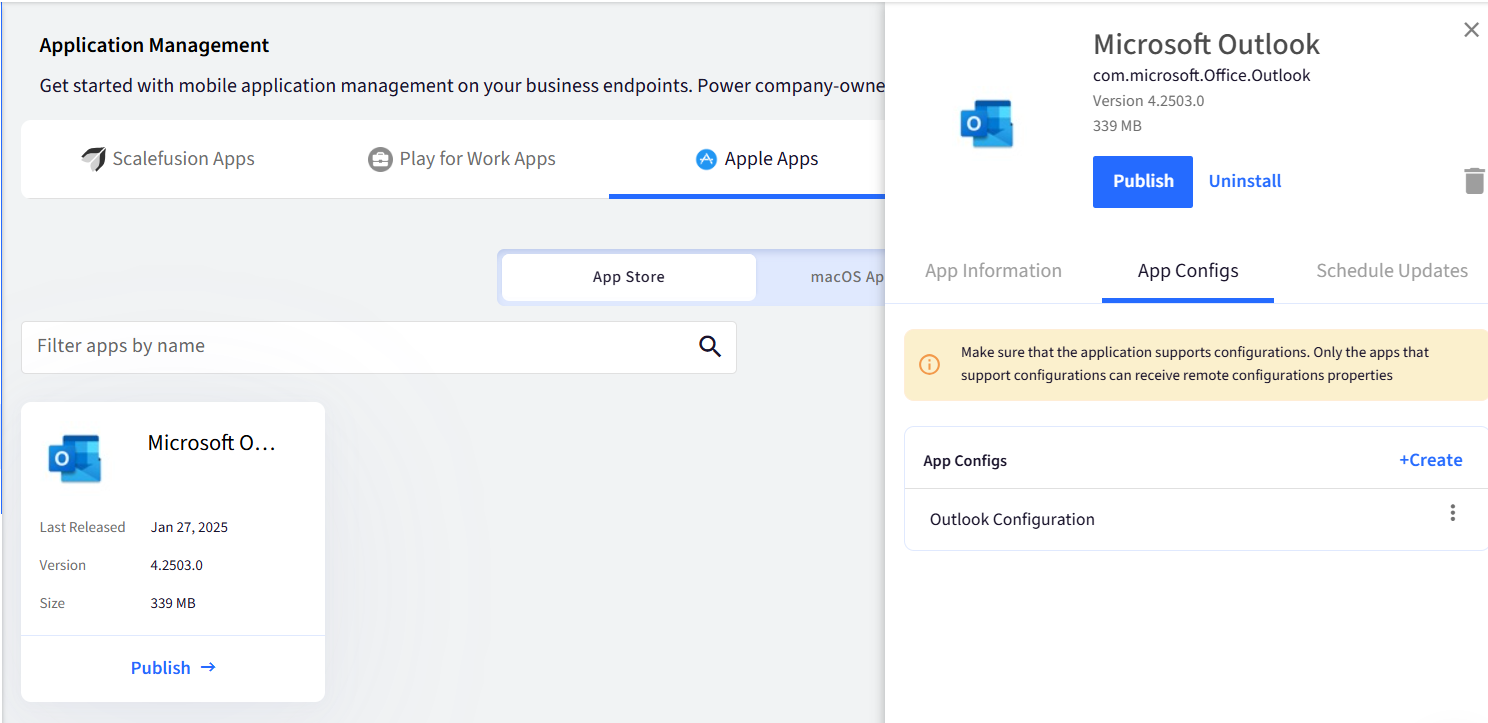
Navigate to Application Management > Apple App Store.
Click on the Outlook app.
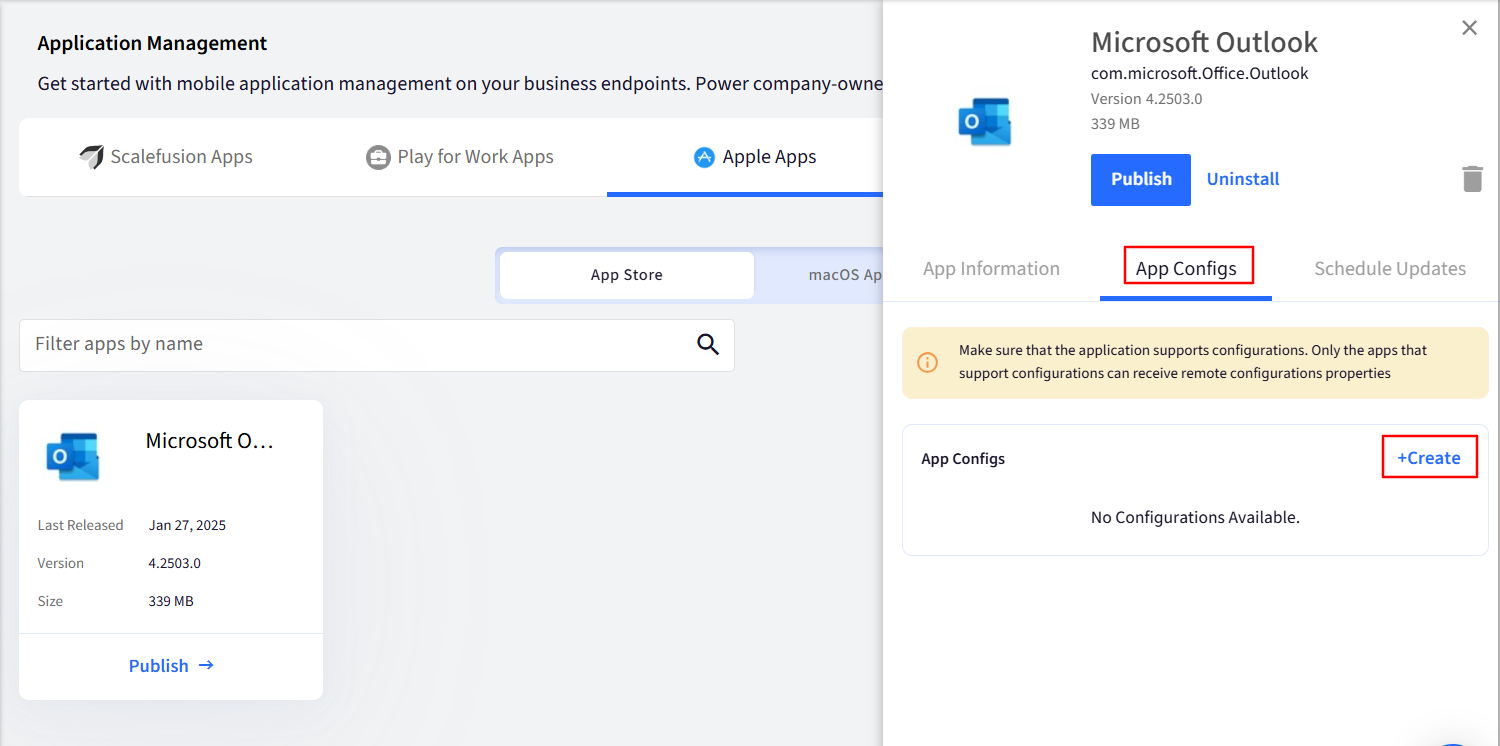
From the wizard on the right-hand side, click on the App Configurations tab and click CREATE.
The App Configuration wizard will be shown. Enter the details in the wizard as provided below:
Enter Configuration name. For eg. Outlook Configuration.
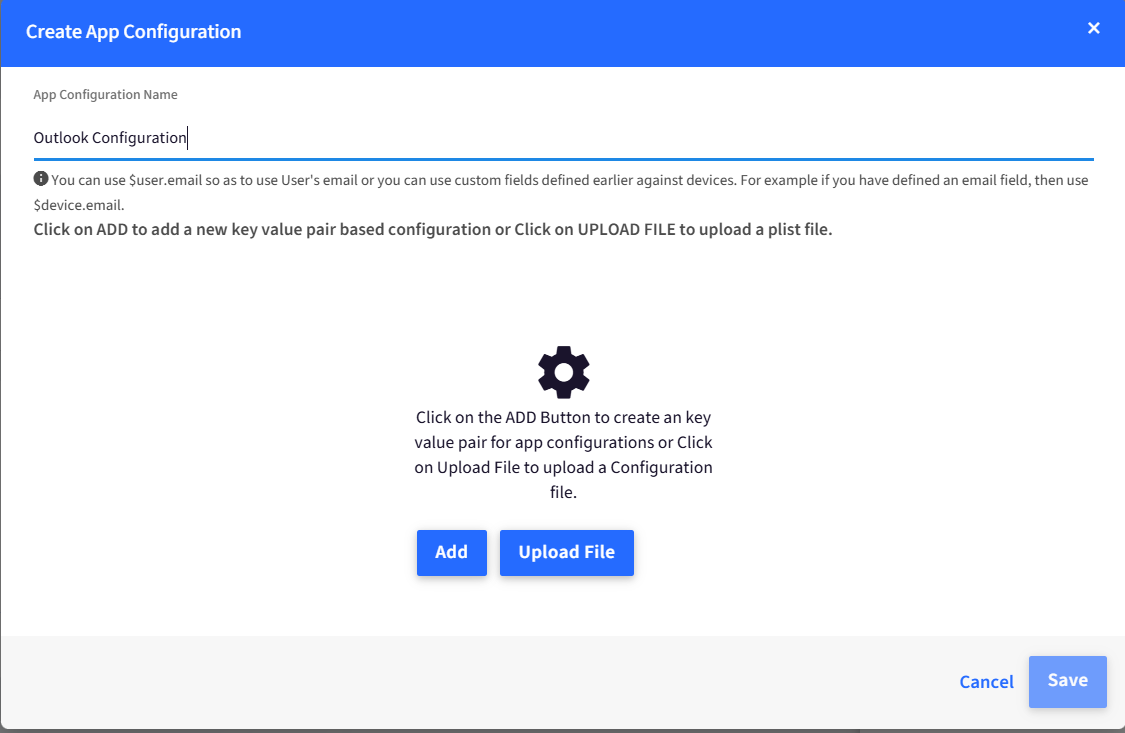
Click on Add and add the following fields one by one under respective heads:
Type
Key
Value
String
IntuneMAMUPN
$user.email
String
IntuneMAMAllowedAccountsOnly
enabled
String
IntuneMAMRequiredAccounts
enabled
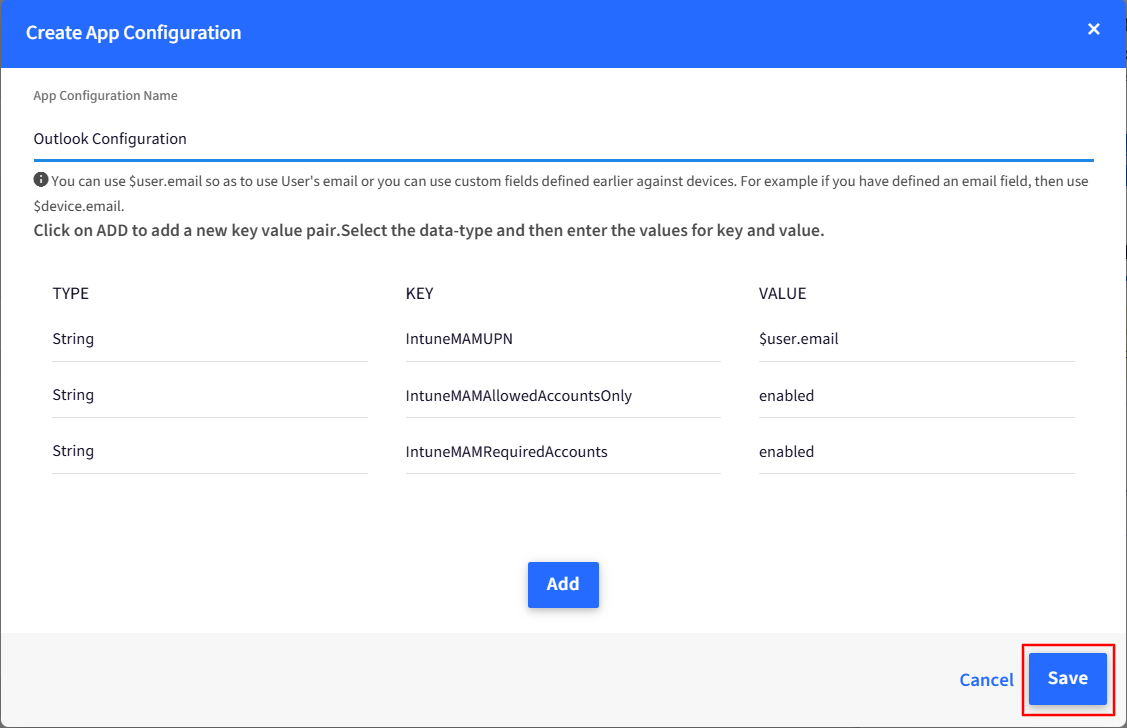
SAVE: Click Save to save the configuration.
Once the configuration is saved, it will reflect on the Dashboard under App Configurations.
The following actions can be performed on the configurations:
Publish: Used to Publish the configuration on the selected devices.
Edit: Used to edit the configuration.
Un-publish: Used to un-publish the configuration from previously published devices.
Delete: Delete and un-publish this configuration.
Effect on the Device
Once the device receives and acknowledges the configuration:
Only the corporate email / assigned email will be available for sign-in.
Any previously logged-in personal email accounts will be removed.
The user will be prevented from manually adding additional accounts.
Publishing the Application Configuration
The next step is to publish the configuration to push them on devices. Follow the steps below,
Android
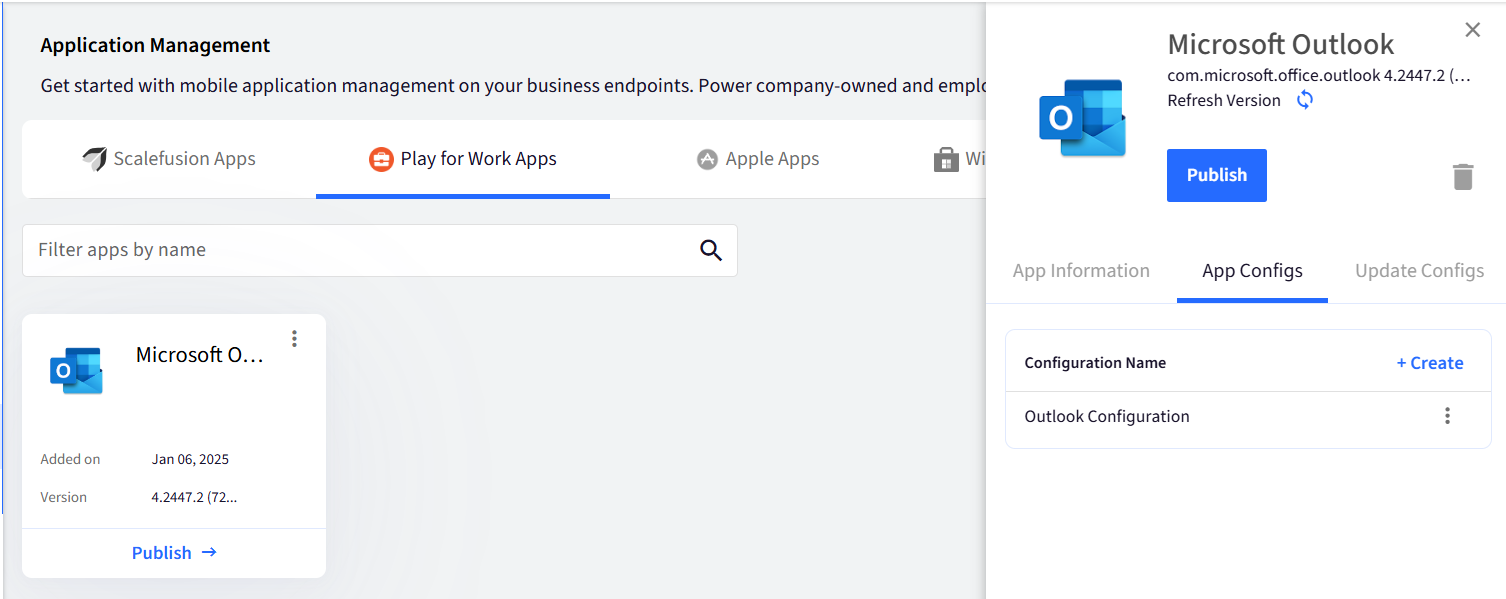
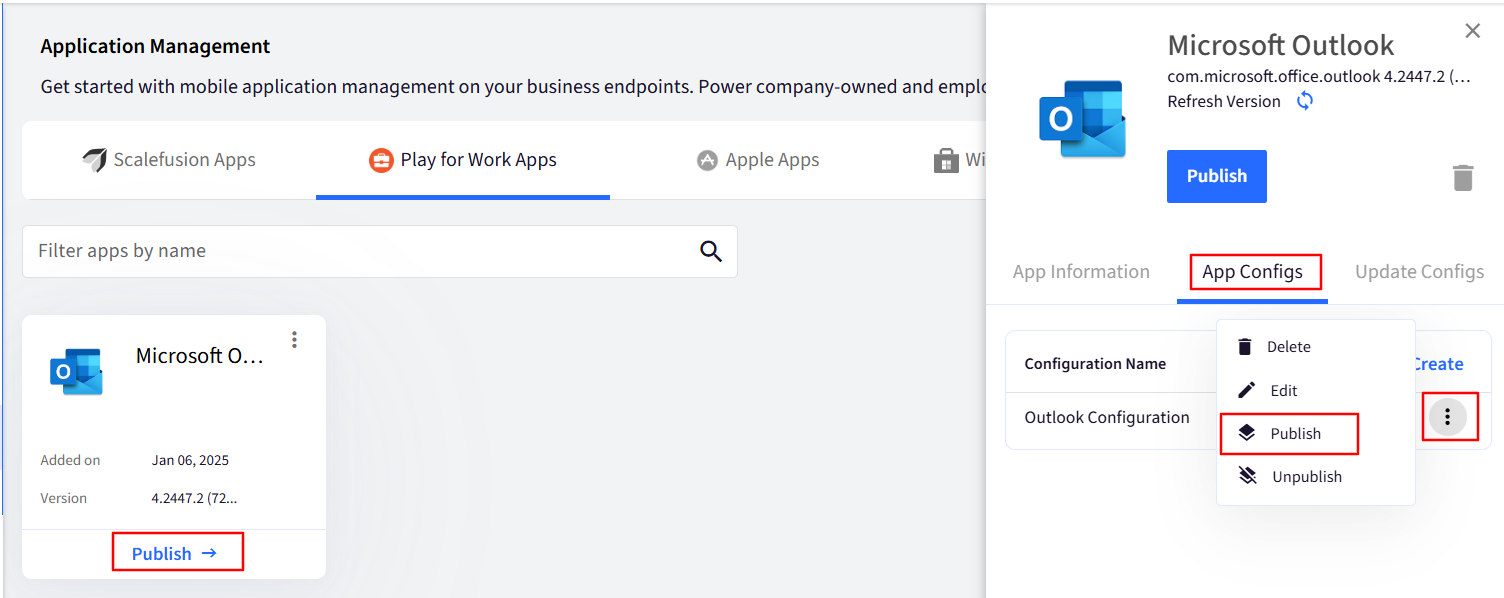
Navigate to Application Management > Play for Work Apps.
Click on the Outlook app.
Click on the App Configurations tab to see the list of configurations. Click on three dots and click on Publish.
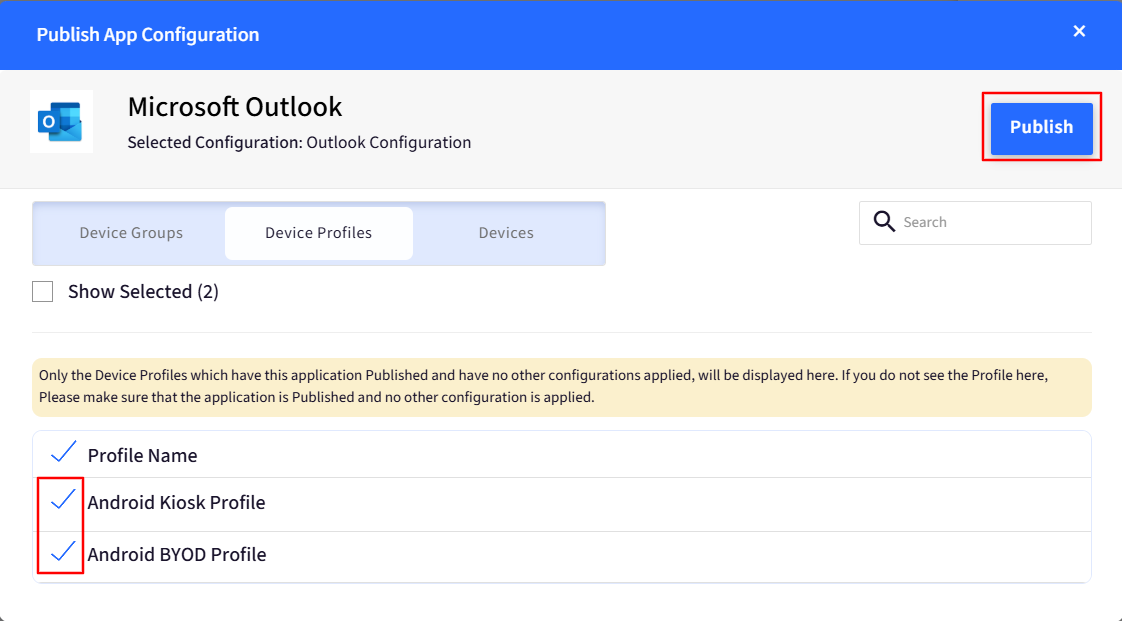
Select Device Groups or Device Profiles or Devices and click PUBLISH.
Once the configuration is pushed, it would take around 5 minutes for the configuration to take effect on the device.
For a device that is newly enrolled in the Device Profile with Configurations, the configurations are pushed once the device is EMM managed and the application is installed.
iOS
Navigate to Application Management > Apple App Store
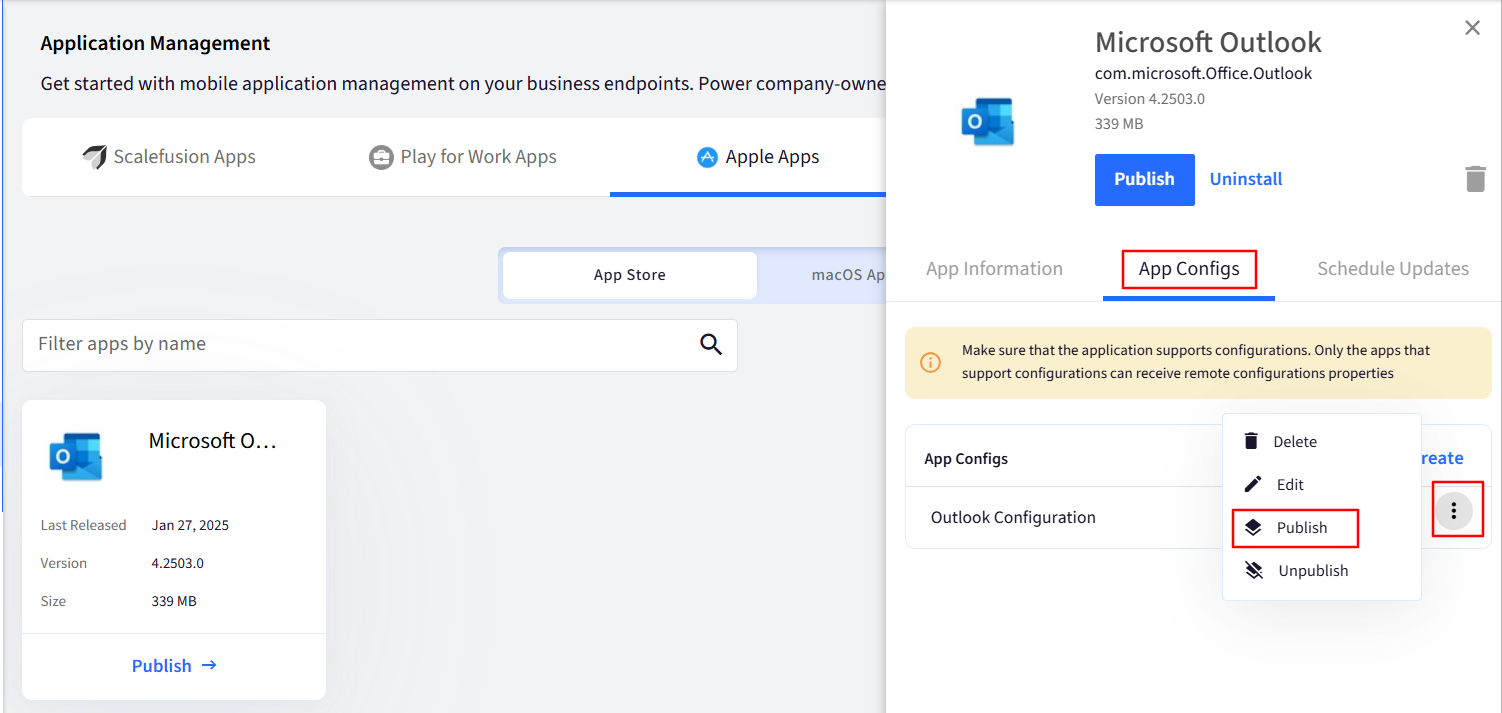
Click on the Outlook app.
Click on the App Configurations tab to see the list of configurations. Click on the three dots next to the configuration and click on Publish.
Select Device Profiles and click PUBLISH.
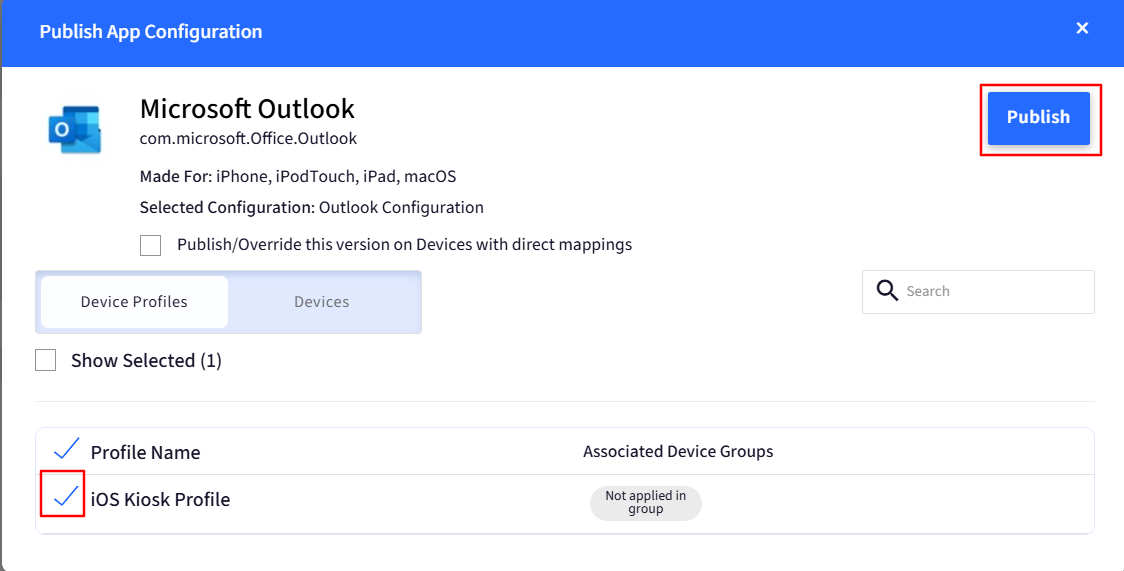
Only the Device Profiles to which the Application has already been Published/Installed and have no other configurations applied will be listed here.
Corporate Owned devices
For corporate-owned devices, use $device.<custom field> in any of the configuration fields. For more information on custom fields, please click here.