Allowing websites or allowing only certain websites is a critical feature for a Device Management solution. Scalefusion offers IT Admins to control the browsing experience on the Windows 10 devices, by providing controls that access to the websites and control settings for Google Chrome, Microsoft Edge (version 77) and Windows Kiosk Browser.
The options to configure the Allow Websites available in a Windows Device Profile, however to use this feature completely first we need to create a master list of Websites that can be used. This document is divided into two sections, the first section guides you on how to create a master list of websites and the next section guides you on how to use the Allowed websites settings in a Windows device profile.
Prerequisites
- Windows OS 10/11 devices enrolled with Scalefusion
- Windows Device Profile should be created on Scalefusion Dashboard
Step 1: Creating an Allowed Website
This section of the Scalefusion Dashboard is used to create a master list of websites that you want to provide access to your users. Follow the steps below to create a weblink,
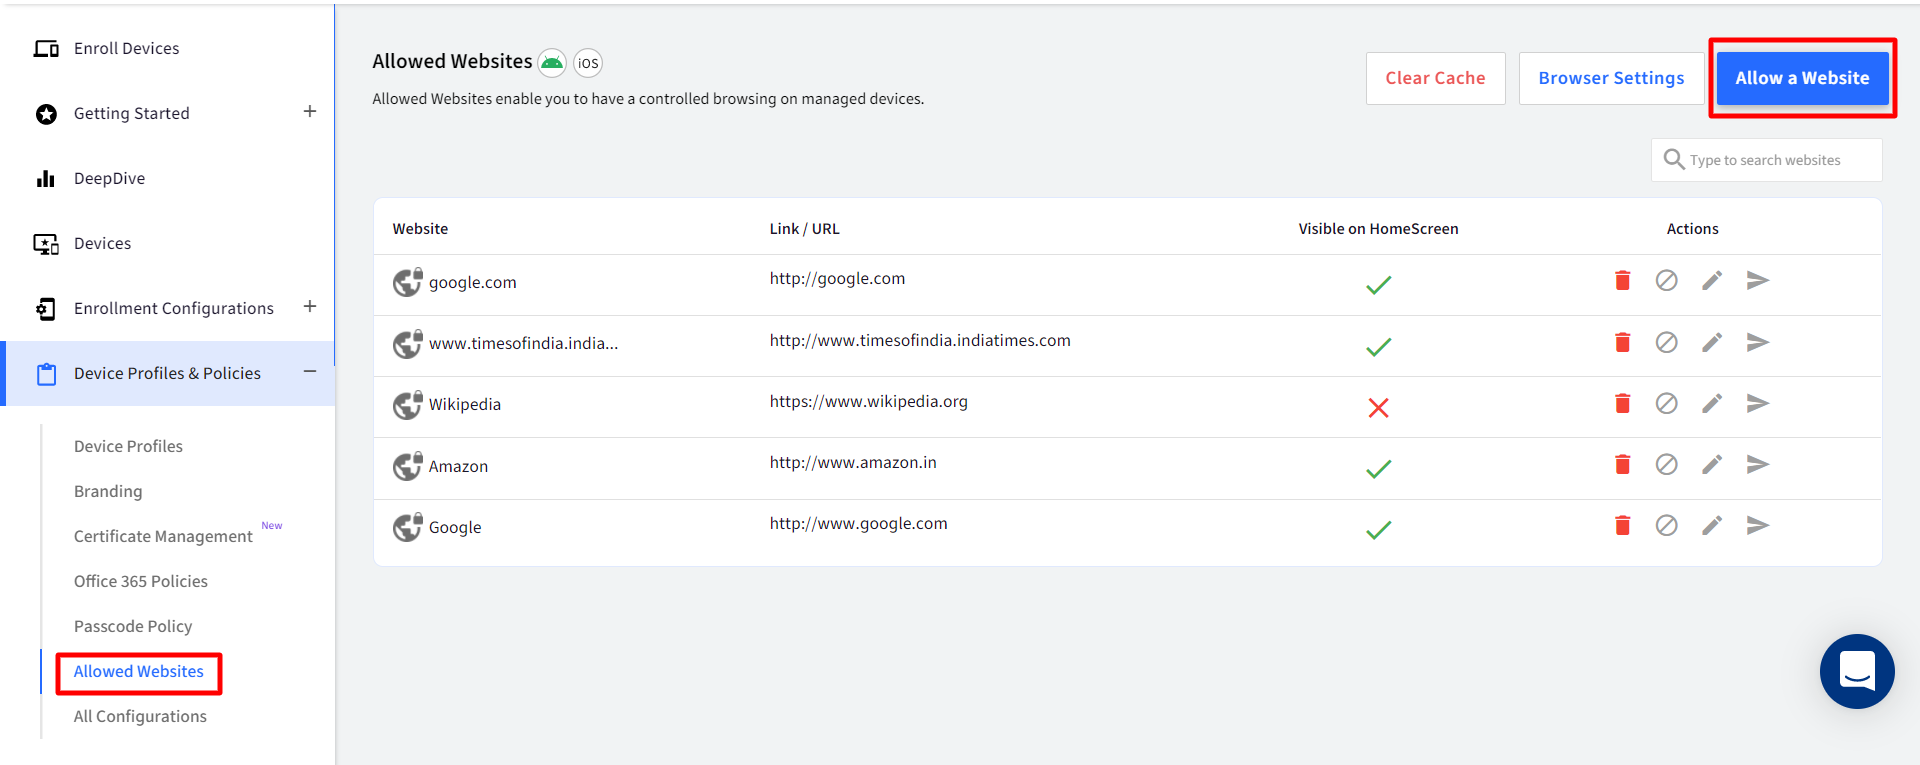
- Navigate to Device Profiles & Policies > Allowed Websites
- Click on Allow a WEBSITE to launch the website creator dialog.
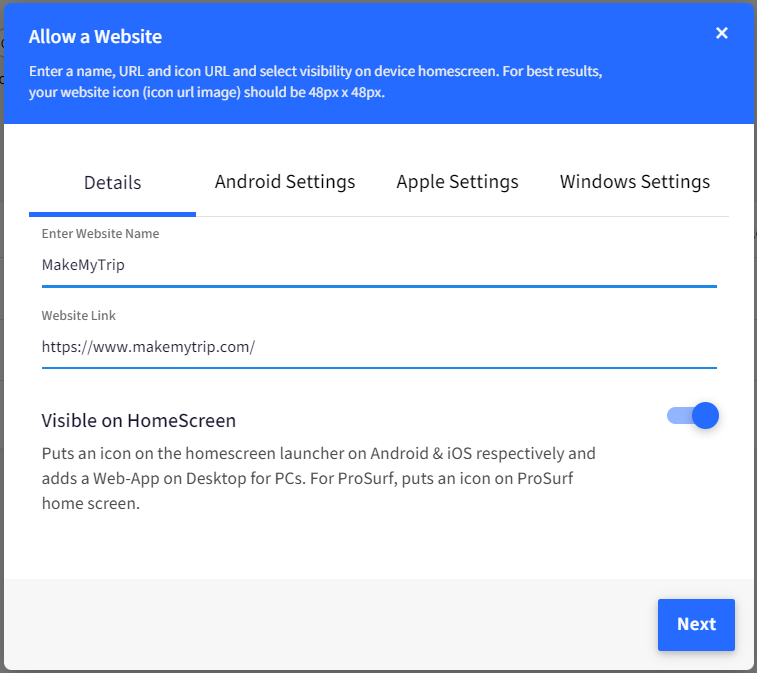
- Under the DETAILS section fill in the following information and click NEXT
- Website Name: The name of the Web-Clip when it is placed in the Dock.
- Website Link: The URL to the website. To publish two or more unique URLs on a device, custom fields can also be entered here (For eg. $device.<fieldname>).
- Visible on Home Screen: Enabling this creates a shortcut of the website on desktop and displays it as a web application.
- The next two sections are specific ONLY to Android, iOS/macOS devices. Click NEXT
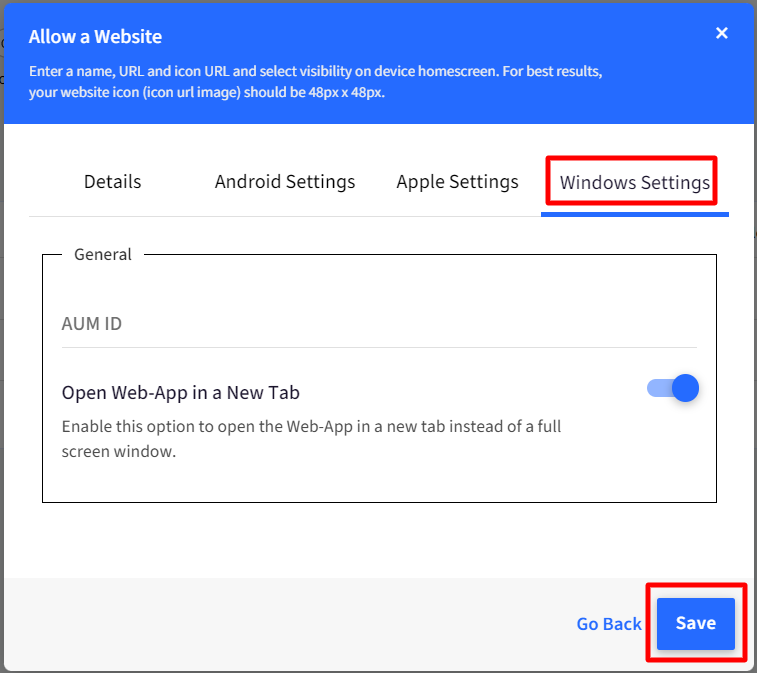
- Under Windows Settings, configure the following:NoteThese settings will be applied only when you choose a Web-App Engine from Browser Settings and the respective browser app is allowed in the device profile.
- AUM Id: The Application User Model Id (AUM id) for the added website. This gets automatically fetched and displayed here once the web app is created on the device. The app is automatically downloaded from Microsoft store on the device using this id.
- Open Web-app in a new tab: If this is enabled, it opens the Web-App in a new tab of the selected browser. If disabled, it opens in full screen window.
- Click SAVE to add the URL to the master list.
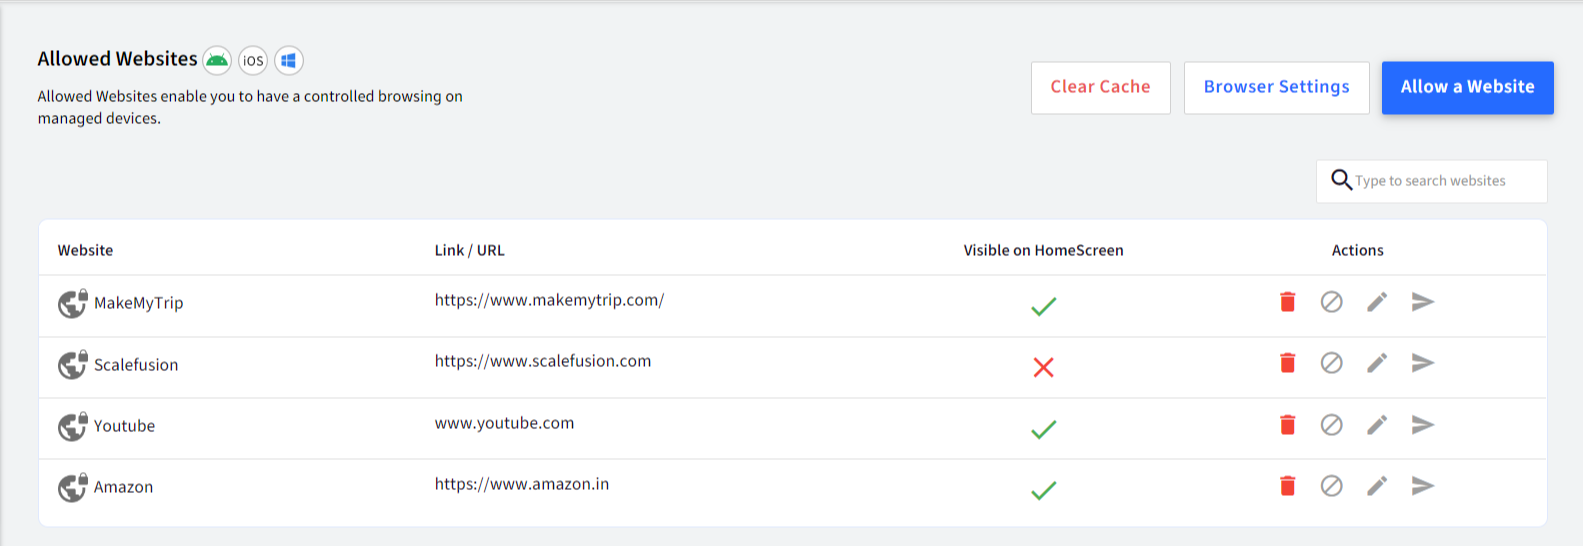
- Once a Website has been added it will appear in the list as shown below.
Browser Settings
To choose web-app engine, click on Browser Settings button on Allowed Websites main page. This opens the App browser settings window. Under Windows tab, select the web-app engine (browser) that will be used to open the web-applications on Windows. Select one of the following:
Microsoft Edge:Recommended choice if you want to use Multi-App Kiosk mode.
Google Chrome: If you select this, then you need to open Google Chrome at least once to install the web app.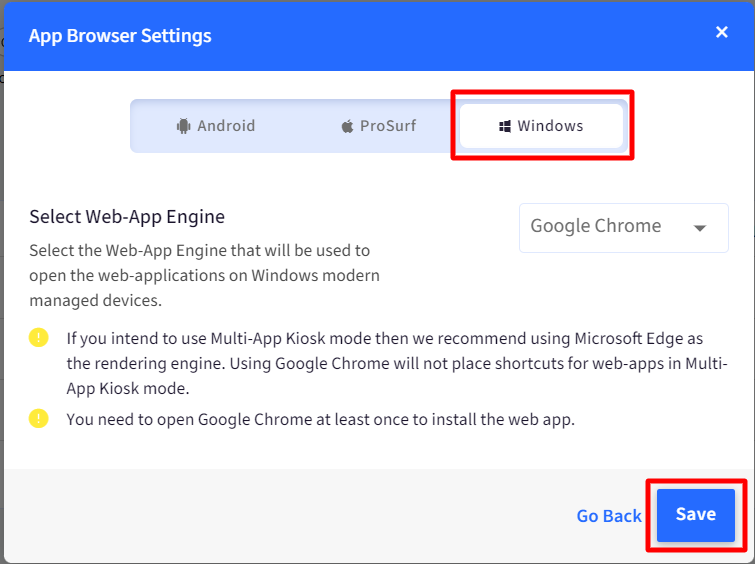
Step 2: Publishing Allowed Websites in a Profile
Once you have the master list of allowed websites ready, the next step is to allow them in the Device Profilesso that the users are restricted to only these websites.
- Navigate to Device Profiles & Policies > Device Profiles. Select a Windows Profile and Edit it or Create a New Windows Profile to launch the profile creation wizard.
- Navigate to the Allowed Websites section.

- The Websites that you have created in Step 1will be listed here. Enable the Websites that you want to allow in this Profile. If a website is enabled in device profile but visible on homescreen is disabled, then the website will be allowed but no shortcut will be created on desktop.
- Bookmark: Toggle this setting to on, if you want to add a bookmark for the website. For this, Bookmarks folder should be configured under Chrome/Edge configurations.
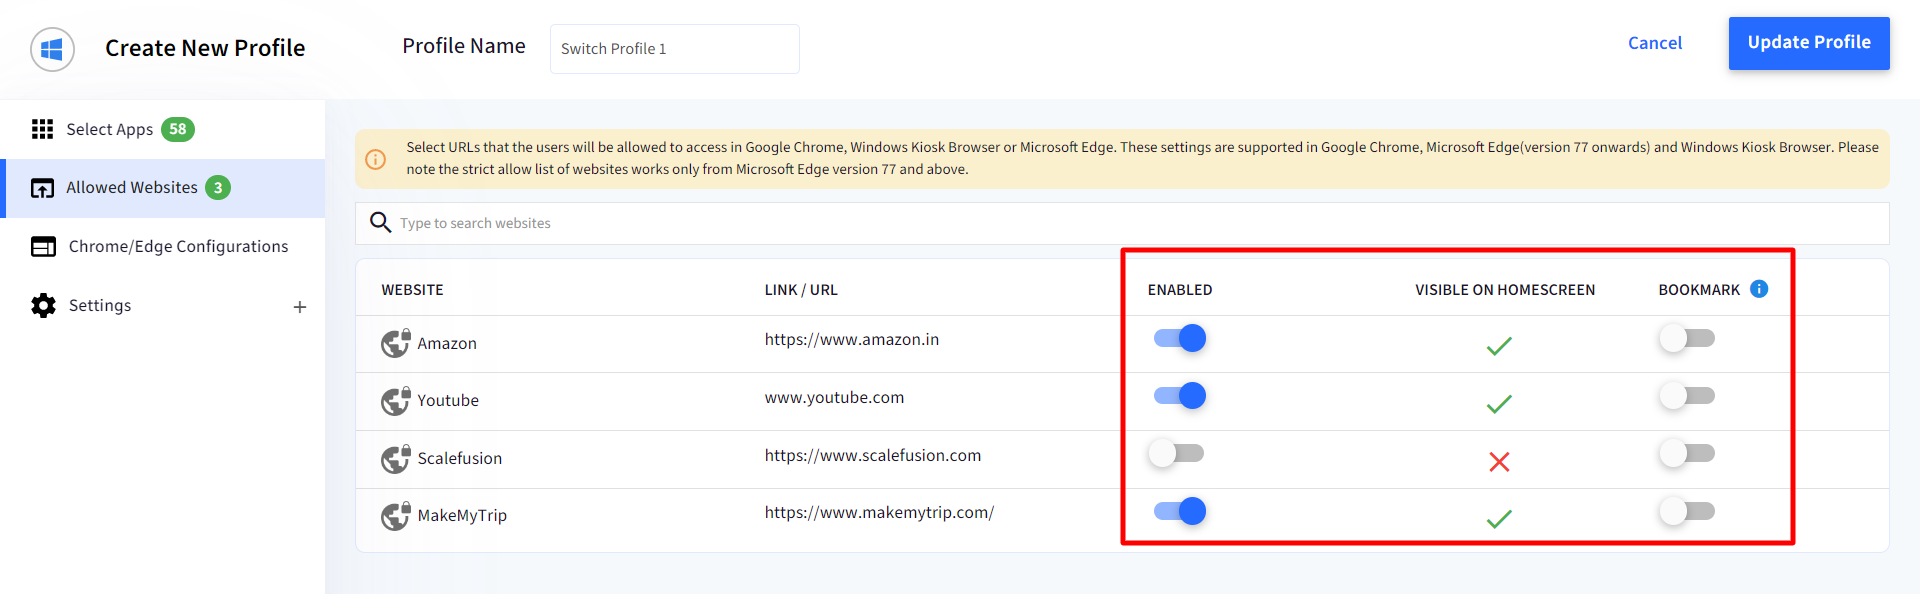
- Click Update Profile to save the changes to the Device Profile.
- The settings will be pushed to all the Devices that have this profile currently applied automatically and will take effect on all the Devices with Google Chrome, Microsoft Edge and/or Windows Kiosk Browser.
If you have configured web-app settings and enabled them in device profile, this is how they will be visible on your Windows desktop.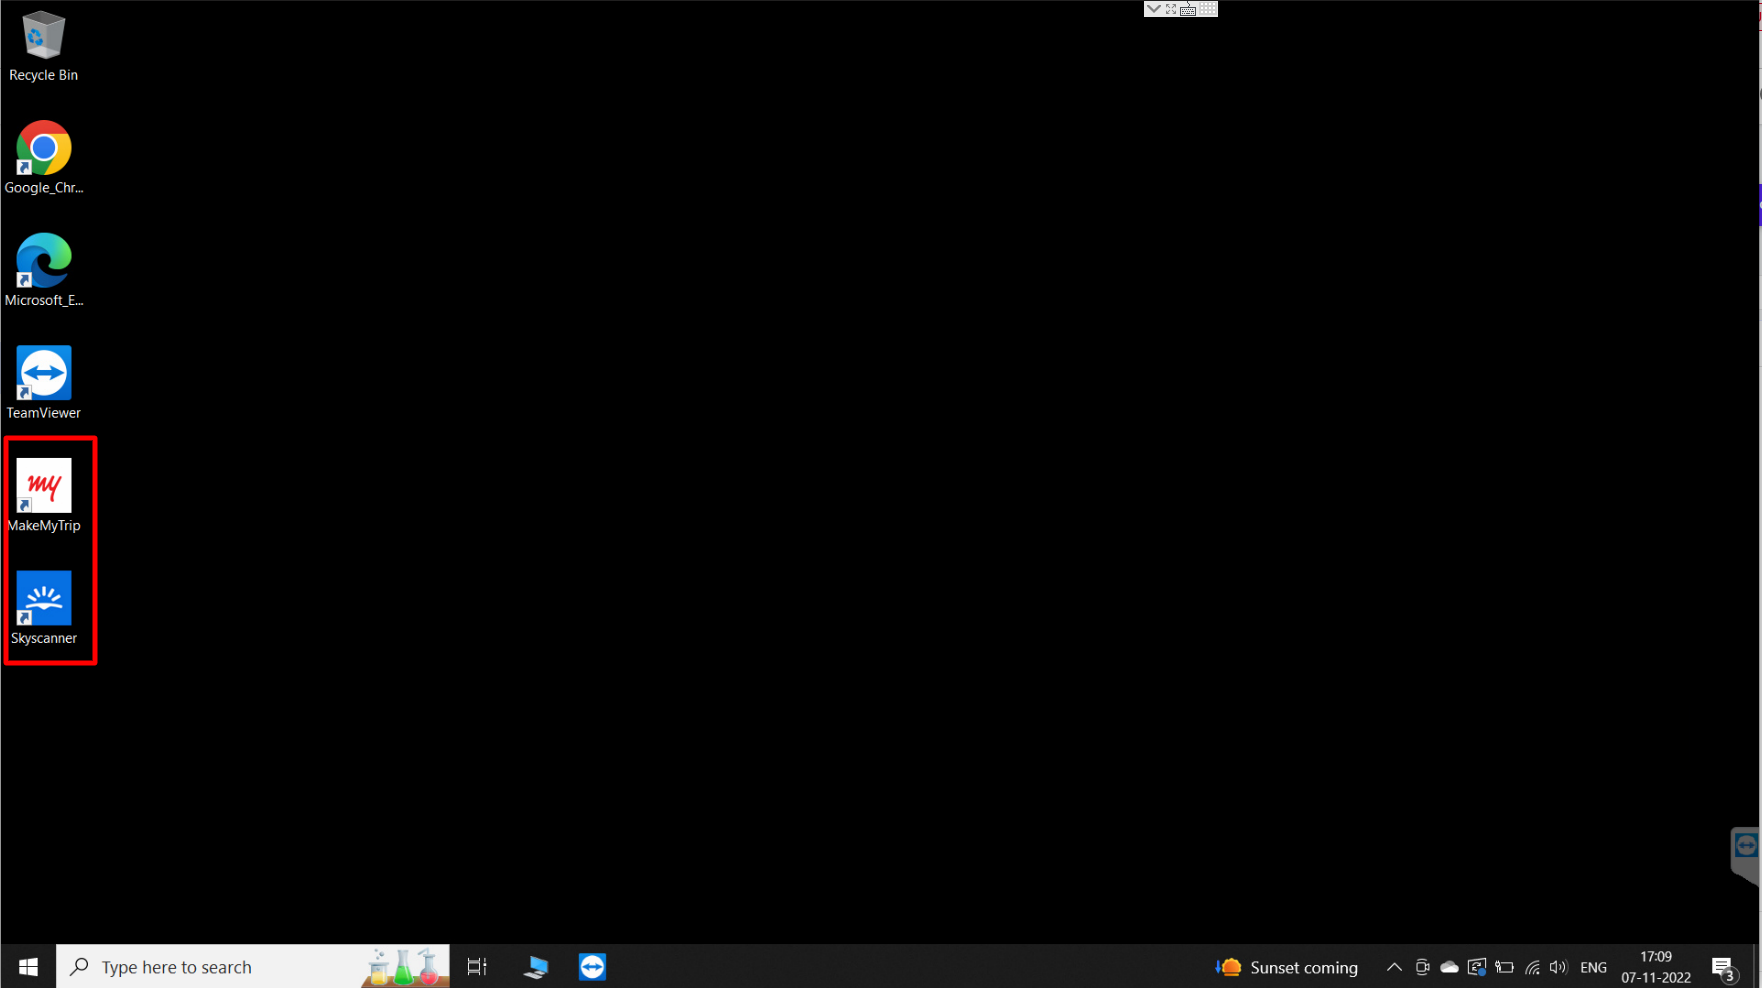
Frequently Asked Questions
Question: How can we control Microsoft Edge as users can use Edge for browsing websites that are not allowed?
Answer: We recommend disabling Microsoft Edge using the Application Policy (Select Apps section) in the Device Profile and having Google Chrome as the browser.
Question: How long does it take for the settings to take effect in Google Chrome and/or Windows Kiosk Browser?
Answer: The changes normally should take 1-2 minute(s), however sometimes the changes are applied on the next restart of Google Chrome or Windows Kiosk Browser.