Scalefusion's Windows MDM agent provides IT Admins with a quick alternative to browser based enrollments. In this option, the IT Admins can install the Windows MDM agent and enroll either in Company Owned or BYO mode.
However by default to install and launch Scalefusion MDM agent on the device, the user or IT Admin must have access to a local Admin user account on the device. This however may not be possible as the devices may already be on the field and the users don't have access to admin account.
In such cases, you can follow the document below to generate a Scalefusion MDM agent installer that can be installed even when the user is a standard user on the device. You can then distribute the custom installer using Scalefusion Content Management or by hosting it in your internal servers. Once the end users install the agent, they can then easily enroll their devices.
1. If your users have admin access or enrollment via an admin user account is possible then you can use our Browser based enrollment methods (recommended for Windows 10 Pro) as well.
2. This approach works for Windows 10 Pro & above and Windows Home (10 & 11) devices only.
Prerequisites
- Scalefusion Dashboard access and a valid subscription
- Windows 10 Pro and above and Windows Home (10 & 11) machine to generate the custom Scalefusion agent.
- On Windows Home (10 & 11) devices, please make sure that the Scalefusion MDM Agent version is 10.0.14.
- A target Windows machine that has to be enrolled.
Step 1: Generating the Custom Scalefusion MDM Agent
The first step is to generate a custom agent using Scalefusion Deployer app. This needs to be done on your source machine or IT teams machine and done once. Follow the steps below to generate the custom MDM agent.
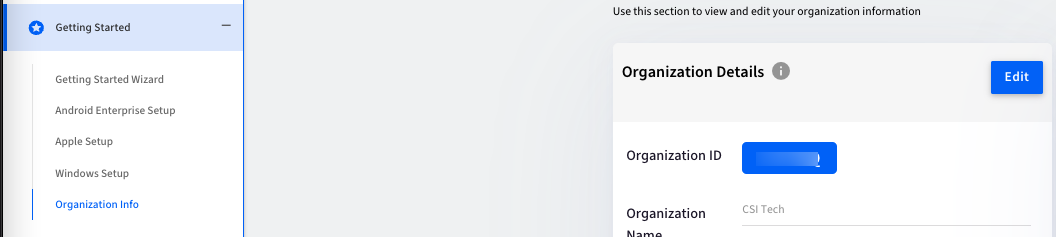
- Download the Scalefusion Windows Agent to your PC. You can download from https://app.scalefusion.com/winmdm/ORG-ID where org-id is the identifier that you see in Getting Started > Organization Info
- To Download the Scalefusion Windows MDM agent click on Download Scalefusion Agent. Please remember the location where the MSI file got downloaded.
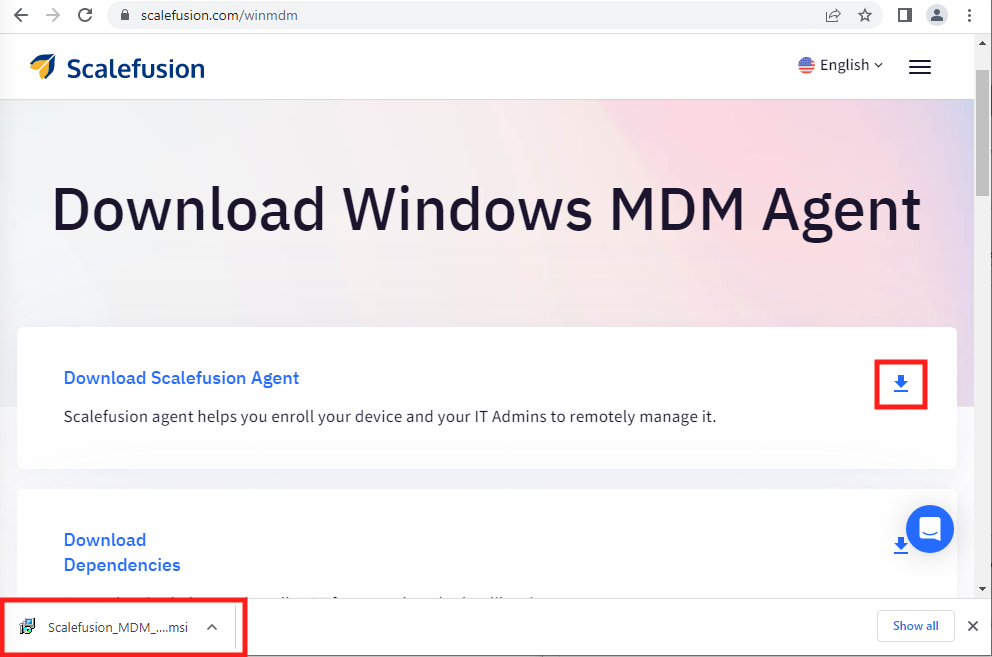
- On the same web page, download the Scalefusion Deployer app by clicking on Scalefusion Deployer. This will download the ScalefusionWindowsDeployer.zip file to your machine.

- To Download the Scalefusion Windows MDM agent click on Download Scalefusion Agent. Please remember the location where the MSI file got downloaded.
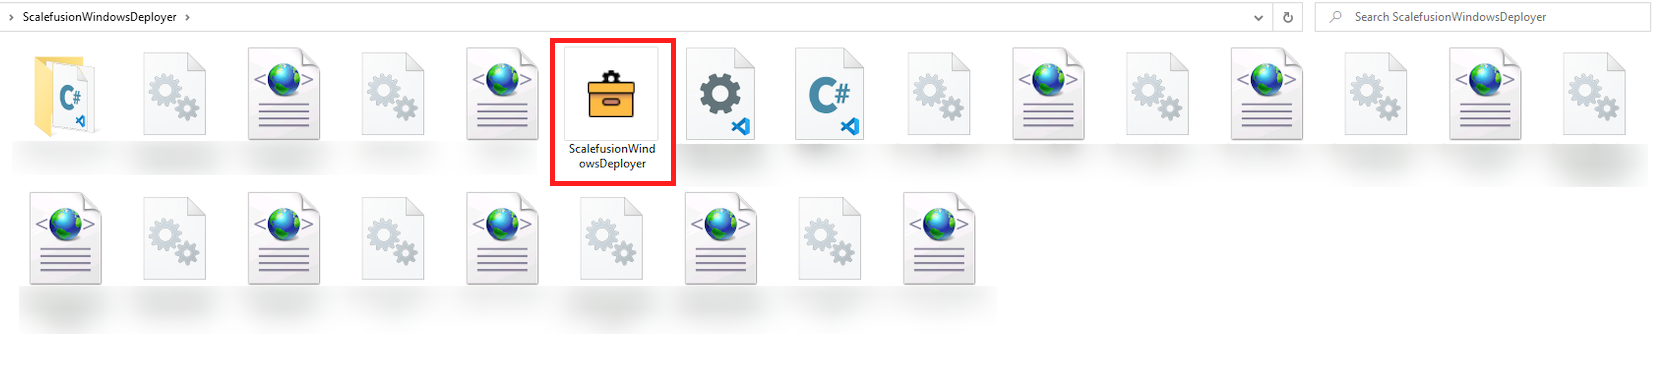
- Unzip ScalefusionWindowsDeployer to a folder on your PC so that you can see the contents of the zip file. Click on Scalefusion Windows Deployer
- Scalefusion Deployer requires you to log in before you can start using it. At the login screen enter the following details and click Login,
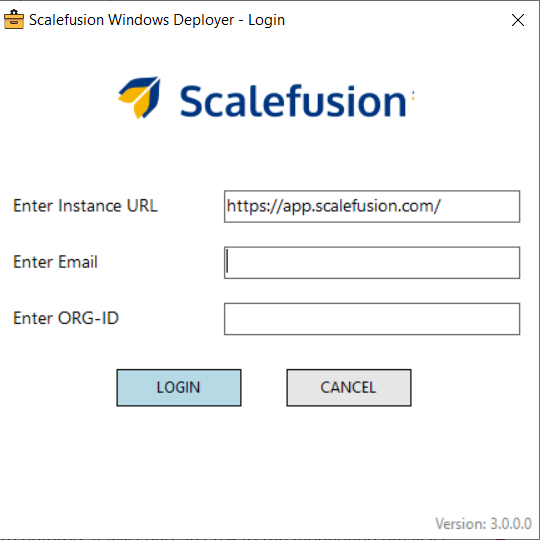
- Instance URL: https://app.scalefusion.comNote:If you are using Scalefusion's India Instance, Server URL will be https://in.scalefusion.com
- Email: The email that you use to sign in to Scalefusion Dashboard.
- Org-Id: The organization Id. This can be taken from Getting Started > Organization Info on Scalefusion Dashboard.
- Instance URL: https://app.scalefusion.com
- After entering all the details and clicking Login, you will receive an OTP (One Time Password) on the email id you mentioned above.
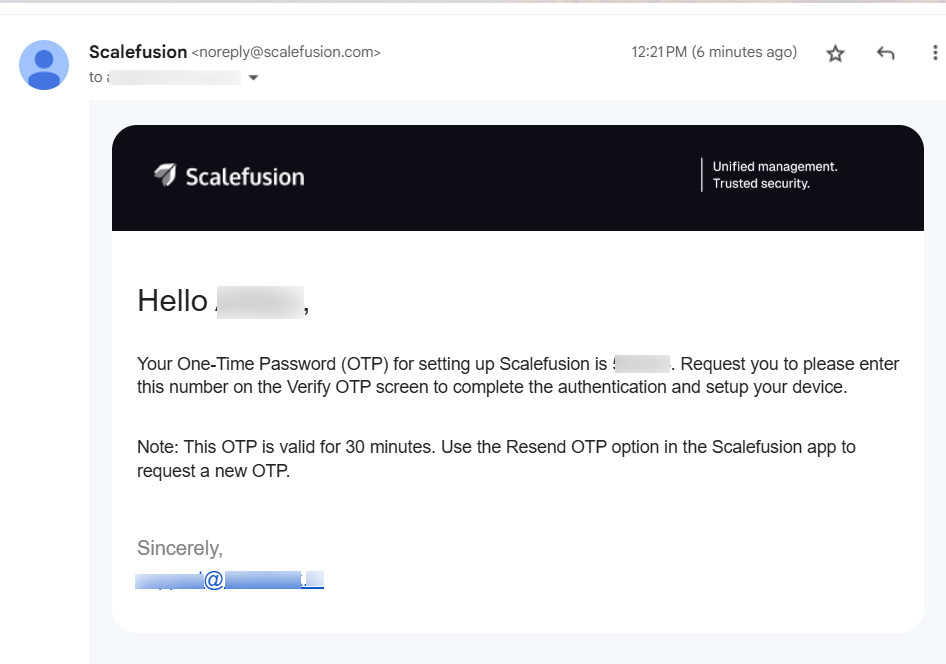
- Enter the OTP on the following screen and click on Confirm to complete the authentication.

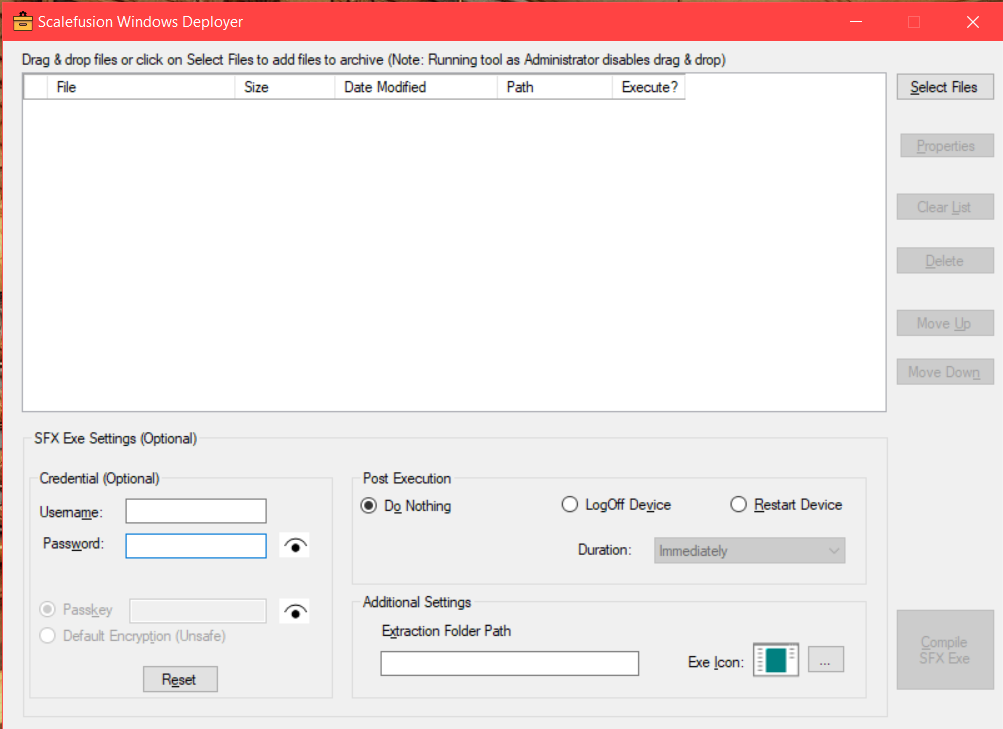
- If your credentials were correct then you would see the Deployer wizard window
- Follow the steps below to generate the custom installer,
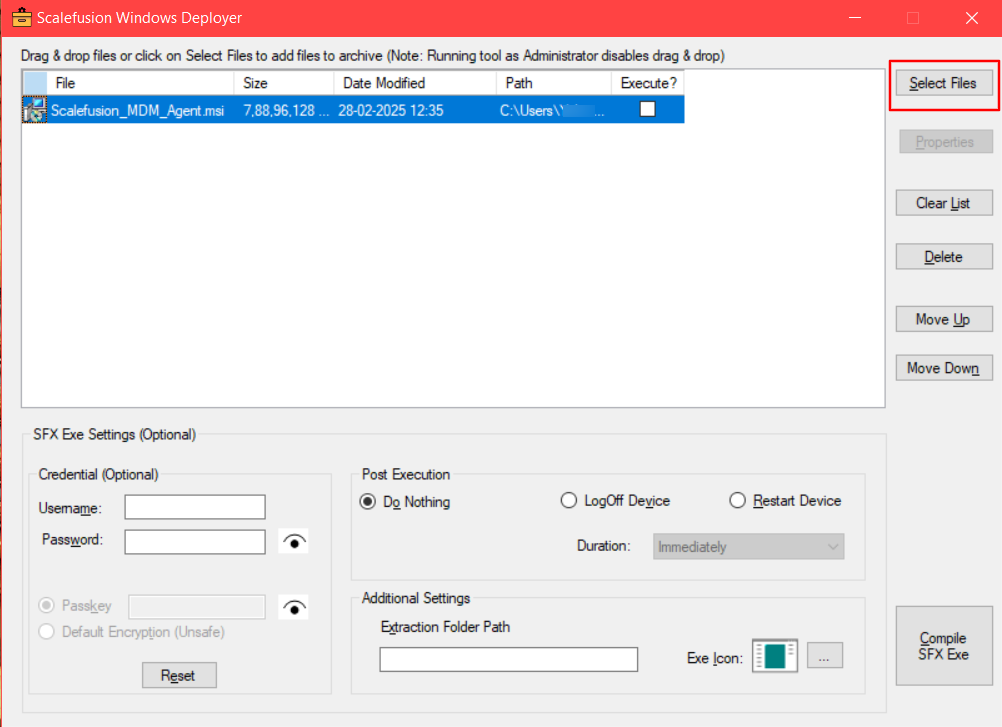
- Click on Select Files and select the Scalefusion_MDM_Agent.MSI downloaded in Step 1.a. to upload it to the deployer.
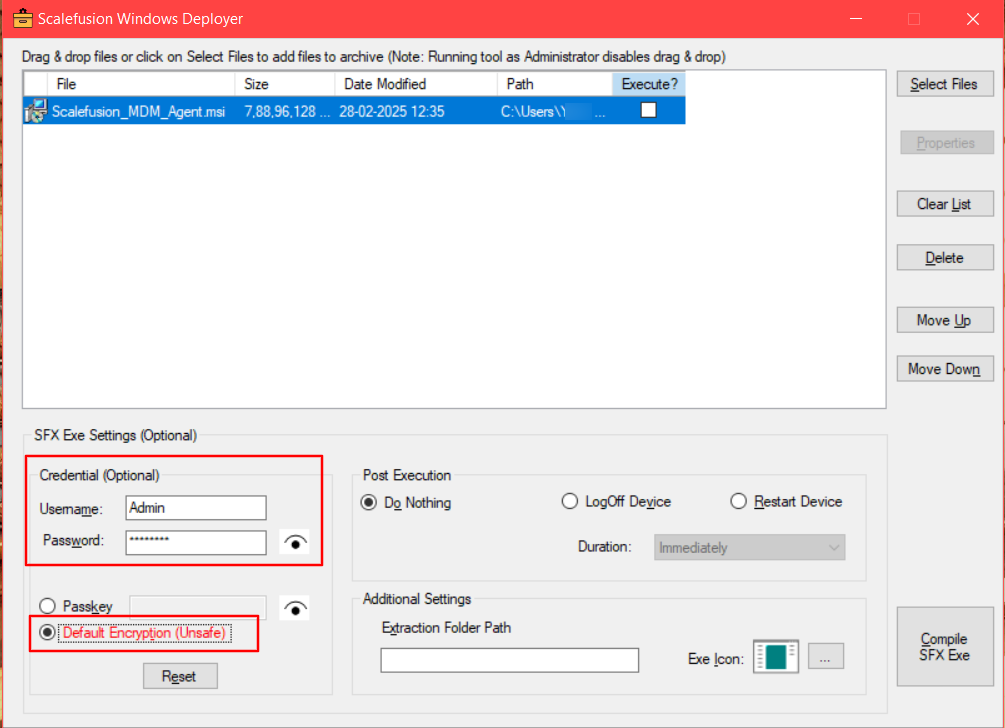
- Enter the admin credentials of target device that is, enter an admin credentials of a user that has admin privileges and is present/created on the target device that you want to enroll.Note:These are the admin credentials of the device that you want to manage, not the PC where you are generating the custom agent.
- Select the Default Encryption option.
- Next, check the Execute checkbox in front of the Agent MSI file and then click on Properties.
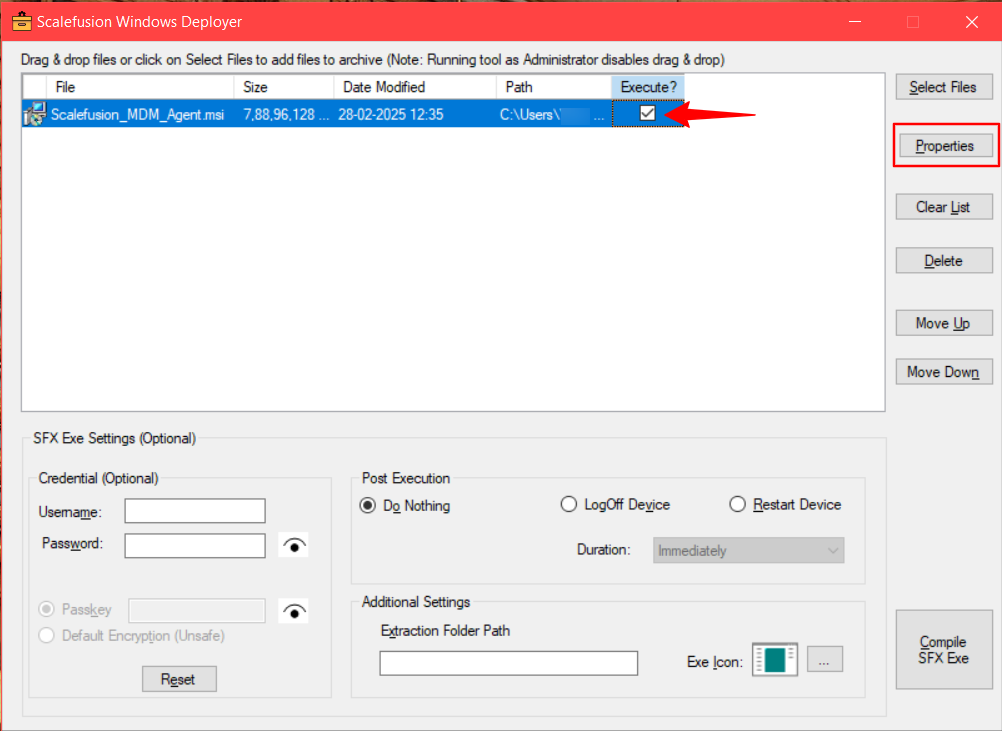
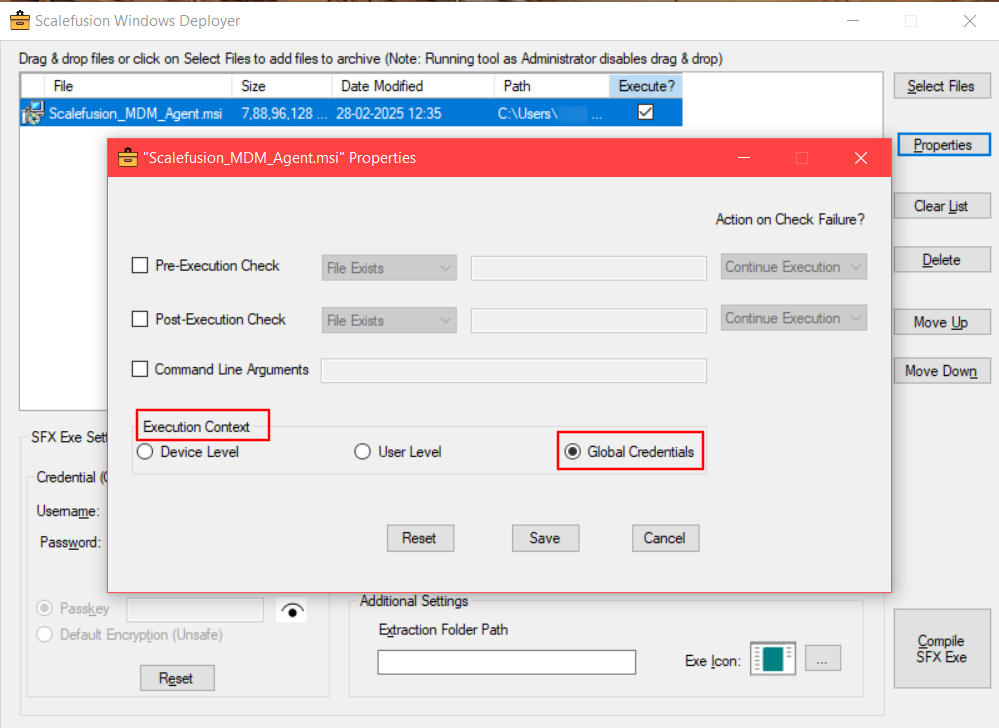
- This will launch the Properties pop-up dialog box.
- In the Execution Context, select Global Credentials.
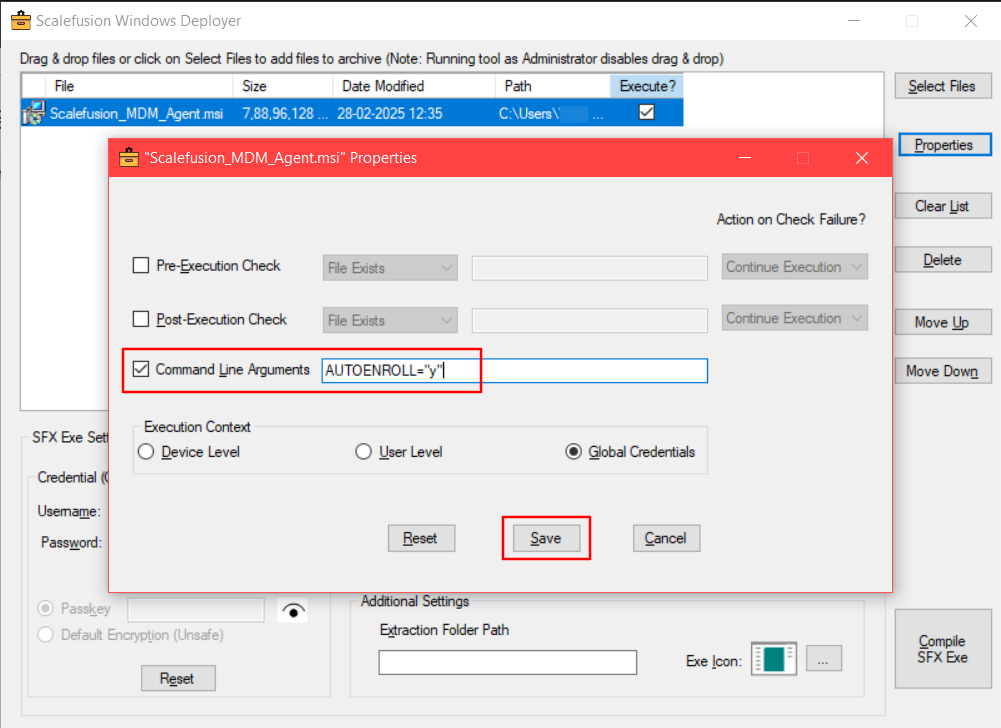
- If you want to auto-enroll the devices without manually installing the MDM agent and entering details, enter the following arguments as it is, in the Command Line Arguments field:
- For Serial no. based enrollment:
AUTOENROLL="y"
- For URL and code-based enrollment:
ENROLLMENT_URL="https://app.scalefusion.com/enroll" ENROLLMENT_CODE="ExxxxR" /qn
Note: The enrollment code is sample value. It should be entered as per Enrollment ConfigurationsNote: If you are using Scalefusion's India Instance, please use the following:
ENROLLMENT_URL="https://in.scalefusion.com/enroll"
ENROLLMENT_CODE="ExxxxR" /qn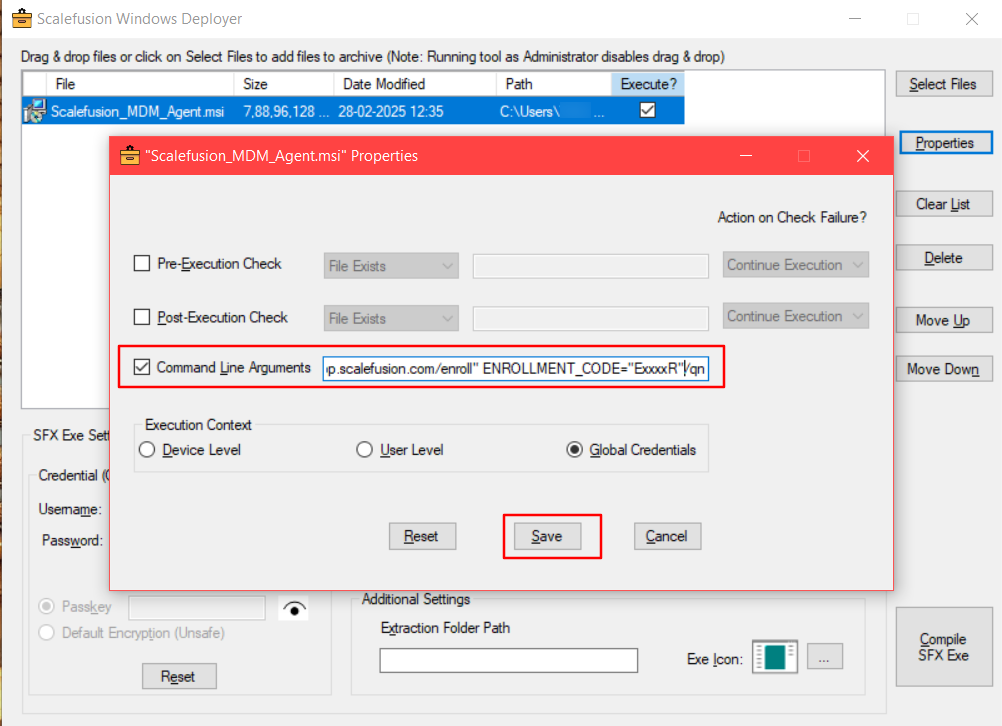
- For Serial no. based enrollment:
- You can also provide an icon for your custom installer, by clicking on the Exe icon option on the bottom left.
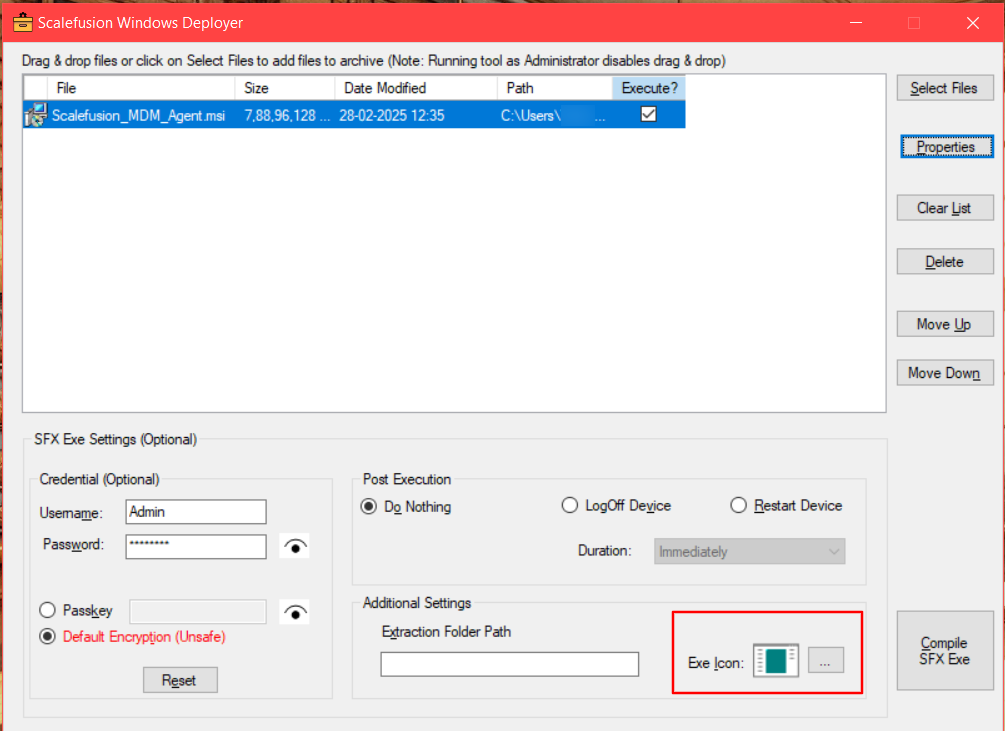
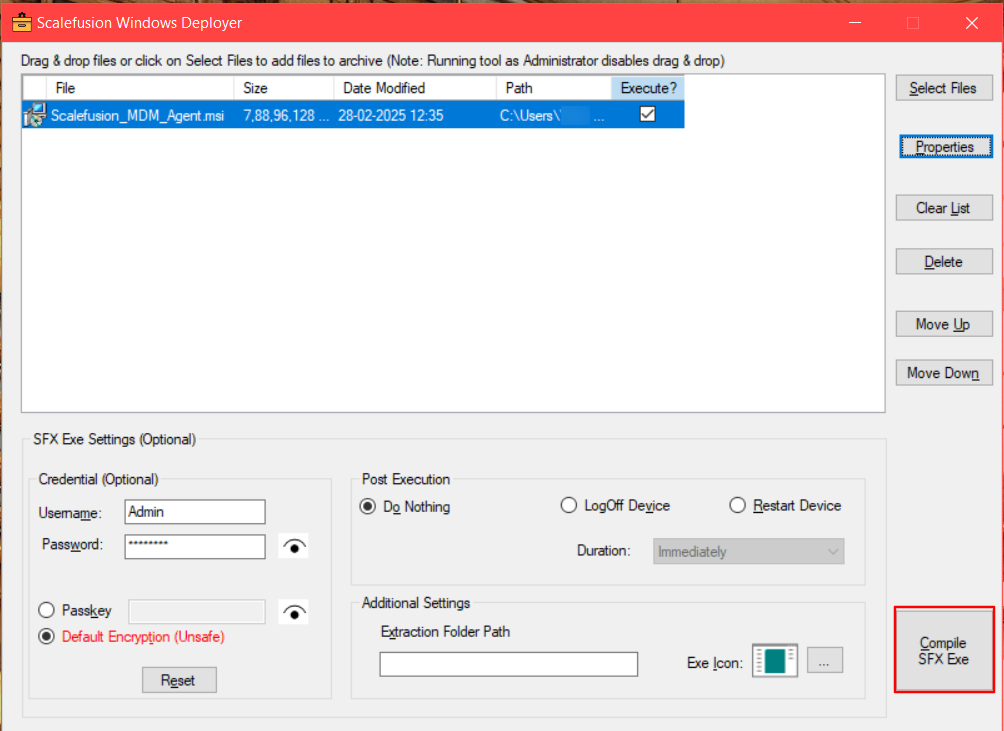
- Once you have filled in the details, click on Compile SFX Exe
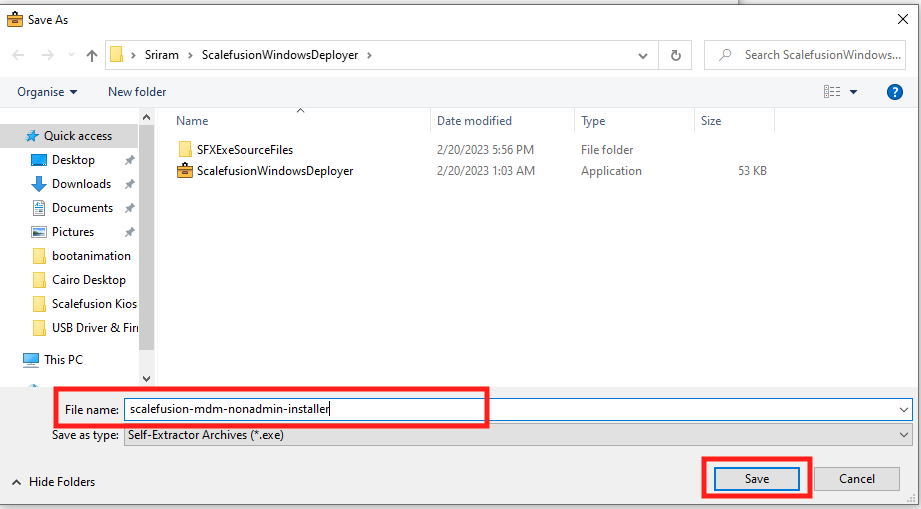
- Select a path where you want to save it, give a name for the custom MDM agent executable file, and click Save. The screenshot below saves it to the same path from where the Scalefusion Deployer was extracted.
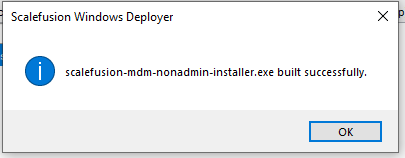
- Once the process succeeds, you will see a dialog indicating that the file has been generated. Click OK
- Click on Select Files and select the Scalefusion_MDM_Agent.MSI downloaded in Step 1.a. to upload it to the deployer.
- Confirm that you have the Scalefusion MDM Agent custom installer generated at the location provided in Step 5.e above. This will be used in the next step.
Step 2: Distribute the Custom Scalefusion MDM Agent to Users
The next step is to distribute the custom Scalefusion MDM agent to your users. You can use any of the following methods,
- Copy it to your internal servers and share the URL with your users.
- If you are using any other MDM, then you can deploy the custom installer from your other MDM
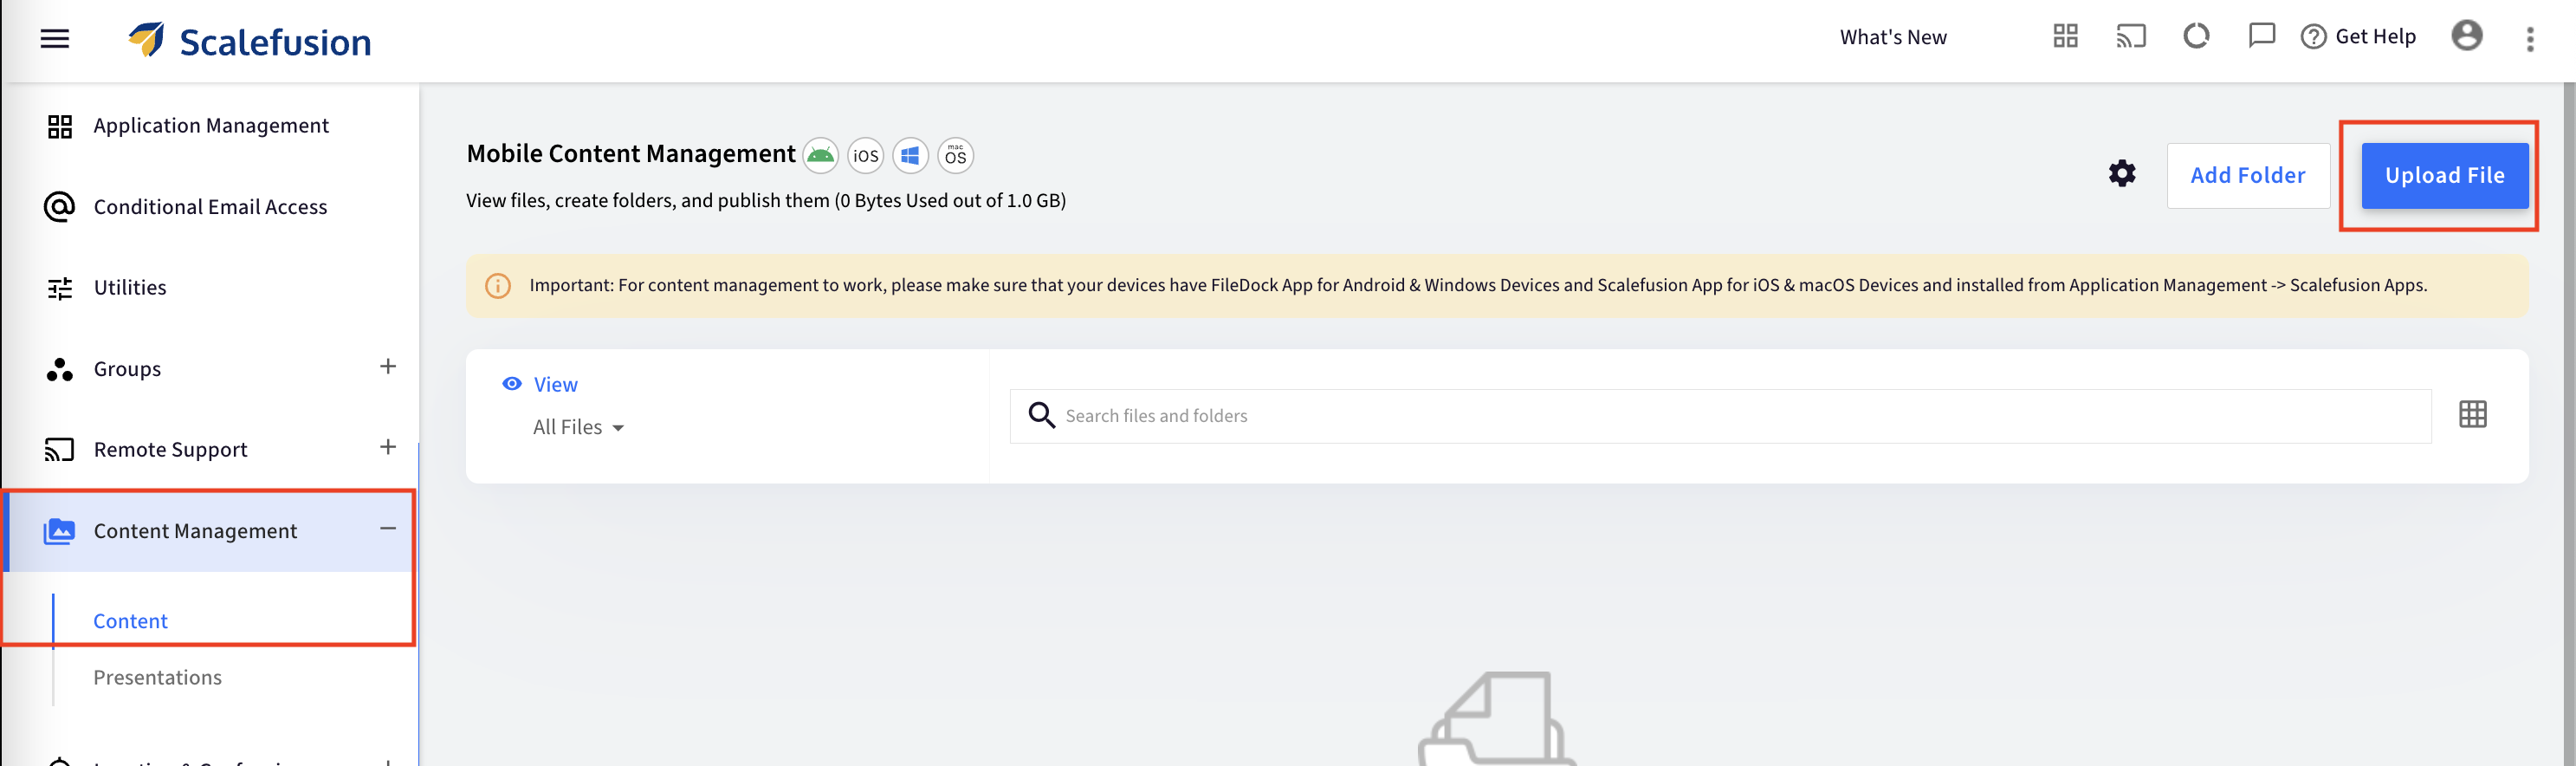
- Use Scalefusion's Content Management to generate a URL/Link for your custom installer.
The steps below describe how you can use Scalefusion's content management to generate a URL/Link for the custom installer.
- Navigate to Content Management > Content and click Upload File to upload the custom installer generated in Step 1.5.eabove.
- Wait for the file to be uploaded and to appear in the list of files. Once the file appears click on the file to view the file details window.
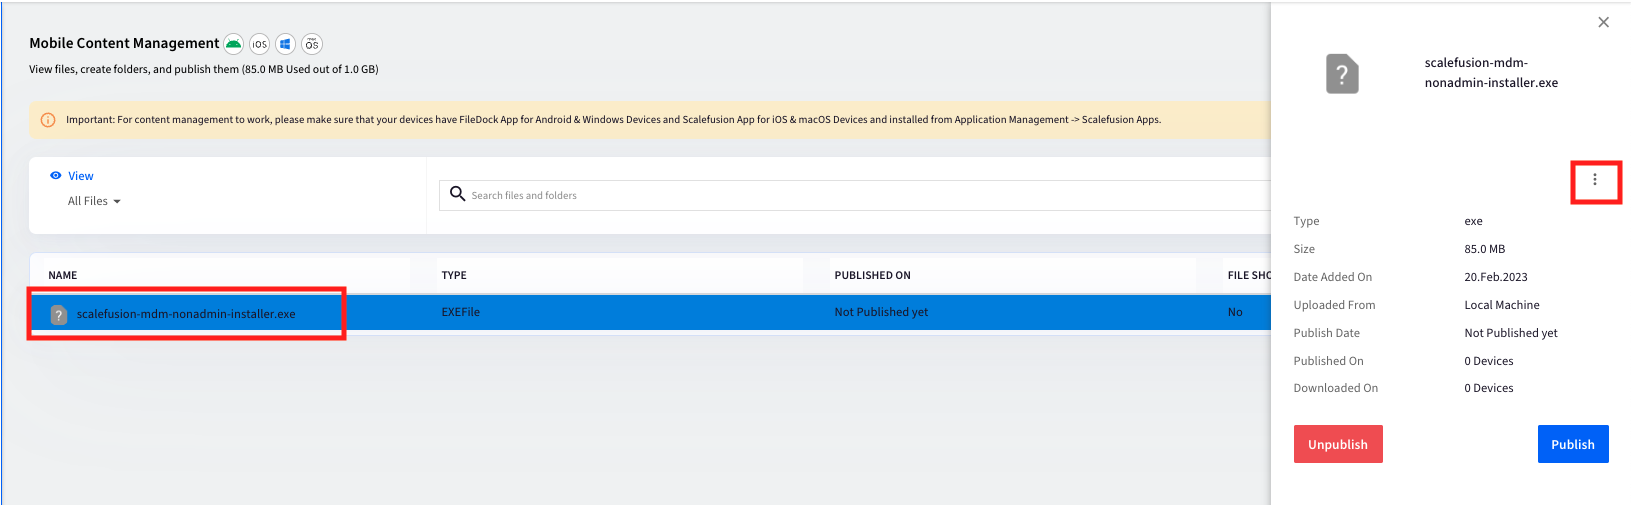
- Click on the 3 dots and from the menu select Copy Download Link

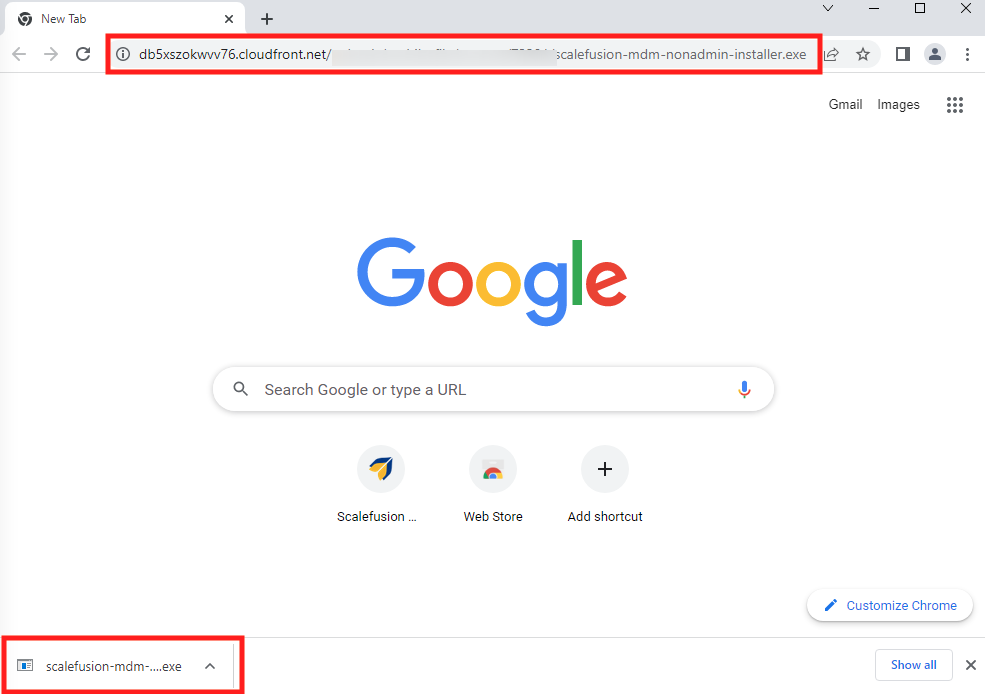
- Now you can open any text editor on your Mac/PC and paste the copied URL to your local machine. The URL would look like below,
https://db5xszokwvv76.cloudfront.net/uploads/mobile_file/content/xxxxxx/scalefusion-mdm-nonadmin-installer.exe
- Pass the above URL to the end users via Email along with the enrollment instructions.In the above URL xxxxxx is dummy and represents the six-digit enrollment code
Step 3: End User experience of enrolling the target device
The final step is to enroll the device. Before you enroll the device, please ensure that,
- The URL generated in Step 2 above has been passed to the user
- You can also install this custom installer via your other MDM or GPO policy
- You have created the required Enrollment Configurations for Company Owned devices or BYO Devices
- If you intend to use Serial# based enrollment then upload the Serial# to Enrollment Configurations > IMEI/Serial# section
- If you intent to enroll Compnay Owned devices then pass the Enrollment Code to users
- If you want to enroll BYO Devices, then import the users and add them to respective User Groups with a Windows profile attached.
Follow the steps below to enroll the device,
- Login to the standard/non-admin user account on the target device and open a browser like Google Chrome or Microsoft Edge. Copy/Paste the URL generated in Step 2 and download the custom Scalefusion agent
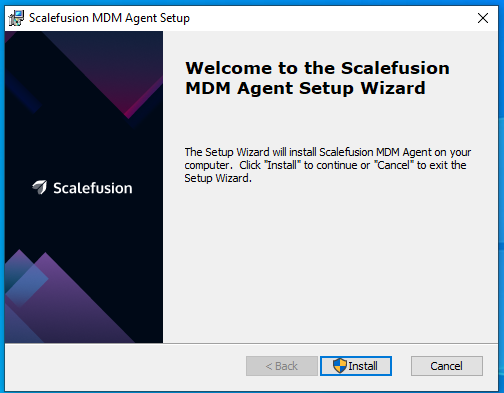
- Click on the downloaded agent MSI file, in this case scalefusion-mdm-nonadmin-installer.exe to start the installation. The installer wizard will open in about 30 seconds time, click Install
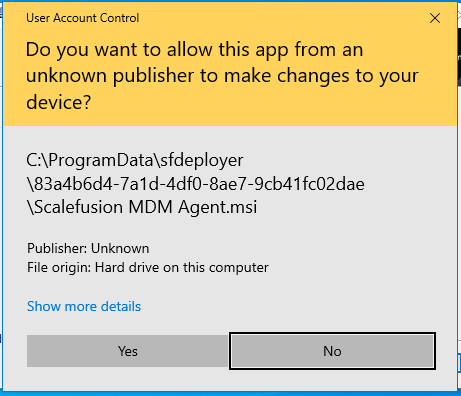
 If the admin account name and password given in Step 2 while generating the custom installer is not present on the device then the installation will not begin.
 - You or the end users may see a UAC prompt asking to confirm the installation, click Yes
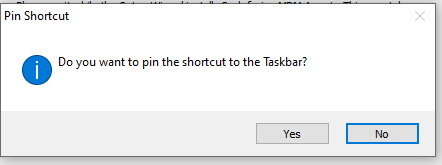
- If prompted to a Pin a shortcut in task bar, choose Yes
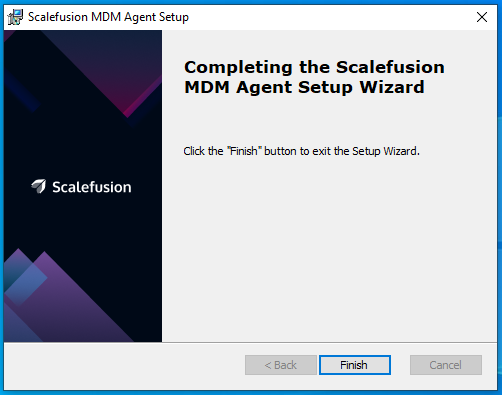
5. Please wait for the installation to complete and once complete you will see the screen below. Click Finish
6. If the installation is successful, a Scalefusion desktop icon will be placed. Click on it to launch the Scalefusion MDM agent and begin enrollment,
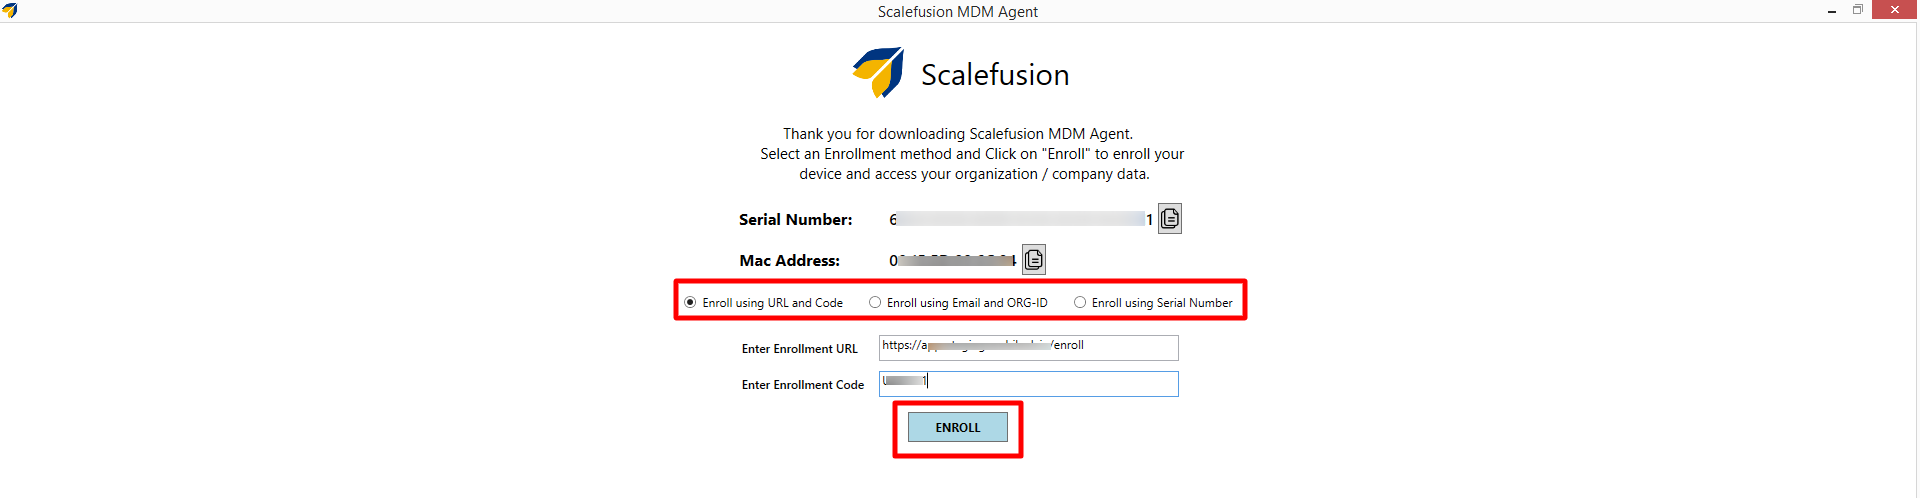
7. Select the enrollment method and enter details accordingly. There are three ways to enroll via the MDM Agent,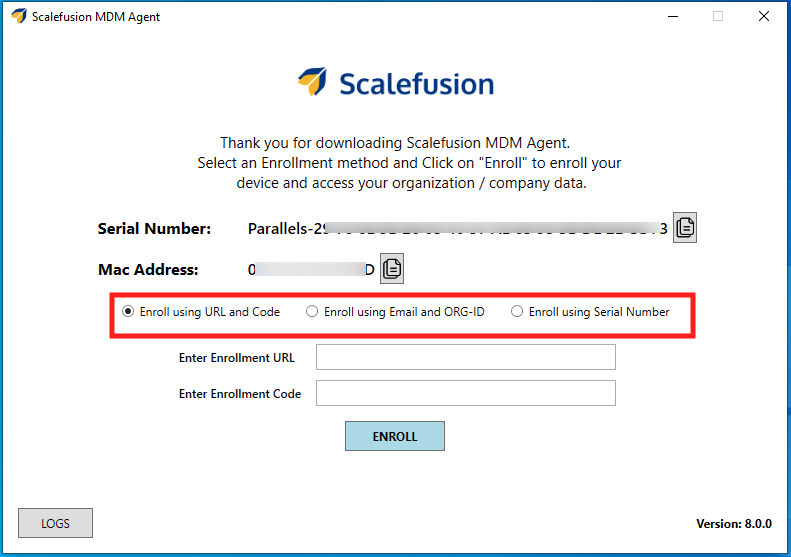
- Enroll using URL and Code: Enter the enrollment URL and code as given in invite email. It is also available in Enrollment Configurations.
- Enroll using Email and ORG-ID: Enter your email id and Org-ID (available in Organization Info on Dashboard).
- Enroll using Serial Number: If you choose this option, your device's serial number is automatically picked up. The device serial number should be existing in the CSV which is uploaded in IMEI serial no. enrollment section.
- Select the enrollment method and click Enroll. In the screenshot below we have used Enroll using URL and Code method.
Note: If you have enabled the flags for Device Configuration while creating Enrollment Configurations, the following screen will be displayed to enter Device Name and Group Enrollment Code: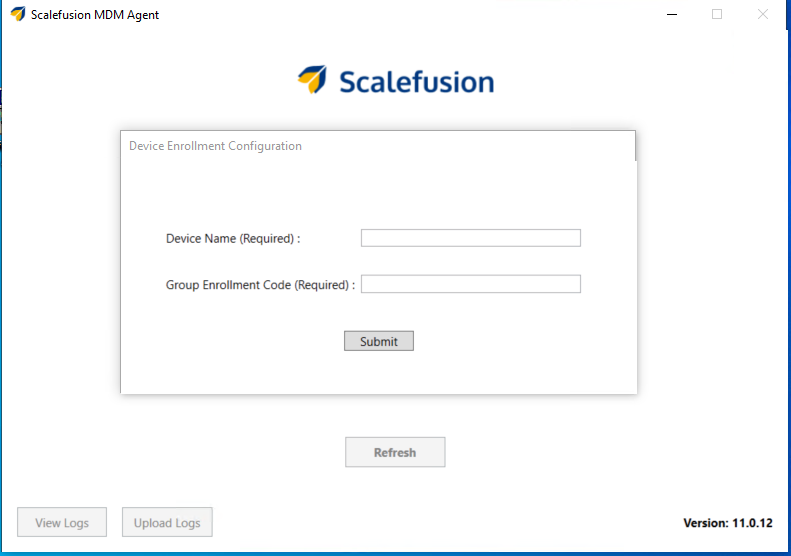
8. Once the device has been enrolled, the UI will be updated to reflect the enrollment status.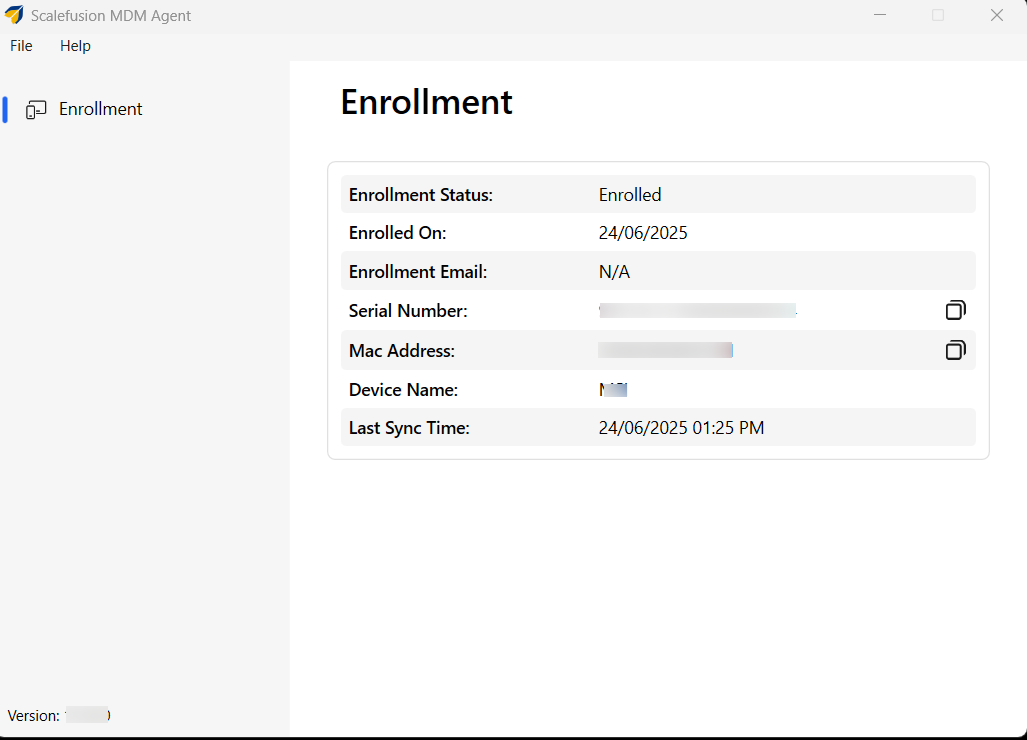
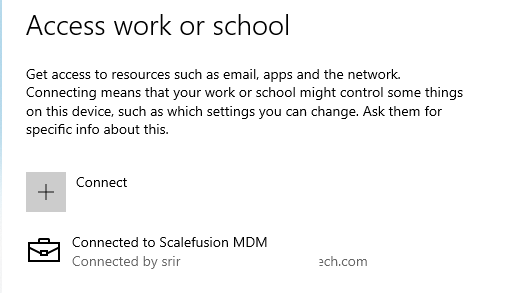
9. Auto-Enroll to Modern Management: If the auto-enroll to modern management was enabled, then the device will also complete the modern management enrollment, the status of which can be checked inthe Access Work or School app.
10. The device would now start appearing in Scalefusion Dashboard as well,
- Device Listing

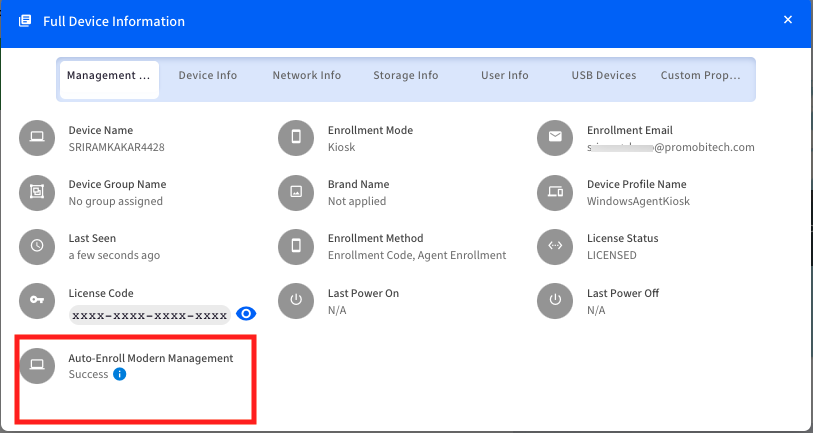
- Auto-Enroll to Modern Management status: If you had enabled the auto-enrollment to modern management in the device profile, then the device will automatically complete the modern management enrollment as well. You can check the status in Device Details > Full Device Information > Auto-Enroll Modern Managementcard,
Here is the path of the Scalefusion folder that will need to be allowed in the antivirus program: C:\Program Files (x86)\Scalefusion
Frequently Asked Questions
Question: We don't have the same admin account and password on our target devices. How do we generate the non-admin/standard user installed?
Answer: This will be practically and logistically challenging. You can choose to generate multiple installers based on the various admin accounts/passwords on multiple device and ensure that each user/device gets the correct installer.
Question: We have generated the non-admin/standard user installer but nothing happens when we click on it. What can be the issue?
Answer: Ensure that you have followed the steps above correctly and also the admin account/password that you gave while generating the custom agent are present on the device. If you still face any challenges then,
- Navigate to C:\ProgramData\sfdeployer folder by logging in to the user where you attempted to install the agent
- In each of the folders that you see here, there would be a file called sfdeployer.txt

- Please share all sfdeployer.txt files with our support team, support@scalefusion.com