The IT admins have to be given more privileges with which they can make access to Scalefusion Dashboard more secure for users. To achieve this, they can configure certain settings via the Admins and Roles section on Dashboard, like:
- Create and manage Administrators
- Create and manage Custom Roles
- Configure Password Policy and Session Management
- Configure SAML sign-in for various Identity Providers
This document describes all about the Admins and Roles section.
Before You Begin
- Have a Scalefusion dashboard account
- The admin should be in the role of Owner or Co-Account Manager
How to Access
Click on your account profile in the upper right corner. There are two ways to access Admins and Roles:
- View and Edit Profile
- Admins and Roles
Sections under Admins and Roles
Following are the main sections on this page:
- Administrators
- Roles & Permissions
- Security
- Sign In Settings

Administrators
You can add new Administrators and manage existing ones. To add a new admin:
- Click on the Add New Admin button in the upper right corner.

- Add Admin window will appear. Enter the details and select the role (to be assigned to this administrator) from the drop-down list.
Account Expire On: You can set a date on which the account will expire, and the admin will not be able to log in and access the dashboard post that date.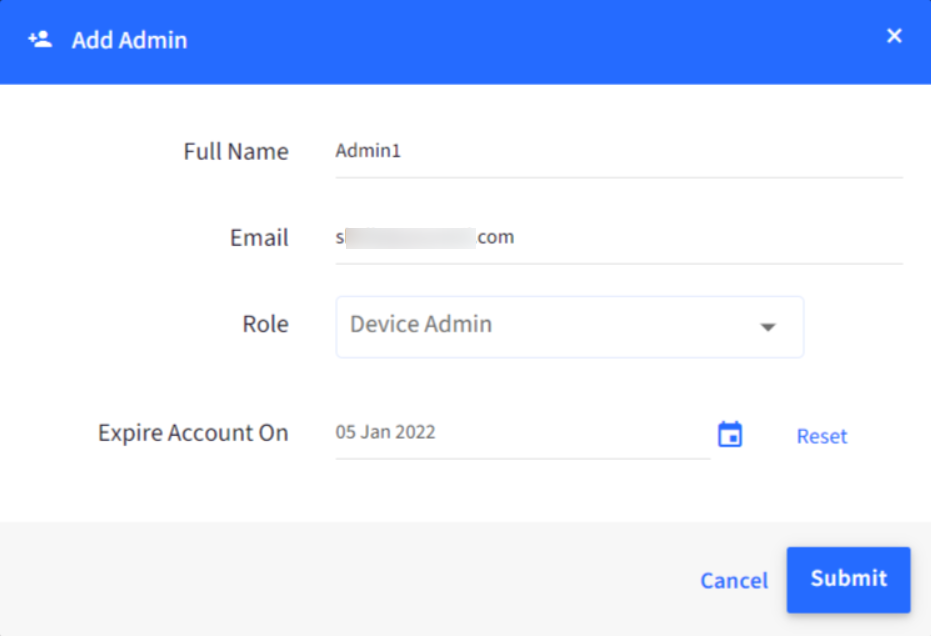
- Click Submit
- You will receive an activation email on the email id entered above, to activate. Click on the Activate Your Account And Log in button in your email. Your newly created admin will appear in the Account Profile.
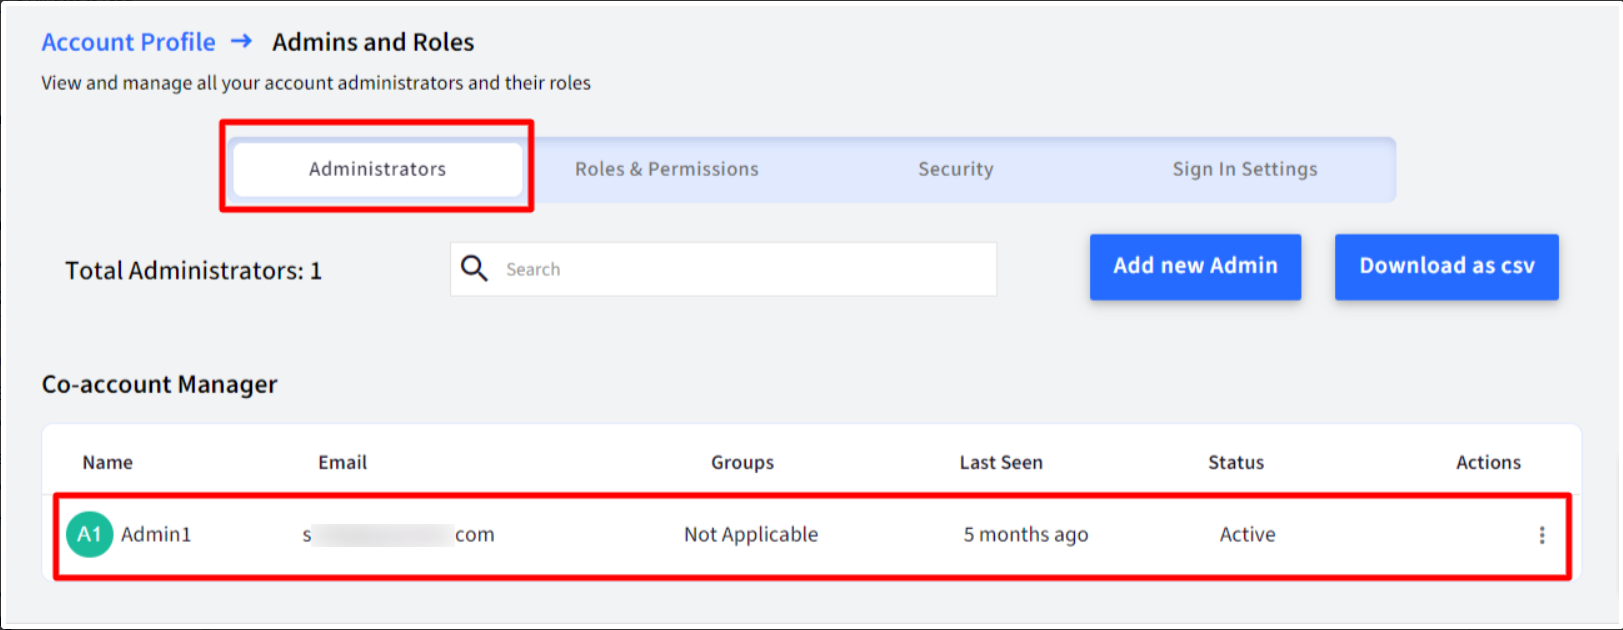
Additional features
- View the total number of administrators displayed on top
- Search for administrator(s) by email id or name
- Download the list in csv format
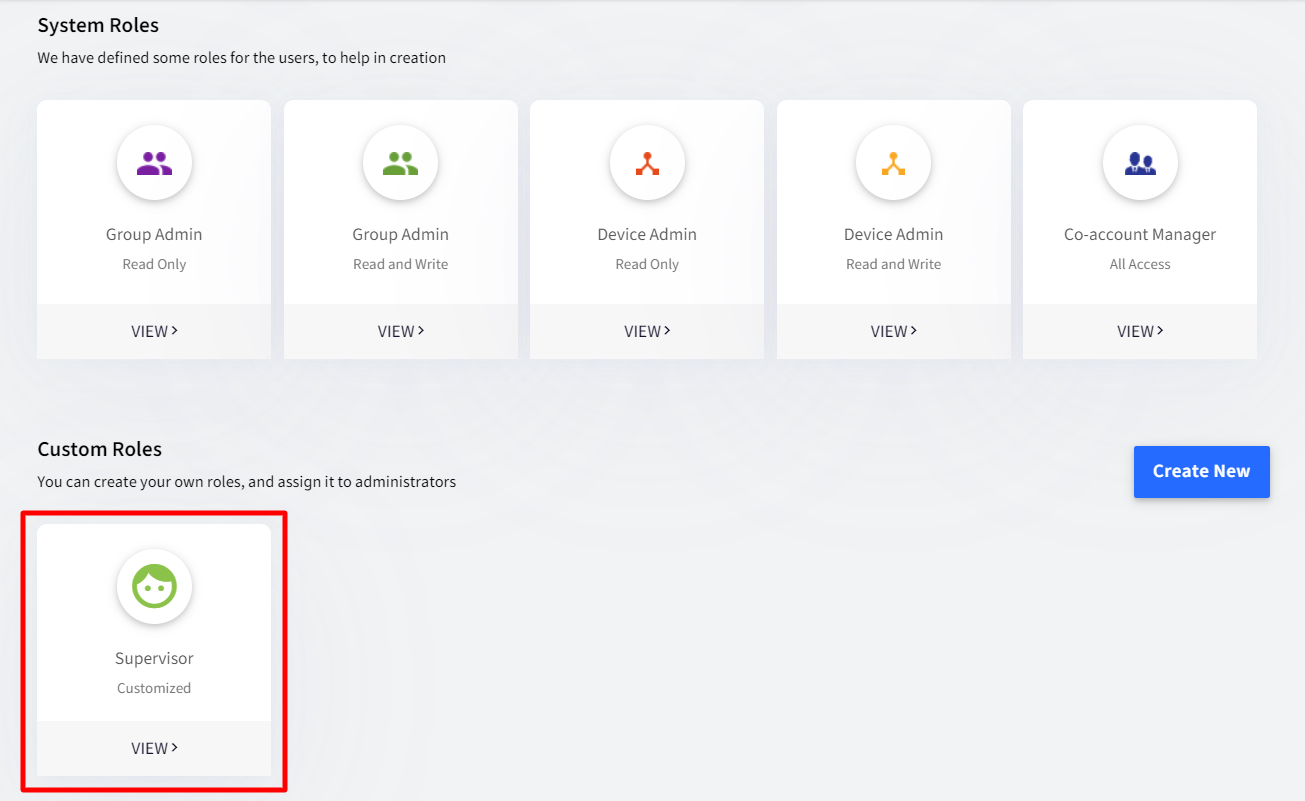
Roles & Permissions
There are two categories of roles:
- System Roles:Scalefusion has some pre-defined roles for users that they can assign while creating administrator(s). They are as follows:
Role Name Description Permissions Group Admin Has access to the devices and other features only for the device groups he/she is assigned - Read Only*
- Read and Write**
Device Admin Has access to all the devices present in the account - Read Only
- Read and Write
Co-Account Manager Has access to all features similar to the owner All Access Approver/Checker Can approve or reject the actions initiated by other admins. Click on View below each system role, to view the permissions enabled for that role. If you want to customize, click on the button Make a copy and make changes to create a role that suits you.
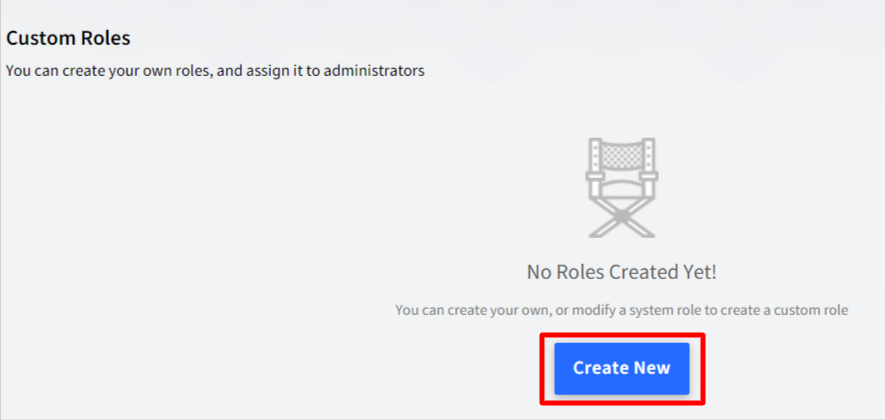
**Read and Write: The users are allowed to read and also make changes to them. - Custom Roles: You can also create your own custom role, enable/disable permissions as per requirement and assign this role to administrators. To create a custom role:
- Under the Admin and Roles page, click on the Roles & Permissions tab.
- Click on Create New under Custom Roles.
- A new page will open. Fill in the following details:
Role Name: Enter a name for this role
Creating Role: Choose one, whether you want to create a role for All Devices or for Device Groups
Permissions: There are three categories to set permissions:- Visibility: Toggle this button to on/off based on whether a particular feature should be visible on the dashboard.
- All Access: This provides both read and write permissions to the admin.
- Read Only: This provides read-only permission to the admin.
- Once all the permissions are set, click on the Save Role button.
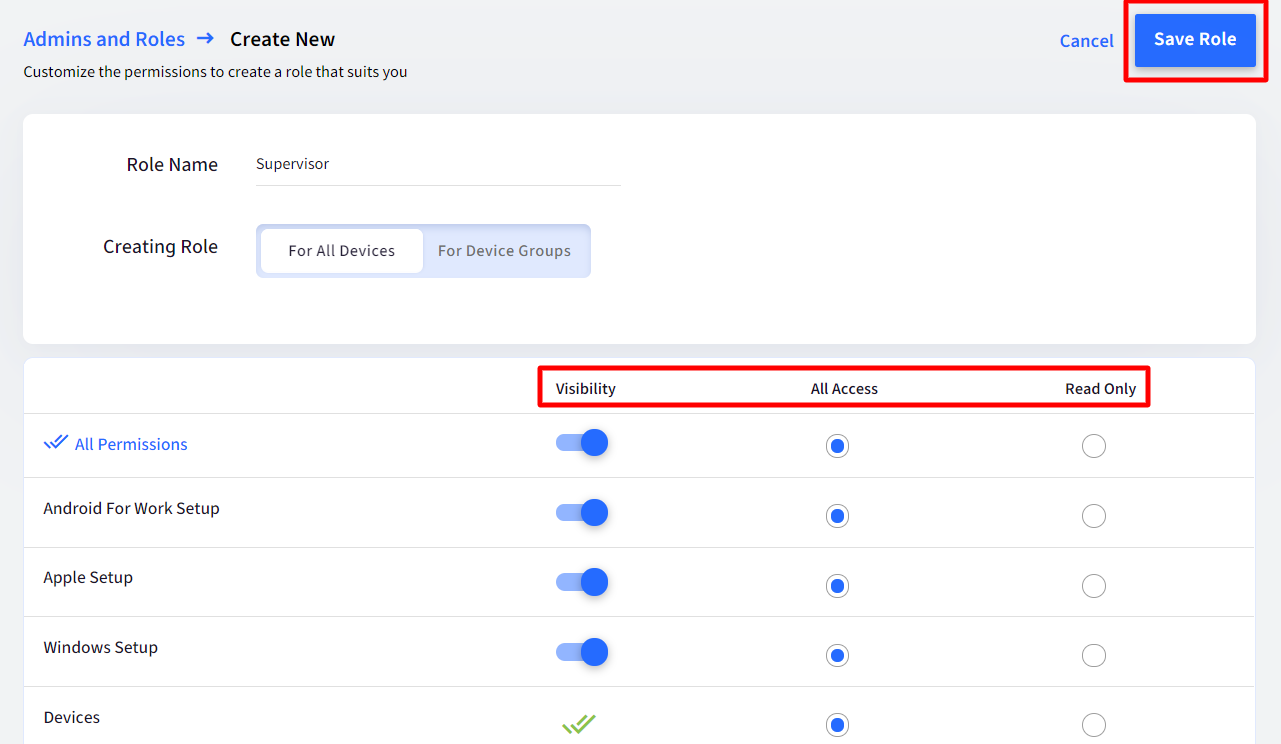
- The custom role created will appear on the Roles & Permissions page.
Assign a custom role to the admin
If you want to assign a custom role to an admin:
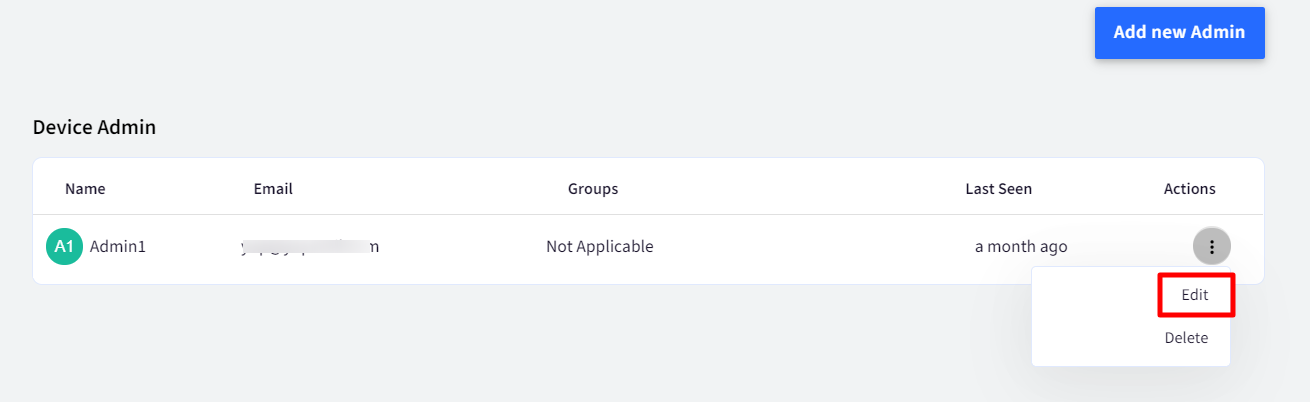
- Visit the Administrators page and click on the three dots in front of an existing admin. Select Edit.
- This will open the Edit Admin User window. Here, in the Role drop-down, select a role and Submit
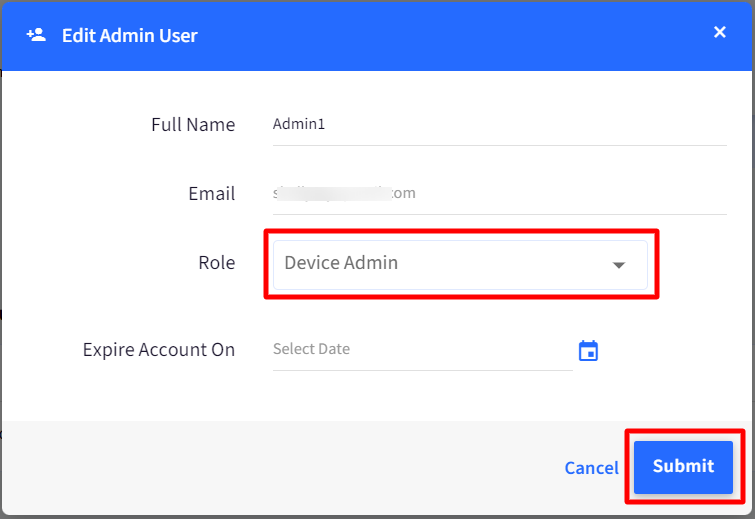
- The custom role, with all the permissions defined in it, will be assigned to this admin.
Security
In this section, you can do the following:
Dashboard Access Rules
Organizations can enhance security by restricting access to the Scalefusion Dashboard to specific IP address ranges. This feature allows administrators to define trusted networks from which Dashboard access is permitted.
How to Configure
- Toggle on the setting Allow Access only from the following IP Ranges
- Define IP address ranges by selecting the following:
- Type: IPv4 or IPv6
- *Enter the IP address or range. Click on Add Range to add more than one IP Range.
- Click Save
*IP Range Specification:
- Administrators can define up to 5 IP address ranges using CIDR notation (e.g., 192.168.1.0/24). For example, to allow access from the public IP range 203.0.113.0 to 203.0.113.255, you would enter "203.0.113.0/24" in the IP range field.
- Only public IP addresses are accepted. Private IP addresses will not be recognized.
Important Considerations:
- Incorrectly configured IP ranges can result in the complete lockout of all Dashboard accounts, including owner, co-account owner, and administrator accounts.
- Exercise extreme caution when configuring these rules to avoid unintended access restrictions.
- In the event of an account lockout due to misconfiguration, contact Scalefusion support at support@scalefusion.com for assistance.

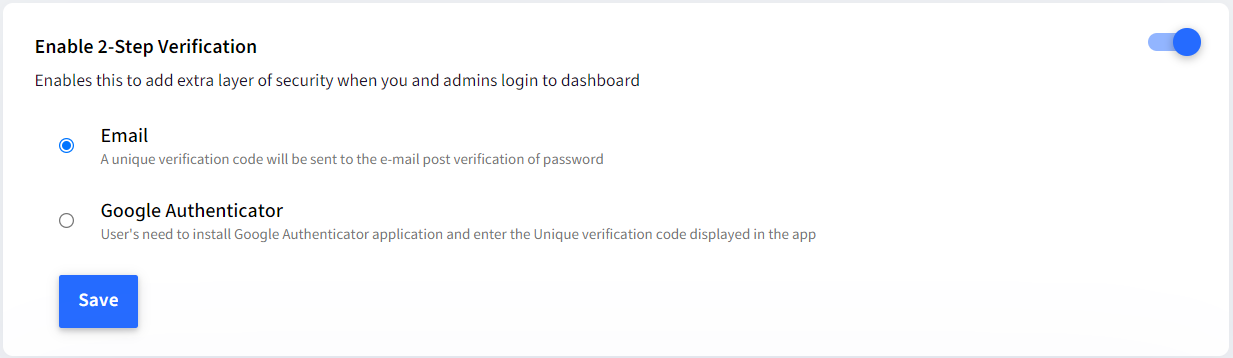
Enable 2-step verification
If enabled, it adds an extra layer of security when you and the admin log in to the dashboard. After password verification, a verification code is sent as a second step which, when entered, authenticates and lets the admins log in to the dashboard. To activate this,
- Toggle on the setting Enable 2-step verification.
- There are two options. Choose any one:
- Email: A unique verification code will be sent to the e-mail post verification of the password.
- Google Authenticator: Users need to install the Google Authenticator application and enter the Unique verification code displayed in the app at the time of login.
- Click Save after selecting one of the above options.
Password Policy and Session Management
Configure password policy for your account as well as for other admin accounts to secure dashboard access.
- To configure, toggle on the Password Policy & Session Management setting. This will activate the settings to be configured

Password Policy can be configured by the Account Owner or CoAccount Owner. However, it applies to any Administrator role who signs in with a Scalefusion account
The policy is not applicable to users who sign in via SAML, GSuite or O365 account
- Following are the settings to configure the Password Policy
Policy Description Minimum Password Length Select from the drop-down what should be the minimum length of the password. By default, it is set to 8. It can be set till 15. Minimum Number of Digits Select the minimum number of numeric digits that should be there in the password. By default, it is None. You can either select 1 or 2 Minimum Number of Alphabets Select the minimum number of characters that should be there in the password. By default, it is None. You can either select 1 or 2 Minimum Number of Lower case Alphabets Select the minimum number of alphabets in lowercase that should be there in the password. By default, it is None. You can either select 1 or 2 Minimum Number of Upper case Alphabets Select the minimum number of alphabets in upper case that should be there in the password. By default, it is None. You can either select 1 or 2 Minimum Number of Symbols Select the minimum number of symbols that should be there in the password. By default, it is None. You can either select 1 or 2 Password Expiry Period Select a time period after which the password expires, and the user is forced to set a new password. The following are the options:
- Never Expires (default)
- In a day
- In a month
- In two months
- Every Quarter
- Every six months
Maximum Password History List Select the number of historical passwords that the user cannot use while setting a new password. The following are the options:
- None (default)
- Current Password
- Last Password
- Last 3 Passwords
- Last 5 Passwords
- Last 10 Passwords
.png)
- Click Save after configuring the policy.
- You will be asked to enter your current login password. Enter the password and click Submit.
- The next time you Sign In to the dashboard, you will be asked to configure a new password with the rules you have set for configuring a new password, provided the existing password does not meet the requirements as per the new policy. The following screen will be displayed to change the password
.png)
Change Password within Dashboard
When the admin/owner/co-account owners want to change their password from within the dashboard from the View and Edit profile, the screen displays rules as per the new policy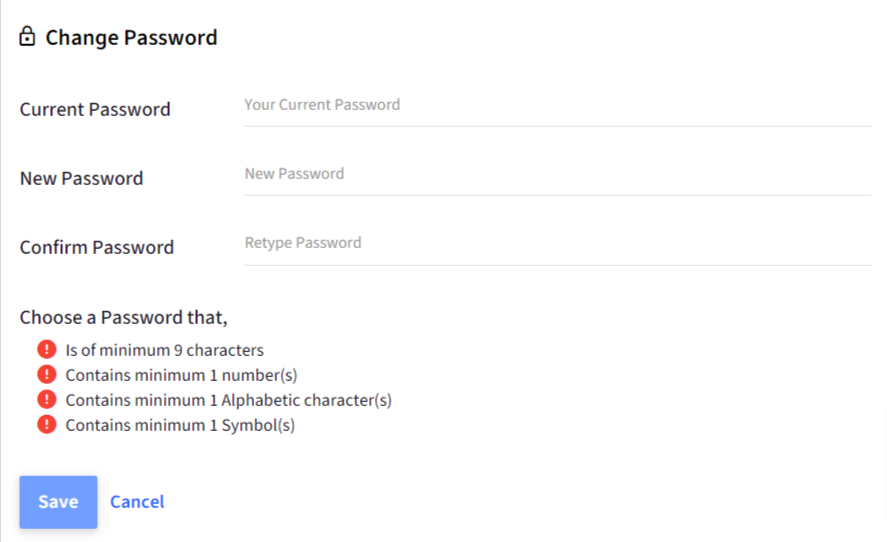
Enable Automatic Session Timeout
Specify the duration after which the user will be automatically logged out from the dashboard. To do so,
Enter duration: This takes values between 1 and 1440 and selects one unit of time out of minutes, hours or days
Enable Multiple Login Sessions
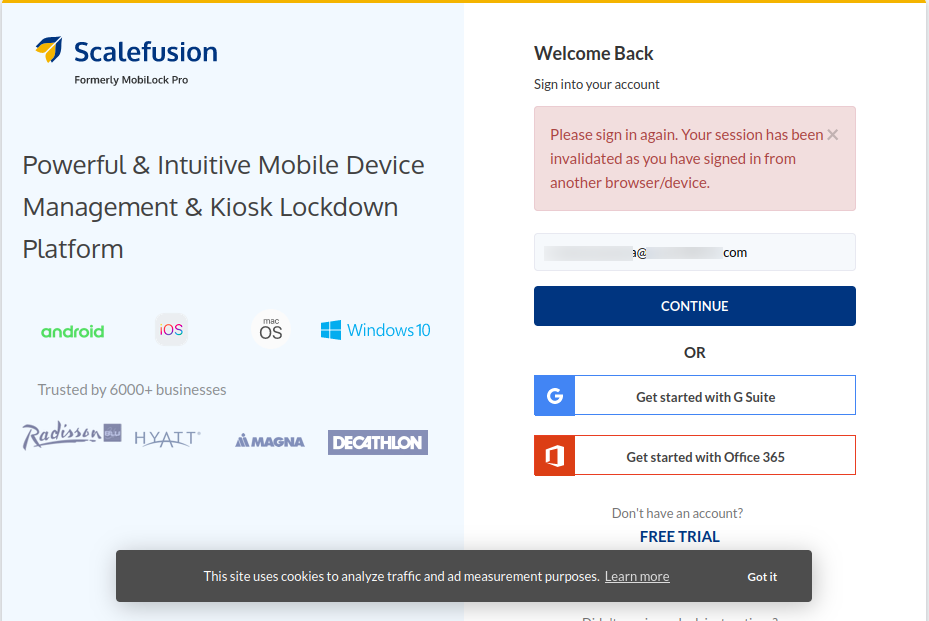
With this setting, the admin can configure if users can sign in to the Dashboard from multiple locations or allow only one session at a given time.
By default, this setting is ON, which means users can sign in from multiple locations. If set to OFF, the user is allowed to sign in only from one device or browser at a time. That is, they will be auto-logged out from their previous sessions when they sign into a new browser.
- If the user does a fresh login from another device/browser, they will be able to log in to the dashboard while on the existing device/browser, the following message will be displayed:
- If you wish to continue using on existing device, click Continue. This will log the user in again and log out from other devices.
Deactivate the Account if the user does not log in for (days)
IT Admins can define a period after which the users' Scalefusion account is marked as de-activated if there is no activity from that account. No activity means the user has not logged in to the account or there is no activity on the Dashboard at all.
Enter the number of days (from 1-365) in front of the setting and click Save. The account gets deactivated after a specified number of days.
If the user tries to log in, the following message will be displayed: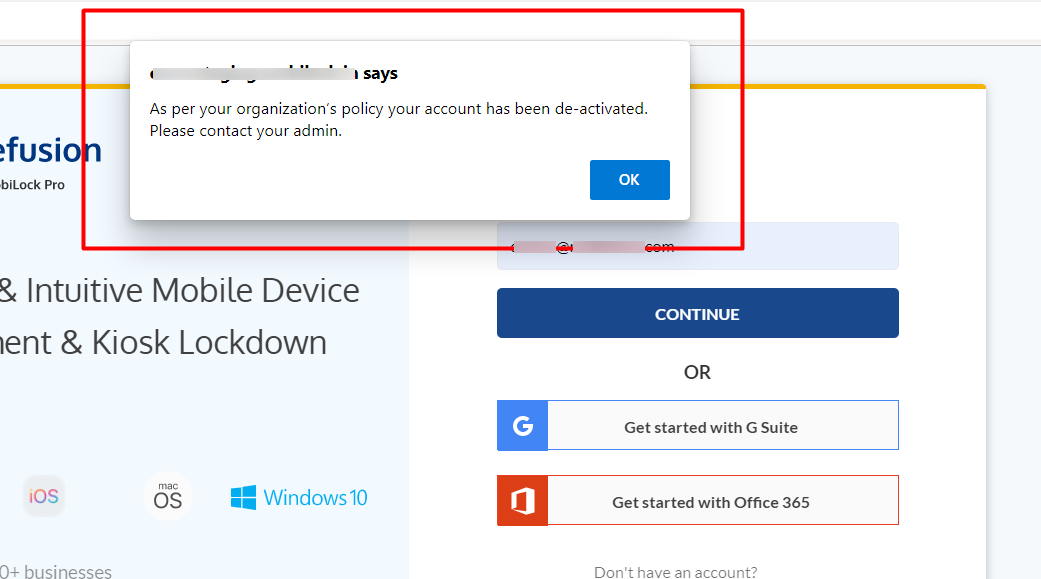
Once an account is deactivated, an email will go to the owner, co-account owner and other admins briefing that the email account is deactivated.
Important Points:
- Except for Co-Account owner and owner, this setting can be configured for any other role
- This setting can also be configured for IdP-based accounts viz SAML, GSuite, O365, Active Directory users
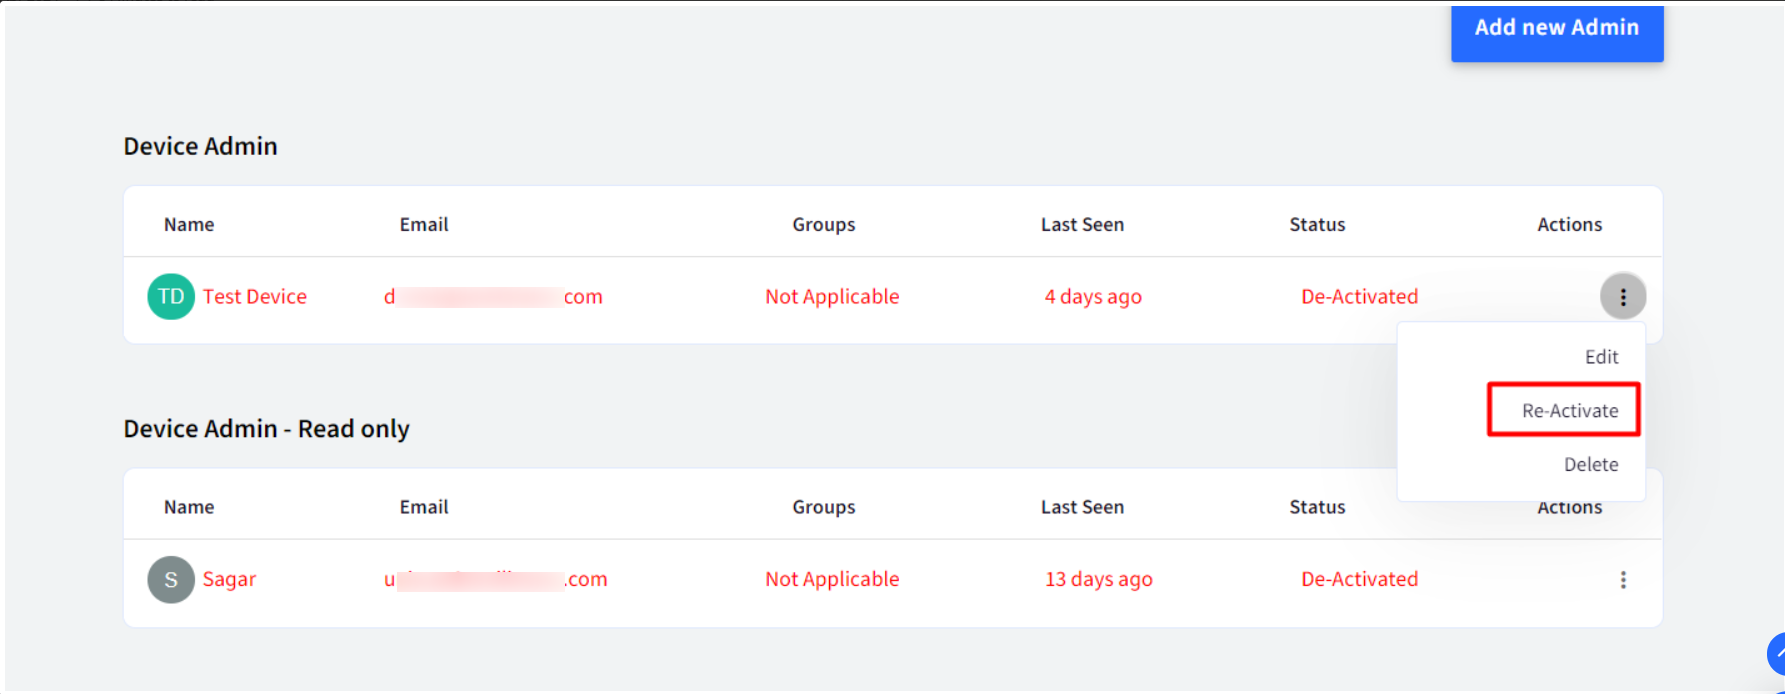
- A de-activated account can also be reactivated. In the Administrators section, click on three dots in front of the account that is deactivated and click Re-Activate. You will get a confirmation box, click Re-activate, and the account will be accessible again.
Account Locking settings on invalid Sign-in attempts
The admins can also configure account locking settings if there are invalid sign-in attempts to the Dashboard.
- The following are the configurable settings:
Setting Description Number of invalid attempts after which the account is locked Select the number of invalid attempts made to log in to Dashboard, after which the user's account will get locked. The options are:
- 3
- 5
- 10
- 15
Duration for which the account should be locked Select the duration (in minutes), and the account will get locked for that much time:
- 30
- 60
- 120
Send Unlock instructions to the user's email The user gets unlock instructions over email as soon as the account gets locked after a specified number of invalid attempts. Following the instructions, they can unlock their account before it gets unlocked after the configured duration. Send Email Alerts on invalid Sign In attempts If set to ON, the users get email alerts if there are invalid sign-in attempts. The alerts can be sent to the following:
- Account Owner
- Co-Account Owner
- Custom email settings: Enter email addresses to whom such email alerts have to be sent.
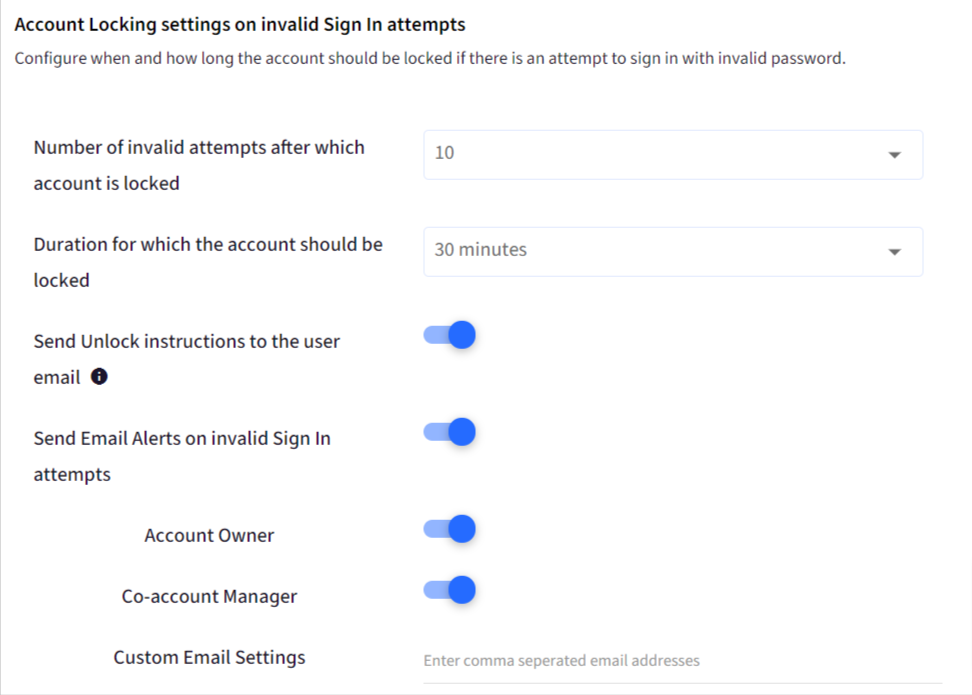
- Click Save after configuring the policy.
- You will be asked to enter your current login password. Enter the password and click Submit.
Sign In Settings
Configure SAML-based Sign In to Scalefusion Dashboard with which you and Admins in your organization with access to Scalefusion will be forced to Sign In using your Authentication provider. To configure SAML, please visit the Integrations help section.