In contrast to mobile phones, personal computers (PCs) are structured as user-based systems, with user accounts used for logging in and logging off from the devices. The IT Admins require the capability to remotely add and manage these accounts on the devices.
Although we have scripts available to regulate various aspects of user account management, the process involved in the creation of a user account may pose a challenge for an average IT administrator. Furthermore, the inconvenience arises from the need to publish a script to a profile or group. To mitigate these issues, Scalefusion now provides efficient utilities at the device level, enabling IT administrators to directly and quickly add users as well as take other actions on them.
This document explains the process of adding and managing users on Scalefusion-managed macOS Devices, at the device level.
Before You Begin
- Mac Device should be enrolled with Scalefusion
- Scalefusion MDM Client's (agent app for Mac) latest version should be installed on the devices with Full Disk Access and Notification permissions granted.
- Supported OS: macOS 10.15 or above
- Users should be subscribed to Enterprise or Business Plan
Adding User(s)
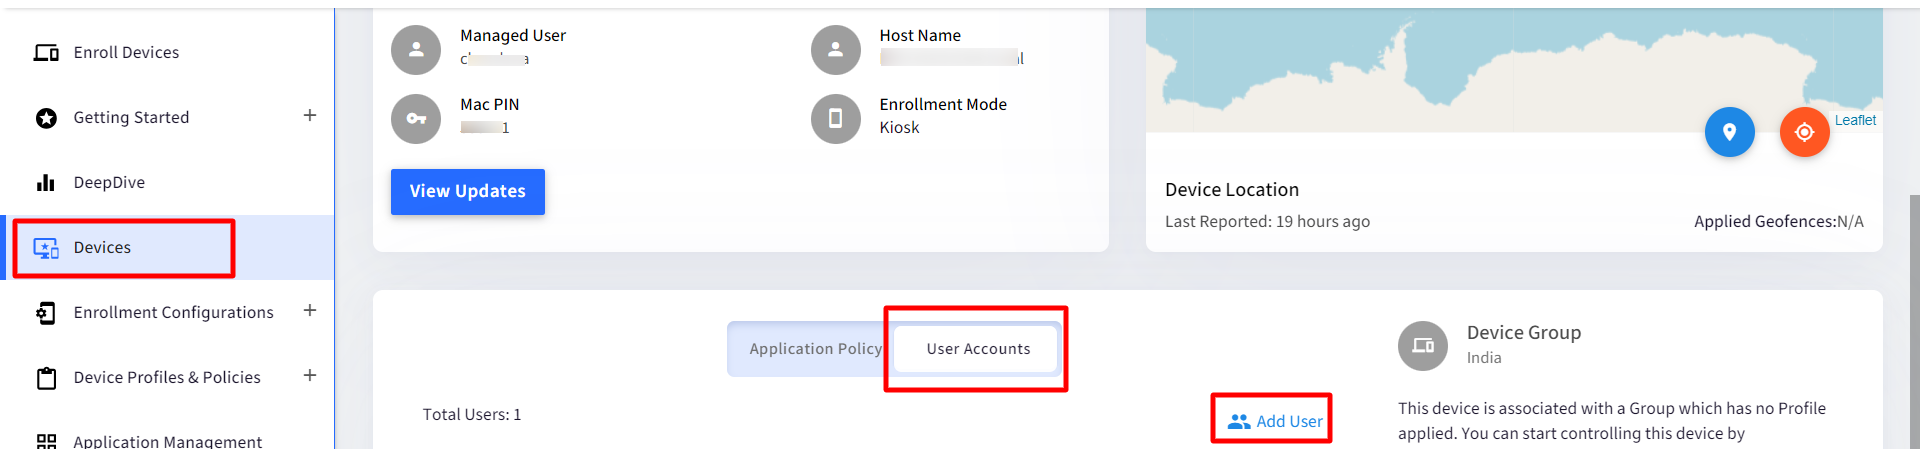
- Login to Scalefusion Dashboard and navigate to Devices Section
- Click on View Details under the device for which you want to add users. This will take you to the Device Details page.
- Scroll down and click on User Accounts tab.
- To add user, click on Add User.
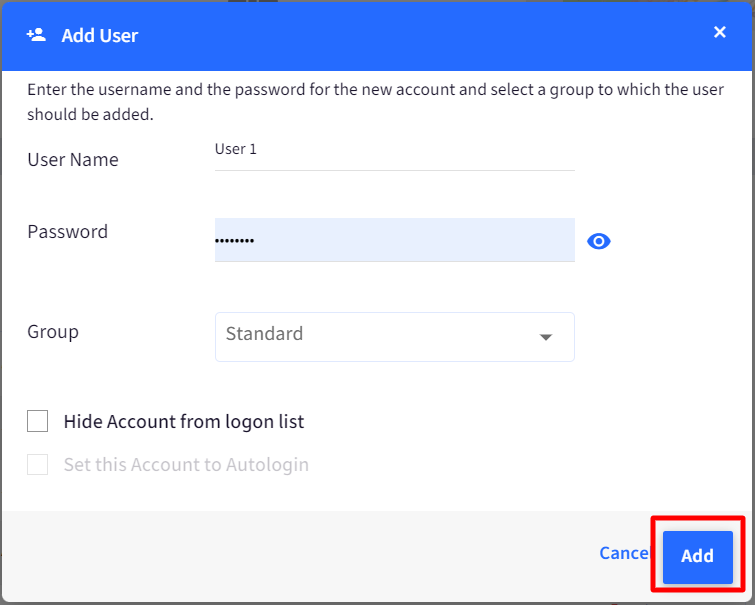
- The Add User dialog box will be displayed. Here, enter the following:
- User Name: Enter Username
- Password: Enter password. Minimum password length should be 4 characters
- Group: Select the group to which this user belongs, either Standard or Admin
- Hide Account from Logon list: Checking this box will hide the username from the login screen.
- Click on Add. The user will be created and displayed on Dashboard.If a user with the same name already exists, a message will be displayed asking you to choose a different name.
Managing Users
Clicking on Add creates the user on the device.
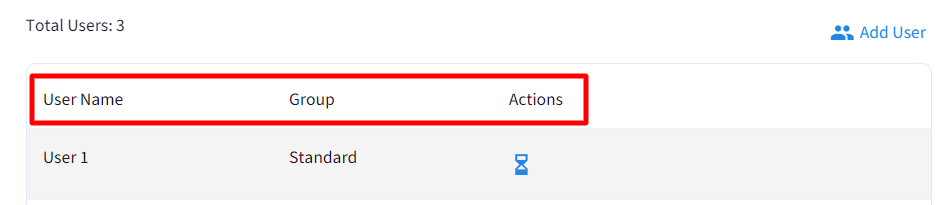
On the Dashboard, the user is displayed with following details:
- User Name: The user account name.
- Group: The group the user belongs to.
- Actions: Few actions can be taken on the users added. These are explained in next section.
Actions on Users
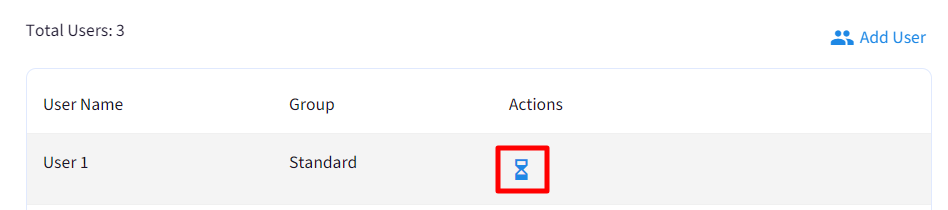
When you add a user from dashboard, an hourglass will be displayed in front of the username, under actions indicating it is not yet acknowledged by the agent. In other words, it is in the process of creation.
Once acknowledged, the following actions can be performed:
Refresh the Dashboard to view the actions
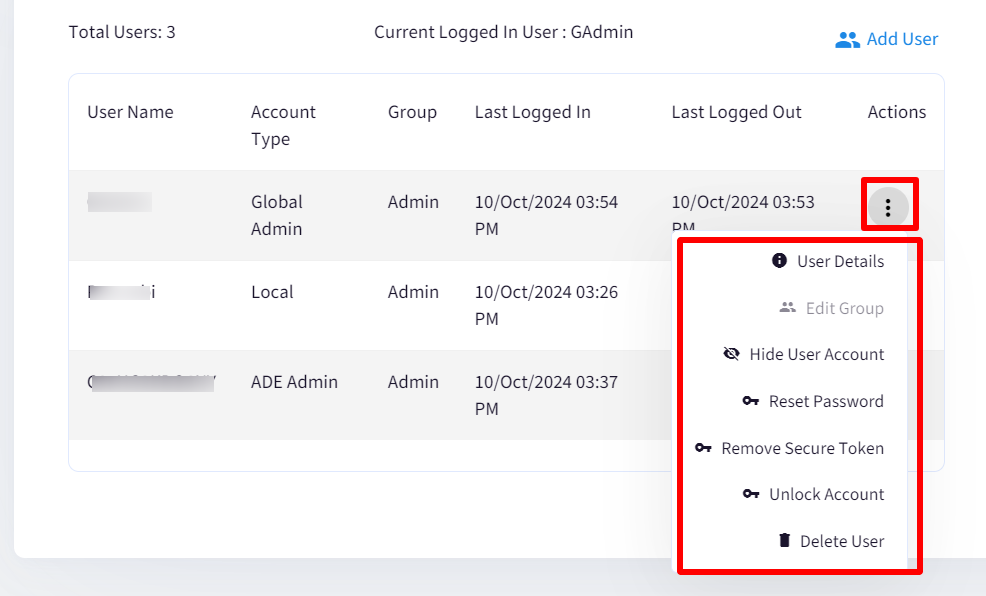
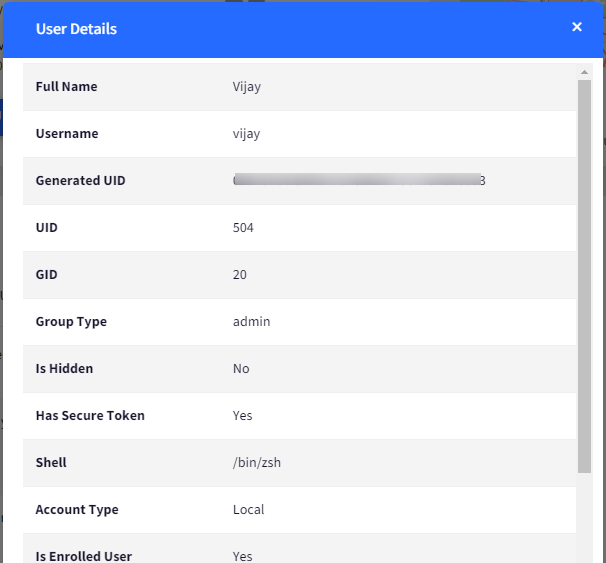
- User Details: Click on the info (i) icon under Actions. This will bring up a new window displaying all the information on the user. Following details for the user will be displayed:
- Full Name
- Username
- Generated UID
- UID
- GID
- Group Type: Displays Standard, Admin, Unknown
- Is Hidden
- Has Secure Token
- Shell
- Account Type: Displays the following:
- Local
- Mobile
- Managed Local : Managed local is shown if there is an email value
- ADE Admin: The admin accounts created via macOS Prestage Setup reflect as ADE Admin. This account cannot be changed to a standard user or deleted.
- Global Admin: The admin accounts created by enabling Create Admin Account from Utilities > Global Settings > Apple Settings or from Device Profile (Scalefusion Agent Settings)
- Is Enrolled User
- Created At
- Last Updated At
- Home Directory
- Managed Email
- Apple ID
- Has Password
- Password Last Set At
- Reset Password: Allows you to reset or change the password for the user account. To reset or change,
- Click on Reset Password.
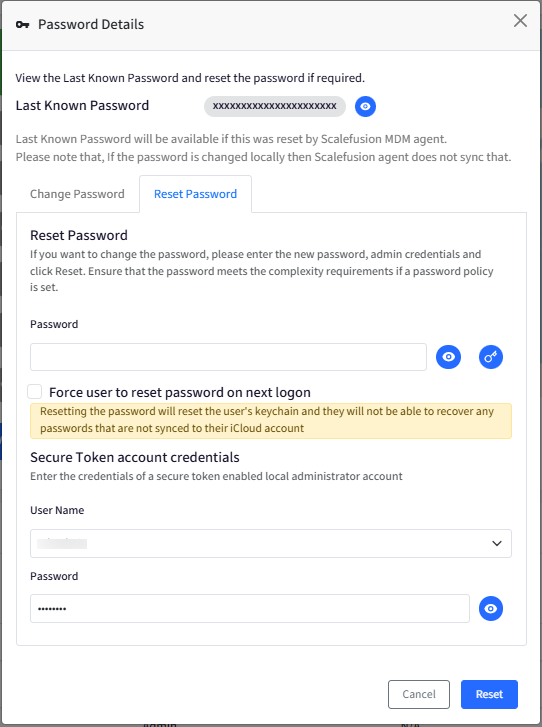
- This will open the Password Details dialog box. From here, you can view the current password and reset the password if required.The current password will be visible in case it is a Global Admin or ADE user. For any other user N/A will be displayed
- Click on the eye icon to view the current password.
- There are two options Change Password and Reset Password.
- Change Password: Choose this option if you are aware of the current password of the user. This will also change the password of the login keychain
- Reset Password:Choose this option if you are not aware of the current password of the user. Here, you need to provide account details of a secure token user. This will change the password of the local account only and not the keychain.
- Administrator Account Credentials: Provide admin credentials of a local administrator account which is secure token enabled. The user accounts added from Dashboard initially, are not secure token users.If passcode policy is set, please ensure that the new password meets the policy requirements. Same applies while adding a new user also.
- Administrator Account Credentials: Provide admin credentials of a local administrator account which is secure token enabled. The user accounts added from Dashboard initially, are not secure token users.
- Force User to reset password on next logon: When this option is enabled, users are required to change their password the next time they log in to the device. Please note this setting is not applicable on Global and ADE admins.
- Click on Reset.
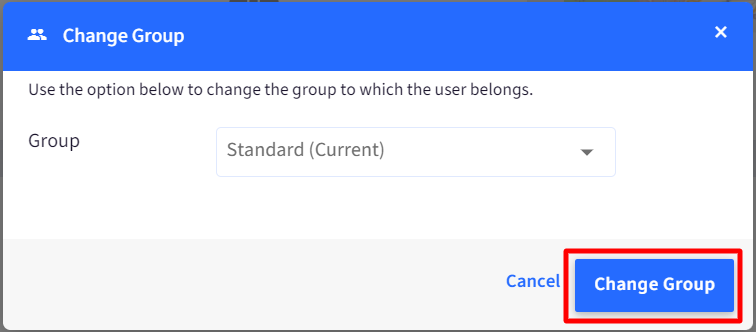
- Edit Group: Use this option to change the group to which the user belongs, from Standard to Admin or vice-versa. To edit,
- Click on the Change Group icon.
- In the dialog box that opens, select the group from the drop-down and click on Change Group.Group cannot be changed if the account type is Global Admin or ADE Admin
- Delete User: Deletes the user from the device. Deleting the user will remove all the user-specific data and apps like user-specific downloads, photos or documents and, more specifically, the user directory. Please note it will not delete files or apps stored at a device level or common location shared across users. Clicking on Delete will bring up a confirmation dialog box. Click on the Delete button to delete the user.
- Hide/Unhide User Account: This will hide the user account. To hide, click on the eye icon. This will open a confirmation box, click Ok,and the account will not be visible on the device. Any account, once hidden, can also be unhidden with the same process.All the actions will be executed on device when it is:
-On
-Online
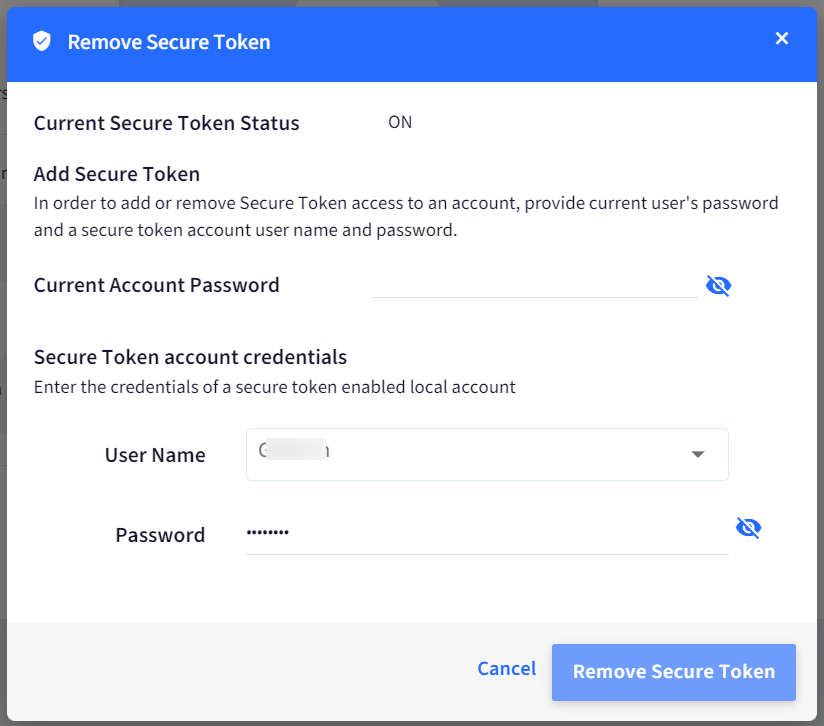
-Not in sleep mode - Add/Remove Secure Token: This will add or remove Secure Token access to an account. The Secure Token option will display as either Add Secure Token or Remove Secure Tokendepending on the current status of the account. Click the appropriate icon to open the dialog.
- Current Secure Token Status: Displays the current status of the secure token for the account (ON or OFF).
- Current Account Password: Enter the current password for the user account. If the password is already saved, it will be displayed in the text field.
- Secure Token Account Credentials:
- User Name: Select the username of the secure token-enabled local account.
- Password: Enter the password for the secure token account.
- Click on the button Add/Remove Secure Token
- Unlock Account: User Accounts get locked if incorrect password is entered multiple times. With this option you can unlock such accounts.
Add users in Bulk
Users can also be added in bulk from Device Groups / User Groups section. To do so,
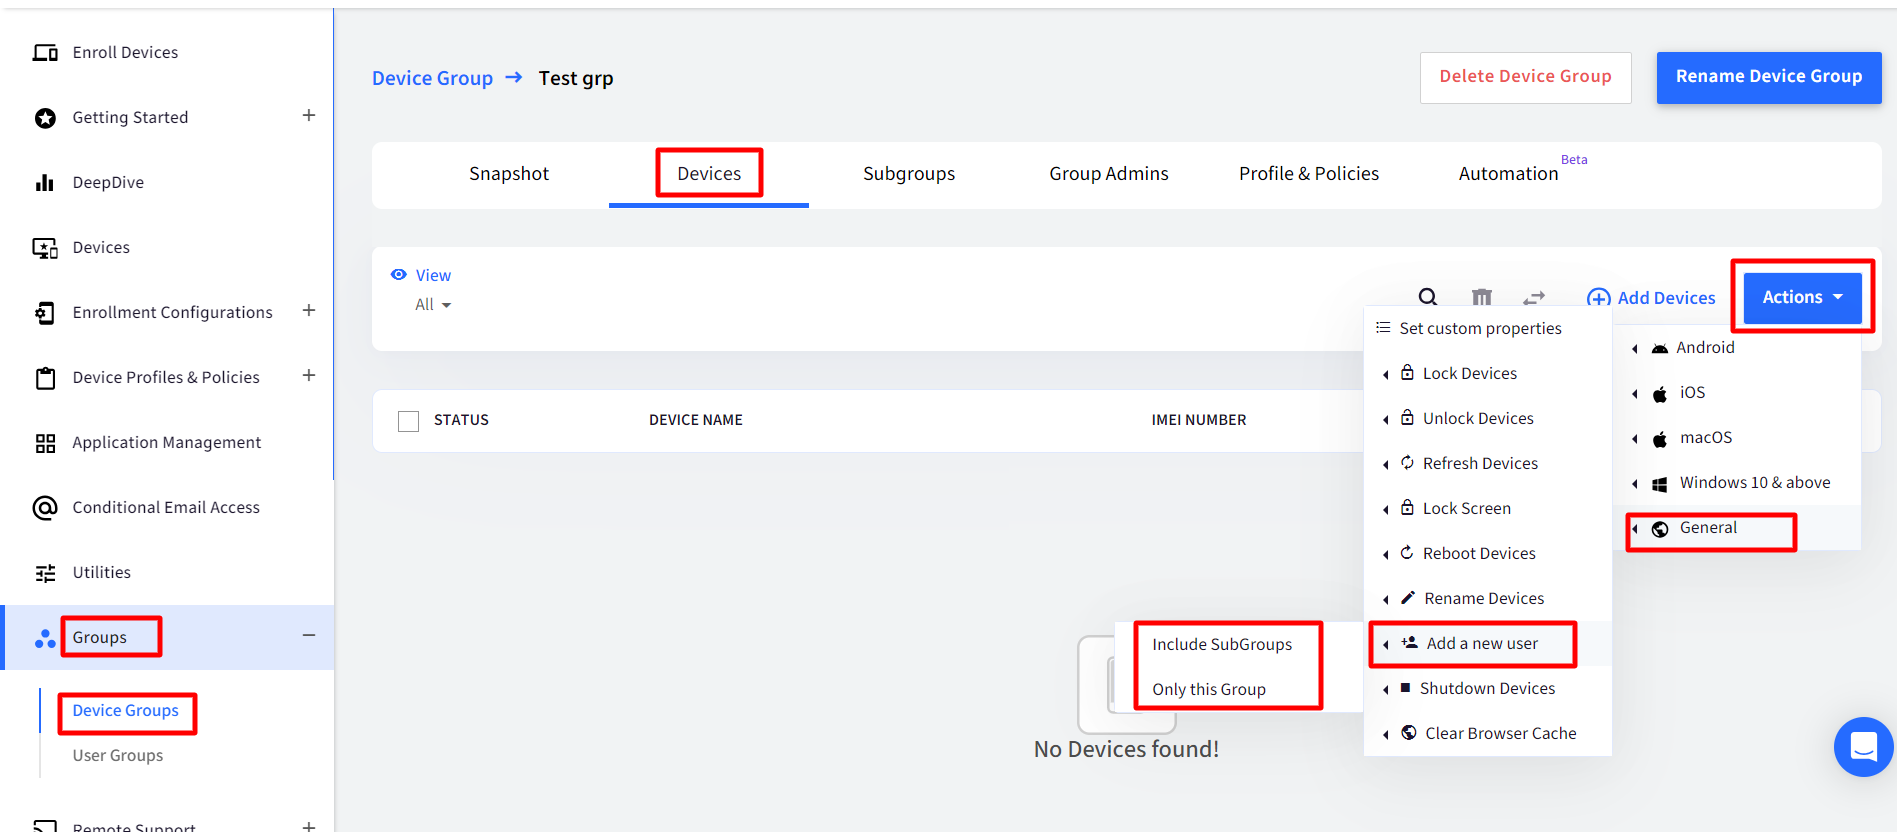
- On Scalefusion Dashboard, navigate to Groups > Device / User Groups > Devices
- Click on Actions > General > Add a new User
- Under this, there will be two options. Click on any one:
- Include Subgroups: The user account is added to devices in subgroups also.
- Only this Group: The user account is created on devices belonging to this group only, excluding subgroups
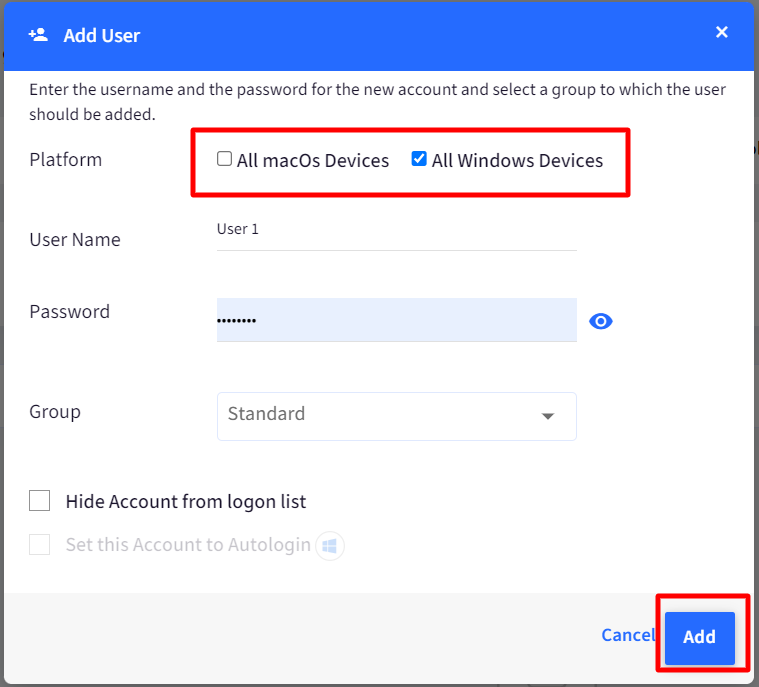
- In the dialog box that opens, select the Platform on which you want to add the user:
- All macOS devices
- All Windows Devices
- Check both if you want to add to both (a) and (b) above
- Enter the rest of the details (same as in the Add Users dialog box explained in the above section)
- Click on Add
- A confirmation dialog box will be displayed. Click on OK. Please note the user will not be added to devices on which Scalefusion MDM Client is not installed.
Reports
- From Device Inventory Report, you can fetch the following information on Users:
- Total User Accounts
- Total Admin Accounts
- Total Standard Accounts
- iTunes Account ID
- For information on users across all devices, you can use Device User Accounts report.