Security Assertion Markup Language, aka SAML, simplifies federated authentication and authorization processes for users by implementing a secure method of passing user authentications and authorizations between the identity provider and service providers.
Scalefusion users can now be migrated to SAML-based Sign-in. This capability makes the Scalefusion application more robust in terms of the security of its users in the arena of Mobile Device Management.
How Does it Work
There are two main entities here - Identity Provider and Service Provider. In our case, Scalefusion is the Service Provider that needs authentication, and the Identity Provider is the one that grants this authorization. We use Okta and PingOne as Identity Providers, which perform the authentication for Scalefusion users.
When a user logs into a SAML-enabled application (Scalefusion), it requests authorization from Okta/PingOne (whichever the user is subscribed to). Okta/PingOne authenticates the user, returns the authorization for the user to Scalefusion, and the user gets logged in to the Scalefusion application.
There are a few configurations that need to be done both at the end of Identity Provider (Okta/PingOne) as well as Service Provider (Scalefusion), which establishes a standardized communication between the two.
This document describes in detail all the steps to integrate Scalefusion with PingOne and make it SAML-enabled.
Before You Begin
- A valid Scalefusion Dashboard account
- A valid PingOne subscription
Steps
In a nutshell, the following are the steps for SAML integration:
- Create an Application on PingOne
- Configure SAML-based Sign-In on the Scalefusion Dashboard
- Add users on PingOne and Migrate Admins for SAML based Sign In
Step 1: PingOne SAML Setup for Scalefusion (Create SAML Integration)
Create Integration
- Sign in to PingOne
- Make sure you are in the Administrator environment (Check the top right corner of the page)
- On the top of the page, click Connections.
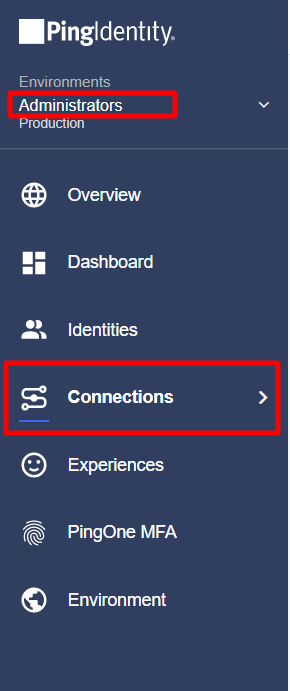
- On the left, click Applications and then + Add Application.
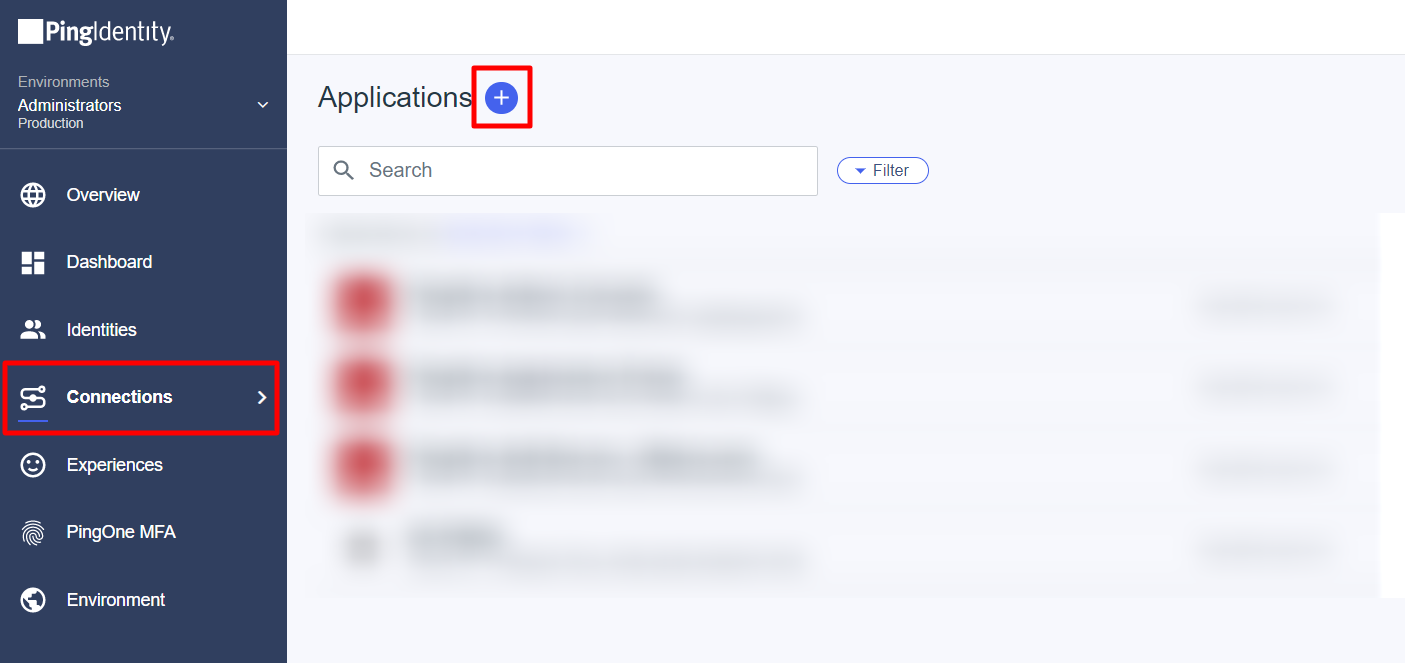
- This opens the Create App Profile page. Enter the following information:
- Application name: A unique identifier for the application. Enter Scalefusion as the application name
- Description (optional): A brief characterization of the application.
- Icon (optional): A pictorial representation of the application. Use a file up to 1MB in JPG, JPEG, GIF, or PNG format.
Click Next.png)
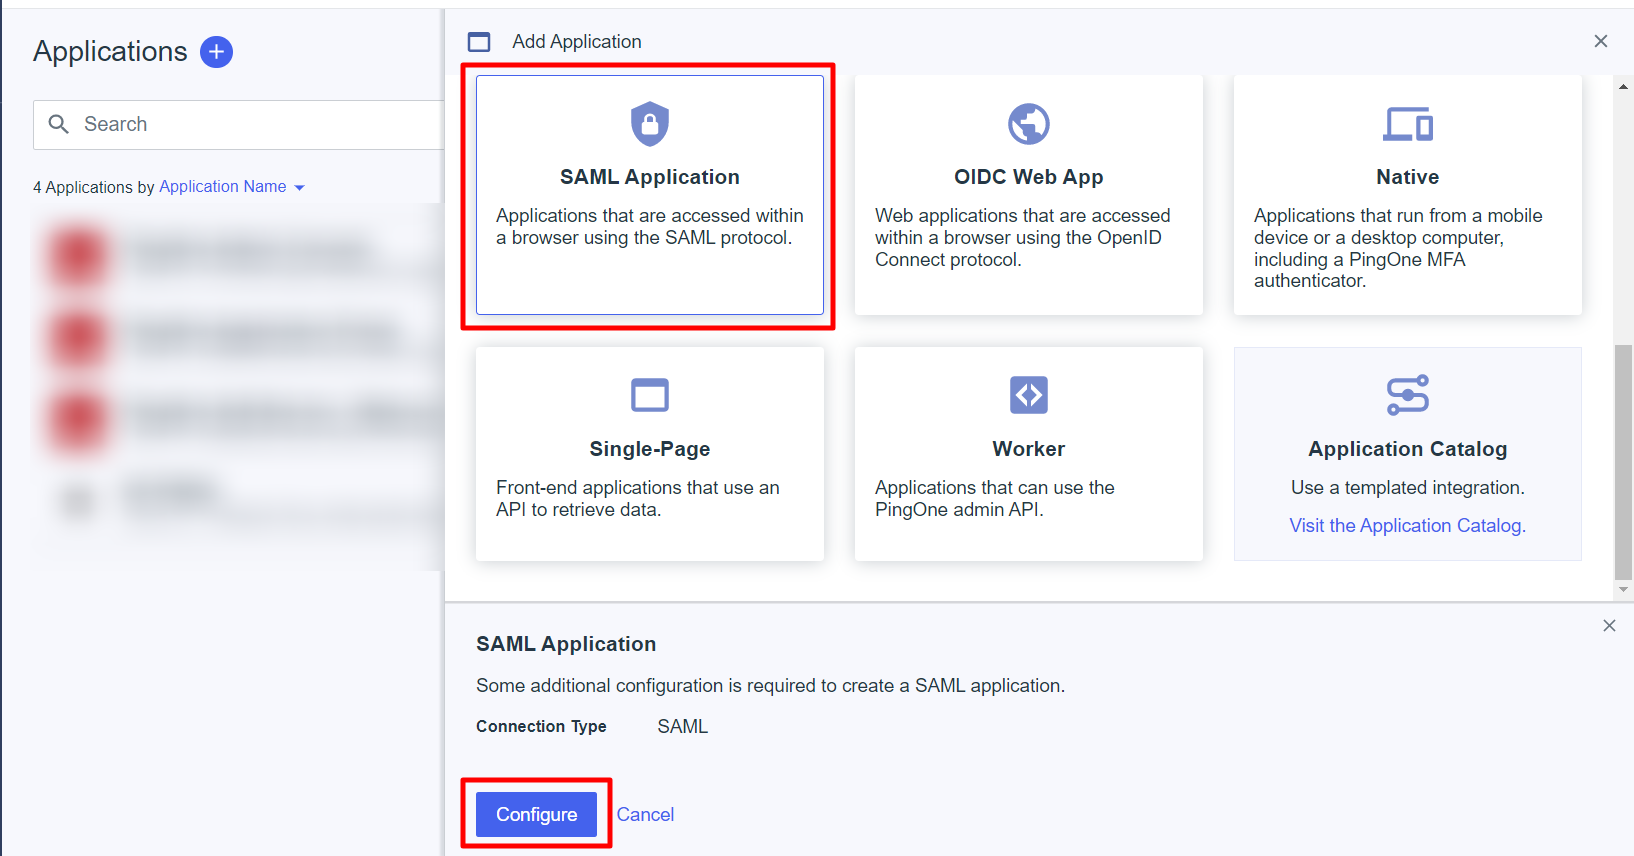
- Select the Application type as Web App and the Connection type as SAML. Click on Configure.
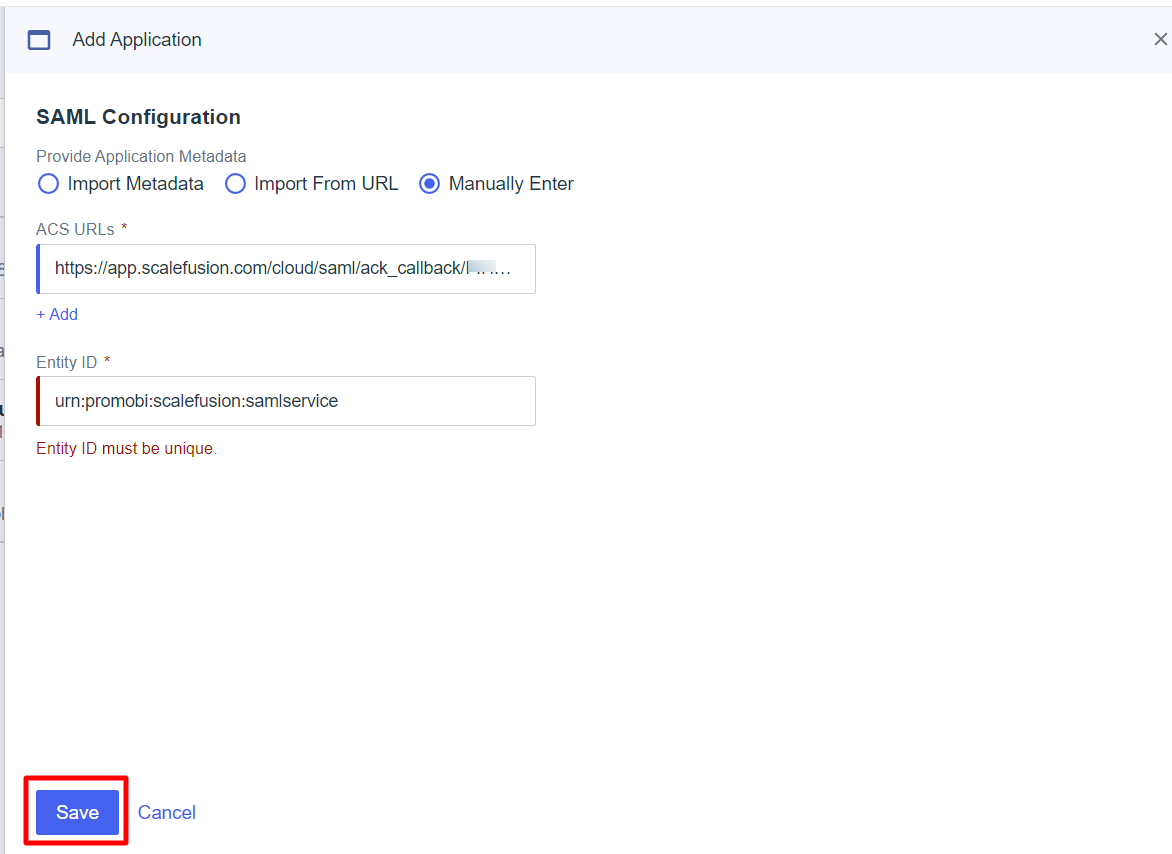
- Configure SAML - Create integration between Scalefusion and PingOne
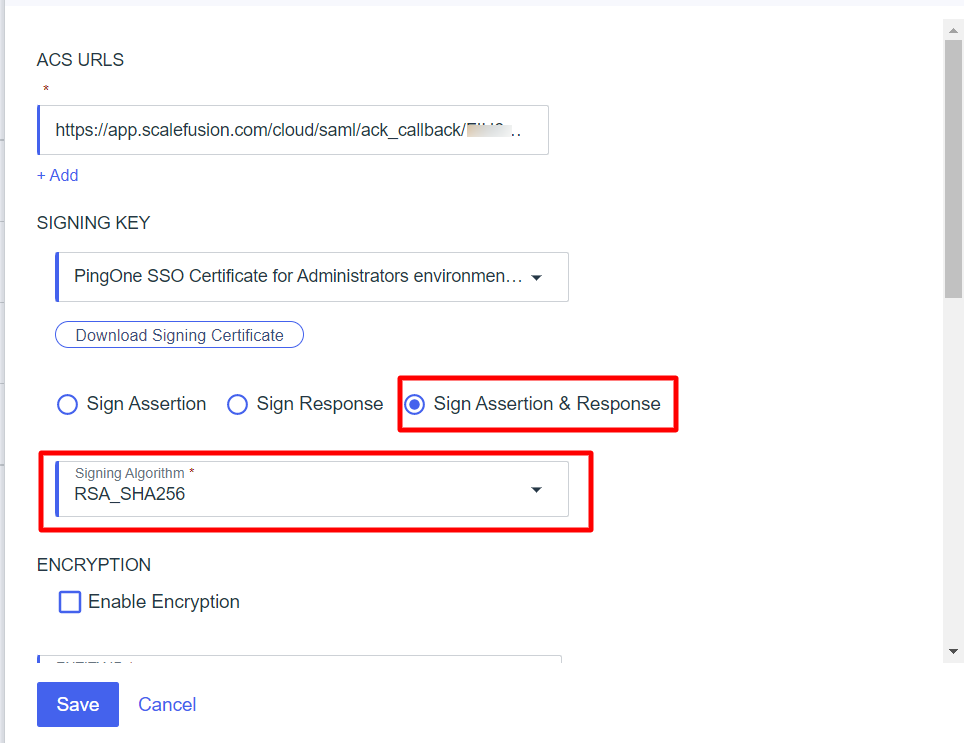
- ACS URLs- This URL is required and serves as the default ACS URL value for the Service Provider (SP), that is, Scalefusion.This URL is available as a Single Sign URL on the Scalefusion dashboard Admins and Roles > Sign In Settings > Configure SAML Sign-In

SIGNING CERTIFICATE - The certificate that confirms that requests, responses, and assertions actually came from the identity provider.
- Select Sign Assertion & Response
- Signing Algorithm - Select RSA_SHA256
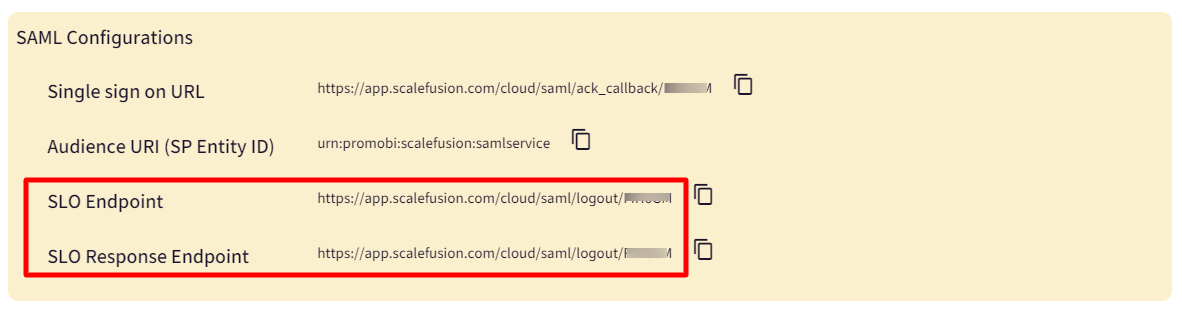
- Entity ID - The service provider's entity ID is used to look up the application. Copy the Audience URI (SP Entity ID). It is available on the dashboard under Admins and Roles > Sign In Settings > Configure SAML Sign In > Audience URI (SP Entity ID).

- SLO Endpoint and SLO Response Endpoint- Copy the respective URLs from the dashboard and paste them here. SLO Response Endpoint is optional.The SLO Endpoint and SLO Response Endpoint URLs will be displayed on the Scalefusion Dashboard only when you select PingOne as SAML Provider.
- SLO Binding - Choose HTTP POST
- Assertion Validity Duration (In seconds) - The maximum amount of time that an assertion is valid (in seconds). The assertion validity duration must be between 60 and 3932100 seconds. For e.g. Enter 60
Click Save and Continue
8. Map Attributes - Here, you provide access to your application for customers to authenticate.
- PingOne User Attribute: From the drop-down, select the Email address
- Application Attribute: saml_subject
Click Save and Close.
The application is configured. For more information on creating an application, please click here
Step 2: Configure SAML-based Sign-In on Scalefusion Dashboard
Scalefusion IT Admins need to configure SAML settings inside Scalefusion so that they can migrate to using SAML. This is the main step that associates an organization's accounts with SAML auth and also lets Admins control settings for Admins.
Prerequisites
Only the Account Owner or Co-Account owner can configure SAML settings on the Scalefusion dashboard.
Setup Instructions for Scalefusion Application
To configure settings on the Scalefusion application, certain details like Issuer URL, SSO/SLO Endpoint etc., are required. These are to be fetched from Okta.
- On PingOne Admin Console, go to Applications
- Click on the application name Scalefusion (created above)
- Enable the application using the toggle button on the right. Click anywhere over to expand it

- Go to the Configurations tab. This contains all settings required for configuration

Configuration steps on Scalefusion Dashboard
- On the Scalefusion Dashboard, navigate to Account Profile -> Admins and Roles -> Sign-in Settings
.png)
- Under Configure SAML Sign-In, enter the following:
- Select SAML provider: Select PingOne
- Issuer URL: It is the Issuer ID (from the Configuration page on PingOne). Copy it and paste it here.
- SAML SSO Endpoint: It is the Single Sign-On Service (from the Configuration page on PingOne). Copy it and paste it here.
- SAML SLO Endpoint: It is the Single Logout Service (from the Configuration page on PingOne). Copy it and paste it here.
- X.509 Certificate: Upload the certificate. The X.509 certificate has to be downloaded from Configuration > SAML Settings.To download the certificate, navigate to the Configuration page on PingOne, click on SAML SETTINGS below CONNECTION DETAILS, click on Edit Icon and download the certificate with X509 PEM.crt format.
- Click Save

- You will get a confirmation box. Click OK
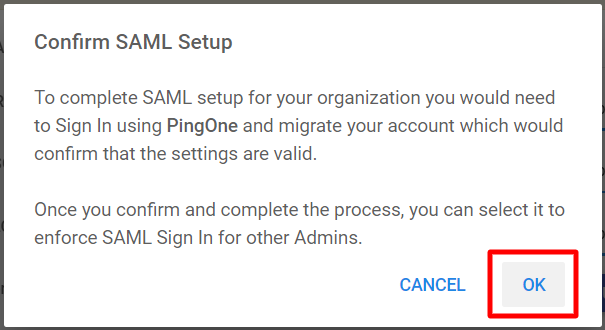
- You will be redirected to PingOne sign-in for confirmation. Enter the Username and Password that you used to sign up on PingOne and do SAML Setup (Step>1). This will come up if you are not signed in to PingOne.
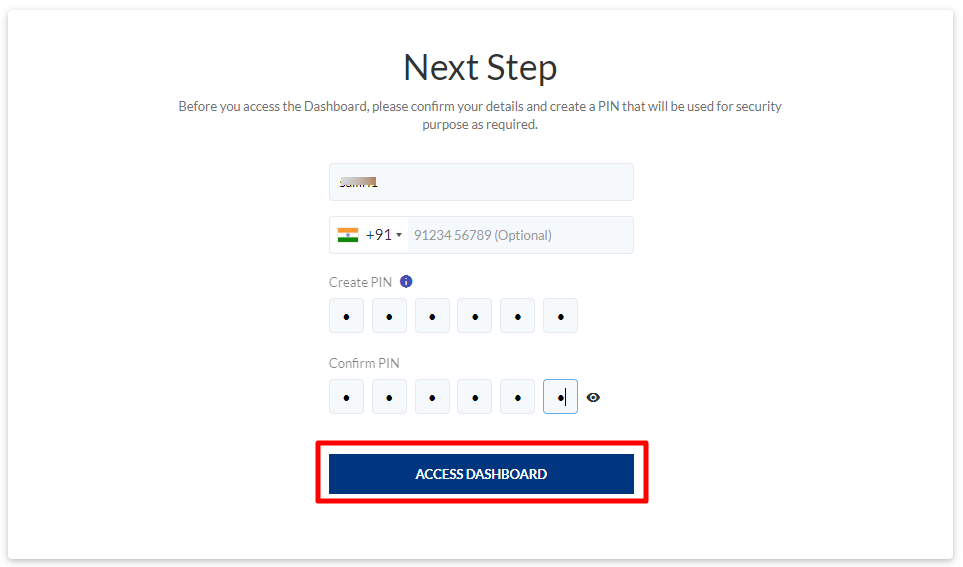
- Once the Authentication succeeds, you will be redirected to the page for setting a PIN.
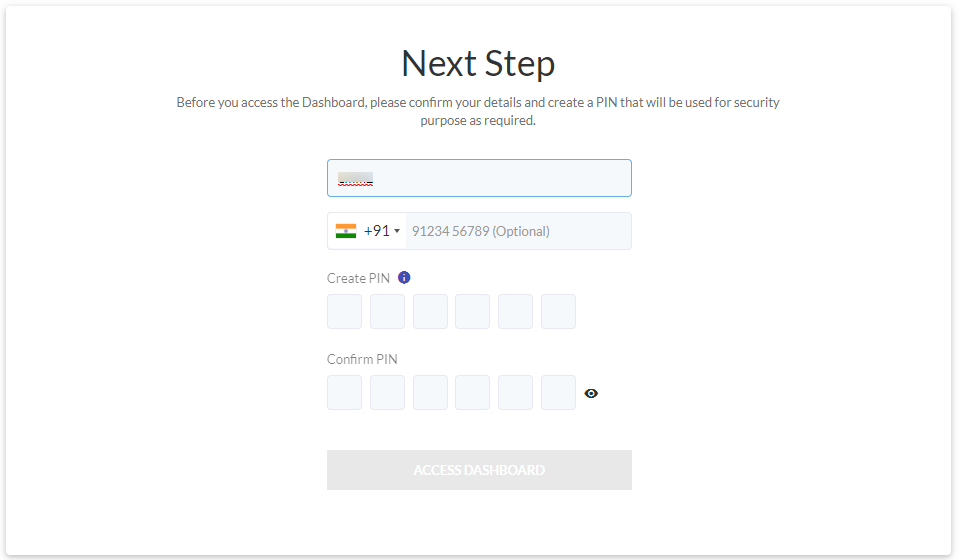 Setting up a PIN is a one-time step
 - Creating a Security PIN: A security PIN helps in authorizing certain actions on the Dashboard, which will require a two-step confirmation. This helps prevent accidental deletes/edits of important data from the Dashboard. To create a Security PIN, please complete the steps below,
- Name: You can Add/Edit the name.
- Phone Number: This is optional. Here you can edit the phone number.
- Create New PIN/Confirm PIN: Choose a 6-digit PIN that will be required to authorize certain actions on the Dashboard as and when required.
- Click ACCESS DASHBOARD to complete the SAML setup.
Once the PIN is confirmed, the account is marked as a SAML account.
- The user lands on Sign In Settings with a dialog to select the admin accounts that he wants to migrate to use SAML-based sign-in. The user can choose to MIGRATE or choose the option LATER. The screenshot below has the Migrate button disabled because there are no admins available who can be migrated.
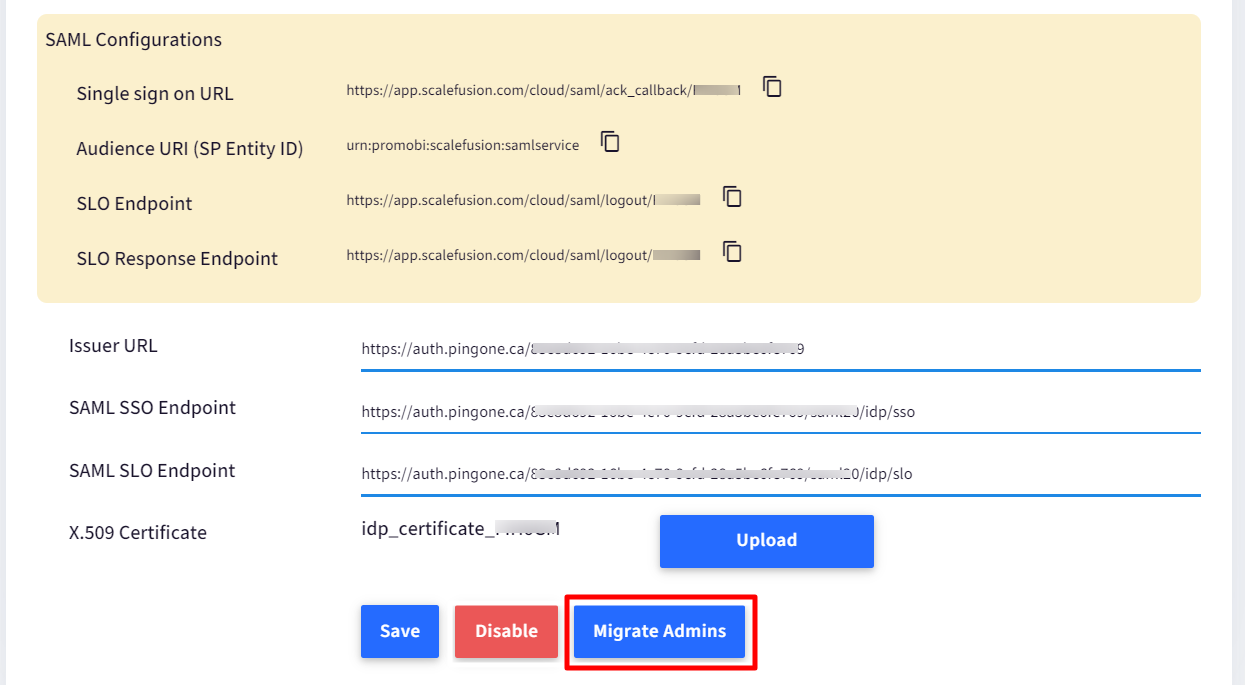
.png) The SAML settings are successfully configured. On the Sign In settings page, you will see additional buttons to Disable SAML and Migrate Admins.
The SAML settings are successfully configured. On the Sign In settings page, you will see additional buttons to Disable SAML and Migrate Admins.
The next time whenever this user tries to Sign in, he will not be asked to enter a password because he is authenticated against the provider (PingOne). This is also indicated on the Scalefusion's Sign-In screen where the Password field is not there..png)
Migrate Admins to SAML-based sign-in
Once an account admin chooses to migrate to SAML, there are options to migrate other admins post first-time setup configuration. However, they can choose to do it later as well.
Prerequisite
The admins who are being migrated have access to the Scalefusion app, and they are added as users under PingOne
Adding Users on PingOne
The users whose accounts would be enabled for SAML sign-in need to be added in PingOne. To do so, follow these steps:
- On PingOne Admin Console, go to Identities
- This opens the Users section. Click on the button Add User. This opens the Add User window.

- Here, enter the required details like First Name, Last Name, username, password etc.User is required to enter this username and password for authentication when he signs in to Scalefusion after his account is configured for SAML.
- Click Save
Migrating Admins
There are two ways to migrate admins to SAML based Sign In:
Sign In to the Settings page
- Navigate to Admins and Roles > Sign In Settings
- Under Configure SAML Sign In, click on the button MIGRATE ADMINS
- A dialog box comes up showing all those admin accounts which can be migrated to SAML based sign in. Select the admin accounts that have to be migrated and click on Migrate

The admin gets migrated to SAML-based Sign In.
Administrators section
- Navigate to Admins and Roles > Administrators
- Click on the action menu in front of the admin for which SAML-based Sign In has to be enforced, and select Enforce SAML Sign In
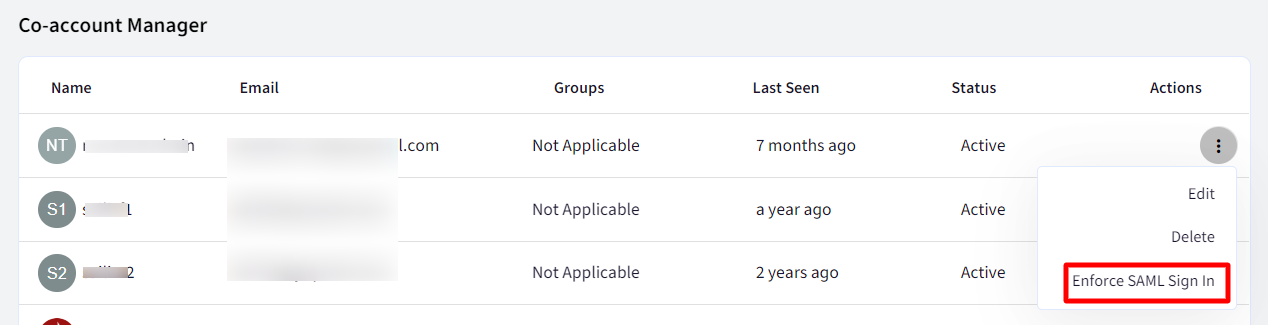
- A dialog box comes up to ensure that the admin has access to the Scalefusion app. Click Ok
.png)
SAML sign-in is enforced for the admin.
An admin's account can be made SAML enabled at the time of his account creation. This can be done by following these steps:
- Navigate to Admins and Roles > Administrators
- Click on ADD NEW ADMIN
- This opens the Add Admin dialog box. In Admin Types choose the option Allow Sign Up using SAMLSign In
.png)
- The Last Seen status for this admin will reflect as Not Logged In Yet until he signs in on the Scalefusion Dashboard.
Disable SAML
To disable the SAML configuration,
- Navigate to Admins and Roles > Sign In Settings
- Under Sign In Settings, click on the button DISABLE
- You will be asked to enter a Security pin. Enter the security pin and click Submit
- The following dialog box comes up, asking you to set a password. This password would be used to sign in once SAML settings get disabled. Click Save after entering a password.
.png) SAML configuration for all related admin accounts (which have SAML Sign-In enforced) also gets disabled. They will receive an email with the password to sign-in
SAML configuration for all related admin accounts (which have SAML Sign-In enforced) also gets disabled. They will receive an email with the password to sign-in
Behavior for O365/GSuite users
GSuite or O365 users can also be migrated to SAML-based configuration with the same process. Once migrated to SAML, they will not be able to use any GSuite / O365 features. However, after disabling the SAML configuration, all the features can be used.
Two Factor Authentication
If two-factor authentication is enabled on an account and SAML is configured, then at the time of sign-in
- The user is redirected to the PingOne login page
- Once validation succeeds, the user lands on Scalefusion's 2-Factor Authentication page, where he would be required to enter a verification code for authentication and then get signed in.
On Device
In BYOD enrollments, with User Enrollment settings enforced, SAML users will be asked to authenticate at the time of enrollment with their respective credentials with which they have signed in and skip the OTP flow. Visit PingOne's help document to learn more.