As organizations grow and evolve, the need to migrate from one Mobile Device Management (MDM) solution to another becomes increasingly common—whether to leverage advanced features, improve security, or align with new IT strategies. With the latest enhancements to Apple Business Manager (ABM) and Apple School Manager (ASM) for iOS 26, iPadOS 26 and macOS 26, Apple now offers a more streamlined and controlled way to reassign devices to a new MDM server without requiring manual wipes or full resets.
This article explores the new features that enable seamless MDM migration using ABM/ASM, and walks through the step-by-step process from configuration to end-user experience.
New Features
Role-Based Migration Control: During MDM migration, users with roles such as Administrator, Device Enrollment Manager, and Site Manager (Apple School Manager only) can define a deadline for completing re-enrollment. They can also monitor the migration status on the device page in ABM/ASM, ensuring oversight during critical transitions.
User Notifications for Re-enrollment: End users receive automated notifications prompting them to re-enroll their devices into the new MDM. As the migration deadline approaches, notification frequency increases to encourage timely compliance.
Enforced Migration After Deadline: If users do not take action by the set deadline, the organization can enforce migration. This triggers a device restart on iPhone and iPad or a non-dismissible, full-screen prompt on macOS, initiating mandatory re-enrollment into the new MDM.
Offline Device Handling: For devices that are offline at the time of unenrollment, users are shown a prompt to manually connect to the internet, ensuring the migration process can proceed without IT intervention.
Preserving App Data on iOS/iPadOS: iPhones and iPads can retain apps and associated data during the transition, provided the new MDM delivers the same apps —helping to minimize user disruption.
Seamless Activation Lock Management: Upon successful re-enrollment, the new MDM server can take control of Activation Lock management and existing bypass codes, maintaining device security without manual reconfiguration.
No Factory Reset Required for iOS Devices: iOS and iPadOS devices can be migrated to a new MDM solution via ABM/ASM without requiring a factory reset.
FileVault Recovery Key Sync Post-Migration: After a macOS device is successfully migrated to the new MDM server, the existing FileVault recovery key is automatically synchronized.
Pre-Requisites
Devices should be part of ABM/ASM
Minimum OS requirements: iOS 26, iPadOS 26, macOS 26
Note:
For this process to function correctly, devices must be added to ABM/ASM while running iOS 26, iPadOS 26, or macOS 26. Devices that are onboarded into ABM/ASM on OS 26 (out of the box) can migrate between device management services without requiring a device reset. However, if devices were initially added to ABM/ASM while running a lower OS version and were later upgraded to OS 26, a one-time device reset is required to re-register the devices in ABM/ASM so that OS 26–specific enrollment and migration changes are applied. Once this reset is completed, subsequent migrations to a new device management service via ABM/ASM will not require additional resets.
Alternatively, you can run the command sudo profiles renew -type enrollment in Terminal on your Mac device(s) to migrate the device to Scalefusion MDM, without resetting it.
However, iPhone and iPad device(s) will require a one-time reset to re-register them in ABM/ASM.
Configuring Devices on ABM/ASM
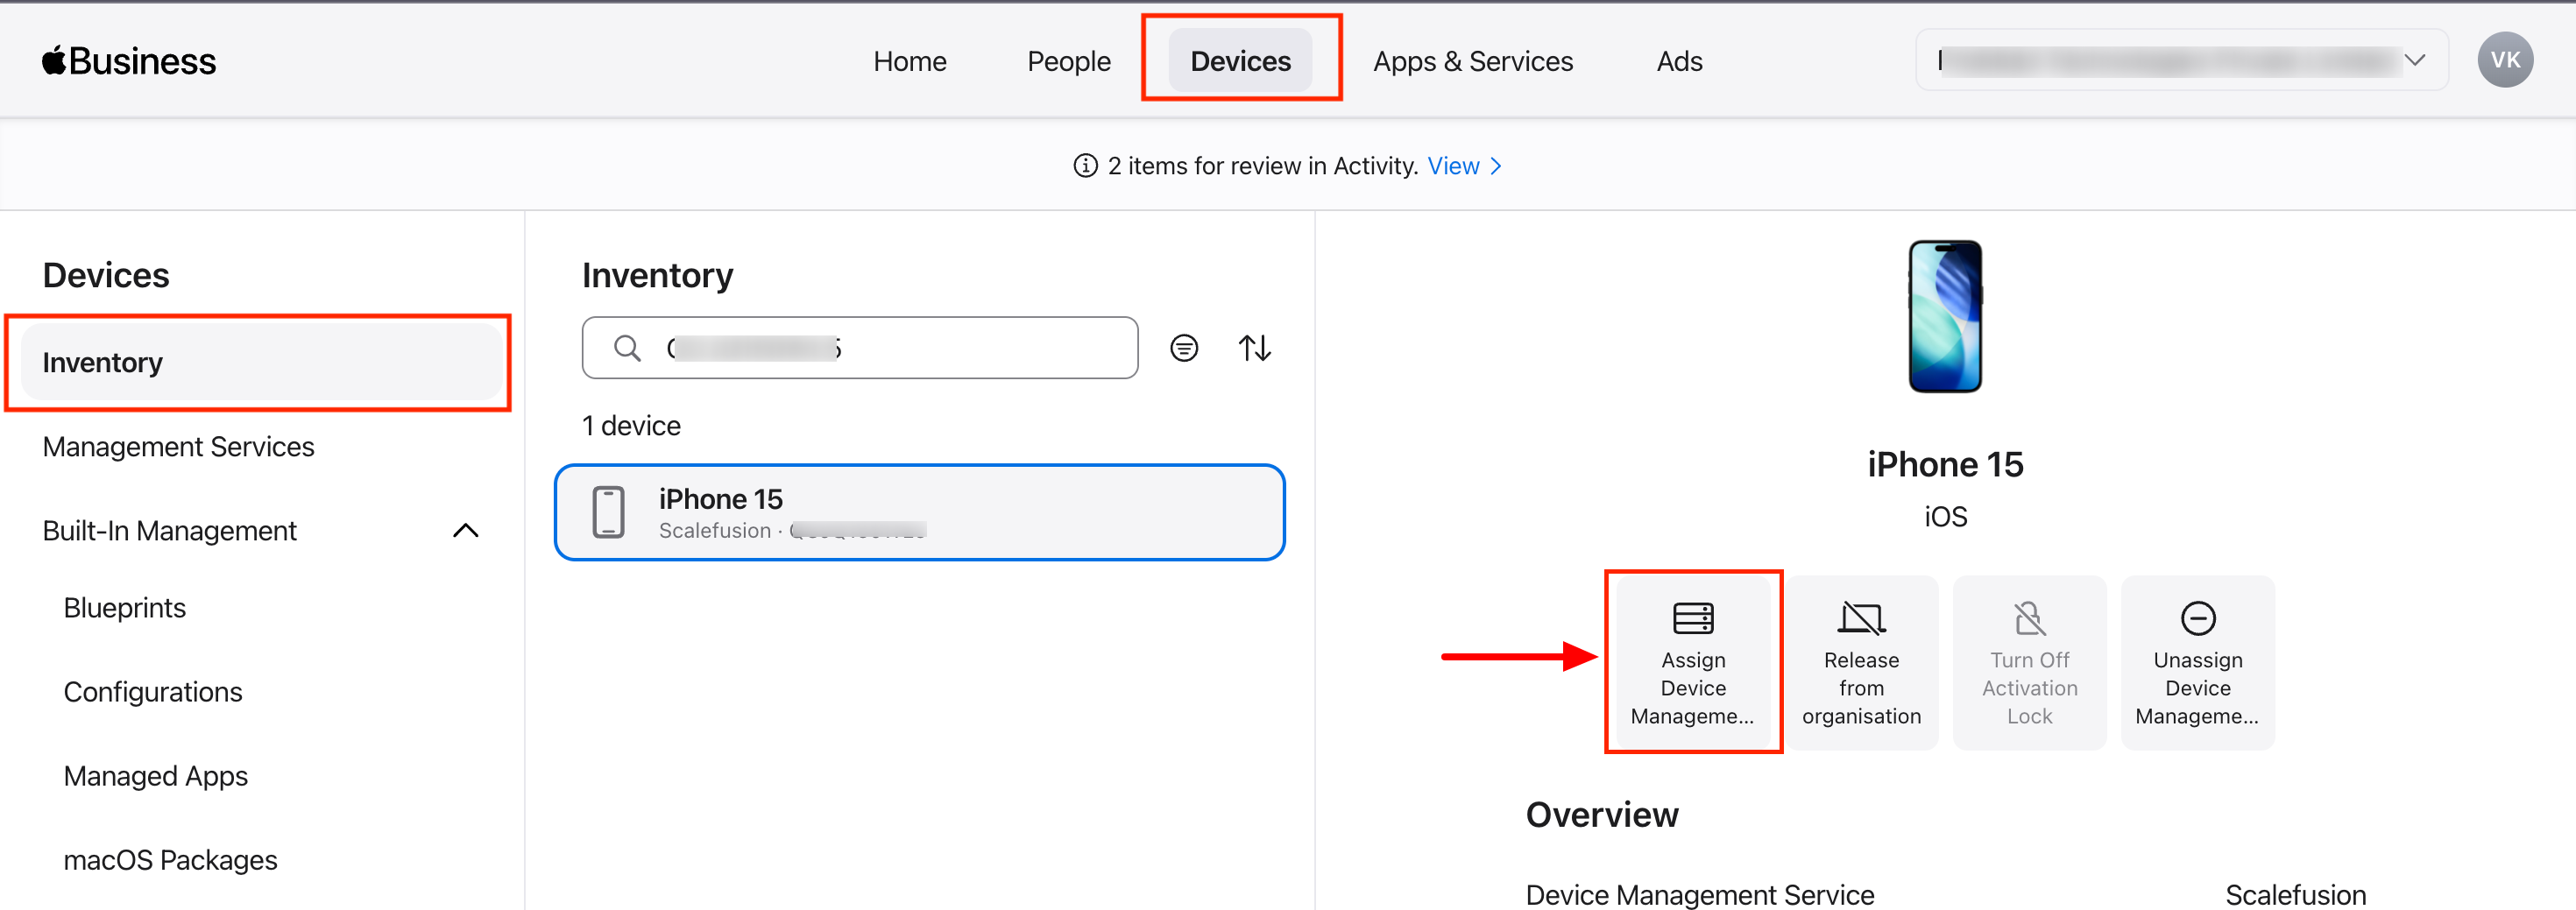
Log in to the Apple Business Manager portal: https://business.apple.com
From the top navigation bar, select Devices and click on Inventory
Search for device and click on Assign device management
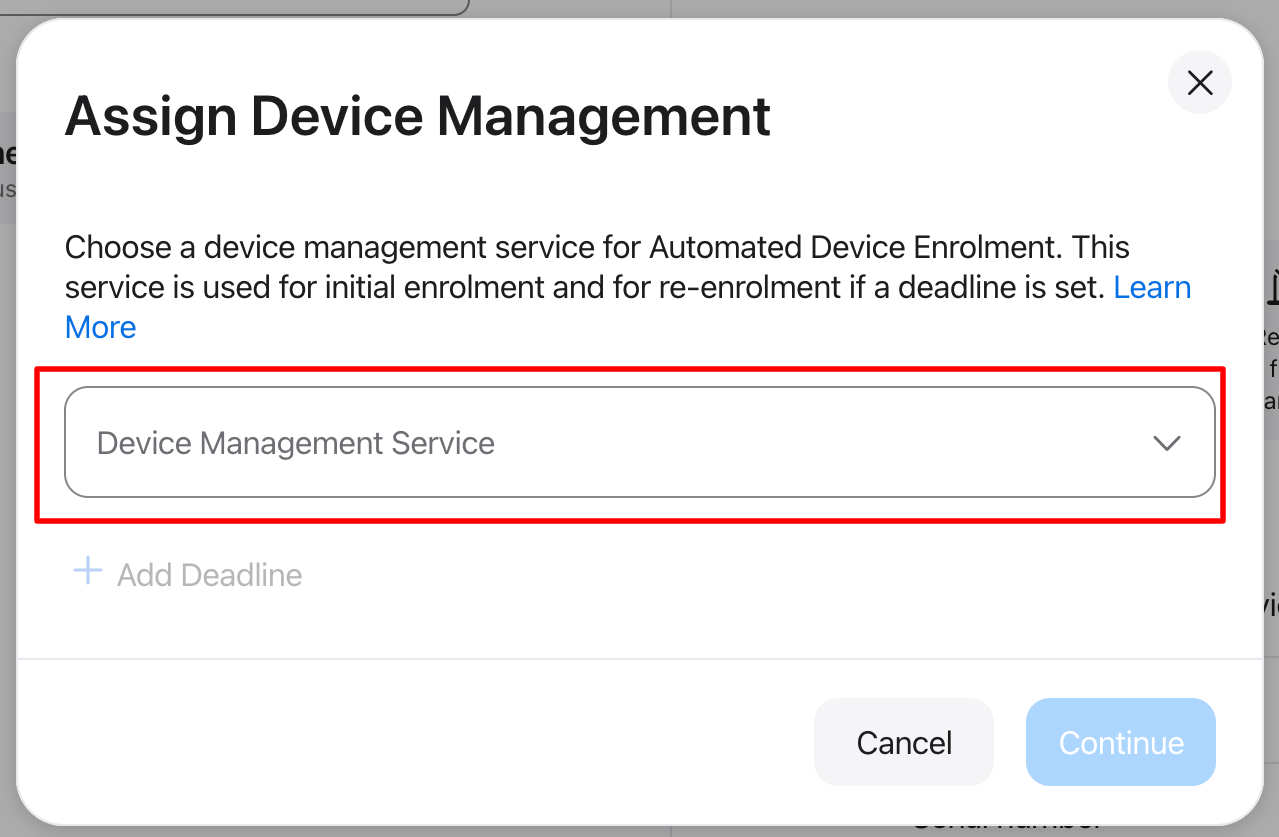
Select the Device management service
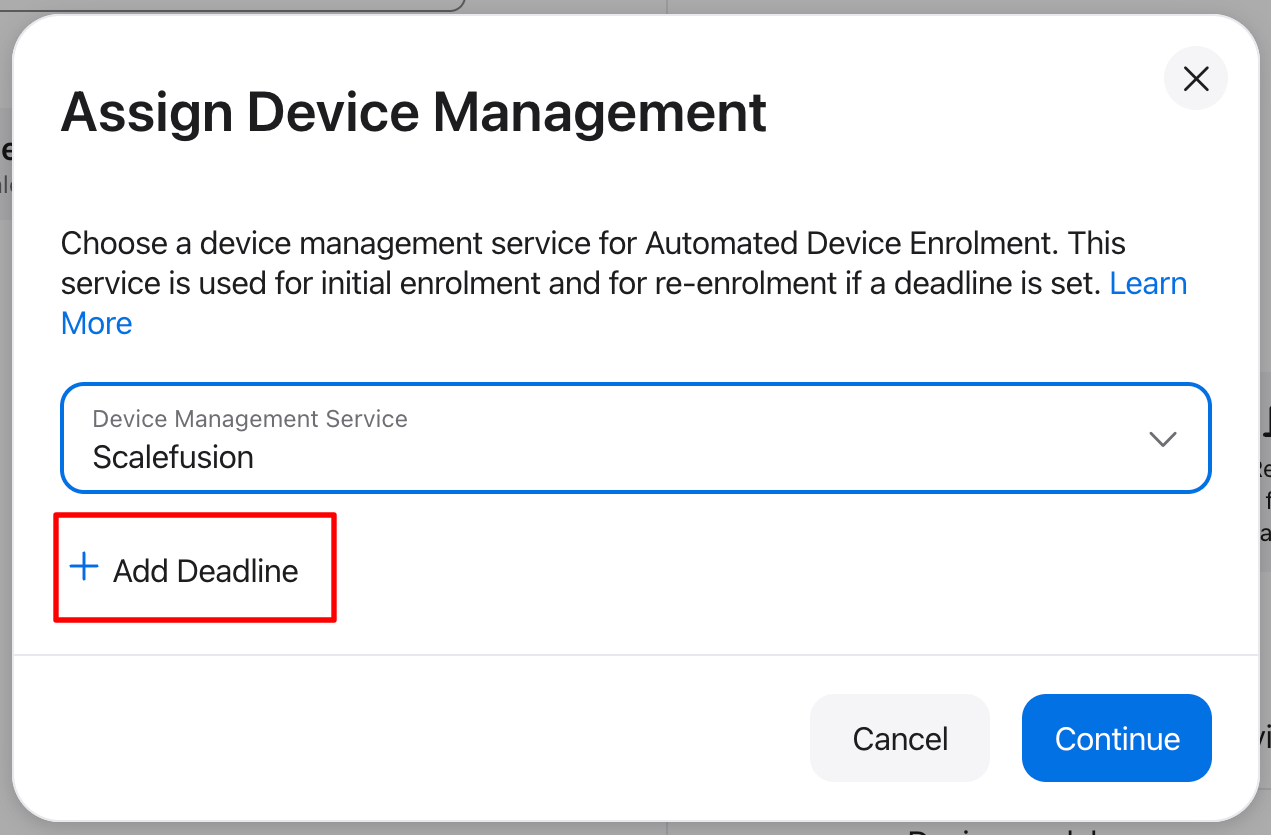
Set a migration deadline by clicking on Add Deadline.
Choose the date and time by which the migration should be completed.
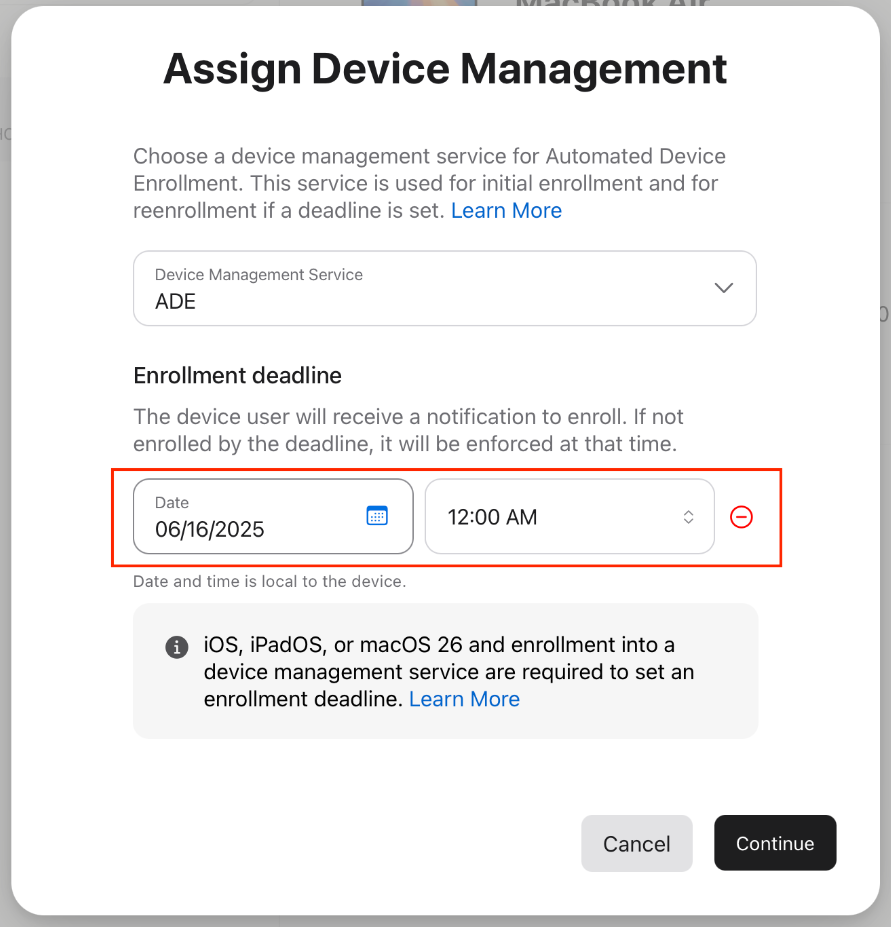
Click on Continue to save the settings.
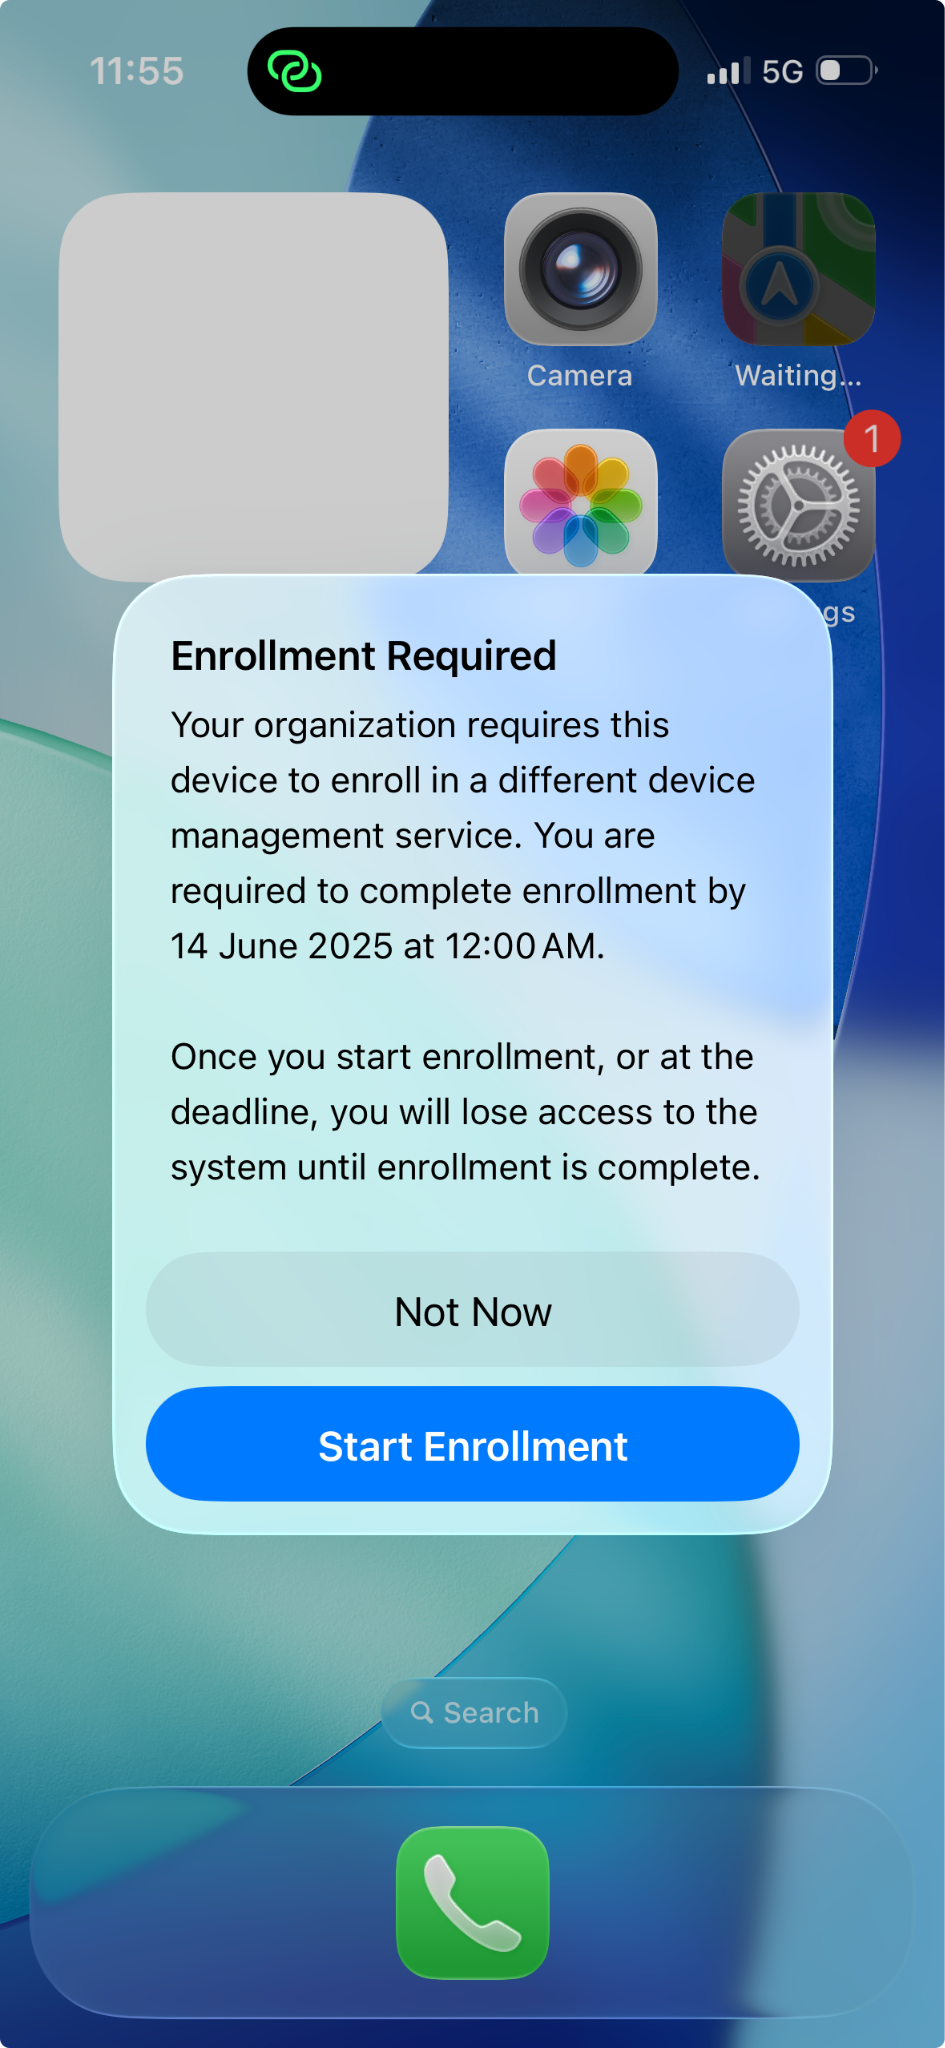
User Experience on iOS and iPadOS
On iOS/iPadOS devices, an alert will appear prompting the user to migrate the device. Click on Start Enrollment
Note: Clicking on Not Now, will dismiss the alert and display it when the deadline occurs.
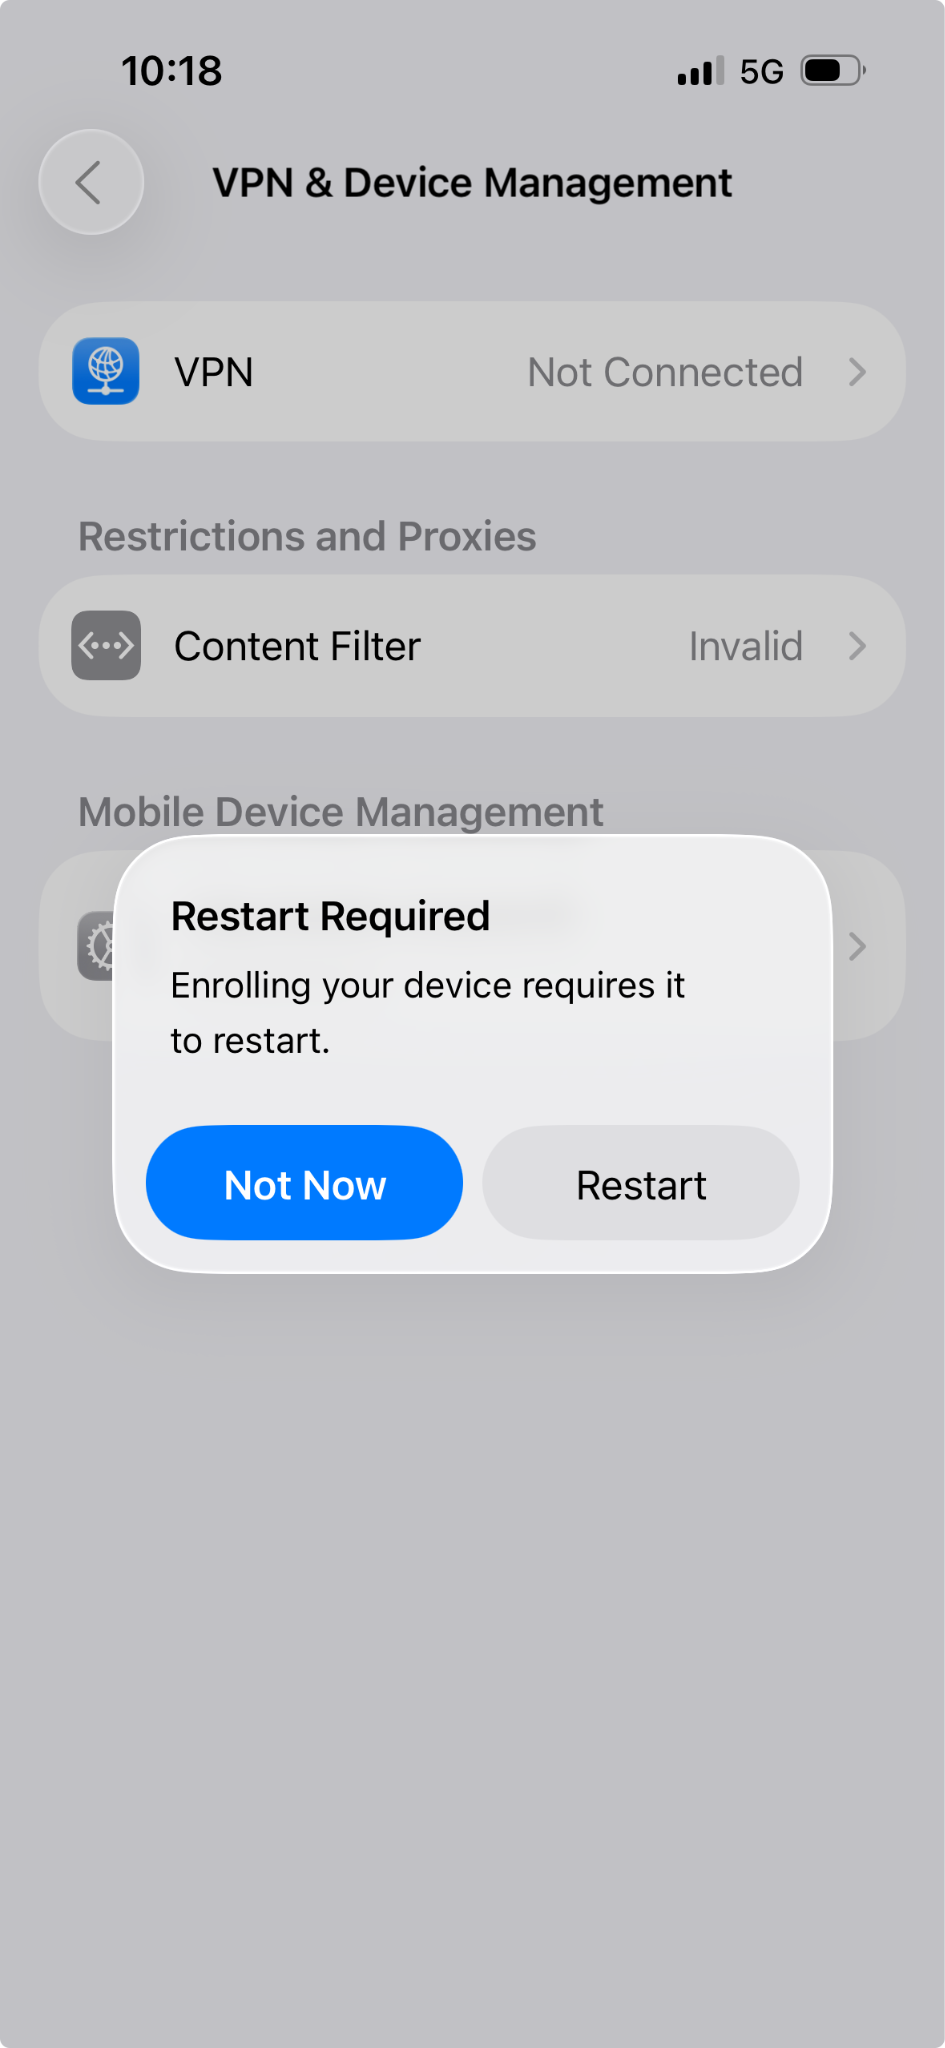
Clicking on Start Enrollment will navigate the user to Settings App, with a prompt to restart the device. Click on Restart
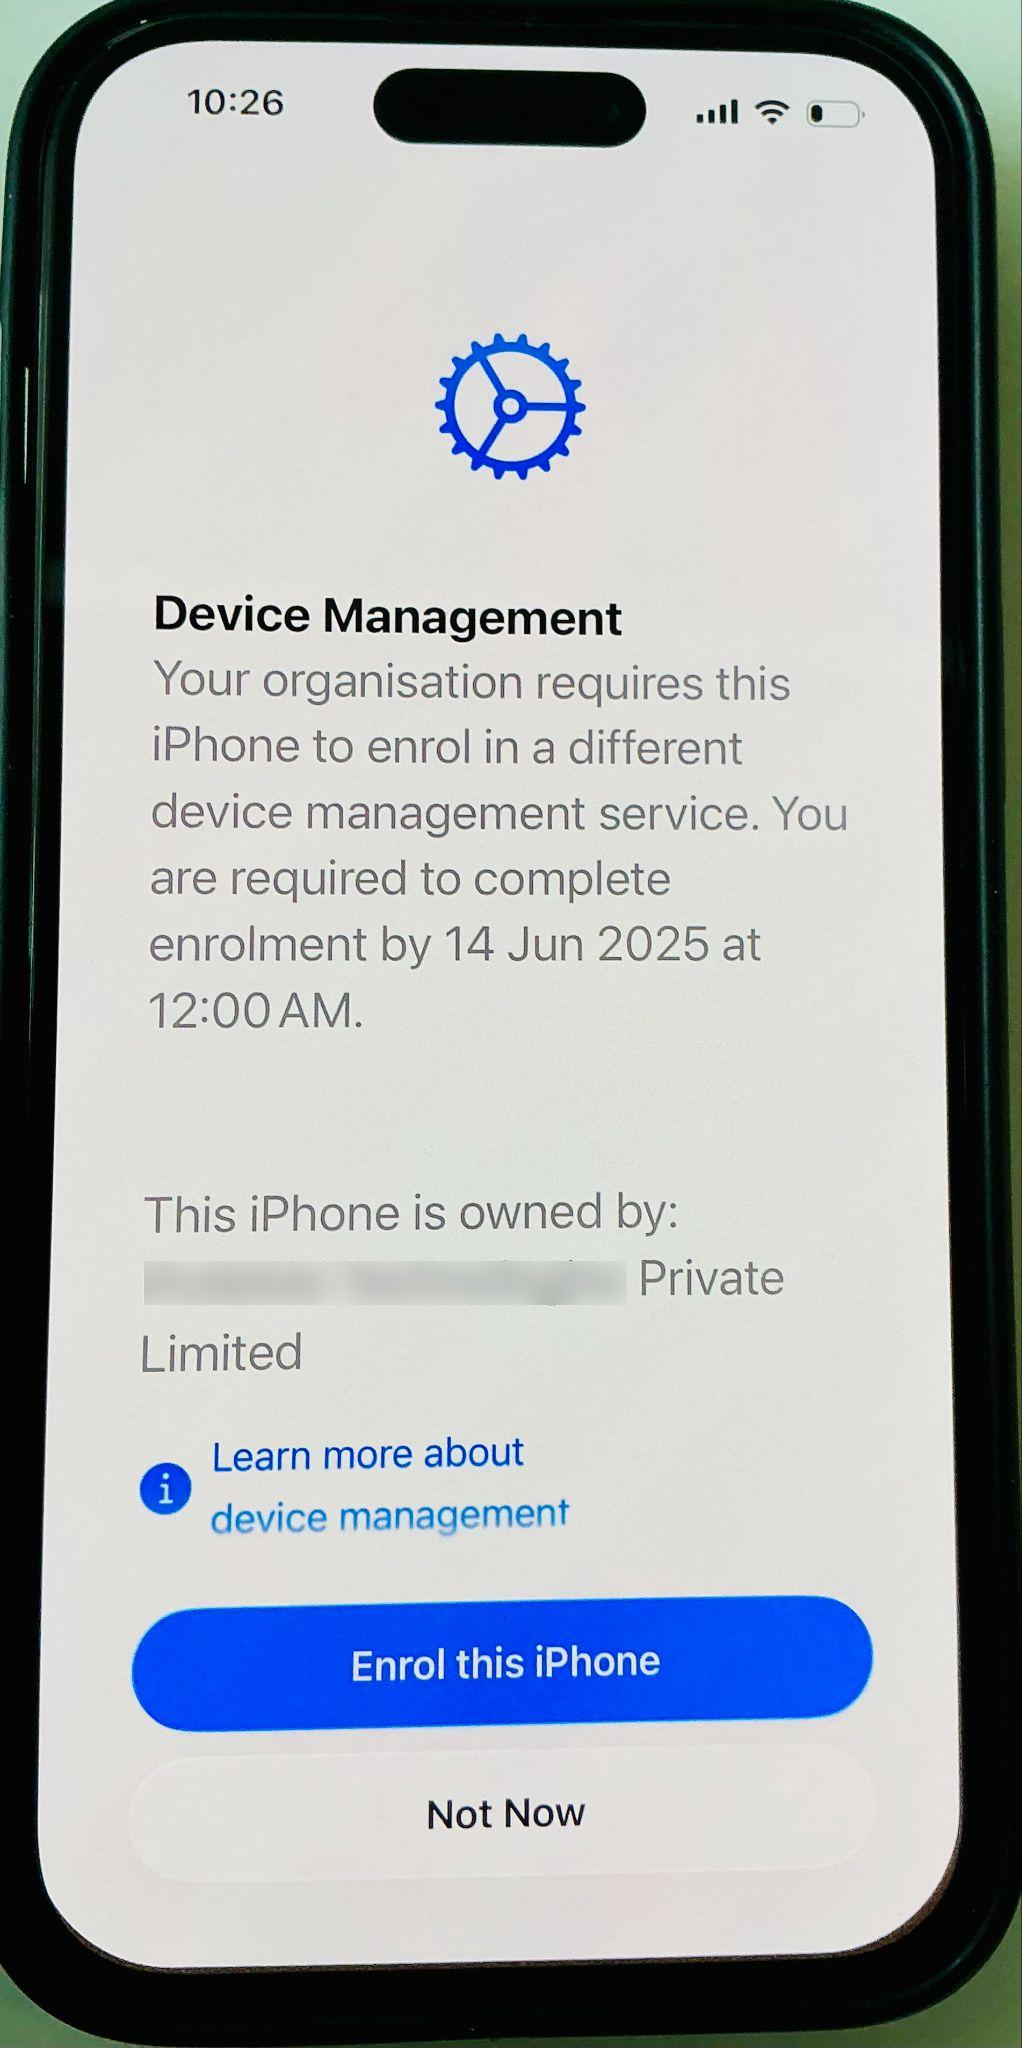
This will restart the device and navigate the user to Remote Management screen. Click on Enrol this iPhone or Enroll this iPad (in case of iPads).
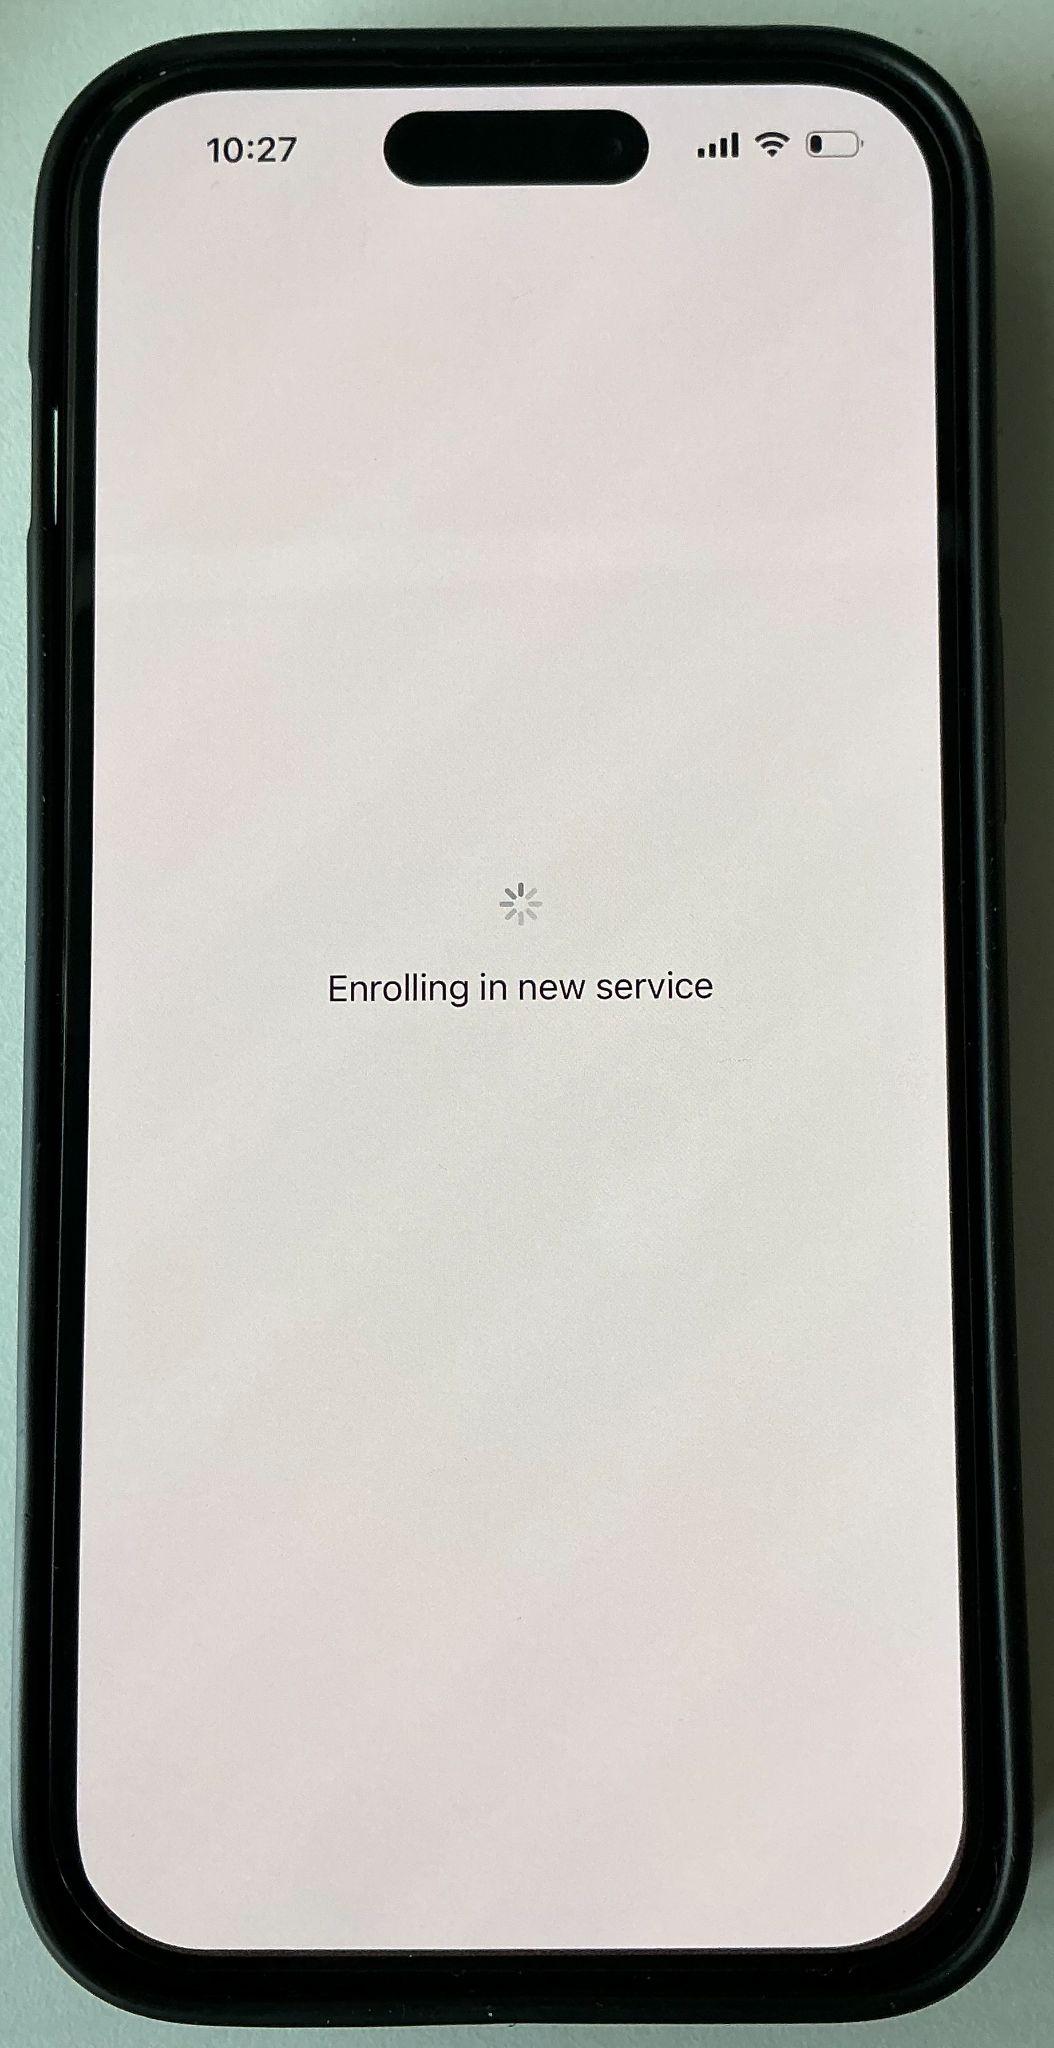
This will start the migration process. The devices are first unenrolled from existing MDM and then enrolled into the new MDM (as shown in the screenshots below).

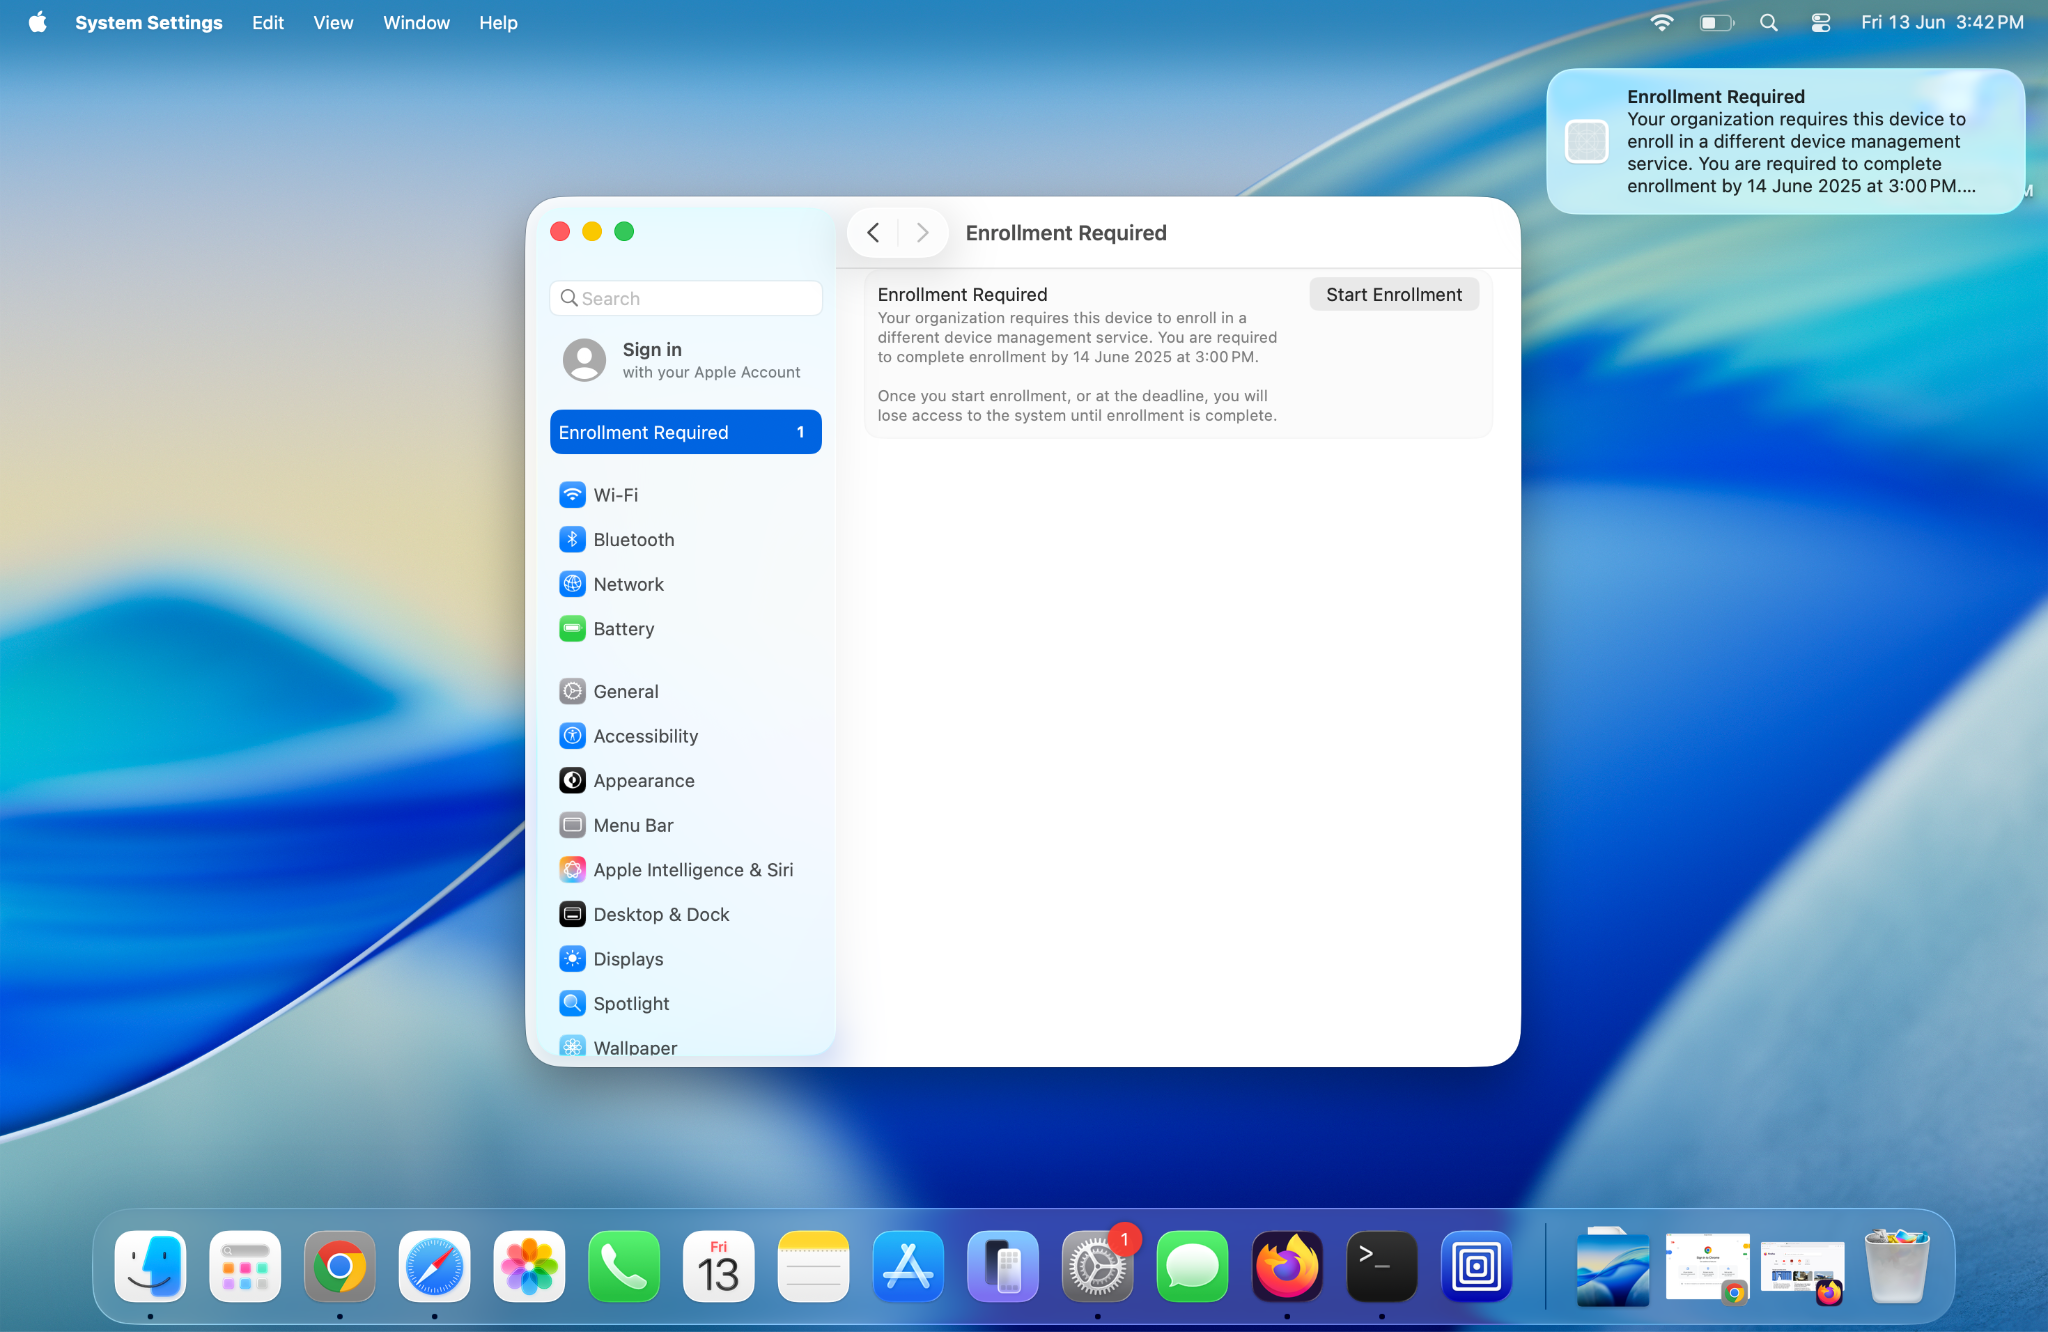
User Experience on macOS device
On macOS devices, a notification banner is displayed to the user with the migration details and deadline. Similarly, an action item appears in the Settings App. Click on Start Enrollment.
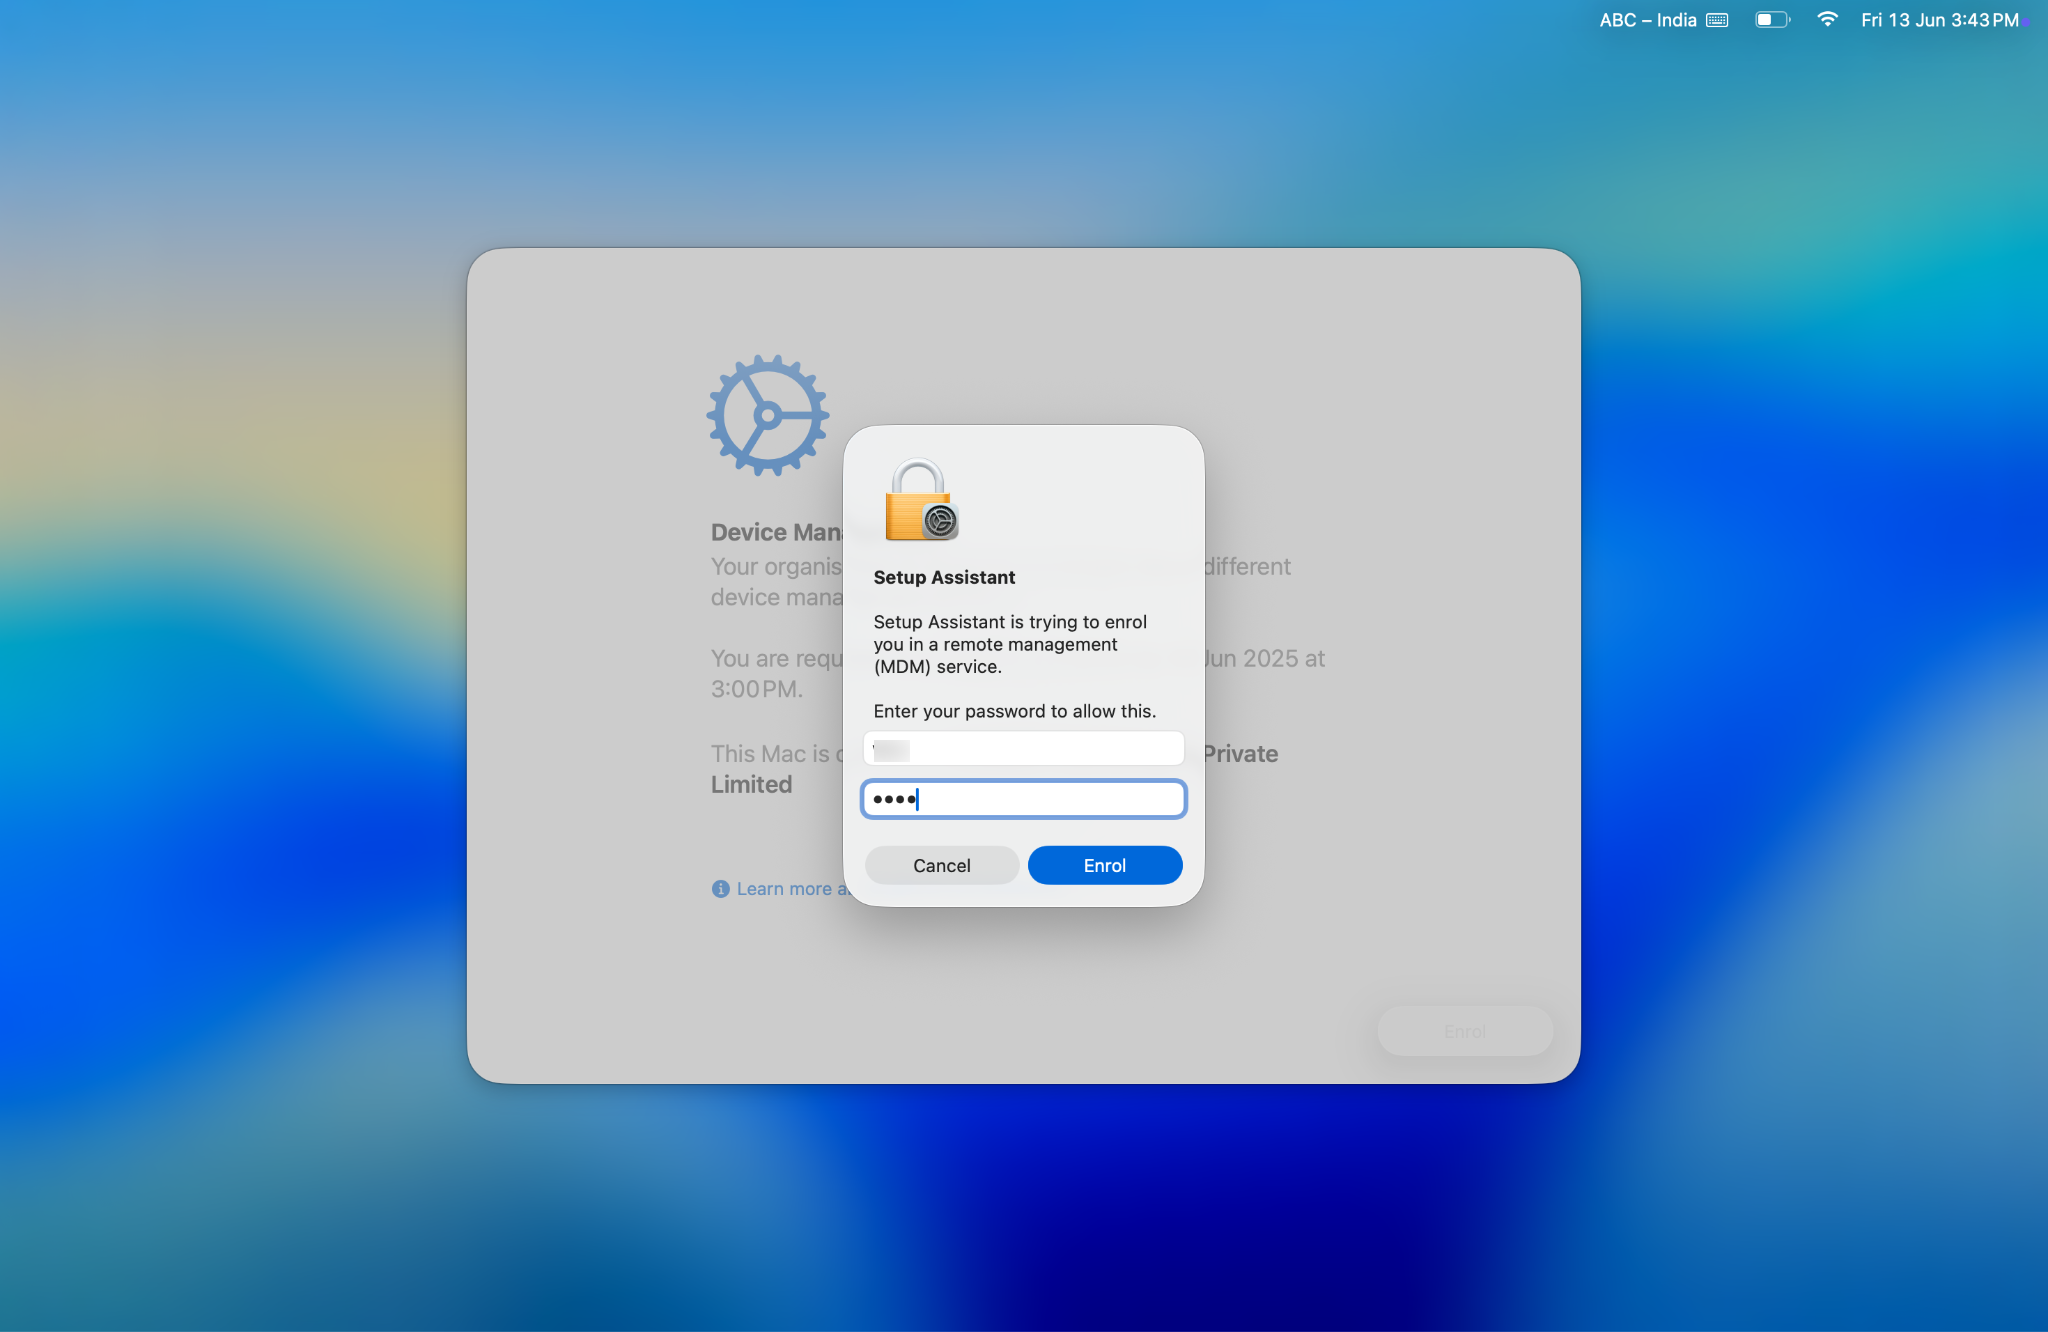
The remote management screen will be displayed. Click on Enrol

User will be prompted to enter credentials in order to start the migration process. Enter your credentials and click on Enrol
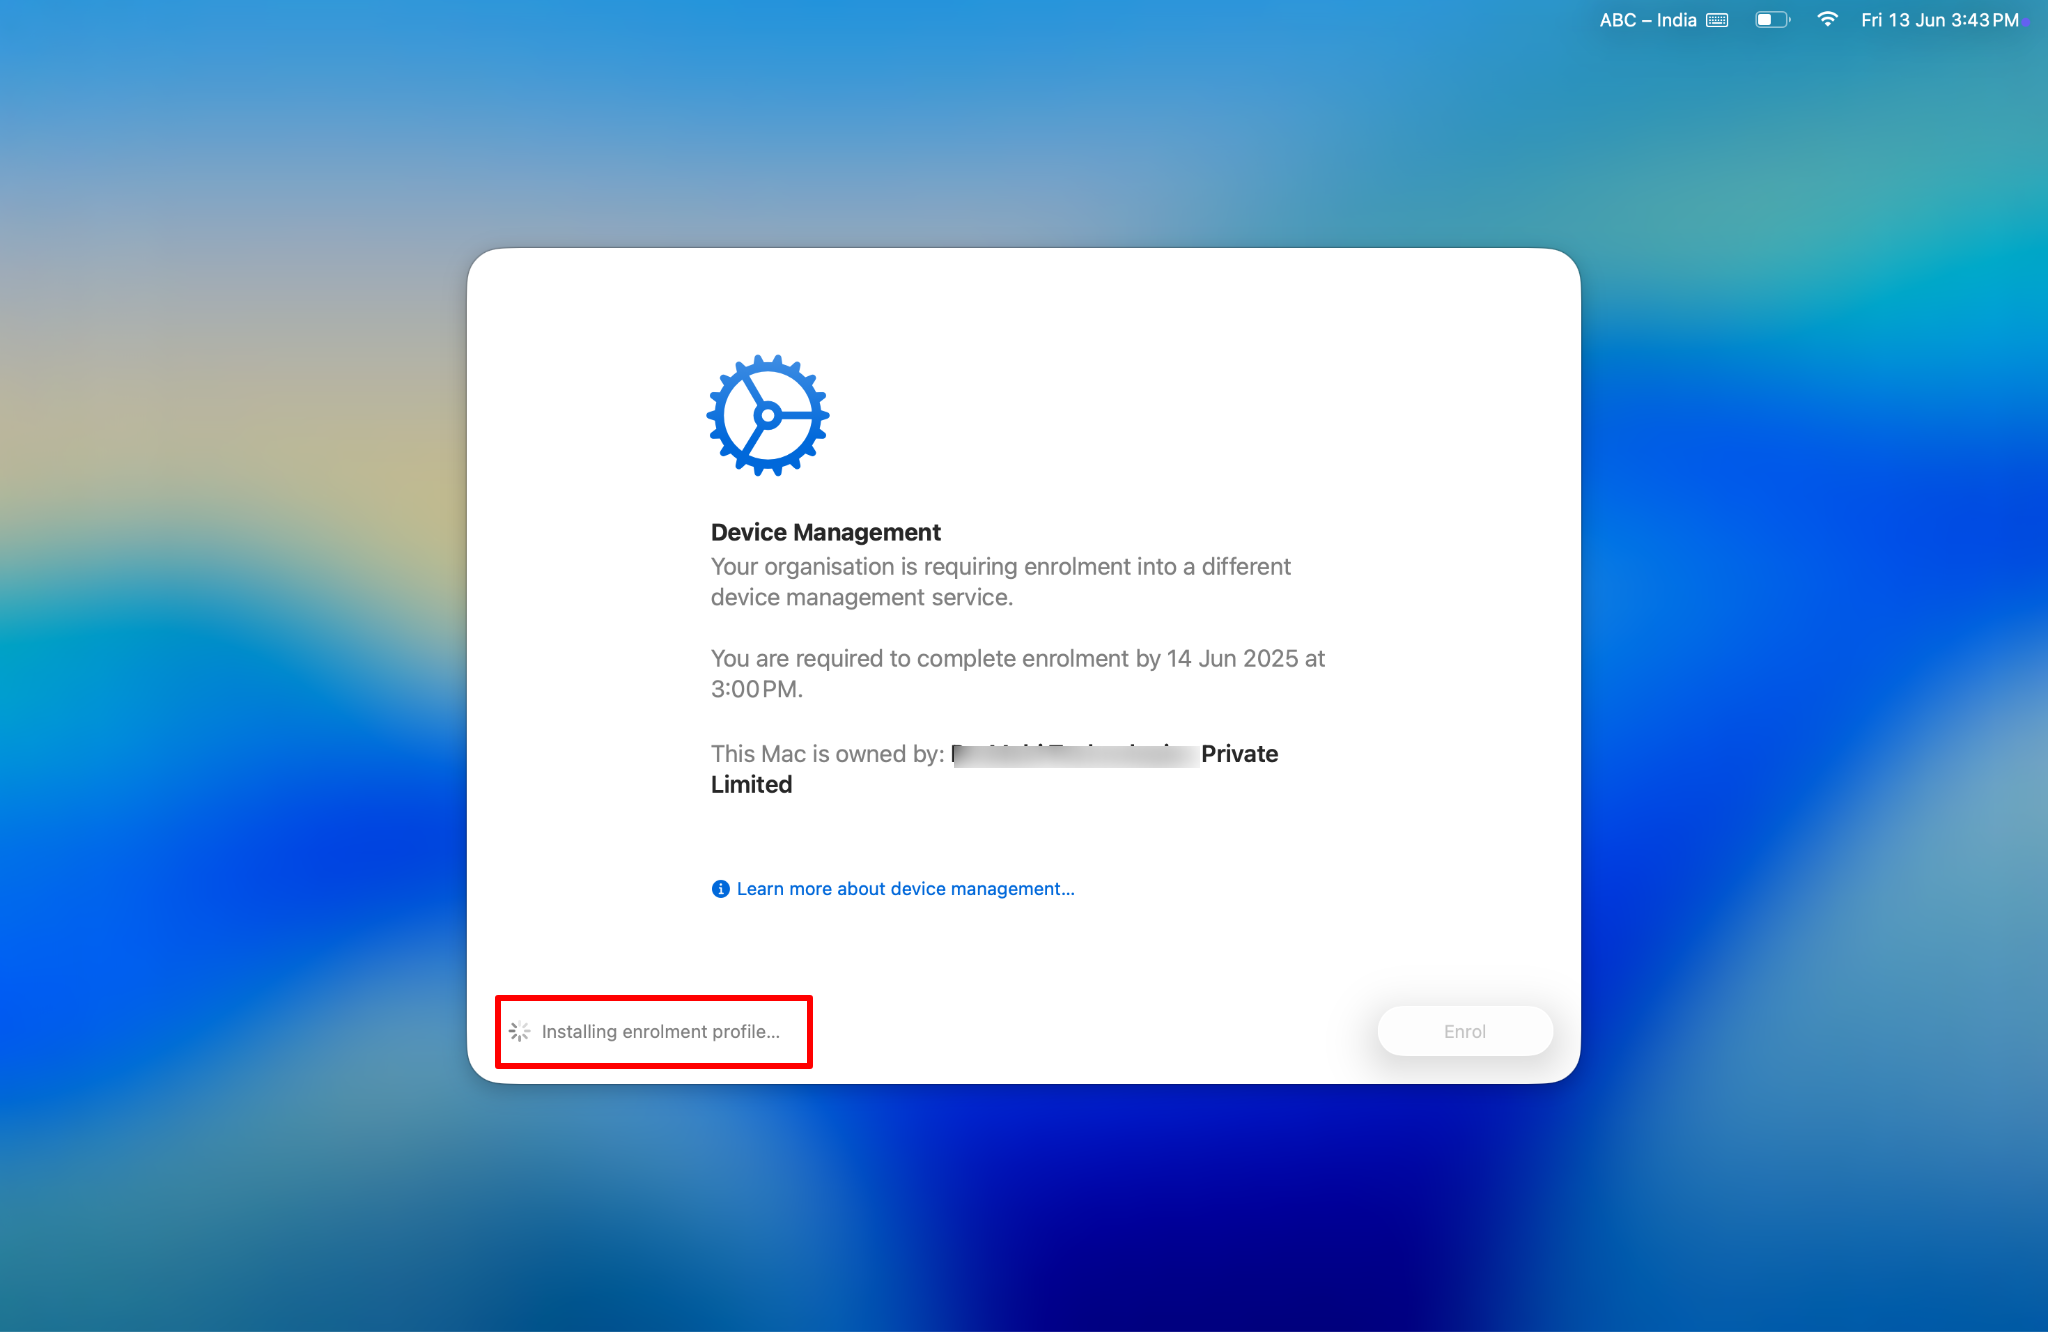
This begins the enrollment process.
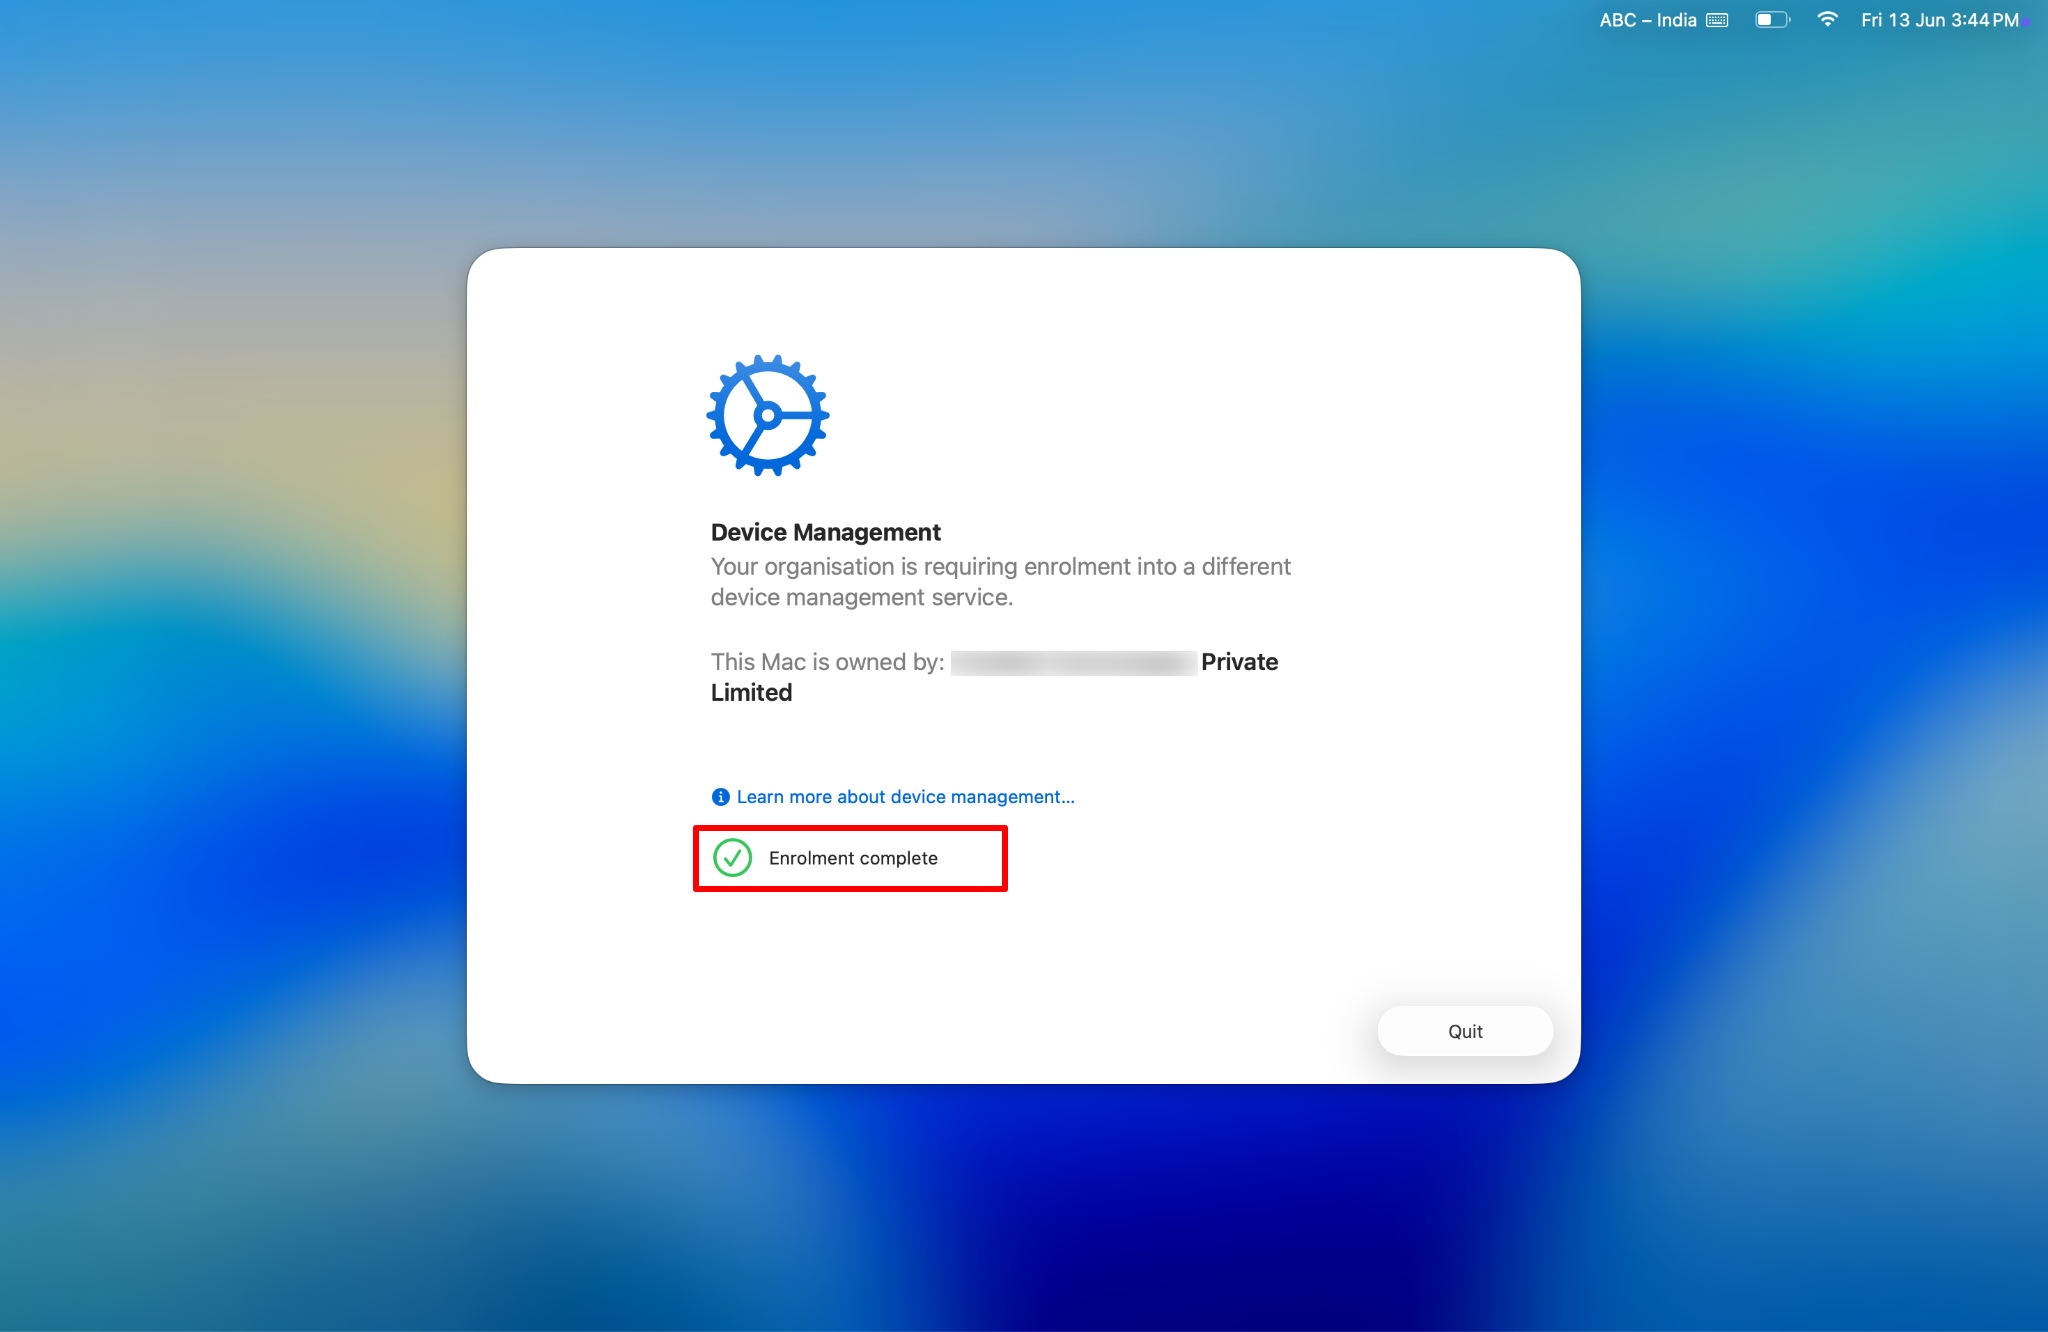
Once the enrollment finishes, a message is displayed confirming the enrollment is complete. Click on Quit to close the window.
Migration Rules for Apple Device Management
iOS Device Migration
An iOS device can only be migrated if it remains managed by the original Automated Device Enrollment (ADE) service. If the device is unenrolled and then reenrolled, whether with the same or a different management service, it cannot proceed with the migration.macOS Device Migration
A macOS device is eligible for migration as long as it is managed by any device management service. This includes scenarios where the device is unenrolled from its original ADE service and then reenrolled either with the same or a different service provided the reenrollment uses profile-based device enrollment.Manual Enrollment via Apple Configurator
If you manually enroll a device using Apple Configurator, the enrollment must occur after the 30-day provisional period has passed.Apple Business Essentials Limitations
Migration to or from a device management service within Apple Business Essentials is not currently supported.