In the Mac ecosystem, Shell scripts are a useful tool to perform system-level tasks, finding patterns in a file, processing the data in a file based on the user inputs, etc. With shell scripts, you can combine many common tasks into one script, saving you time and possible errors when performing similar tasks over and over.
Moving a step forward towards enhancing Device Management of Mac devices, Scalefusion MDM enables uploading shell script files and then executing those scripts remotely on Scalefusion-managed Mac devices.
This document describes how Shell scripts can be uploaded and deployed on managed Mac devices.
Prerequisites
Create a Mac Device Profile
The devices should have Mac version 10.15 and above
Mac Devices should be enrolled with Scalefusion
The latest version of the Scalefusion - MDM Client is installed on the enrolled Mac device.
Make sure that you have the required storage in the Enterprise Store. To learn more about space allocation, please visit here.
Enterprise App package and the following details from the developer,
shell script (.sh) file
File size should be less than 2GB
Uploading and Installing a Shell script
Step 1: Upload the Script
Follow the steps below to upload and install a Shell script,
Sign In to Scalefusion Dashboard. Navigate to Application Management > Enterprise Store
Click on Upload New App > Upload macOS App
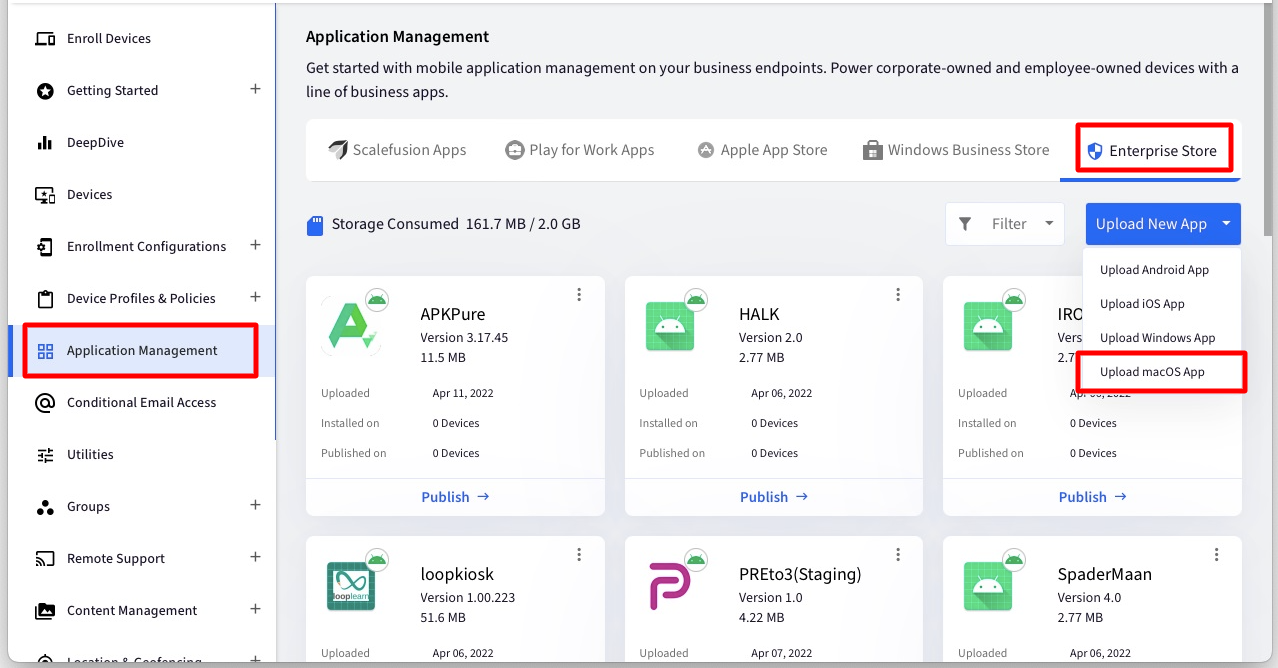
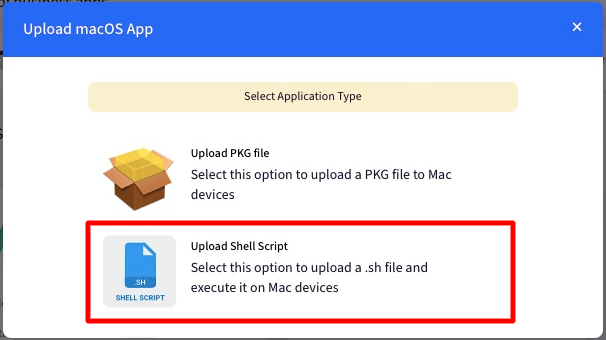
In the Upload macOS app window, choose Upload Shell script to upload the .sh file that will execute the script.
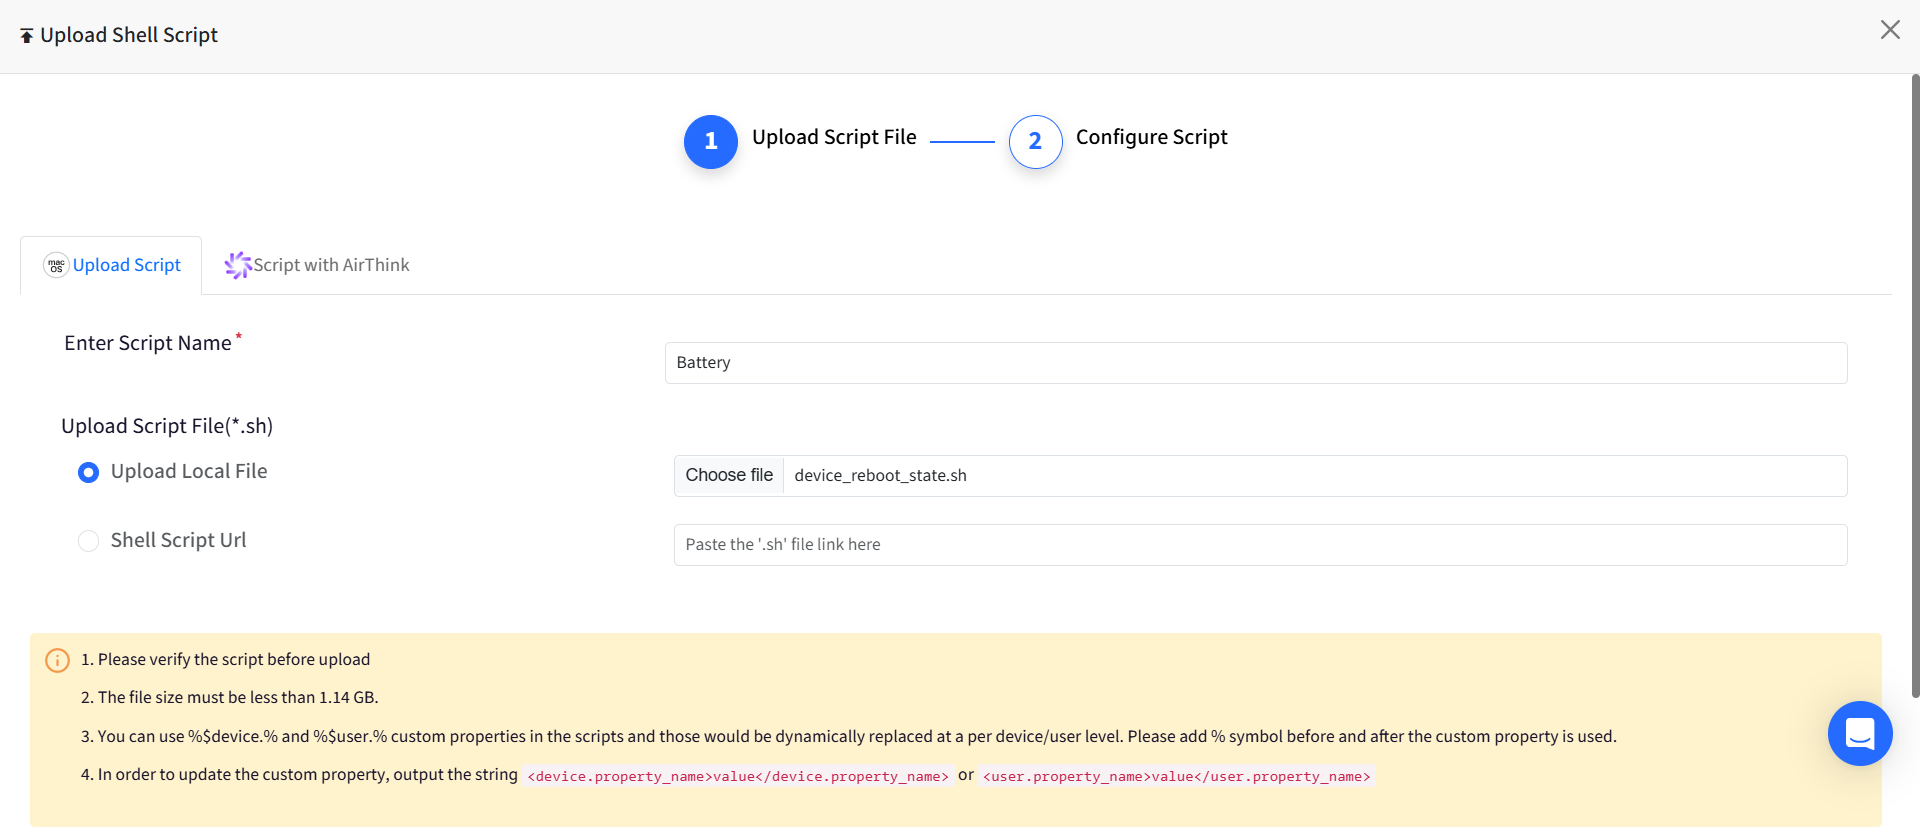
This will open the Upload Shell Scripts wizard. Upload the script file and click Next
Enter Script Name: Enter a name for the script
Upload Scripts File: Select how you want to upload the script file,
Upload Local File: Use this option if you have the .sh file available locally.
Shell Script URL: Use this option if you have hosted/uploaded the file on your servers and have a link that is accessible publicly. Provide the URL to the externally hosted file. This URL should be publicly available.
Step 2: Configure Script Settings and Custom Properties
Description: Briefly describe what this script does and when it should be used. The description can be up to 512 characters.
Run Script as signed-in user: Select whether the script has to be run as signed-in user or not:
Yes (default): Permissions of the logged-in user will be used at the time of script execution.
No: The script will be executed at the root level.
Configure Execution Frequency: Configure when the script should be executed.
Run Once On Publish: The script will be executed only once on the device when it is published from the dashboard.
Run At Every Login: The script will be executed every time the user logs into their Mac machine.
Run On Schedule: You can select on which days the script should be executed.
Select Day: Select day(s) from Monday to Sunday.
Configure Time(s): You can set a time for executing the script and can add multiple time periods.
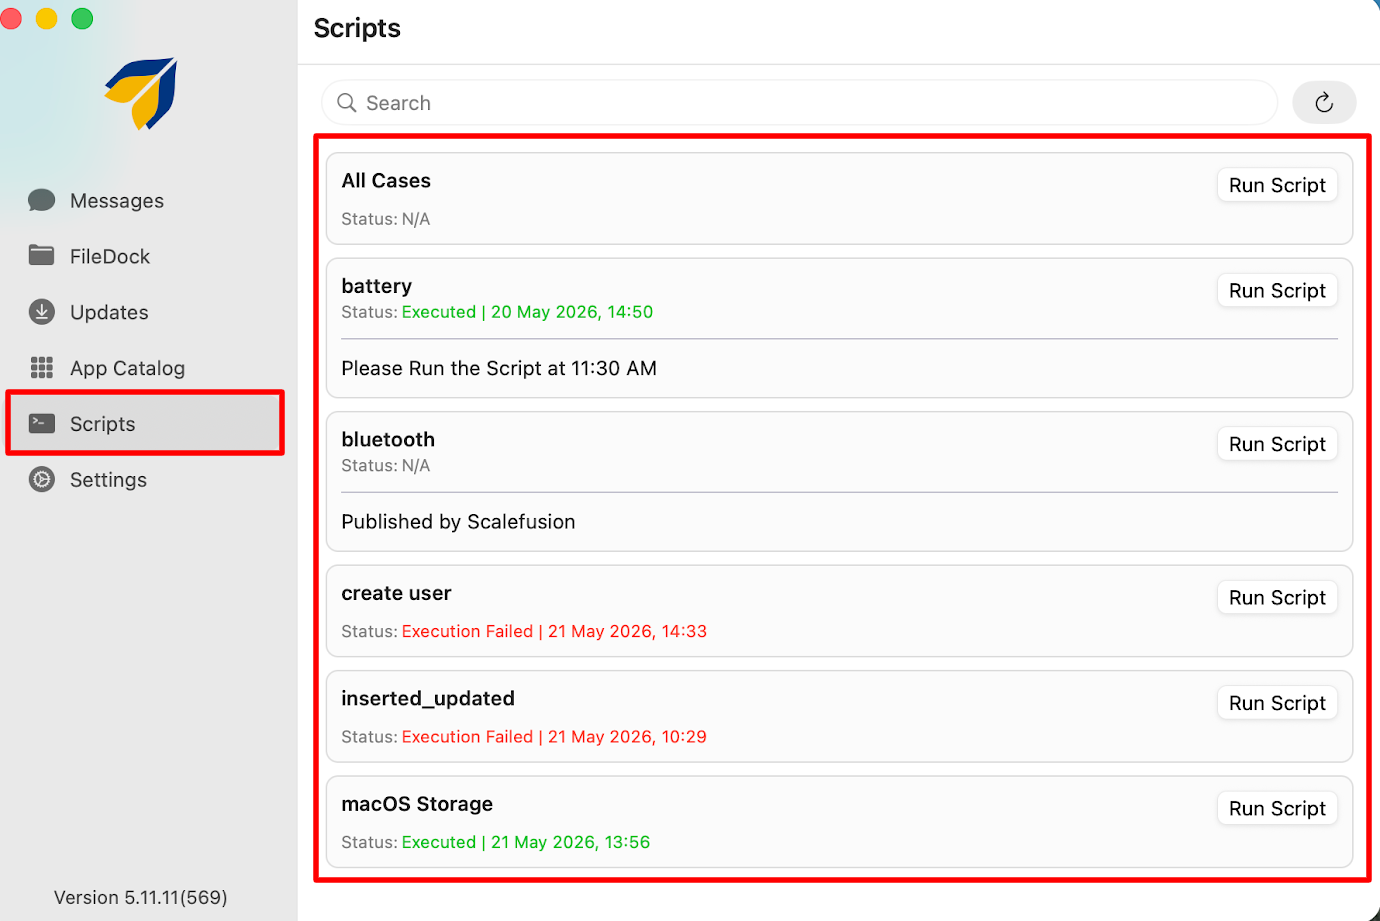
Add to Catalog: Enable this to let users execute this script on-demand from the catalog
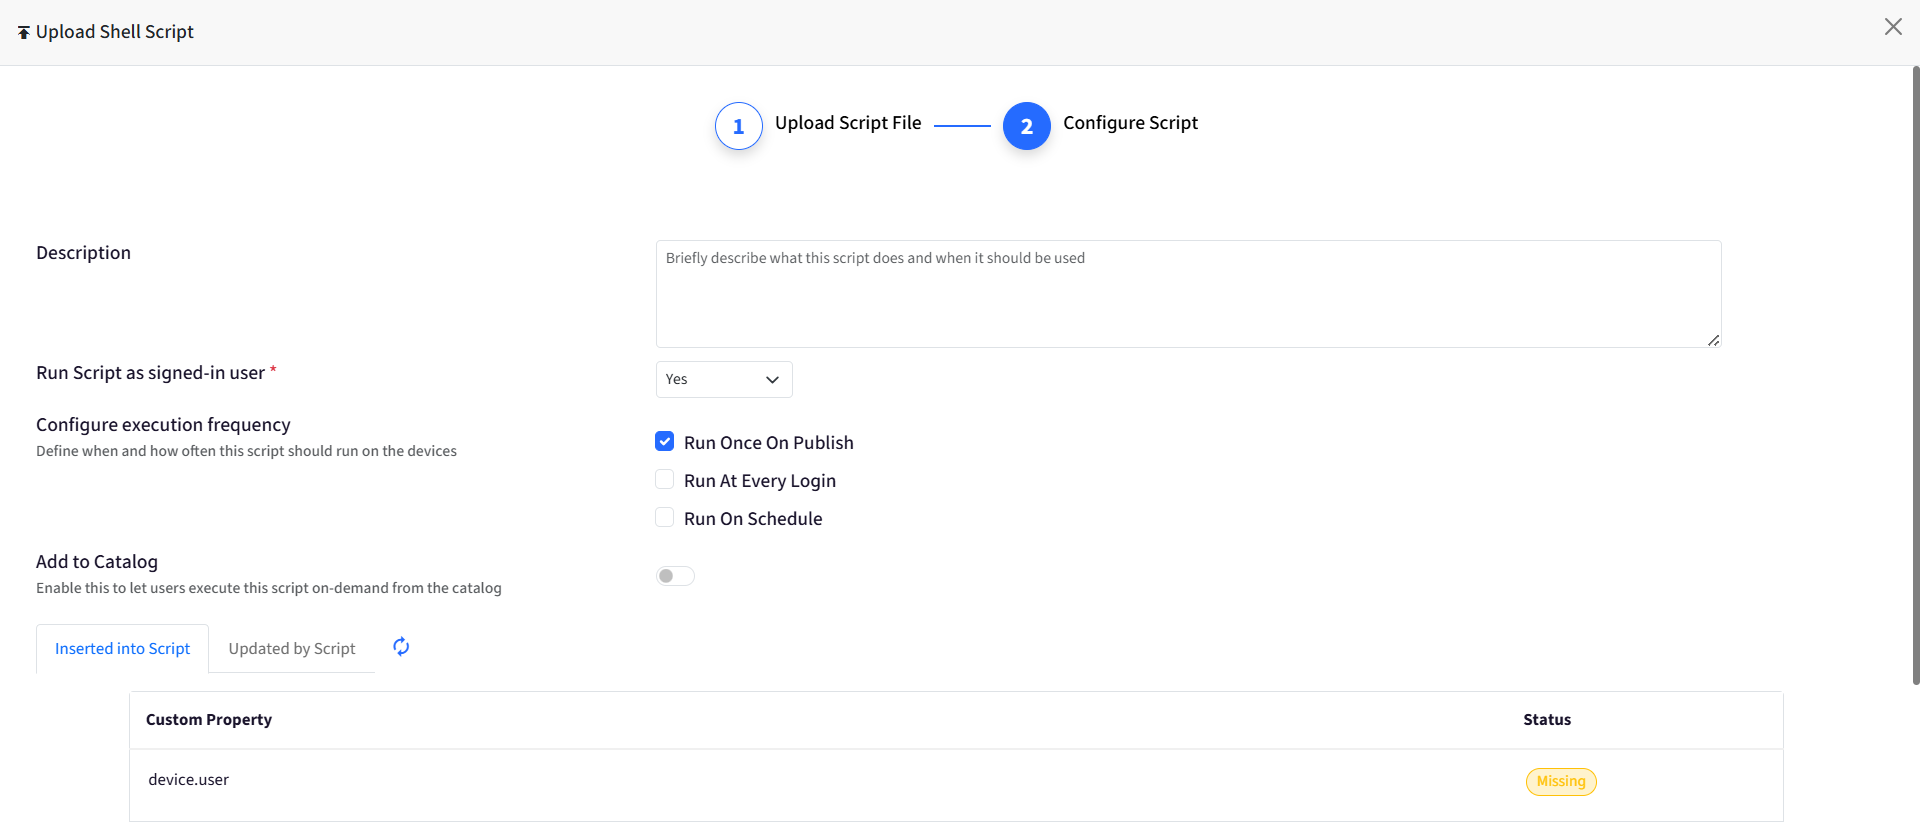
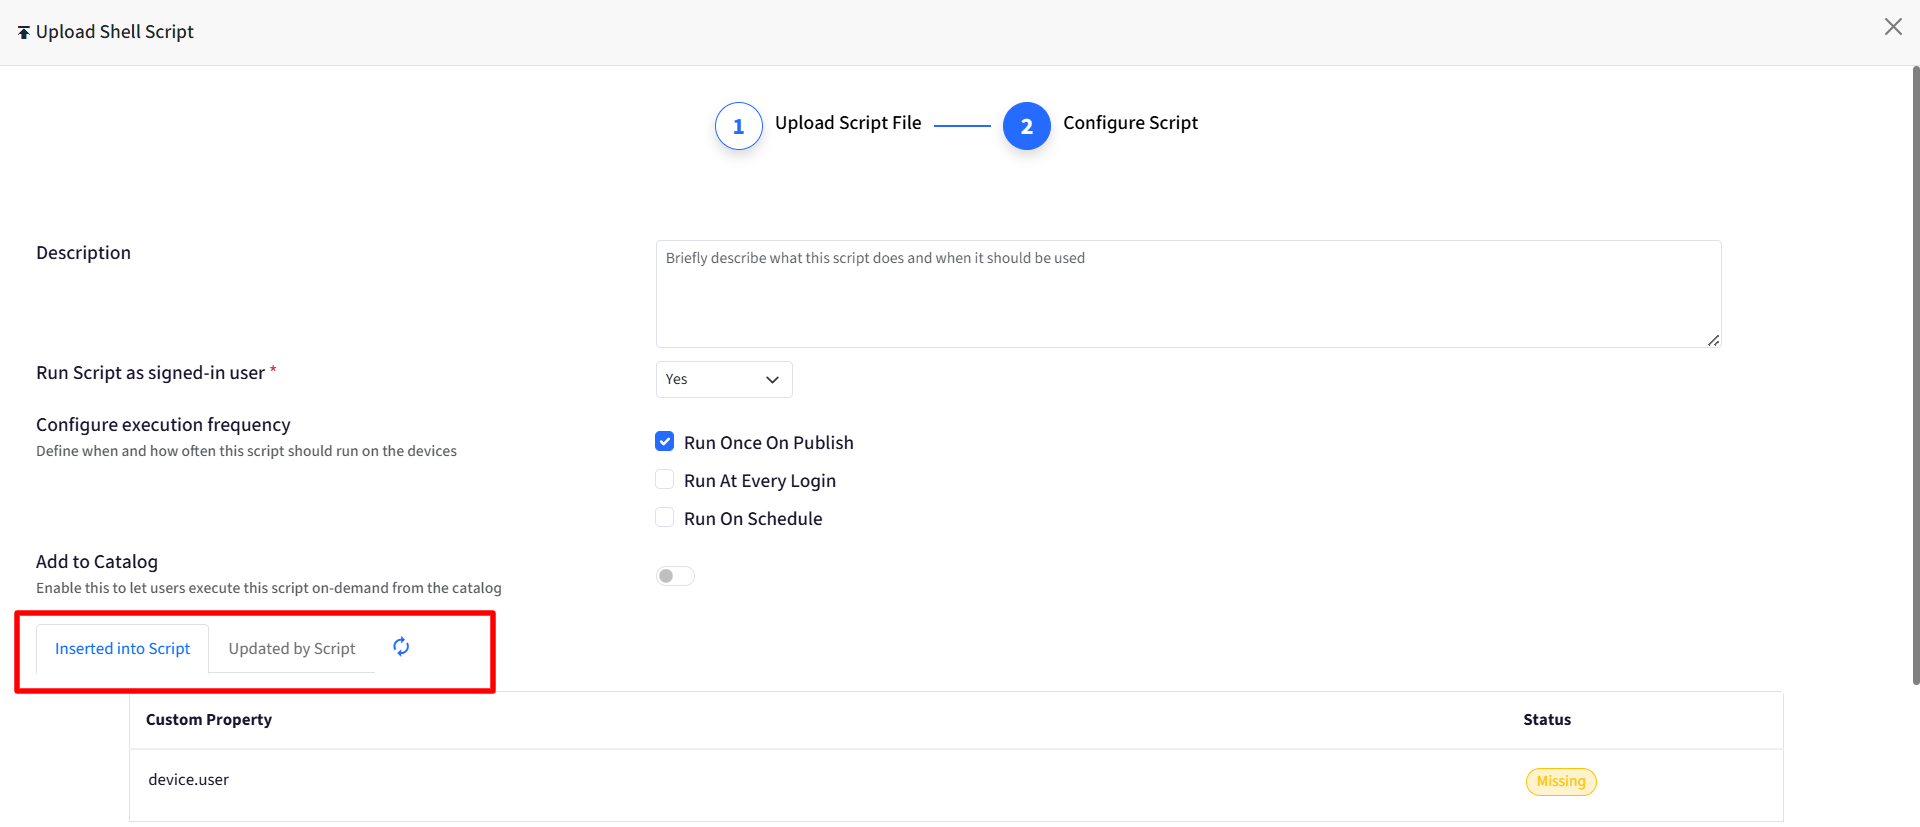
Inserted into Script: These are properties used as inputs inside the script. Each property shows:
Available: Property exists
Missing: Property does not exist
Updated by Script: These are properties updated by the script output. For each property, you can:
Bind or unbind it from the script (from Actions)
Choose whether to reset the value to
Nullif no value is foundSee if it’s already bound to another script (in Status)
A custom property can be bound to one script per platform.
Restrictions on Updating Custom Properties
If a custom property is linked to a script:
It cannot be edited from:
Device details
User details
Bulk upload
Developer APIs
You must remove the script binding first.
Click Save
Once you click on SAVE, Scalefusion will process the script, and if the processing succeeds, then the following dialog will be shown.
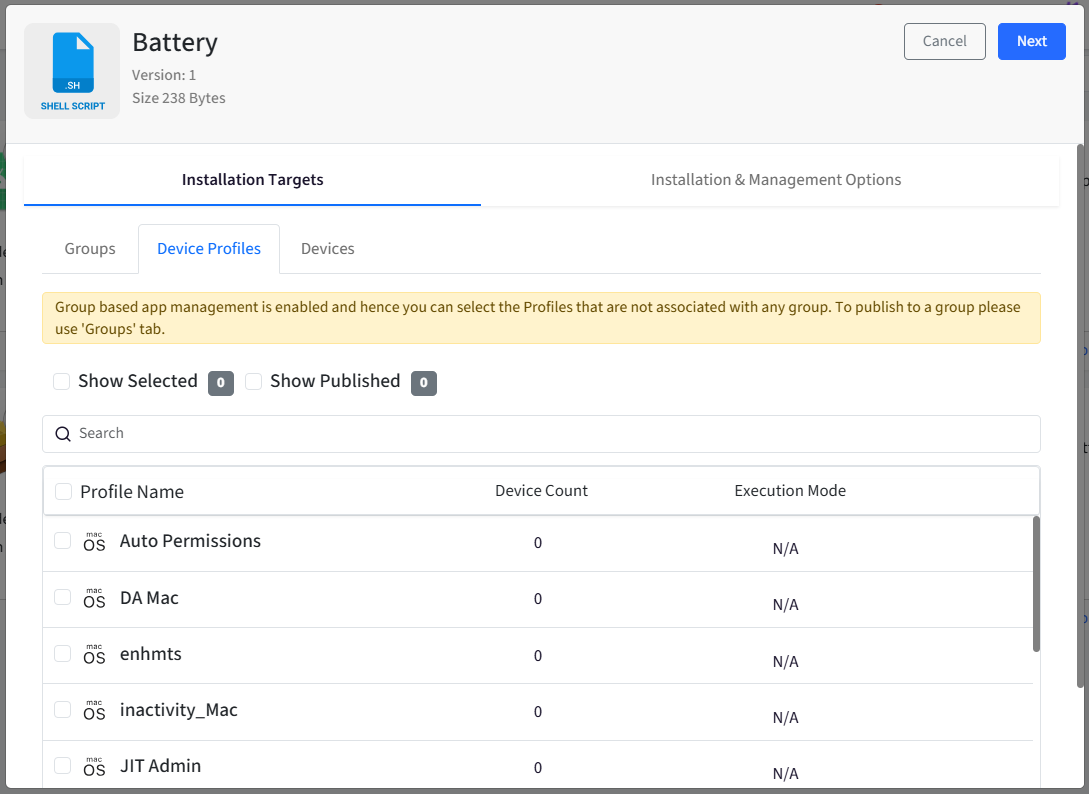
Step 3: Publish Script
The Publish window includes the following tabs:
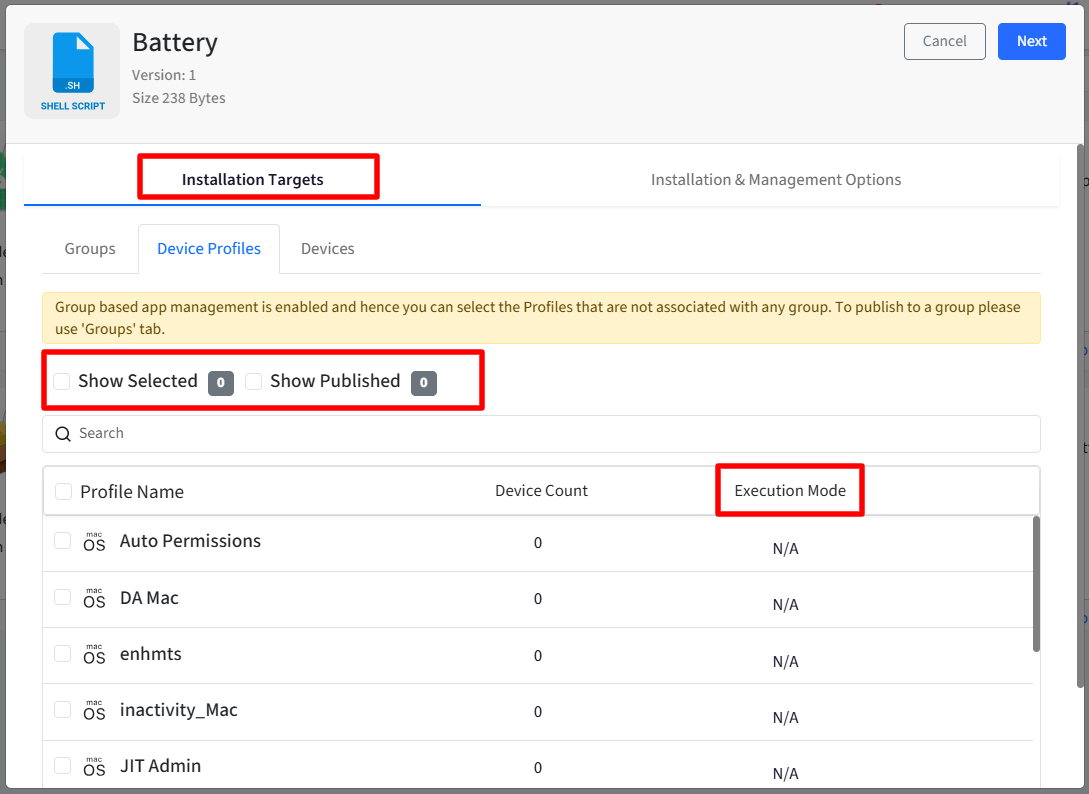
Installation Targets
Installation & Management Options
Installation Targets
The Installation Targets allows you to select and review the Profiles, Groups, and Devices where a script will be published.
Published Targets: Use the Show Published option to display targets where the script has already been published.
Execution Mode: The Execution Mode column displays the current execution configuration for each target. This displayes:
N/A: The script has not been published to the target.
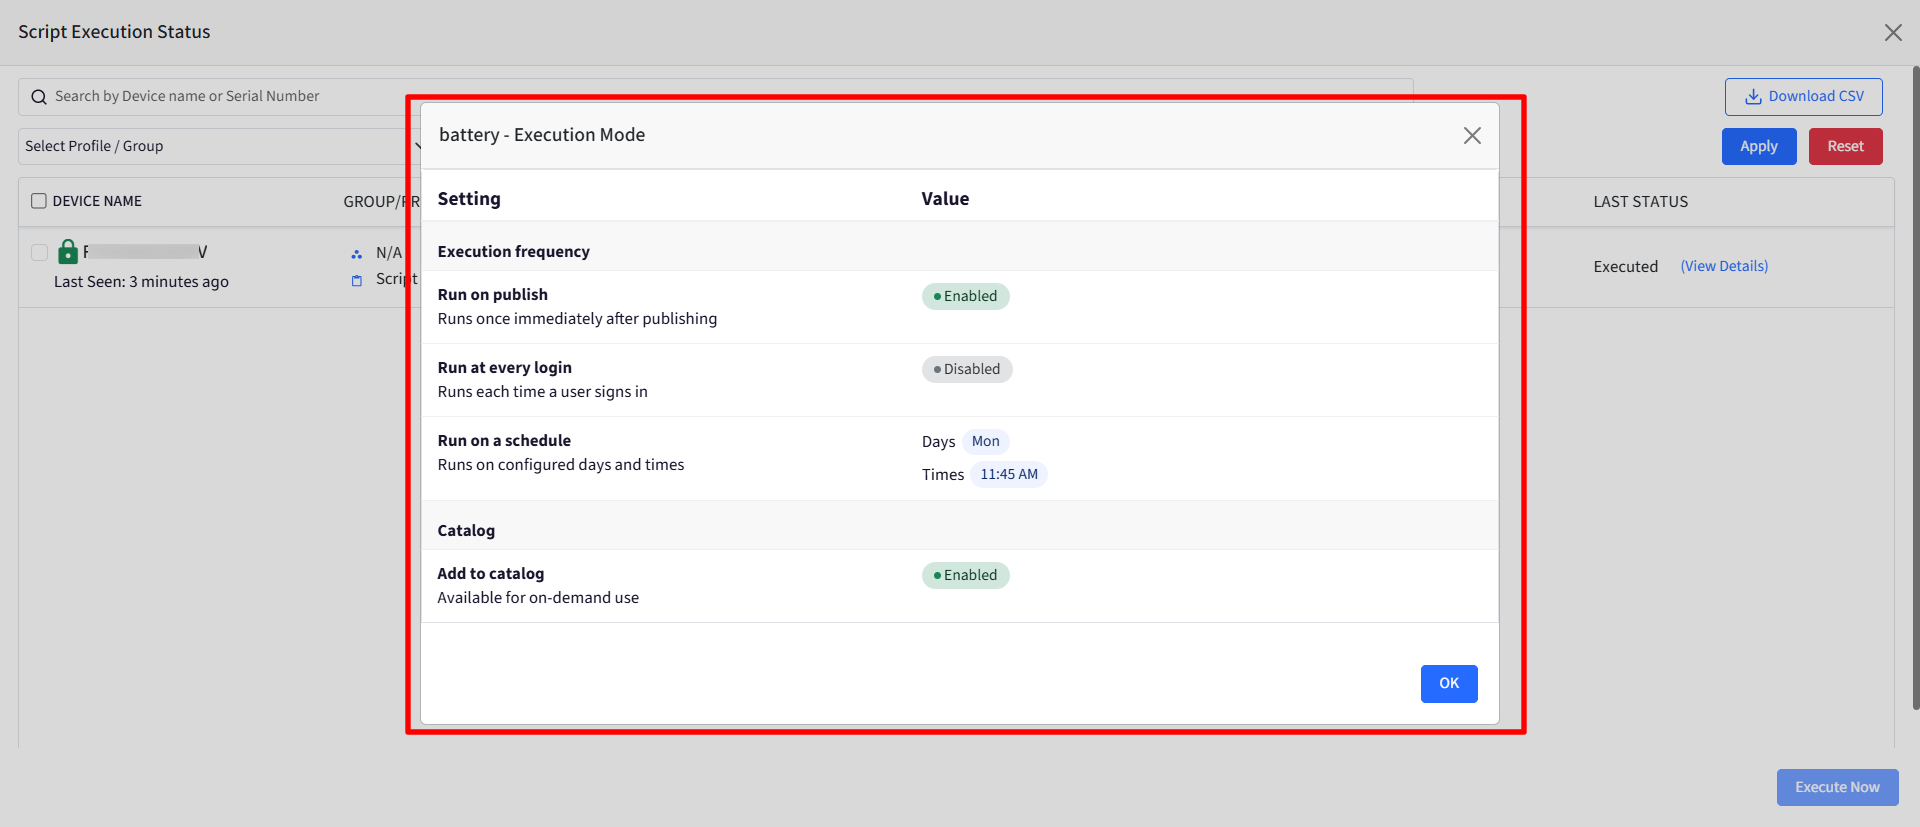
View Execution Options: Opens the Execution Options dialog to view execution settings for the published script.
Installation & Management Options
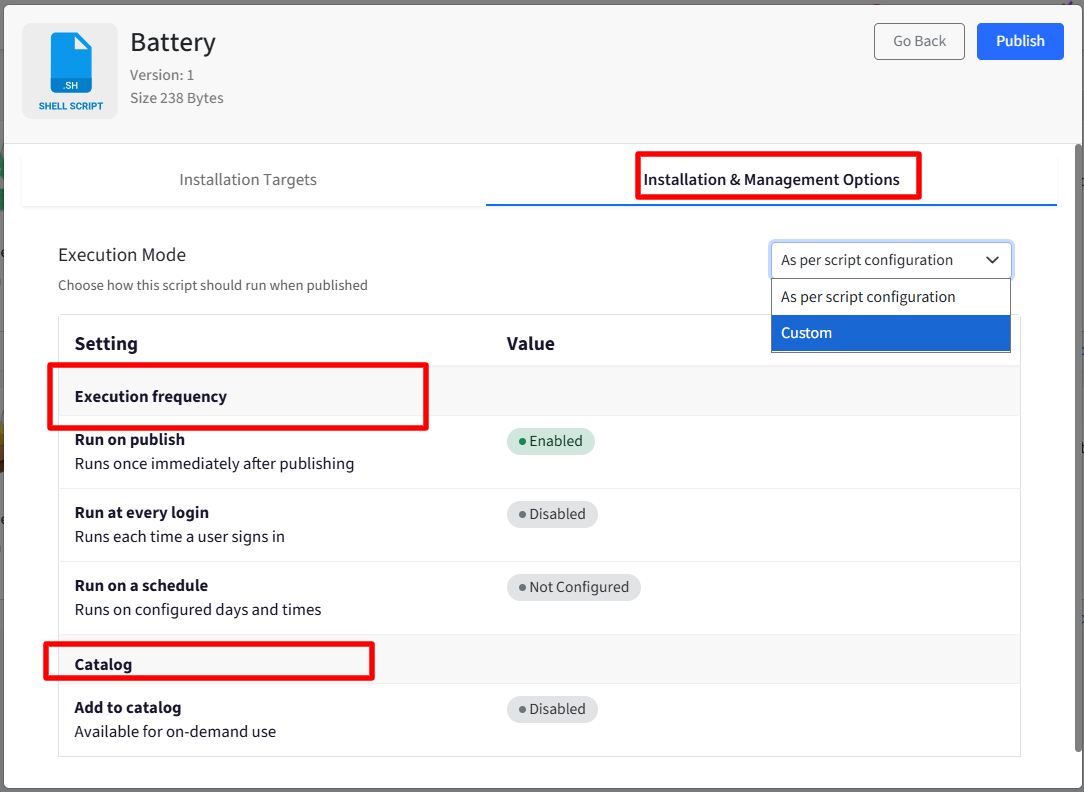
The Installation & Management Options allows administrators to configure how the script should execute when published.
Execution Mode: Defines how the script should run when published. Following are the available options:
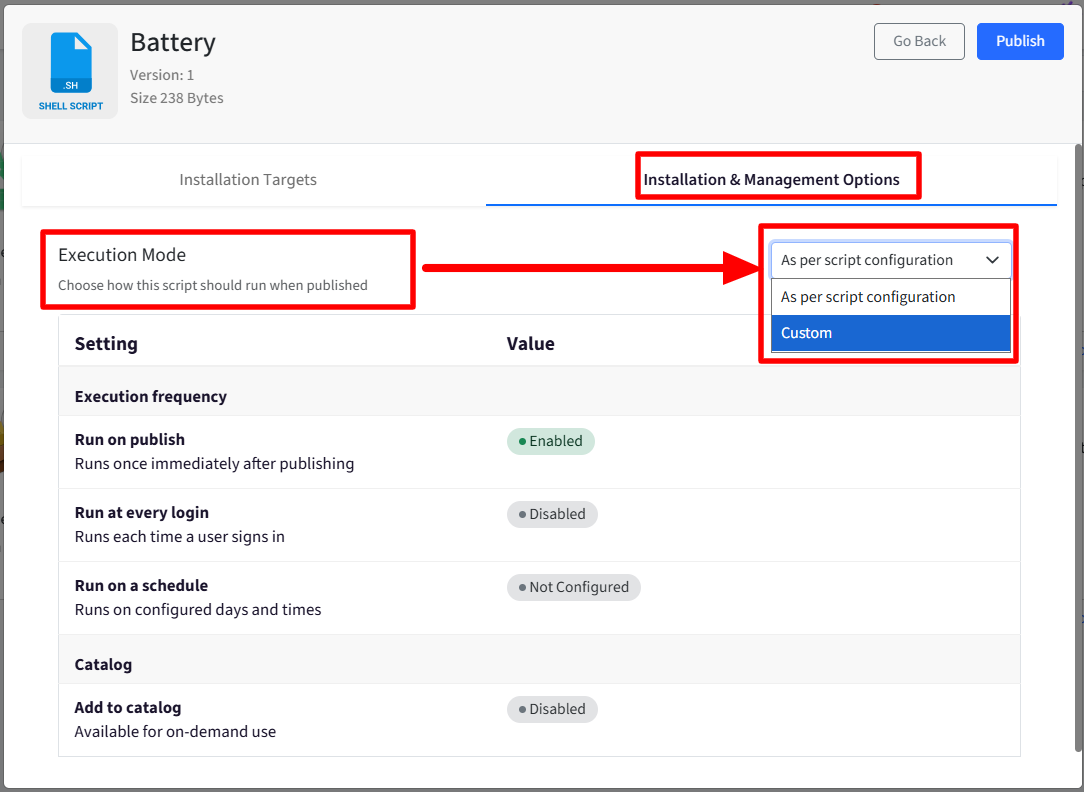
As per script configuration: Uses the execution settings configured within the script.
Custom: Allows custom execution settings during publishing. When Custom is selected, the following options are available:
Run as per Frequency: Runs the script using the execution frequency configured in the script settings. If frequency settings are not configured for the script, the option remains disabled
Add to Catalog: Makes the script available under Scripts section inside the agent app on the device for on-demand execution.
When Custom execution mode is selected, at least one of the above execution options must be enabled
Script Configuration: The Script Configuration section displays the execution settings configured within the script to help you make publishing decisions.
Execution Frequency
Run on Publish: Indicates whether the script runs immediately after publishing.
Run at Every Login: Indicates whether the script runs whenever a user signs in.
Run on a Schedule: Displays the configured schedule (day and time) for script execution. If no schedule is configured,it displays Not Configured
Catalog
Add to Catalog: Indicates whether the script is available for on-demand execution.
Checking Execution Status
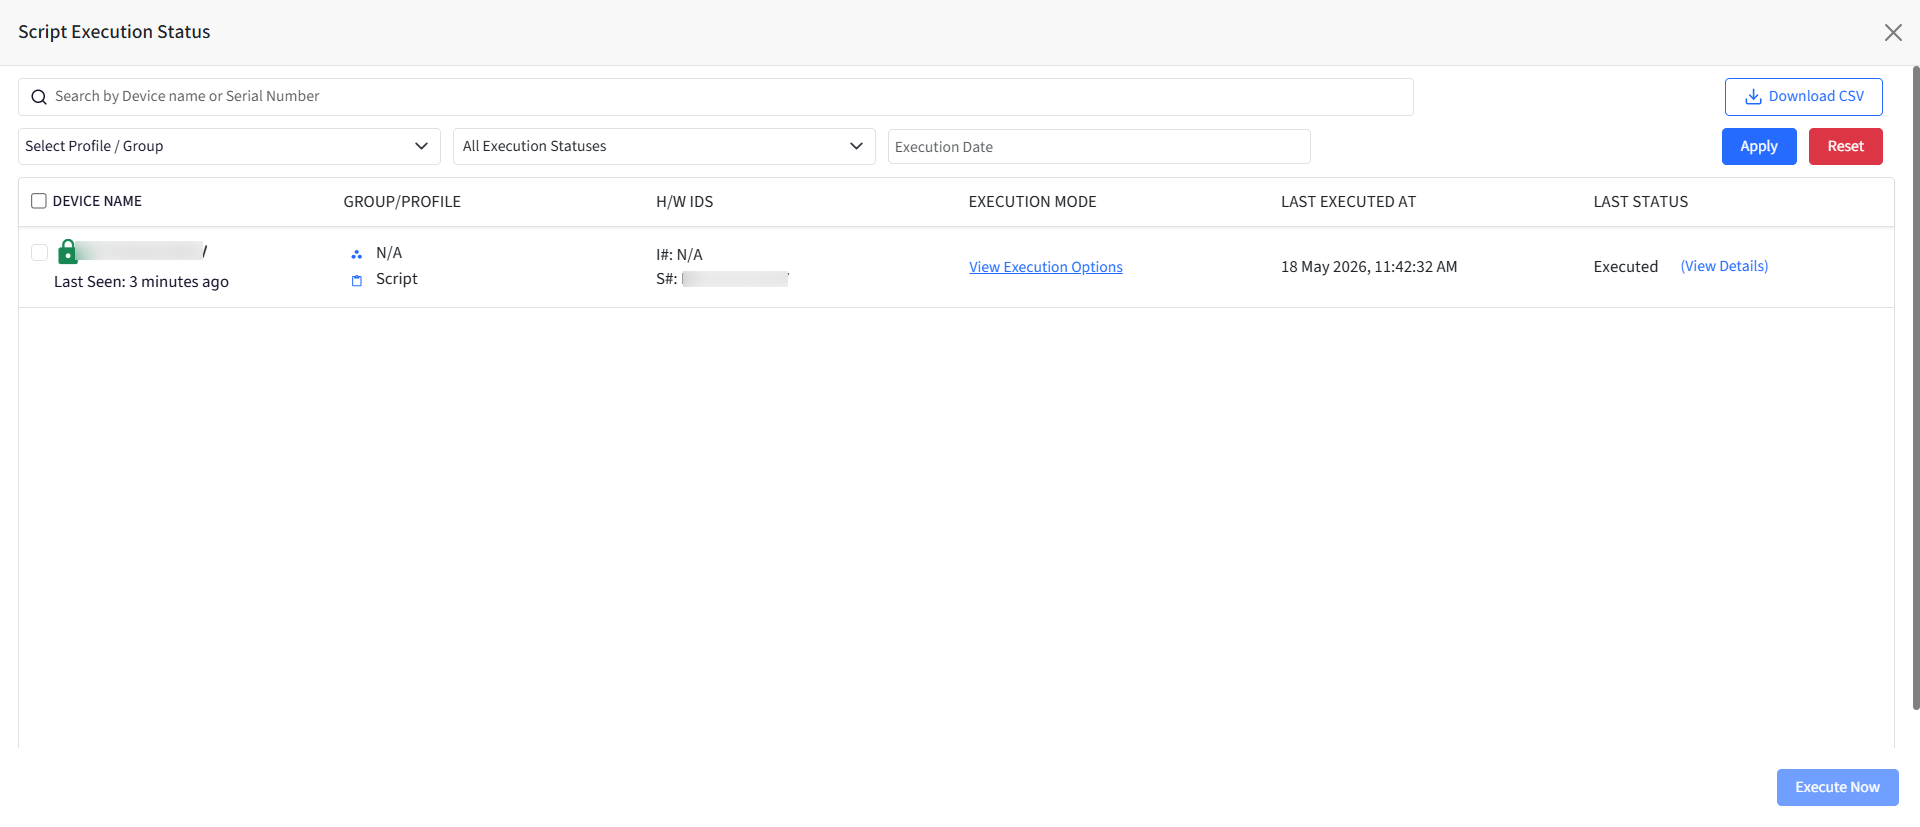
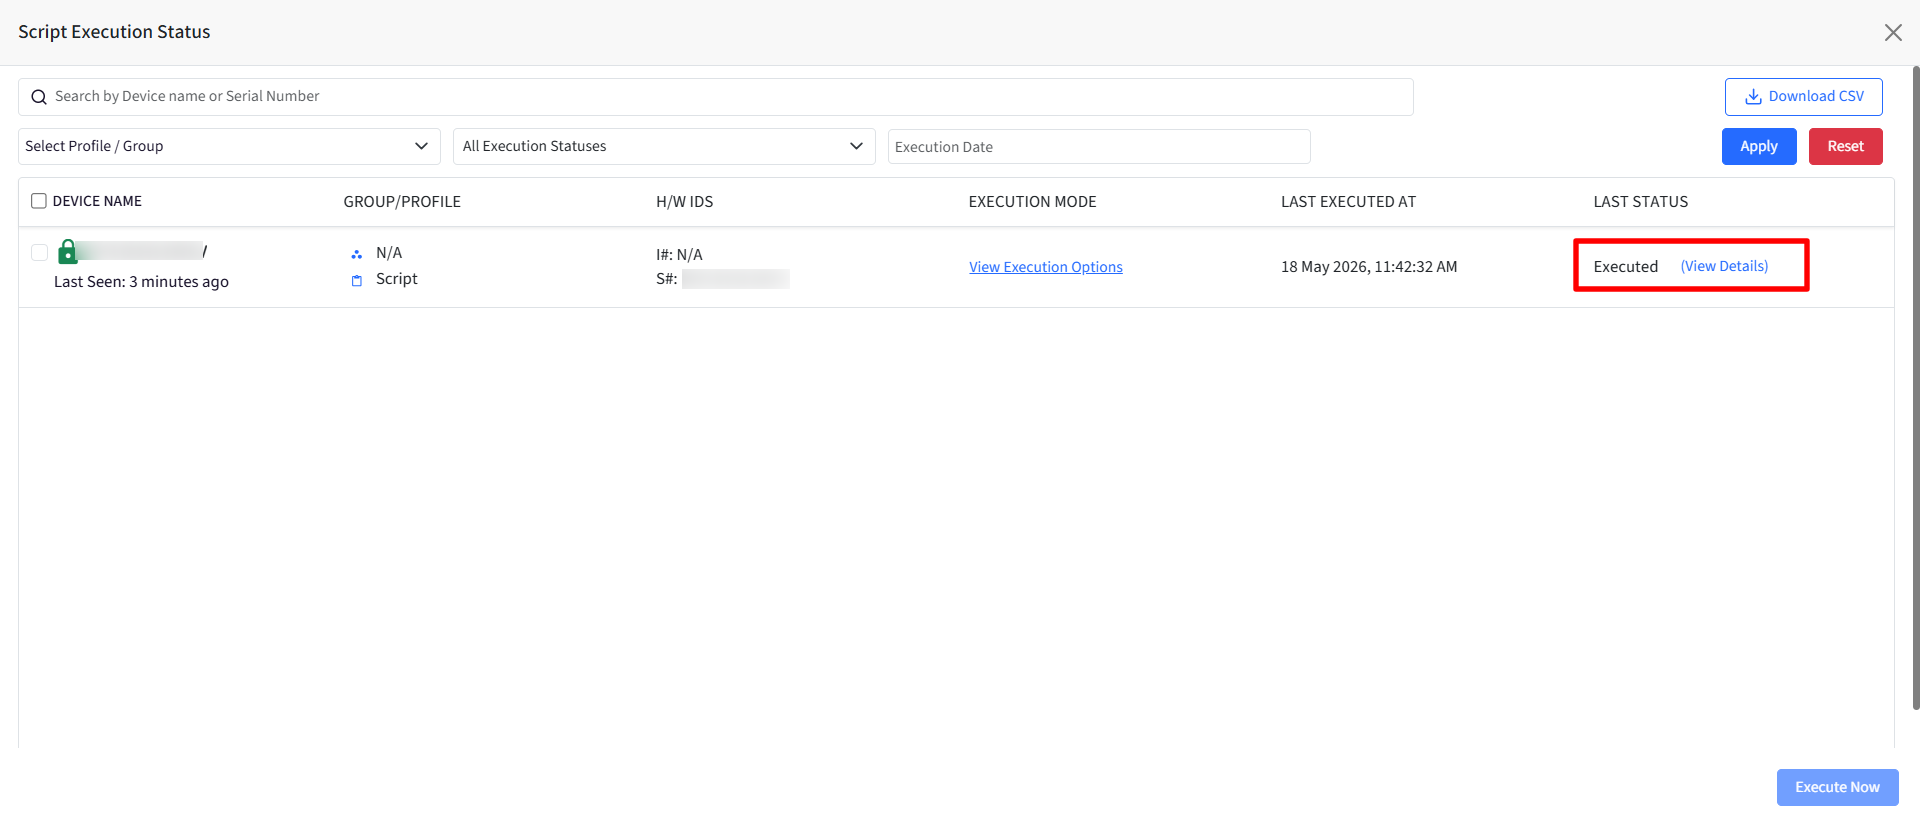
After publishing, you can check the status of whether the shell script pushed from the enterprise store has been executed or not by using the View Status option,
A script that is well executed on the device shows the status as Executed or Downloaded, and if not, then the status shows as either Pending, Executing, or Execution Failed.
Here,
View Execution Options opens the Script Options dialog displaying the Script Configuration table, including execution frequency and catalog settings.
You can search for devices using Device Name or Serial Number and also filter devices.
Execute Now: Queues the script for execution on selected devices. The action is available only when selected devices are not in the following states:
Executing
Downloading
On Device
The shell script executed will reflect on the device, or the data fetched through the script will be visible on the dashboard. For example, in the above step, we have uploaded and published a script to get the battery status from the managed device. Navigating to the View Status and clicking on the View Details hyperlink, we are able to see the details of the battery health in the Output tab.
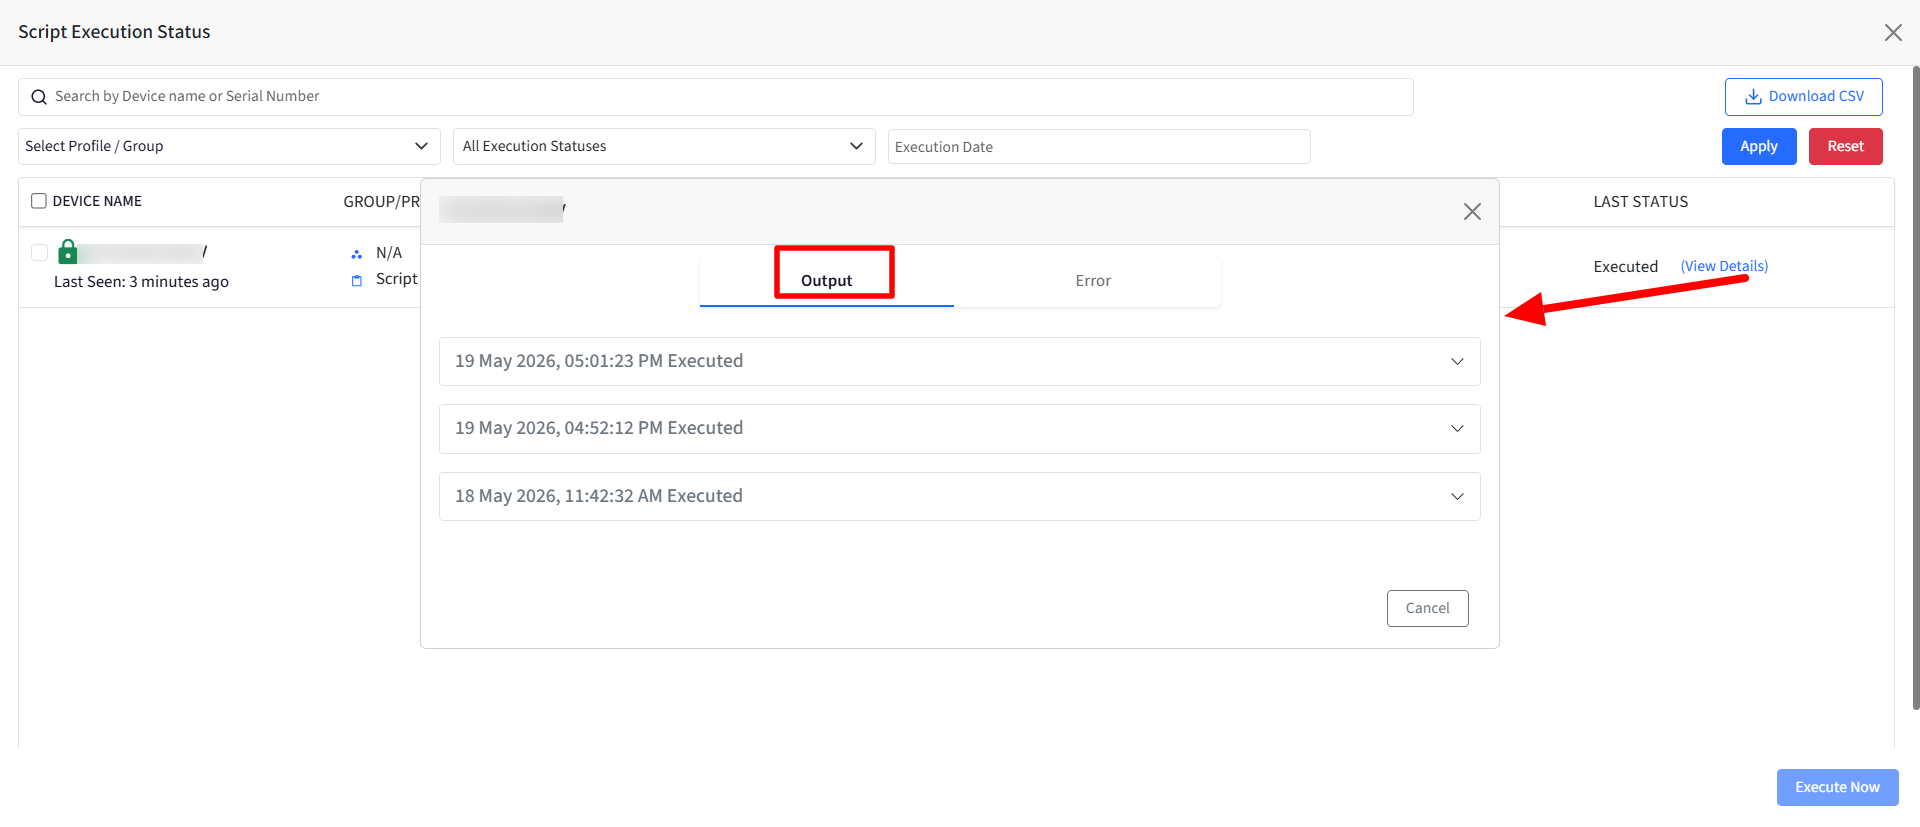
If the script fails to execute, you will be able to see the reason for the same in the Error tab.
Note that the device needs to be active and online for the scripts to be executed on it.
Uninstalling Shell Script
Shell scripts can be uninstalled from the devices remotely. Follow the steps below to Uninstall a previously deployed script,
Navigate to Application Management > Enterprise Store
Click on the Shell script that you uploaded earlier to see the script information wizard, Click on Uninstall.
Select the Device Profiles / Groups / Devices where you want to uninstall the application and click on Uninstall.
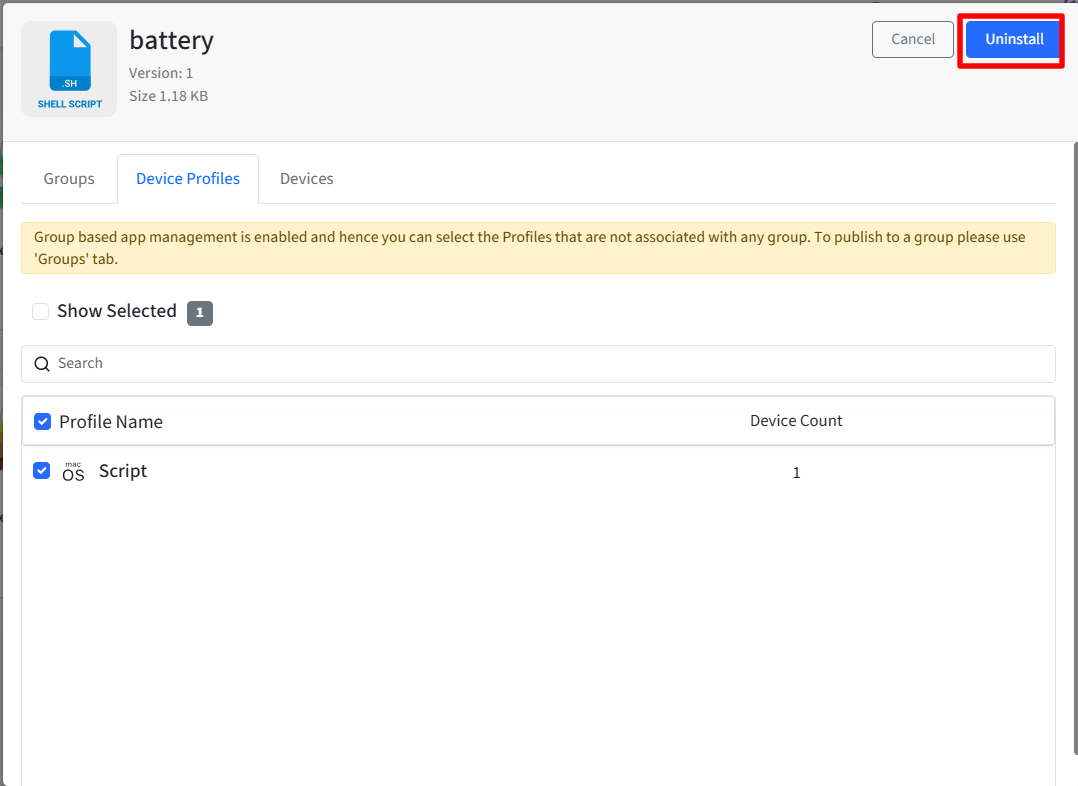
Once this step is done, the script will no longer be force-installed and executed on the devices.
Deleting Shell Script
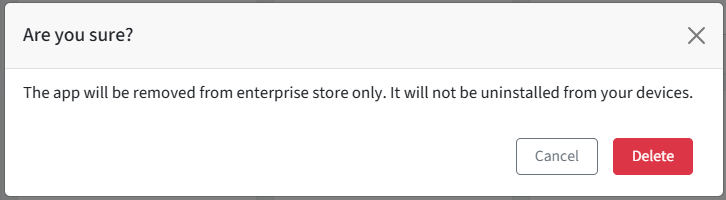
A Shell script file can also be deleted. It deletes the script file from the Enterprise Store on the Scalefusion Dashboard as well as from the device. To delete a script file,
In the script information wizard, Click on the Delete button.
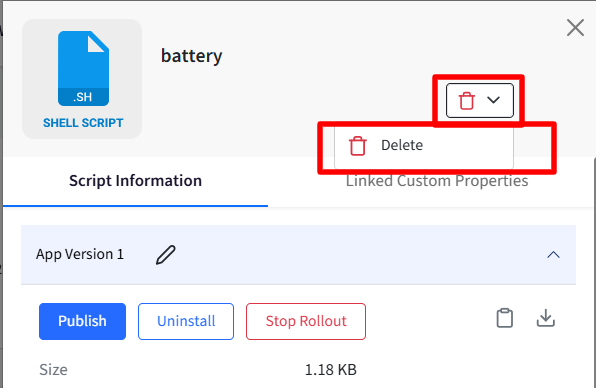
You will get a confirmation box. Click OK.
Dynamic Scripts
The Shell scripts are static in nature. That is, the same script gets executed on all devices. However, in some cases, the admin may want to pass some dynamic values based on the device or user of the device where the script is executing. Scalefusion now extends the support of Custom Fields to allow for dynamic substitution using our agent. For example,
echo "User Id is %$device.Id%"
echo "User Name is %$device.Name%"
echo "User Surname is %$device.surName%"
To know more about the Custom Fields feature and how to use it, please refer to our guide here.