User Groups
- 23 Sep 2023
- 5 Minutes to read
- Print
- PDF
User Groups
- Updated on 23 Sep 2023
- 5 Minutes to read
- Print
- PDF
Article Summary
Share feedback
Thanks for sharing your feedback!
Once you have added the users, for better and easier management of users, you can group them under User Groups. This gives you the flexibility to see all the devices of grouped users under one section. You can easily change the profile of a group and change the policies on all the devices in one shot. Follow the steps below to create a group and add users,
- Sign In to Scalefusion Dashboard and navigate to Groups > User Groups
- There are two ways you can create groups, viz.:
- Add one group at a time: To create a single group at a time, follow the steps below.
- Add Groups in bulk: To learn how to create groups in bulk, please visit here.
- Click on CREATE NEW GROUP drop-down and on Create New Group under it. This will start the group creation wizard.

- This wizard has 3 sections, as mentioned below,
- Select Users: First, select all the users that you want to be a part of this group.
- Choose Android Device Profile: Select the Android BYOD Profile that you created earlier. This profile will be applied to all the Android devices of the users in this group.
- CHOOSE iOS DEVICE PROFILE: Select a default device profile for all your iOS devices. Select the device profile that you want to apply and Click NEXT.
- CHOOSE WINDOWS PROFILE: Select a default device profile for all your Windows devices. Select the device profile that you want to apply and Click NEXT.
- CHOOSE MAC DEVICE PROFILE: Select a default device profile for all your Mac devices. Select the device profile that you want to apply and Click NEXT.
- ADD ADMIN: You can choose Group Administrators for the newly created Group.

- Click on the Create User Group button to complete the creation of the group. Once the group is created, it will be listed on the User Group listing page.
 Note:
Note:- To view the users of the group, click on View Details.
- In the Group Detail view, use ADD USERS to add new users to the group.
- In the Group Detail view, click on CHANGE to change the BYOD Profile for all the users in this group.


View Group Details
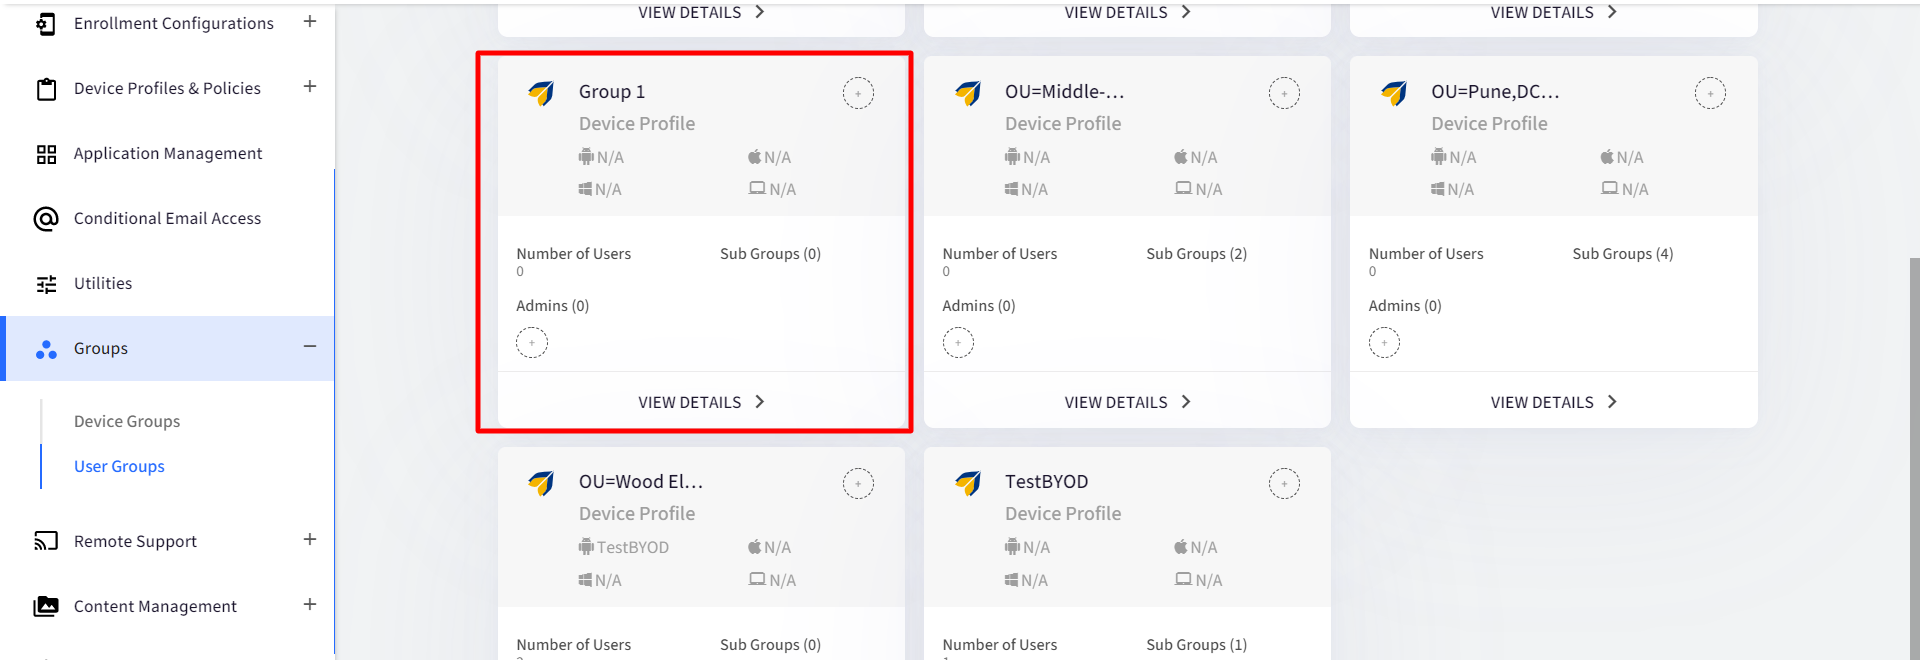
Groups created are displayed on the dashboard as shown. To view details and perform other actions, click on View Details. The View Details page shows details under the following headings:
- Users: Lists the users and devices which are part of the group. New users can also be added from here
- Subgroups: View and manage subgroups
- Group Admins: View, add & remove Group Admins
- Profile & Policies: View the device profile and policy applied to the group and change it.
- Automation: Define automation rules by defining certain conditions to automatically move users to groups. This feature will be available only for subscribers to the Enterprise Plan.


User Group Level Options
Scalefusion offers group-level actions that can be used to perform quick actions across the users in the group. The options can be accessed on the Group Details page.
- Rename User Group - Change the name of the group.
- Delete User Group - Delete the user group. All users will retain their last Device Profile and will still be in a Locked state.
Users
From here, you can add or remove users from the user group, move device(s) from one group to another and perform additional actions as well.
Adding Users to an existing User Group
- You can add devices to an existing group. To do this, navigate to Groups > User Groups.
- From the list of groups, click on View Details on the Group in which you want to add devices.
- Under the Users tab, click on Add Users.

- This will open up a dialog that displays all the users that are not associated with any Groups so far. Select the users that you want to add and click on Submit.


User Subgroups
You can also create sub-groups under User Groups. Sub-groups can be created in any of the following two ways:
Create a SubGroup on the Group Listing Page
- Log in to Scalefusion Dashboard.
- Navigate to Groups > User Groups
- In the group listing page, click on the widget over the group under which the sub-group has to be created.

- This takes you to the Sub-group creation flow (explained below)

Create a SubGroup at the Group Details Page
- Log in to Scalefusion Dashboard.
- Navigate to Groups > User Groups
- Click on View Details of the device group under which Subgroup has to be created
- On this page (Group Details), under the Subgroups tab, you will find a button New Sub Group. Click on it

- This takes you to the Sub-group creation flow (explained below)

Subgroup Creation
- Enter a Name for the subgroup. Click on SUBMIT.

- Clicking on Submittakes the user to the Sub-Group Creation page, which is similar to the usual group creation flow,
- Select Users: The users that don’t belong to any group will be shownSub-Groups are entities which have their own users. Hence, only those users can be added that are not part of any other user group.
- Select Android Profile
- Select iOS Profile
- Select macOS Profile
- Select Windows ProfileOn all the above platforms, by default, parent profiles are inherited unless they are assigned with a new BYOD device profile.
- Select Admins: Only the Admins that are not the admins of the parent group are listed here.The Subgroups also inherit all the admins from the parent user group. More Admins can be added after Subgroup creation
- Select Users: The users that don’t belong to any group will be shown
- Click CREATE USER GROUP to create the Subgroup.
- Once a Subgroup is created, it is listed in the Group Details view, just like a User Group

Clicking on View Details opens the Subgroup details view and has similar features that exist in a user group
Important points on Subgroups
- A User group can have unlimited Subgroups
- A Subgroup can have unlimited Subgroups under it
Importing GSuite / O365 User Groups and Subgroups
Admins can import their GSuite / O365 User groups and send invitations to the users to enroll their devices with a G Suite / O365 account. To import:
Only subscribers to Legacy and New Enterprise Plan can import GSuite / O365 user groups. The rest of them will get an option to upgrade.
- Navigate to Groups > User Groups
- Click on the button Group Management and select Import GroupsThe Group Management button will be visible only to users who sign in with their GSuite organization ID or O365 account and who are not signed in with SAML.
.png)
- This opens the Import Groups page, which lists all the GSuite User groups and subgroups.For O365 users who are logged in with their O365 credentials, the Import Groups page would list all O365 User groups and subgroups
- Select the groups/subgroups that have to be imported and click Import.
.png)
- You will be redirected to the User Groups page on the dashboard, and it will show the GSuite / O365 groups you have imported.
.png) If there are any users in the user groups, they also get imported to Scalefusion.
If there are any users in the user groups, they also get imported to Scalefusion.
.png)
.png)
.png)
On GSuite / O365 User Groups, no additional actions can be performed through the Scalefusion Dashboard
- Rename Group(s)
- Delete Group(s)
- Add / Remove Users
- Create Sub Group
Only Device Profile and Group Admin(s) can be added.
Sync Groups
Any actions that take place on user groups at GSuite's or Office 365 end (rename, delete etc.) to ensure that the changes reflect on the Scalefusion dashboard so that both are in sync, Group Management > Sync Groups can be used.
Was this article helpful?