User Management
- 28 Sep 2023
- 9 Minutes to read
- Print
- PDF
User Management
- Updated on 28 Sep 2023
- 9 Minutes to read
- Print
- PDF
Article Summary
Share feedback
Thanks for sharing your feedback!
To drive your BYOD strategy, it is very important to import your users to Scalefusion. This helps Scalefusion to identify and authorize the employees of your company when they try to enroll and helps you to invite the users using the Scalefusion Dashboard and keep track of the usage.
Scalefusion offers a simple User Management flow, primarily divided into two parts,
- User Management: This section helps you add the users or import en-masse. You can set additional enrollment rules so as to get fine-grain control on the deployment.
- User Groups and Subgroups: This section helps you group your users so that you can manage them easily and in one shot rather than managing them individually.
In this guide, we will learn how to add users, import users using O365, import users using GSuite
Before You Begin
- Make sure that you have a valid Scalefusion Dashboard account.
- Have created a BYOD Profile and an Enrollment configuration for at least one device OS type.
User Management
At a high level, Scalefusion's user management offers the following functionalities,
- Adding a User
- Importing Users in bulk
- Bulk Update Imported / Added Users
- Inviting the Users
- Viewing Enrolled Devices
- Deleting the User
Adding a User
Follow the steps below to start adding users to the Scalefusion Dashboard.
- Sign In to Scalefusion Dashboard and navigate to Enrollment Configurations > User Enrollment
- Click on ADD USER to add one user using the add user wizard. The wizard offers you the following options,
- Username: Provide the username/display name for the user to be added.
- Email: Provide the email for the user. This is the email that the user will use to sign in to the Scalefusion client on their devices.
- User Group: Lists the user group(s) created from the User Groups section. Select a user group you want this user to be part of.
- Phone Number: An optional field to provide the phone number and country code. This is currently unused, but in the future, you can use it with Eva Communication Suite for a unified contact book. If you have configured SMS service provider settings to receive OTP over SMS for BYOD enrollments, then the OTP will go to the phone number you have entered in this field.
- Number Of Devices: Select how many devices the user can use to enroll. The default is 1; that is, the user is restricted to using only one device. You can choose a range between 1-4 devices. If it is more than 4, then you can select Any.
- IMEI/SERIAL Number(s): This is an optional field and gives you the flexibility of pre-verification of devices from where they can enroll. If you are restricting the users to enroll in a given number of devices, that is, 1 to 4, then you can go ahead and add the IMEI/Serial numbers that you want them to restrict to. For example, you may want to allow the user to enroll from 2 devices but have access to only one IMEI, then you can specify only one IMEI number. This would mean the user can enroll from 2 devices, out of which one has to be an exact match.
- Custom fields: Displays custom fields you have defined (if any) with their type. Add specific values for those fields.

- Clicking on ADD adds the user, and the user starts appearing in the list, as shown below.
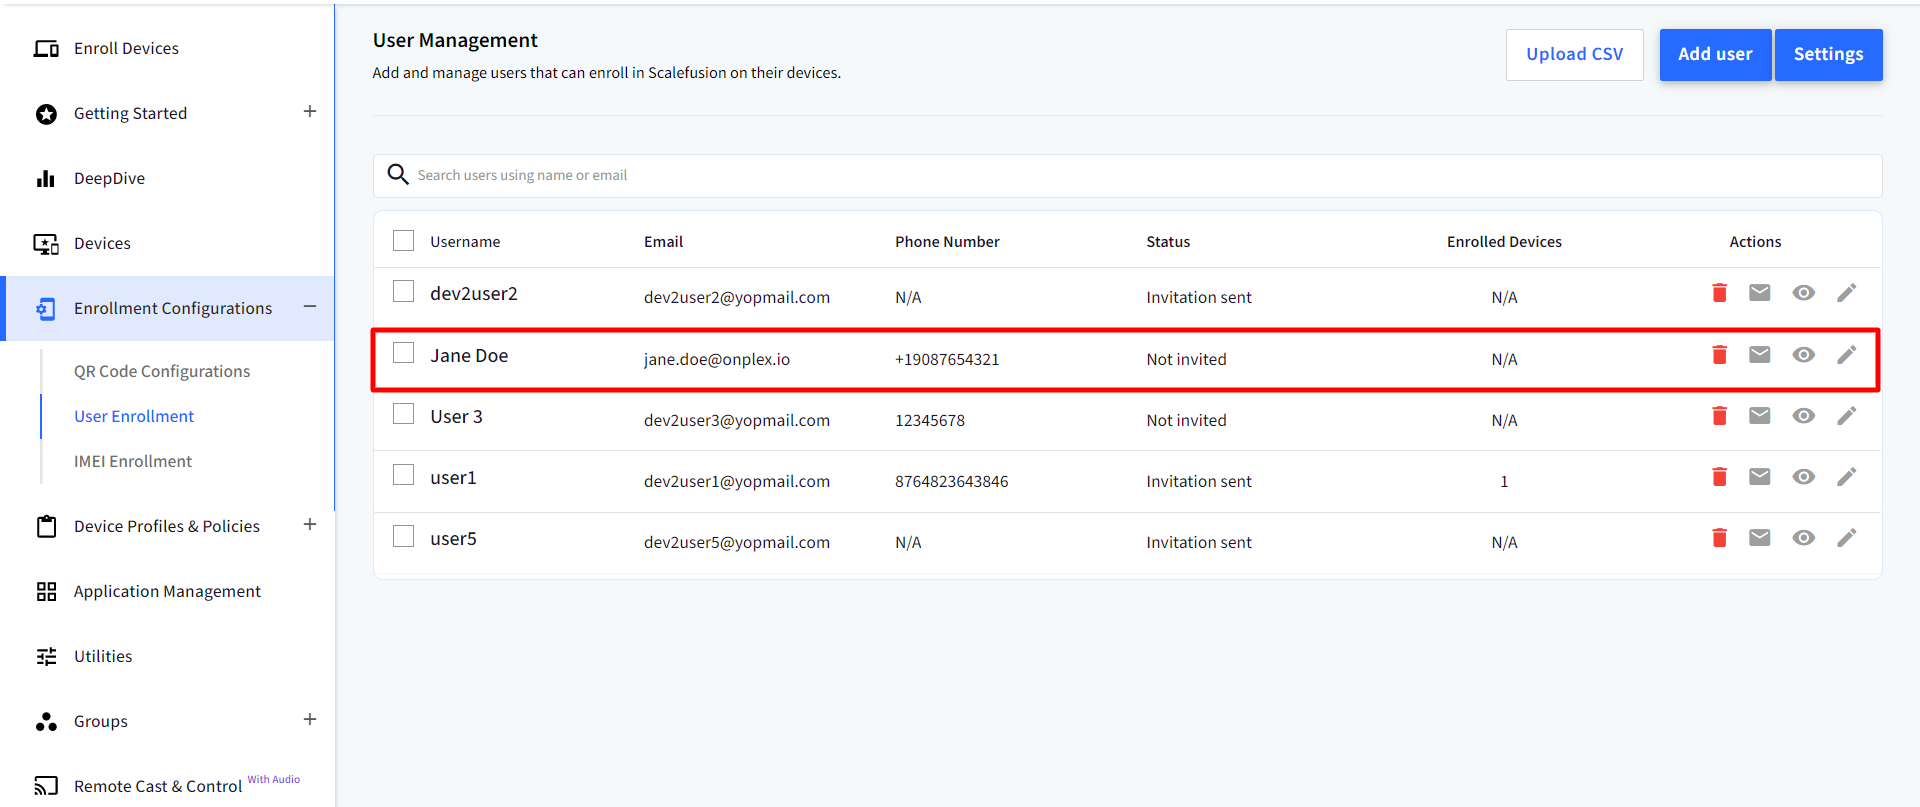
- Once you have added the users, you can go ahead and Invite them as described in our Inviting Users section below. You can use the Editaction from the action panel to edit the user information.The email field of a user can be edited until the user has not enrolled. Once they enroll, the Email can no longer be edited.


Importing Users in Bulk
To Import users in Bulk, Scalefusion provides two options. The options are,
Import Using CSV
For organizations that do not use an IDP like Office 365, Instead of adding users one by one, you can also choose to bulk import them using a CSV file. To do so, follow the steps below,
- Sign In to Scalefusion Dashboard and navigate to Enrollment Configurations > User Enrollment
- Click on UPLOAD CSV to view the upload CSV wizard. From this screen, download the sample CSV first.

- The CSV has the following fields,
- username: Provide the username/display name for the user to be added.
- User email: Provide the email for the user. This is the email that the user will use to sign in to the Scalefusion client on their devices.
- Phone number: An optional field to provide the phone number. This is currently unused, but in the future, you can use it with Eva Communication Suite for a unified contact book.
- max_devices: Select how many devices the user can use to enroll. You can enter a value between 1-4 to give a fixed value or -1 to make it to any number of devices.
- device_id_1, device_id_2, device_id_3, device_id_4: These are optional fields and give you the flexibility of pre-verification of devices from where they can enroll. If you are restricting the users to enroll in a given number of devices, that is, 1 to 4, then you can go ahead and add the IMEI/Serial numbers that you want them to restrict to. For example, you may want to allow the user to enroll from 2 devices but have access to only one IMEI, then you can specify only one IMEI number. This would mean the user can enroll from 2 devices, out of which one has to be an exact match.
- group_name: Provide the user group name with which you want to associate the user.
- Once you have added all the data to the CSV file, click on the UPLOAD CSV button in the upload wizard and upload the file. Once the CSV is verified, all the users start appearing in the list on the Dashboard.You can upload as many CSV's as you want, one after the other. You can also use the Admin and Roles to choose which admins are allowed to do user management.
- Once the users are added to the Scalefusion Dashboard, you can then Invite them to enroll their devices as described in the Inviting the Users section

Import Using Office 365
If you are using Office 365 to access the Scalefusion Dashboard, then you can Import users from your Azure AD. Please follow the steps below to import users,
Import Users won't be possible if you are signed in with your SAML SSO account.
- Sign In to Scalefusion Dashboard and navigate to Enrollment Configurations > User Enrollment
- Click on Import Users > Import from O365

- If you are importing from O365 for the first time, then you would have to authorize Scalefusion to import users from your Azure AD. Click on Authorize to complete the authorization.

- You will be navigated to Microsoft's permission page to grant the required permissions. Click Accept to complete the step.Consent on behalf of your Organization: You will see this checkbox If you are an administrator for your Azure AD, and you can this checkbox so that other Scalefusion administrators in your organization need not give the permissions and can import the users directly.
 If you are not an authorized Azure AD admin or do not have enough privileges to Import users, then you will see an error on this page. Please contact your admin so that you can get the required privileges for Azure AD first.
 - If the permissions have been granted properly, then you will be redirected to the Scalefusion Dashboard, and the users in your organization will be listed. Select the users that you want to import at this point in time and click Import,

- You can search the users using their Name or Email
- Scalefusion fetches the first hundred users. As you scroll down the list, Scalefusion will fetch more users and display them.
- Once the users are imported, they will be listed in the User Management screen. By default, the users will be allowed to enroll in 1 device. You can change the number of devices that they can enroll or add additional device identifiers using the Edit option in the ACTIONS menu.


Inviting the Users
Once the users are added to the Scalefusion Dashboard, you can then Invite them to enroll their devices as described in the User Enrollment guide.
Bulk Update Imported / Added Users
The admins can edit the information (like device IDs and maximum devices) in the bulk of the users that have been imported or added to the Scalefusion Dashboard. To bulk update, simply download the imported user's list in CSV, make edits in the CSV and save it. Now upload the updated CSV again. Here are the steps:
- In the upload CSV dialog, click on Imported Users. This will populate two options:
- All Users: Downloads a CSV of all Users imported so far
- Users with no Devices: Downloads a CSV of only those users who have been imported on Dashboard but don’t have at least one device enrolled

- The downloaded CSV will contain a list of users (as per selection) along with other related details like device IDs and maximum devices.
- Make edits to the list and save the CSV file again. You can also add new user details
- Once you have added all the data to the CSV file, upload the CSV file in the upload wizard by selecting Browse files.
- When re-uploading, you will get a confirmation box displaying the count of new users added (if any) and the count of existing users who have already been imported. Click Confirm

This completes the process of updating imported users in bulk.
Viewing Enrolled Devices
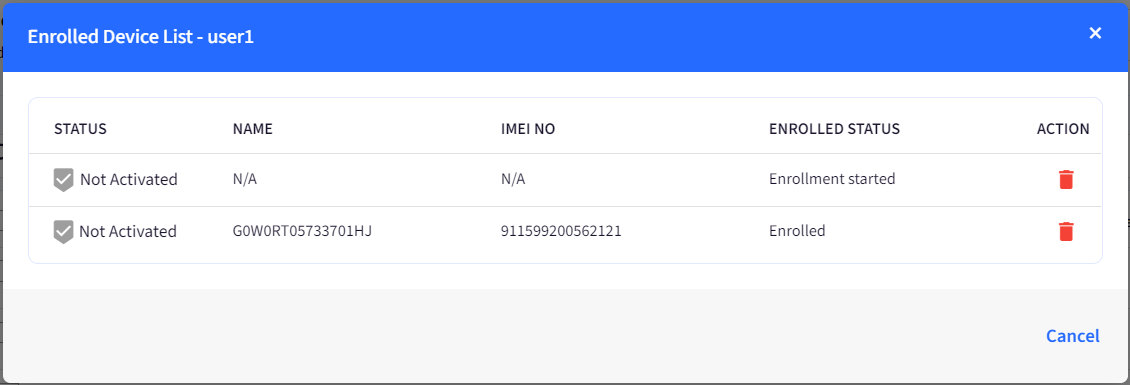
Once your users start enrolling their devices, you can see all their devices under the Devices section. However, if you want to see the mapping of users and their devices, then you can use the View action next to each user to get the details.
Deleting a User
- To delete a user completely from your organization, use the Delete action from the action menu. This will not only delete the user but delete all the work apps and the data from their enrolled devices and remove their devices from the Dashboard.

- If you just want to delete just one device of the user, then you can view the list of enrolled devices of that user and select the delete action. This would remove the work apps and all their data only on the selected device.


Importing GSuite / O365 User Groups and Subgroups
Admins can import their GSuite / O365 User groups and send invitations to the users to enroll their devices with a G Suite / O365 account. To import:
Only subscribers to Legacy and New Enterprise Plan can import GSuite / O365 user groups. The rest of them will get an option to upgrade.
- Navigate to Device Management > User Groups
- Click on the button Group Management and select Import GroupsThe Group Management button will be visible only to users who sign in with their GSuite organization ID or O365 account and who are not signed in with SAML.

- This opens the Import Groups page, which lists all the GSuite User groups and subgroups.For O365 users who are logged in with their O365 credentials, the Import Groups page would list all O365 User groups and subgroups
- Select the groups/subgroups that have to be imported and click Import.

- You will be redirected to the User Groups page on the dashboard, and it will show the GSuite / O365 groups you have imported.
 If there are any users in the user groups, they also get imported to Scalefusion.


On GSuite / O365 User Groups, no additional actions can be performed through Scalefusion Dashboard
- Rename Group(s)
- Delete Group(s)
- Add / Remove Users
- Create Sub Group
Only Device Profile and Group Admin(s) can be added.
Sync Groups
Any actions that take place on user groups at GSuite's or Office 365 end (rename, delete etc.) to ensure that the changes reflect on the Scalefusion dashboard so that both are in sync, Group Management > Sync Groups can be used.
Was this article helpful?