Remote Cast for iOS
- 22 Dec 2023
- 5 Minutes to read
- Print
- PDF
Remote Cast for iOS
- Updated on 22 Dec 2023
- 5 Minutes to read
- Print
- PDF
Article Summary
Share feedback
Thanks for sharing your feedback!
Scalefusion Remote Cast for iOS helps IT Admins remotely troubleshoot the devices on the field or help educational institutions with guided sessions on students' iOS devices. We have also added additional features that allow you to take Screenshots, record screencast sessions and raise a service desk request on the managed devices.
Before You Begin
- Make sure that you have either an Enterprise Plan subscription or if you are IN-Trial, then you have requested access to this feature.
- An iOS device has been enrolled in Scalefusion
Supported Devices
- Remote Cast for iOS works on iOS 11 and above.
- Remote Cast for iOS works either on non-supervised or Supervised devices.
Device Profile Settings
Before you start using Remote Cast for iOS, please note that this feature works only if Screenshot is allowed on the managed devices. To make sure that this setting is allowed,
- Navigate to Device Profile > Restrictions > General Settings and make sure the Allow Screenshot is enabled.


Step 1: Installing & Setup Remote Cast
Installing & setting up the Remote Cast app is the first step to using this feature. This can be done by the end-users, even when the devices are field, as the process is simple; however, for corporate-owned devices, we suggest setting up beforehand so that there are no issues while the devices are in the field. To install & setup Remote Cast, please follow the steps below,
- Navigate to Application Management > Scalefusion Apps and click on Remote Cast for iOS
- Click on PUBLISH to view the install wizard. Select the Device Profiles where you want to install the application and click PUBLISH
- This will initiate the installation of the application on the managed iOS device. Note that users will be asked to sign in to their iTunes account to download and install the application.If you are an Apple Business Manager customer and use the Volume Purchase Program, then you can automate the installation of the Remote Cast by procuring the licenses of the application.
- Once the application is downloaded, click on the Remote Cast icon to launch the application. The application will auto-configure itself on the first launch.
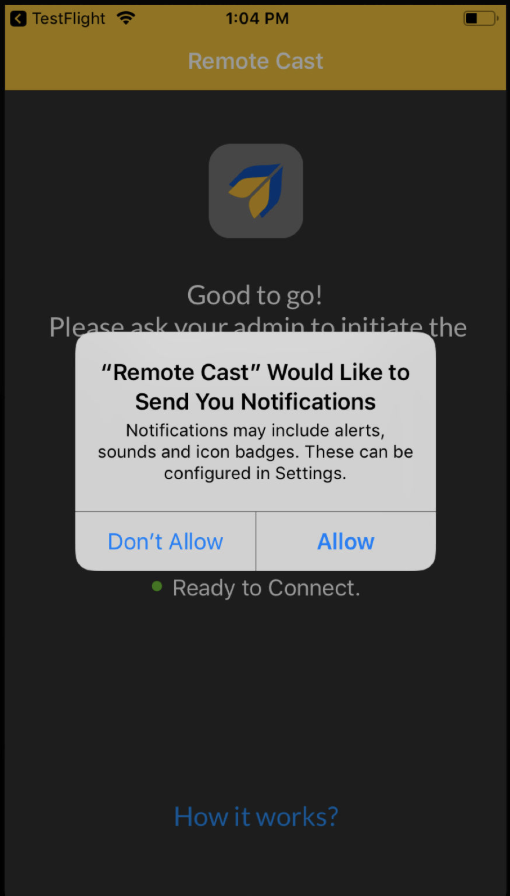
- On the first launch, the application will also ask for Notification Permission: This is required to show the initiate screen cast notification request. click AllowOn Supervised Devices, Notification Permission will be automatically granted.
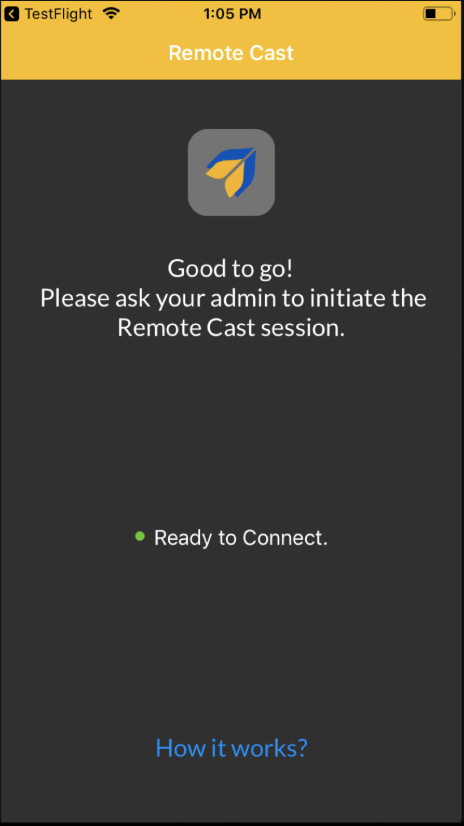
- If the application is successfully set, you should see the screen below,


Remote Cast & Control Settings
When Remote Cast is used in security and privacy domains like tablets with kids or with people in hospital care, if somebody takes a remote cast session, companies normally want to enforce recording of that session as a checkpoint for the agent taking the RCC session to make sure that everything is recorded.
To enable this, the following settings have been provided that can be configured from the Dashboard before starting a session and can be used as global settings for all admins.
The settings can be accessed from the Settings button available in Remote Cast & Control on the Scalefusion Dashboard. Clicking on Settings opens a dialog box where admins can configure them.
| Setting | Description |
| Auto-Record Remote Cast sessions | Enabling this automatically records the remote cast sessions. After the session is completed, the recording gets downloaded to the IT Admin PC/Laptop. If this setting is ON, session recording cannot be stopped. |
| Auto-Enable Voice Call in a Session | Enabling this starts a session with calling functionality enabled. This setting sets the default for the session. IT Admins still have to start the call during the session. |
| Allow Users to stop the session | This setting, when enabled, allows users to stop the session before the IT Admins start. |
| Show Message to other Admins when a Session is in Progress | If this setting is enabled, IT admins get an alert when another admin tries to take access of a device that already has an ongoing session. In some cases if the session is terminated abruptly, then the last admin can immediately start the session, however for other admins it would take an hour to initiate the session. |
Step 2: Initiate Remote Cast
Once you have set up the Remote Cast, you are now ready to start the remote cast session from the Dashboard. To initiate a remote cast session,
- On the Dashboard, navigate to “Remote Cast & Control”. The list of iOS and Android devices where the Remote Cast client has been set up will be displayed. Select a device and click on START SESSION A Remote Cast session can also be initiated from the Device Details page. On the Device Information card, there is a shortcut icon for Remote Cast before the Gear icon, clicking on which directly takes you to the Start session screen.
- You will be navigated to the screen casting page with the following components,
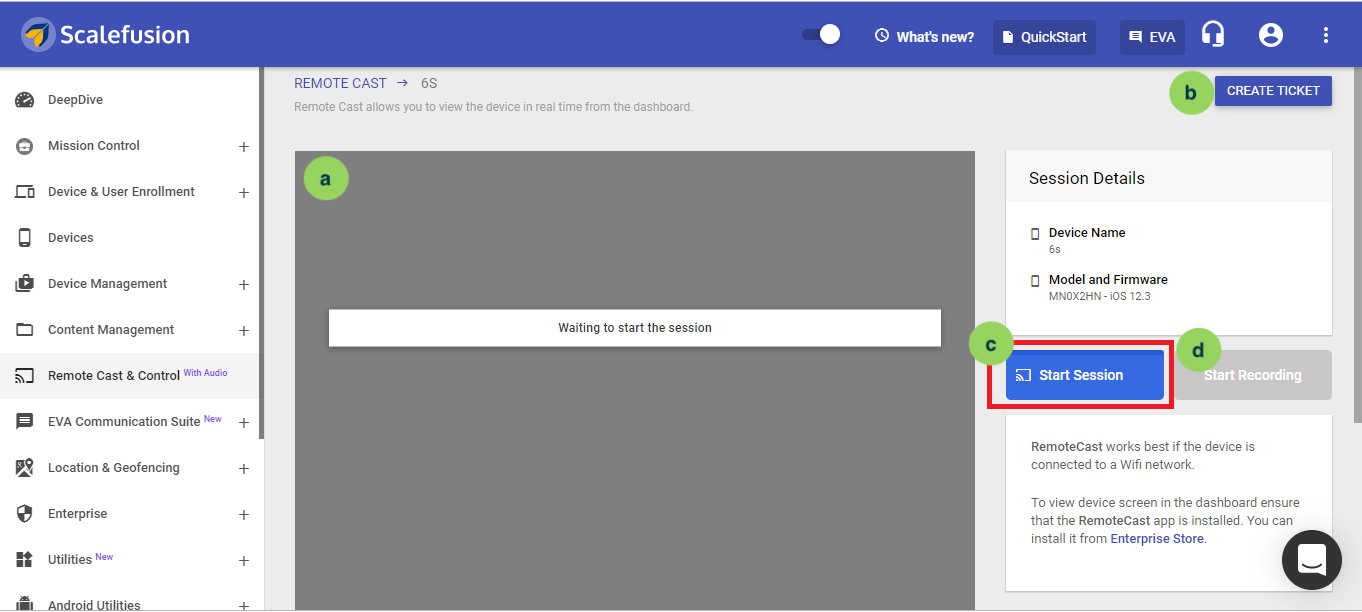
- Cast Console: The area where the mirrored screen appears.
- CREATE TICKET: Create a Service Desk ticket - Supported only if you have integrated your ITSM tool.
- Start Session: Click on this button to start the session.
- Start Recording: Use this option to start recording the session once it is started.
- Click on ‘Start Session’ to initiate the cast session. This will result in a notification being sent to the device, as shown below.
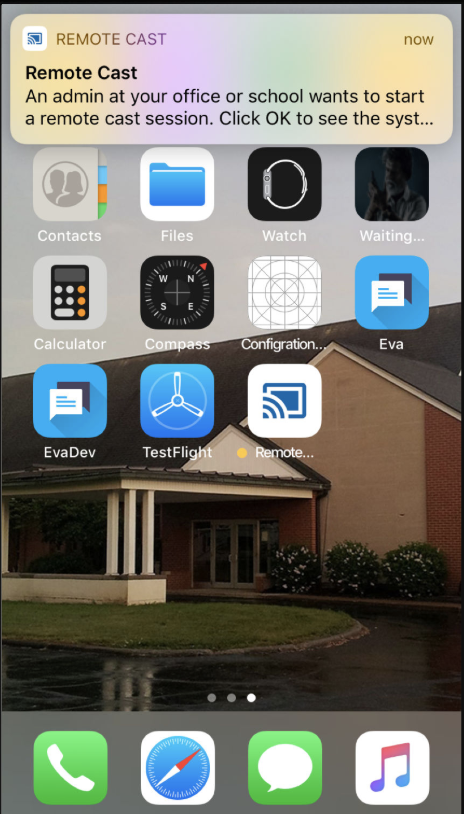
- Clicking on the notification will launch the Remote Cast app and give a heads-up to the user on the next steps, as shown below,
.png) NOTE: If the Remote Cast app was not set up as described in Step 1: Install & Setup Remote Cast, the user would have to perform these steps now.
NOTE: If the Remote Cast app was not set up as described in Step 1: Install & Setup Remote Cast, the user would have to perform these steps now. - Clicking on OK at step 4 above, the iOS native broadcast screen will be started. Select Remote Cast & Click on Start Broadcast

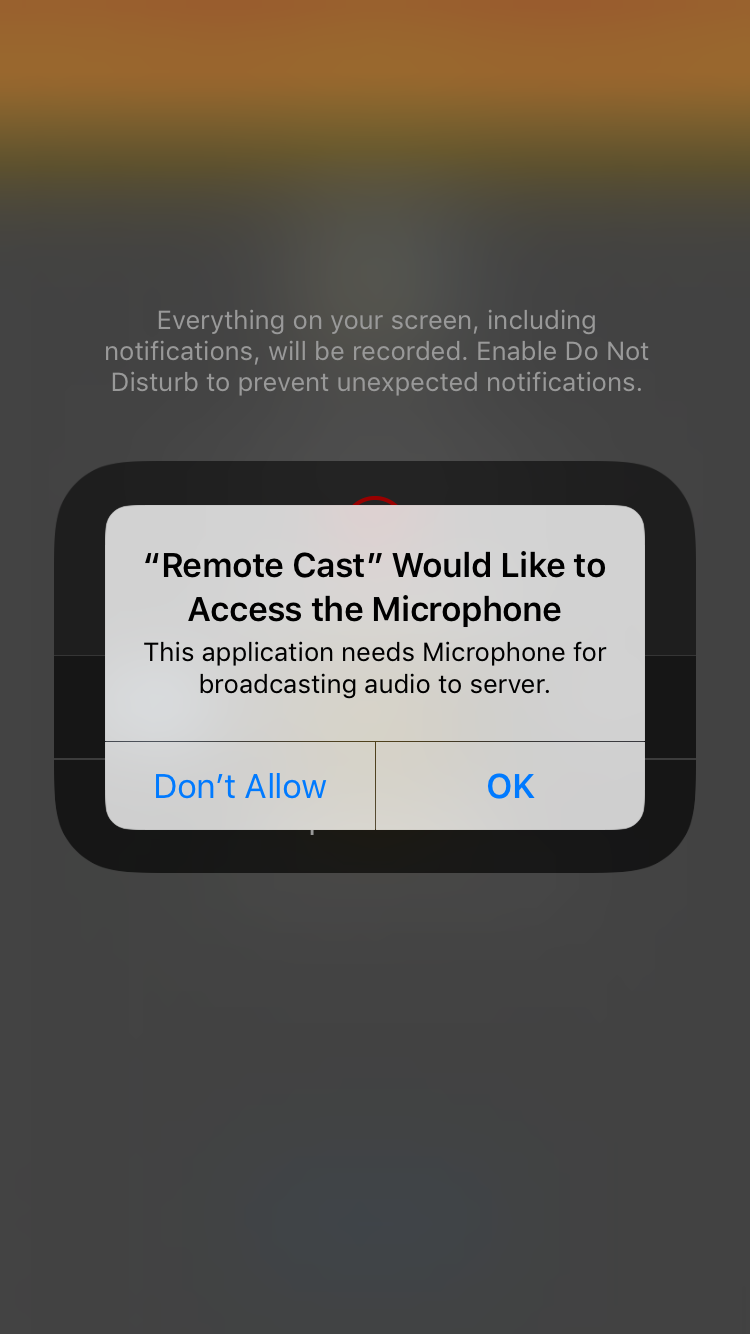
- For the first session, permission to grant Microphone access will be asked. Click OK. This will start the broadcast, and in about 3 seconds, the device screen will start mirroring on the Dashboard.
- Once the cast session is started, the Dashboard will keep updating based on the user interaction on the device. This screen also offers additional options, as shown below,
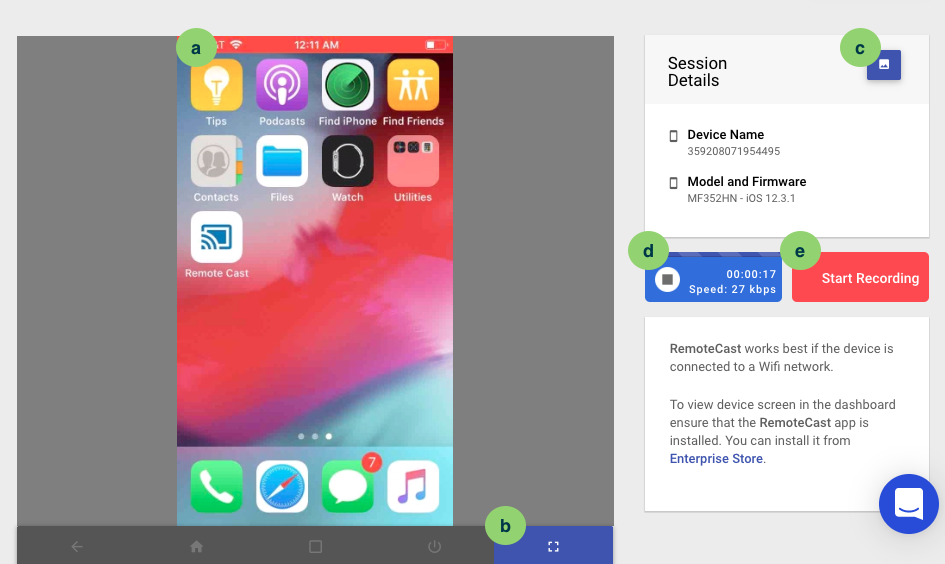
- Broadcast Operation Indicator: On the device, the user will see a red bar as long as the broadcast session is ongoing.
- Switch to Full Screen: Use this option to switch to full-screen view.
- Snapshot: Take a snapshot of the current frame that will be saved to your computer.
- Stop Session: Stop the ongoing session.
- Start Recording: Record a video of the ongoing session
- Device Level Actions: During remote sessions, if the admin wants to perform actions like rebooting the device or locking/unlocking the device, then they can do it from the same screen. Clicking on the Settings button pulls a menu with the following actions to choose from
- Refresh
- Lock/Unlock Device
- Full Device Information


.png)


Do reach out to us at support@scalefusion.com if you have any questions or are facing any issues during setup or usage of this feature.
Was this article helpful?