QR Code for Company Owned iOS Devices
- 28 Sep 2023
- 3 Minutes to read
- Print
- PDF
QR Code for Company Owned iOS Devices
- Updated on 28 Sep 2023
- 3 Minutes to read
- Print
- PDF
Article Summary
Share feedback
Thanks for sharing your feedback!
QR Code or Device Enrollment Configurations are a quick and easy way to enroll your iOS devices. By creating a QR Code configuration, you can choose the default Group or Profile and a naming convention for the devices that are enrolled using this QR Code.
Additionally, these Configurations also provide you with a URL that can be used with Apple Configurator 2 or directly on Safari on the iOS device.
This enrollment method lets you enroll the devices in Company Owned Device Management mode. If you are looking to let your employees enroll their personal devices, please refer to our Enroll iOS Devices using Personal/BYOD QR Code guide.
Before you Start
- Make sure you completed the APNs upload part as per Setting Up APNs guide.
- Make sure you have at least one Device Profile as per Create an Apple Device Profile guide.
Steps
- Once you are logged into Dashboard, navigate to Enrollment Configurations > QR Code Configurations
- Click on CREATE to open the QR Code configuration wizard.
- Under the Basic tab, provide the following details, and click NEXT
- Configuration Name: A name for this configuration
- Choose Enrollment Type: Choose Kiosk if you want to enroll Company-owned devices.
- Choose Enrollment Method: Select Enrollment Method from of the following:
- Userless Enrollment (Selected by default): On selecting this option, no user authentication will be asked for at the time of enrollment.
- User Authenticated Enrollment: Selecting this will ask for user authentication at the time of enrollment, associating the user with the device. To enable User Authenticated Enrollment, the following criteria should be fulfilled:
- The account should have some users added or imported.
- The account should have Organization Info and Terms of Services configured.
- Device Naming Convention: Choose a naming convention that will be used to auto-generate device names when the devices are enrolled.
- Use OS Name: If this is selected, then the device names are pre-fixed with the OS name.
- Set Device Name on iOS & macOS devices: Users can choose to Set the device name on the device during enrollment. This flag is selected by default.Device Name is based on the naming convention that is generated on the Dashboard

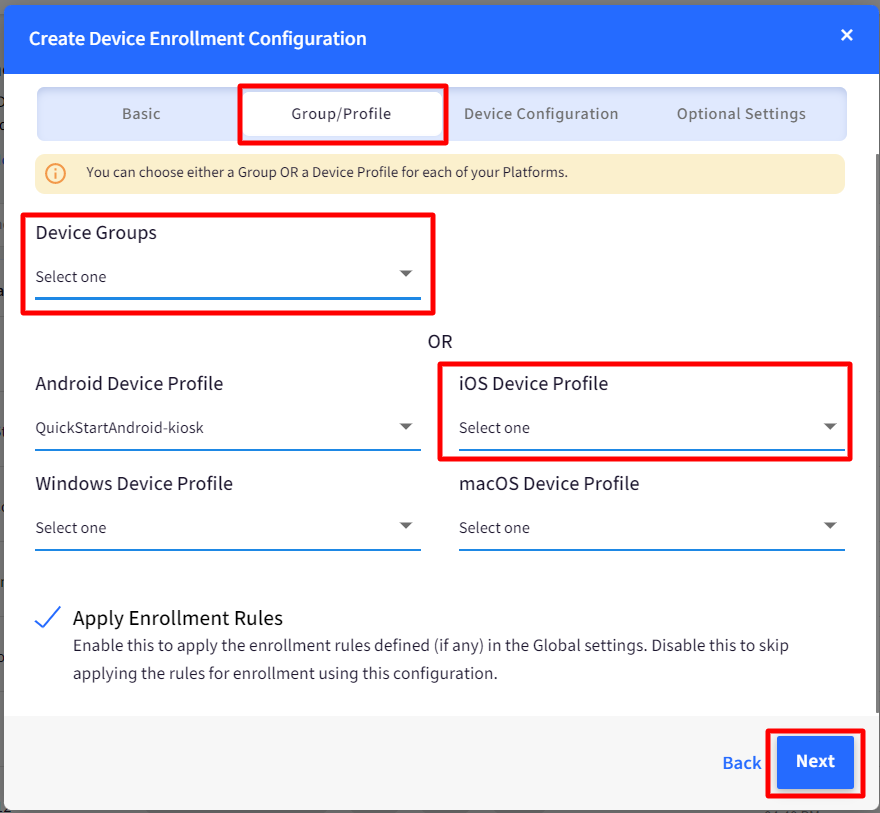
- In the Group/Profile tab, select an iOS Profile or a Group with iOS Profile. Click NEXT. Apply Enrollment Rules: If any enrollment rules are defined in Global settings, they get applied when a device is enrolled using this configuration. Disable this setting to skip applying the rules for enrollment using this configuration. Click NEXT
- Device Configuration: These settings are for Android devices. For iOS, these can be skipped. Click Next
- The Optional Settings section helps you set a default license for the devices enrolled using this configuration. This is an optional section and can be left blank. If the selected licenses have no free slots or this option is left blank, then the next available license is used to enroll the device. Configure Wifi: Configure Wifi settings which will get applied to the device when it gets enrolled with this configuration.Enrollment Network Settings are configured to speed up the enrollment process when you are enrolling via 6-times tap and scan a QR.
.png)
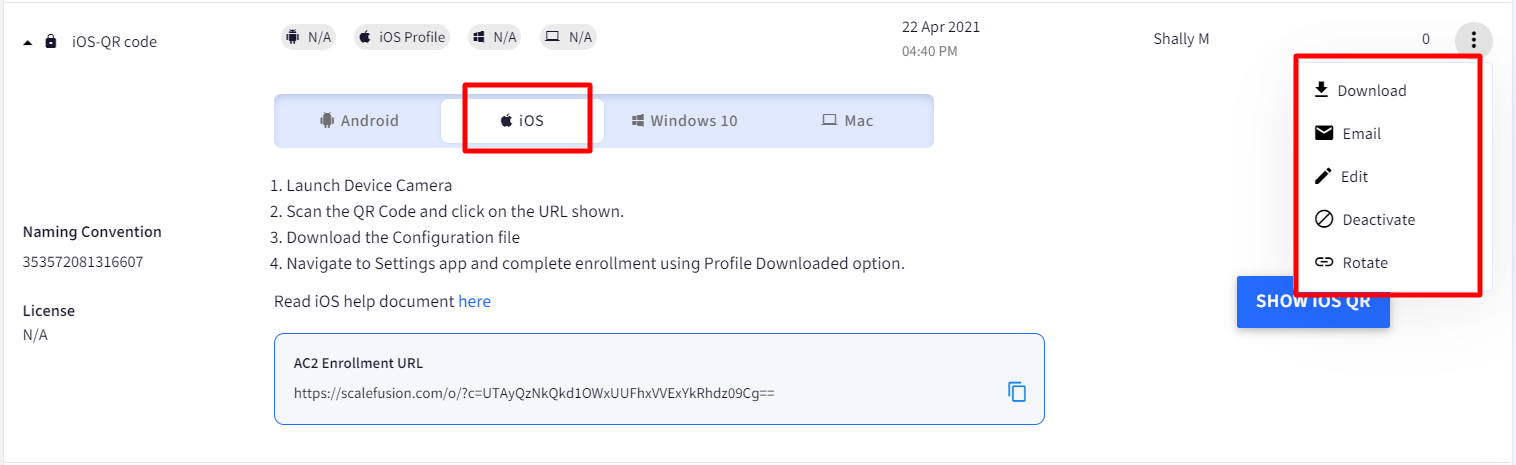
- Once the configuration is saved, it will appear in the list. A configuration has the following options,
- Show iOS QR - That can be used to scan using the iOS Camera.
- Download - This will download the configuration file. This is Not Applicable for iOS devices.
- Email - This will send an email to your account with a QR Code and the details on how to set it up.
- Edit - Helps you in editing the Configuration. Note that editing won’t impact the devices that are already enrolled.
- Deactivate - If you no longer wish to use this configuration or think it is compromised, then you can deactivate the config. Once Deactivated, the configuration can be deleted.
- Rotate - If you think that the configuration is compromised, you can use this option. This will generate a new QR Code and URL. Note that the previous QR Code and URL will no longer be valid.


.png)

Now that you have created a QR Code to enroll company-owned devices, follow our guide on How to Enroll Company Owned Devices.
Was this article helpful?