QR Code Configurations for Android BYOD Devices
- 01 Mar 2024
- 3 Minutes to read
- Print
- PDF
QR Code Configurations for Android BYOD Devices
- Updated on 01 Mar 2024
- 3 Minutes to read
- Print
- PDF
Article Summary
Share feedback
Thanks for sharing your feedback!
QR Code or Device Enrollment Configurations are a quick and easy way to send invitations to your employees. This would allow you to create a configuration wherein you can choose an auto device-naming convention and the BYOD profile that should be applied to the devices that enroll using this configuration.
In this document, we will see how to create a QR Code configuration using a BYOD Profile and how to send invitations.
This document is to create a configuration for your Employee-owned devices. If you are looking to enroll in corporate-owned devices, please refer to our QR Code guide for Corporate devices.
Before You Begin
- Sign In to the Scalefusion Dashboard
- Have added Users as explained in User Management.
- Have created at least one BYOD Profile as explained here.
Creating a QR Code Configuration
- Navigate to Enrollment Configurations ➞ QR Code Configurations. This section displays all the device enrollment configurations that you have created.
- Click on CREATE to open the configuration creator window.
- The configurator creator is divided into 3 steps, as explained below,
- Basic: Use this section to set the following:
- Configuration Name: A name for this configuration
- Enrollment Type: Choose Personal (BYOD). This will be used to create a configuration that will be used to enroll employee-owned devices.
- Device Naming Convention: Choose a naming convention that will be used to auto-generate device names when the devices are enrolled using this configuration.

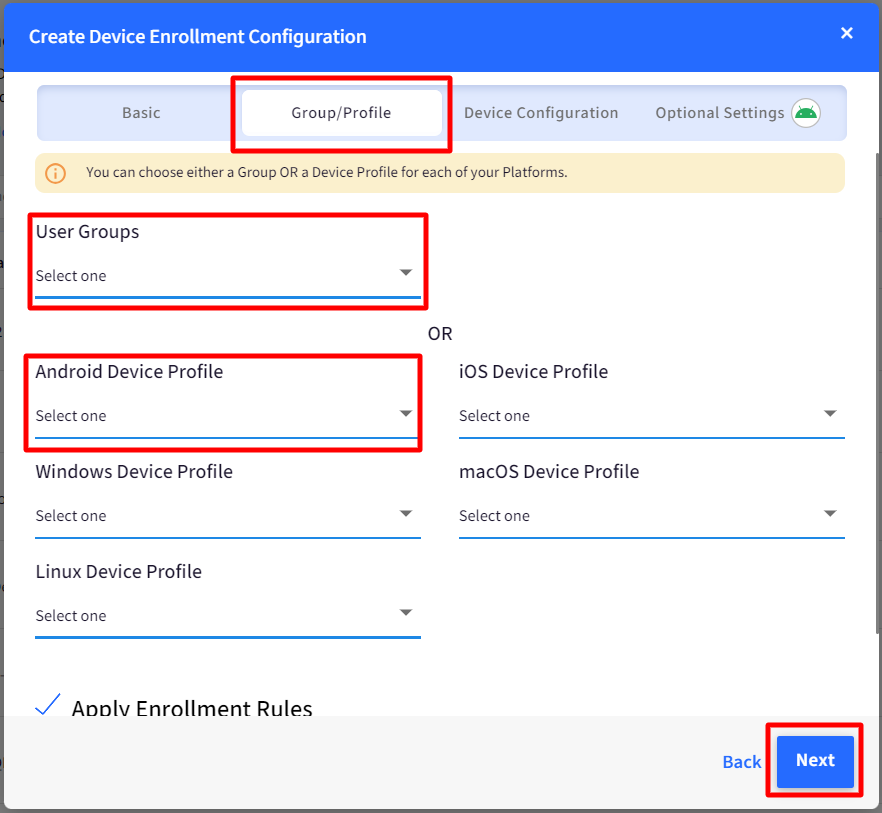
- Group/Profile: The next section is to choose the User Groups or BYOD Profile. For the BYOD enrollment type, you can choose only the BYOD Android Profiles. Click NEXT once you have selected the profile.
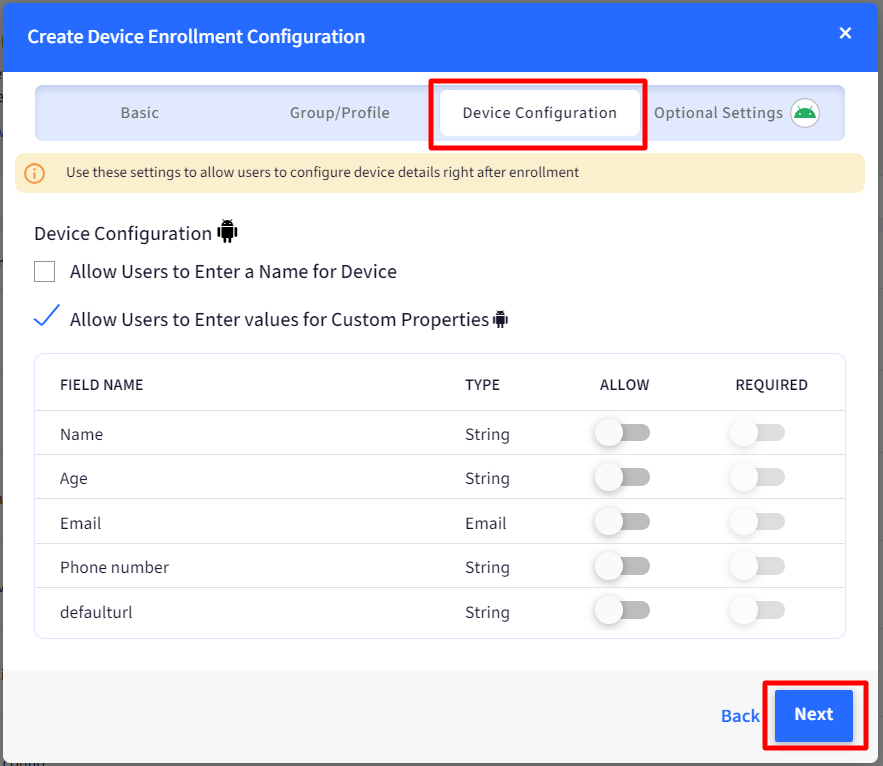
- Device Configuration: The following are the additional settings that can be configured under this:
- Allow Users to Enter a Name for Device: If this is selected, then users are allowed to set the device name from the device when they enroll it.
- Allow Users to Enter Values for Custom Properties: When this flag is selected, users can set values for the custom fields (from the device at the time of enrollment) that are defined through Custom Properties. For each custom field following can also be configured from here:
- Allow: Shows or hides the custom field to the user
- Required: Select if the field is optional or required.Device Configurations can also be enabled from Device Profile (Restrictions > Device Settings)
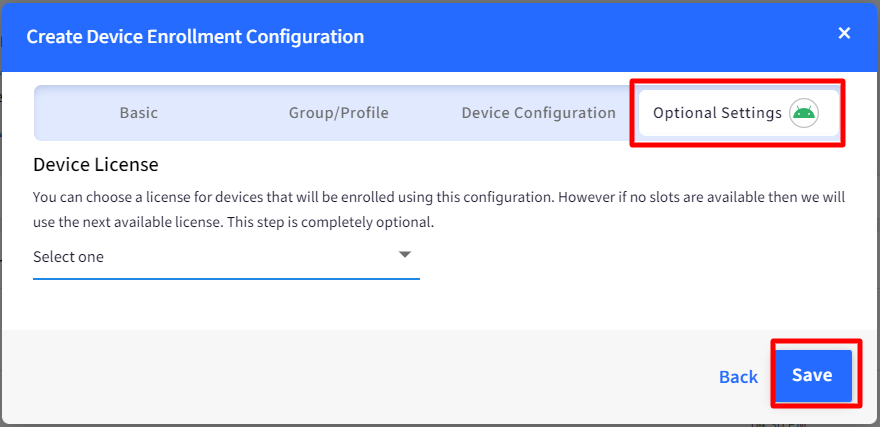
- The Optional Settings section helps you set a default license for the devices enrolled using this configuration. This is an optional section and can be left blank. If the selected licenses have no free slots or this option is left blank, then the next available license is used to enroll the device.
- Click SAVE once done
- Basic: Use this section to set the following:
- Once a QR Code configuration is saved, it will appear on the configuration listing along with other configurations, if any. Each BYOD configuration provides you with the following options,
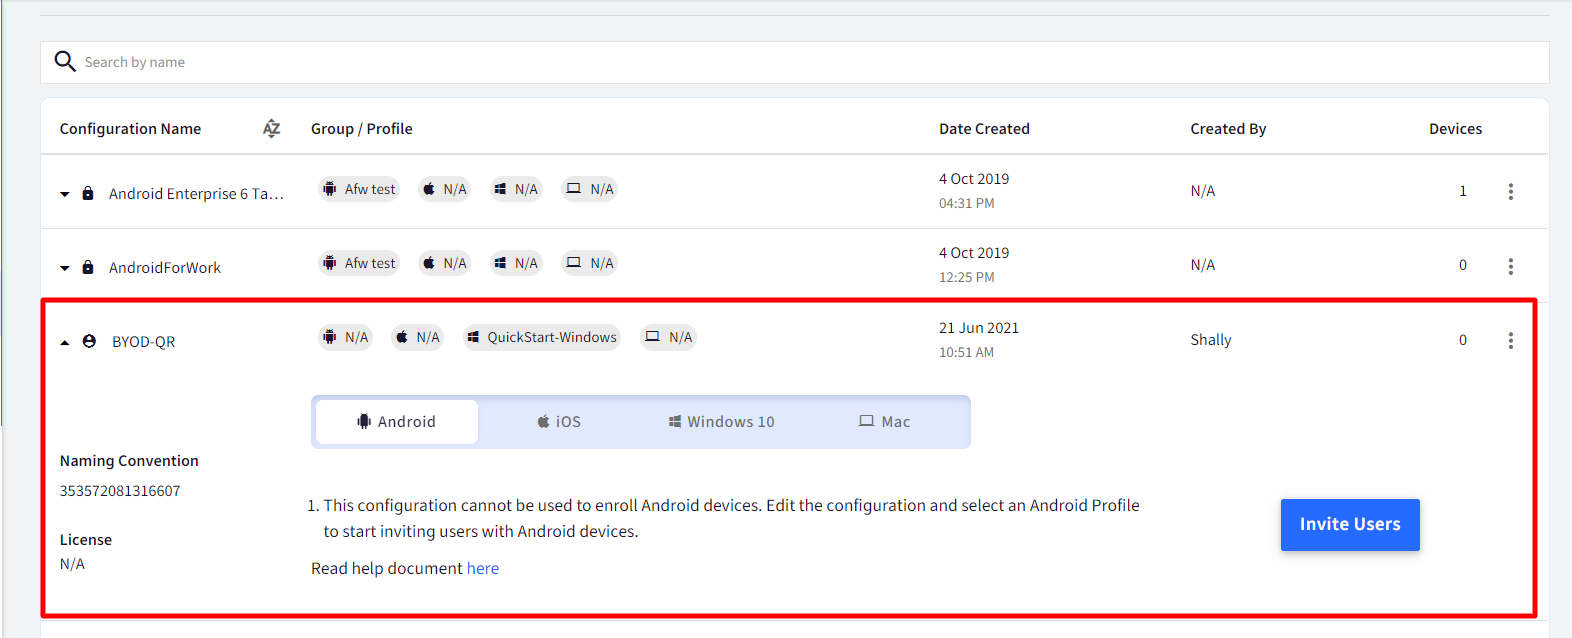
- INVITE USERS: Start inviting users to enroll using this configuration. The users will be sent an email with the details on how to enroll.
- EDIT: Use the quick action on the action bar to edit this configuration. Any changes to the configuration will not affect the users who have already enrolled.
- BLOCK: Use the quick action to block the configuration. The invites sent prior to blocking will no longer be active, and no new invites can be sent.


Inviting Users to Enroll using Configurations
- Click on the INVITE USERS button or click on Invite from the actions to start the Invite flow,
.png)
- The first step in the invite flow is to review the email that will be sent to users. In the email, you, as an admin, can edit the Welcome and Thank You notes. The other areas are for the use of Scalefusion, where we will add the enrollment information.
Click NEXT once you have edited the email as per your requirement.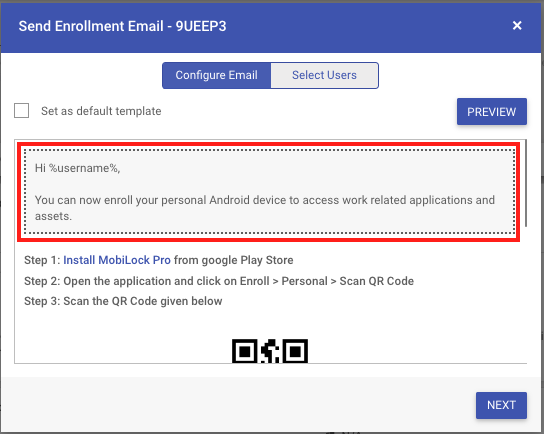
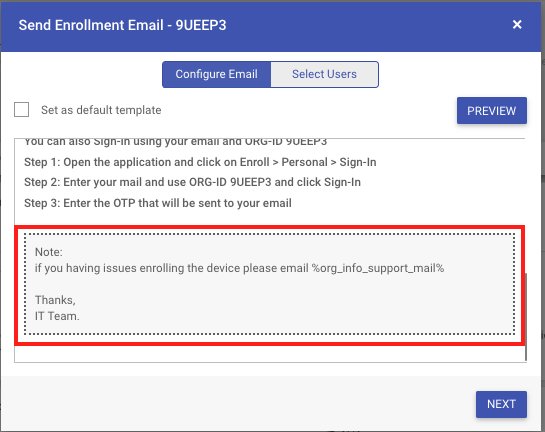 The %org_info_support_email% is dynamically substituted based on the Organization Info that has been provided earlier. You can use this expression if you want to restructure the note.
 - The last step is to select the users that you have previously added in the User Management section and click SEND,
.png)
- All the user will get an email asking them to enroll their devices. Refer to our enrolling an employee-owned device guide to see what would be the end-user experience.
.png)


.png)
Was this article helpful?