Preload Scalefusion MDM Agent Application into Windows OS Image
- 11 Oct 2023
- 6 Minutes to read
- Print
- PDF
Preload Scalefusion MDM Agent Application into Windows OS Image
- Updated on 11 Oct 2023
- 6 Minutes to read
- Print
- PDF
Article Summary
Share feedback
Thanks for sharing your feedback!
Cloning a Windows OS image on a new Windows device refers to creating an exact copy or replica of the operating system from one device and transferring it to another device. This can be useful when setting up multiple devices with the same configuration or when migrating to a new computer.
The Scalefusion MDM agent application for Windows can also be pre-loaded on the machines prior to cloning the Operating System. This allows you to easily enroll new Windows devices into Scalefusion, where all you need to do is add device Serial No. on the Dashboard.
The document below describes this process of cloning Windows OS and how Scalefusion MDM agent application can be pre-loaded while cloning.
Pre-Requisites
- A Source Windows machine with Windows OS installed.
- A target Windows machine on which OS image will be cloned.
- Storage device like Pen Drive with minimum 32GB space.
- Supported OS: Windows 10 and above.
Overview
Here is an overview of the steps involved right from pre-loading Scalefusion MDM agent application to enrolling a cloned device in Scalefusion. These are explained in detail in later sections:
- Load Scalefusion MDM Agent application on source device.
- Create an OS image.
- Clone the OS image on new (target) Windows Devices.
- Enroll new Devices to Scalefusion with Windows MDM Agent application.
Step 1: Preload Scalefusion MDM agent application
Following steps are to be performed on the source device from which OS image will be created:
- Download Scalefusion Agent by visiting https://scalefusion.com/winmdm.
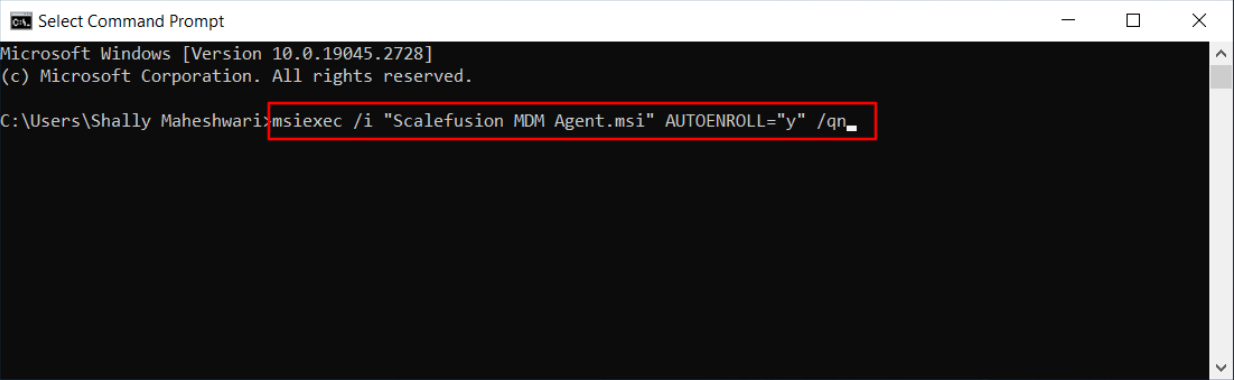
- Open command prompt on the device and run the following command to install Agent with Auto Enrollment option:msiexec /i "Scalefusion MDM Agent.msi" AUTOENROLL="y" /qnAUTOENROLL="y" is used for auto enrolling devices into Scalefusion using Serial No. Enrollment. Kindly ensure the Serial number of the device (where MSI is executed) is not uploaded on Scalefusion Dashboard. This will ensure Agent is installed and auto-enrollment is enabled on the device but the device will not be enrolled into Scalefusion at this point of time.
- The Agent installation should take about 3 to 4 minutes. Once it is done, go to Add/Remove programs and verify if Scalefusion MDM Agent is present to make sure Scalefusion Agent is successfully installed on the device.
- At this point, enrollment is pending.

Step 2: Create Windows OS Image
Below, we have explained steps to create Windows OS image for cloning, using the tool Sysprep. However, any other paid or free open-source tools available can also be used for the same.
To create an OS image using Sysprep in Windows, follow these steps:
- On the source machine where you want to create OS image, navigate to the Sysprep folder. The default path is: C:\Windows\System32\Sysprep\
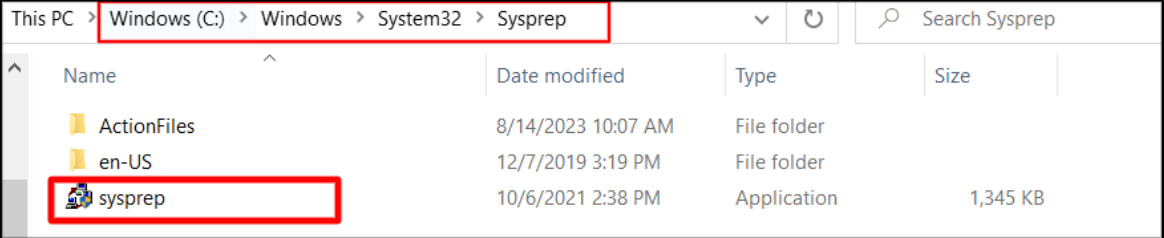
- Run the Sysprep.exe tool by double-clicking on it
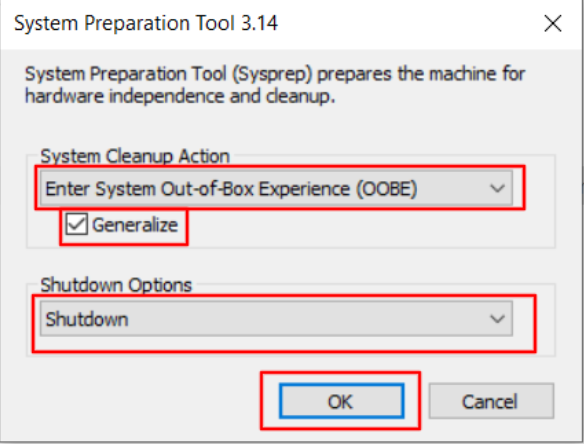
- In the System Preparation Tool window, select the following options:
- System Cleanup Action: Select Enter System Out-of-Box Experience (OOBE).
- Shutdown Options: Select Shutdown to power off the computer after the process completes.
- Generalize: Ensure this option is checked to remove unique system information.
- Click OK to start the Sysprep process. The tool will generalize the system and shut down the computer.
- Now insert a bootable pendrive and Turn on the device. During power-on, go to the BIOS setup and choose to boot from Pendrive.The Pendrive should have minimum 32 GB size available.
- Once the device is booted with pendrive, it will show Windows Installation dialog. Ignore the dialog and press Shift+F10 to launch the command prompt.
- On the command prompt, type diskpart and press enter.

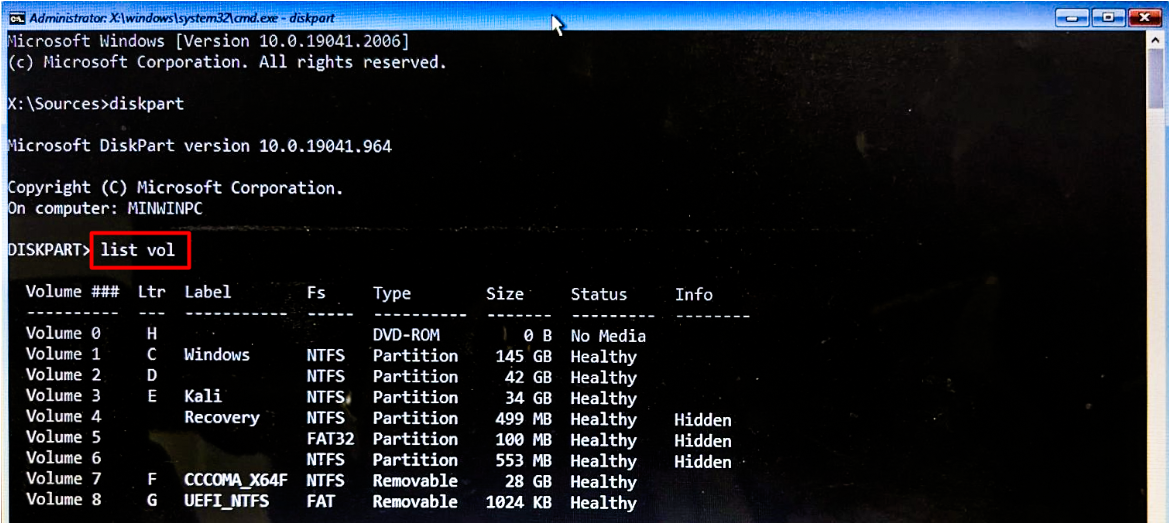
- Now, type list vol and press enter. This will display all drives (including pendrive) on the machine. Note down the drive letter for pendrive and operating system.
- Type exit and press enter to exit from Diskpart.
- Now, on the command prompt, run the below command to create an OS image. This command uses Microsoft command line utility dism.exe to create an image.dism /Capture-Image /ImageFile:"pendrivelocation:\imagefilename.wim" /CaptureDir:C:\ /Name:imagefilename /compress:maximum /bootableFor more information on command, please refer Microsoft documentation.
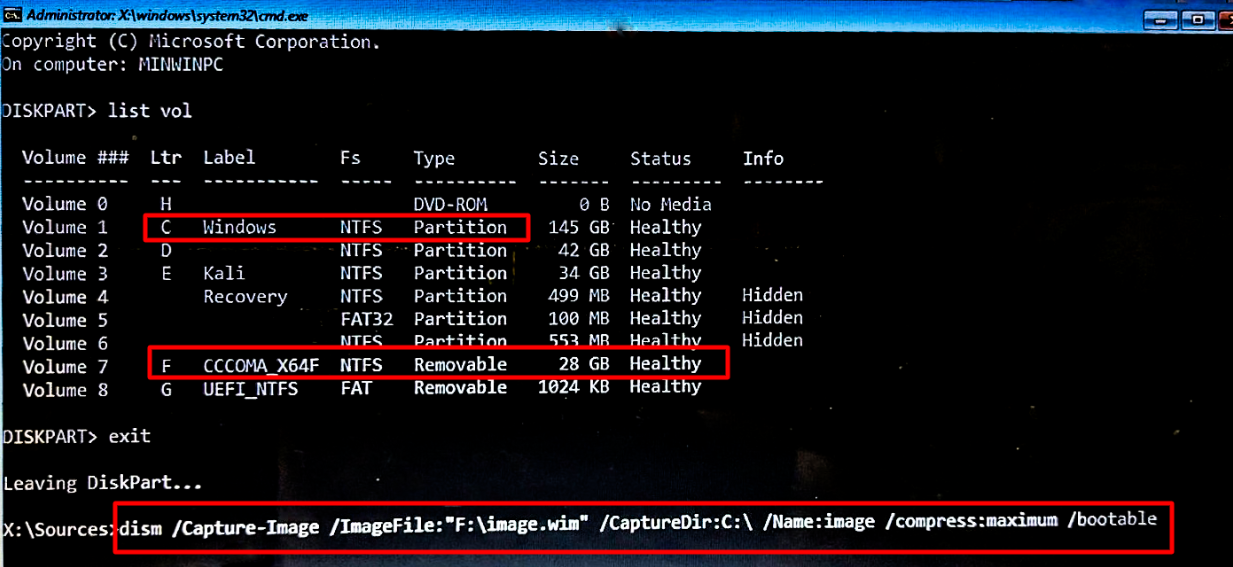 In the above screenshot, F (under Ltr column) denotes pendrive and C is the drive where the OS is installed.
 - The image creation may take a couple of hours as it depends on installed OS and its software size.
- Once the image is successfully created, a message will be displayed The operation completed successfully.

- This completes Windows Image Creation.


Step 3: Clone the OS image onto new Windows devices
The next step is to clone the Windows OS image (created in Step #2 above) on the target Windows device. The OS image can be cloned on two types of devices, viz.:
- Windows OS is not installed, that is, a fresh new Windows machine.
- Windows OS is already installed.
The process of cloning for both the above is explained in detail in below sections. These steps are to be performed on target Windows devices.
Step 3.1: Where Windows OS is not installed.
- Insert Bootable pendrive and turn on the device. During power-on, go to the BIOS setup and choose to boot from Pendrive.
- Once the device is booted with pendrive, it will show Windows Installation dialog. Ignore the dialog and press Shift+F10 to launch the command prompt.
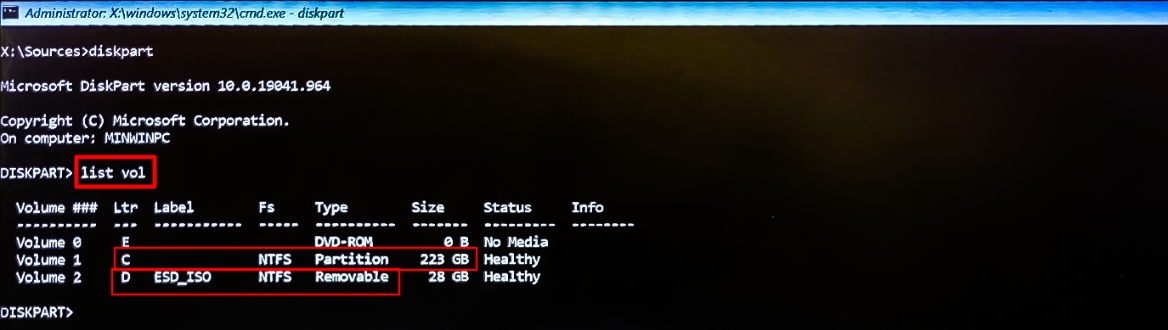
- On the command prompt, type diskpart and press Enter to start Disk Partition Utility.

- Now, type list vol and press Enter to see the list of volumes / partitions. Note the temporarily assigned drives as alphabetical letters for your newly formatted Windows OS partition and install media, such as a pendrive. You can identify the Windows partition by its size and the install media by its type, which is Removable.
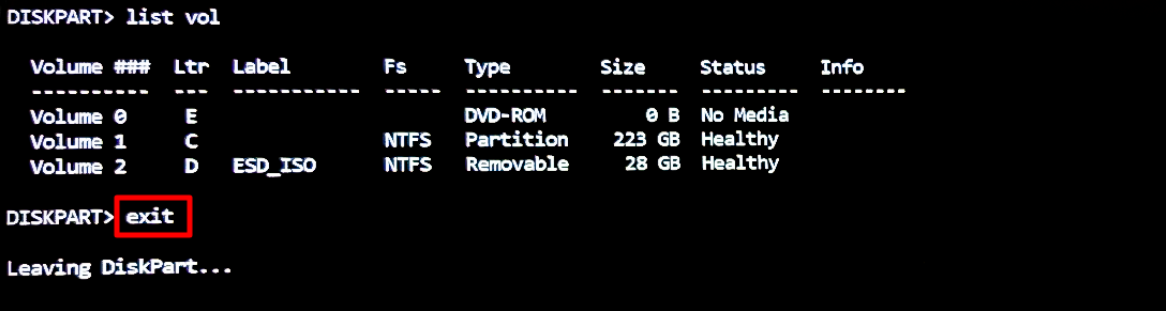
- Type exit and press Enter to quit Disk Partition Utility.
- Enter following command to check correct index for your preferred Windows edition. Replace the highlighted drive ID letter with your actual install media ID (in this case it is D).dism /Get-WimInfo /WimFile:pendriveimagelocation.wim
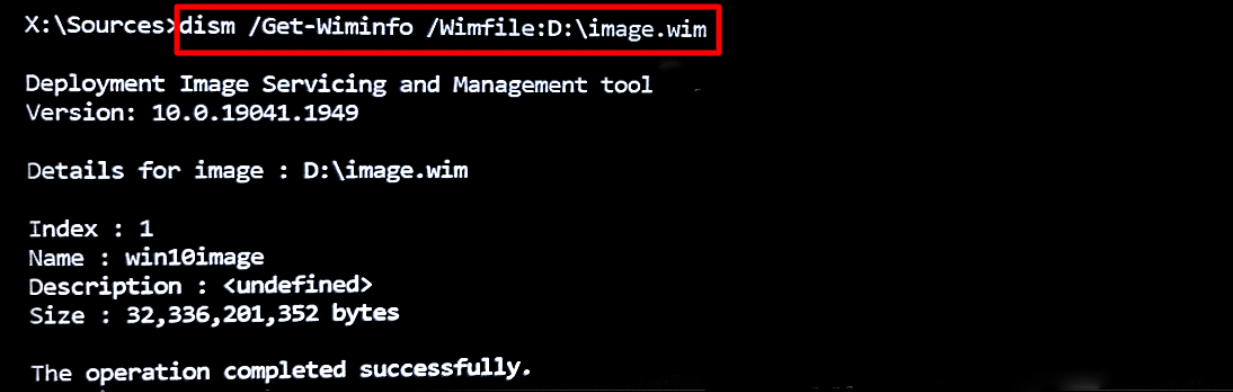
- In this case index# is 1.
- Enter following command, replacing drive ID letters and Windows edition index# with your actual ones. Here,
- ImageFile: It is the path to install.wim file on install media.
- ApplyDir: It is the temporary drive ID for partition where Windows will be installed, followed by :\Dism /apply-Image /imageFile:imagelocationinpendrive.wim /index:1 /ApplyDir:imagewheretostore:\
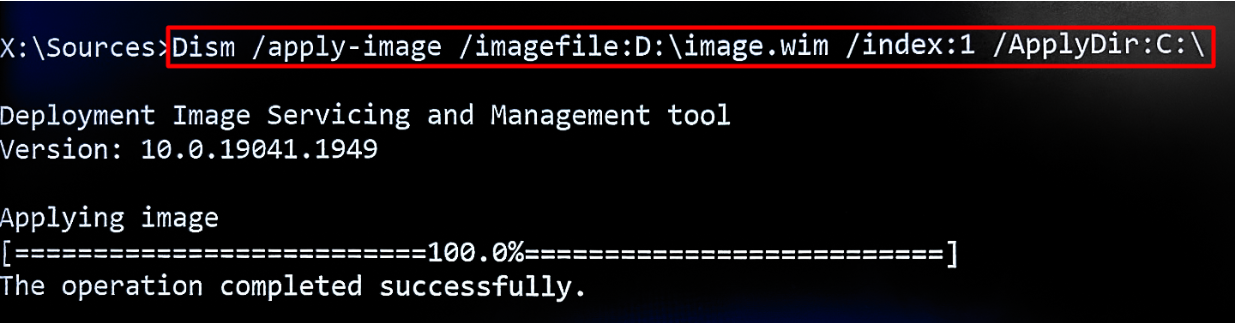
- DISM will now apply Windows image to selected partition (C: in this example). This partition will get the correct drive ID (C:) when image has been applied and Windows is restarted. When DISM is ready you can check that Windows system folders have been created with DIR C:
- Now we need to create boot records with the BCDBOOT command. We can find it on the newly created Windows partition, in the Windows\System32 folder. Enter following command to write boot records to make hard disk bootable.C:\Windows\System32\bcdboot C:\Windows /s C: /f AllC is the drive where we have installed Windows Image.

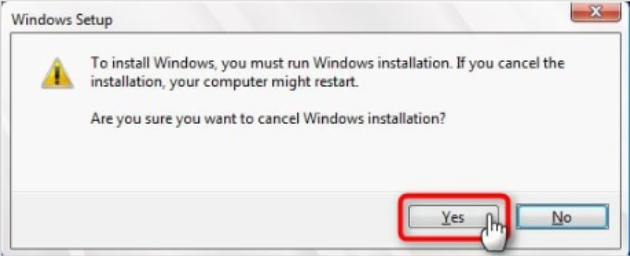
- Close the Command Prompt and also Windows Setup.
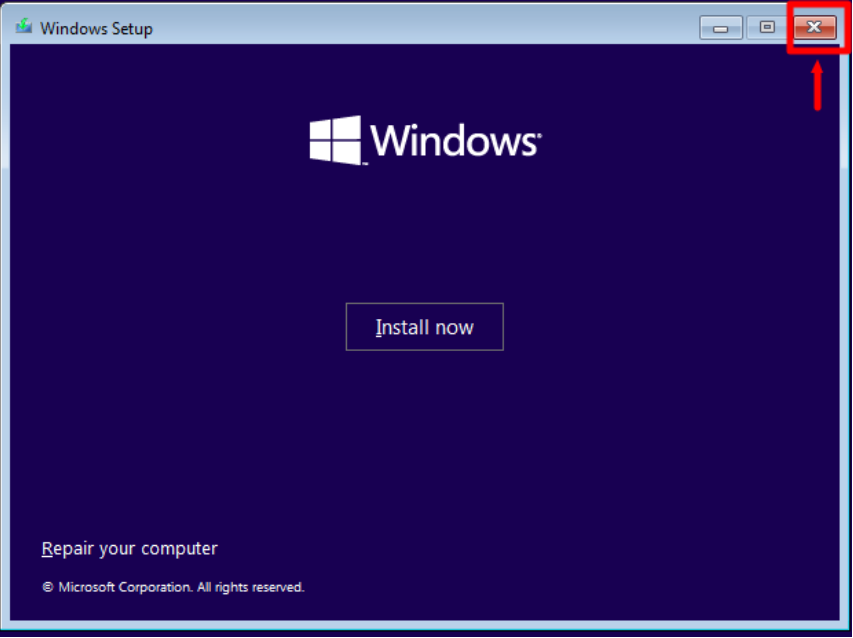
- Click Yes to restart the machine.
- Windows will now restart, booting from the hard disk entering the final phase of setup, showing Windows Welcome (OOBE) Mode. Select your region and add the initial user profile.
- This completes the process of cloning Windows OS image on target device.


Step 3.2: Where Windows OS is already installed
On target Windows devices where OS is already installed, follow these steps first to apply image:
- Insert Bootable pendrive and Turn on the device in boot mode.
- Once Windows setup windows appears then click Shift+F10 to open the command prompt window.
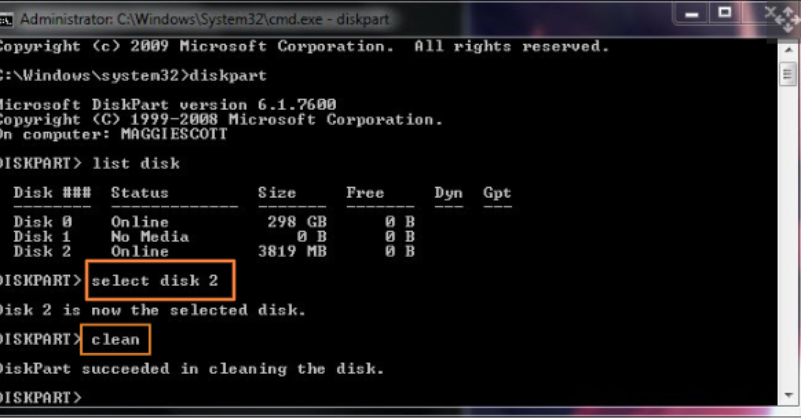
- On the command prompt, type diskpart and press enter.
- Next, type list disk
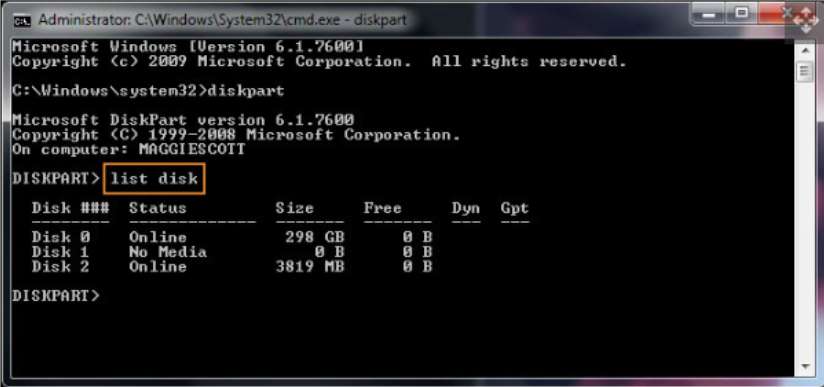
- Select the Drive to Format by typing select disk <number>
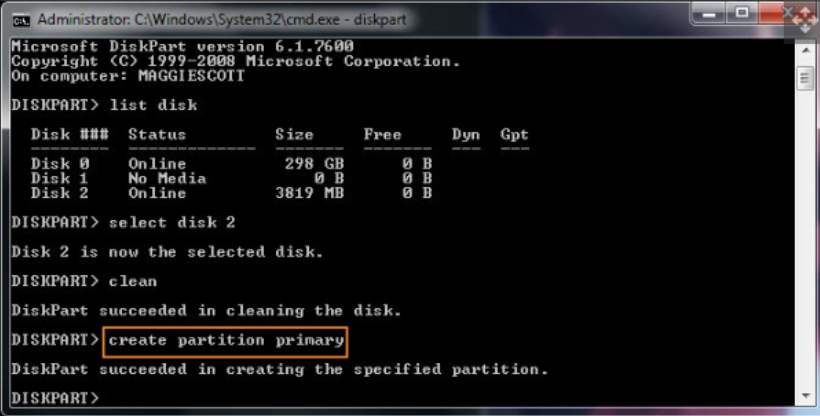
- Now, clean the Disk by typing clean
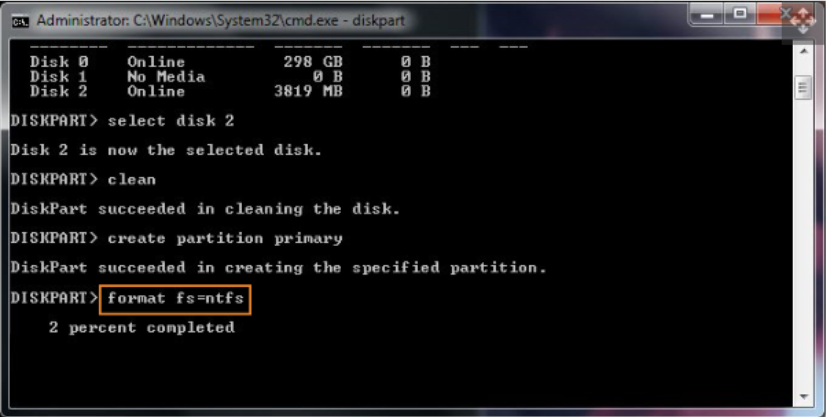
- Next, type create partition primary
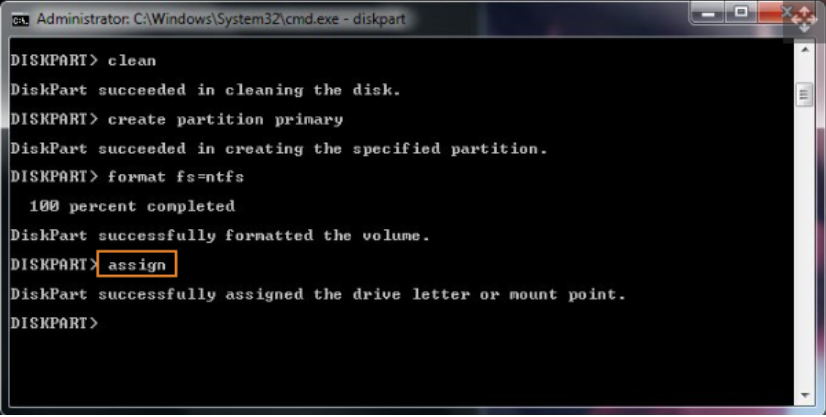
- Format the Drive by typing format fs=ntfs
- When formatting is complete, assign a Drive Letter by typing assign
- On successful completion, type exit to quit Disk Partition Utility.
- Now follow the process mentioned under Step #3.1 above (Point #3 onwards till #14)
- Once done, you should find Scalefusion MDM Agent application installed on the target Windows machine on booting it up. Now, you can enroll the device.


Step 4: Enroll new devices into Scalefusion with Scalefusion MDM Agent as a non-admin user
For a non-admin user, following steps need to be followed to enroll the new (target) Windows device on which OS Image is created:
- Once the device is restarted, configure the machine.
- Create an admin user on the device.
- Login to the device with the Admin user. Verify Scalefusion MDM agent application should be installed on the machine.
- Launch command prompt as Administrator and run below command to get device’s serial number.wmic bios get serialnumber
- Note down the serial number.
- Now, create a non-admin user on the device.
- Login to the machine with the non-admin user.
- Shutdown the device.
- Upload Serial Number to Scalefusion dashboard and configure a profile as well.
- Turn on the machine again and login with non-admin user.
- Wait for 2-3 minutes and launch Scalefusion MDM agent application.
- Device will be enrolled to Scalefusion. On the dashboard you should be able to see the device and its details.
Was this article helpful?