Linux Device Profiles
- 28 Sep 2023
- 2 Minutes to read
- Print
- PDF
Linux Device Profiles
- Updated on 28 Sep 2023
- 2 Minutes to read
- Print
- PDF
Article Summary
Share feedback
Thanks for sharing your feedback!
Device Profiles help IT Admins group various policies in one place. Once a profile is created, you can use it to create enrollment configurations that help you enroll devices. Additionally, any changes to the profile are automatically applied to all the devices currently associated with the profile. Device Profiles can also be attached with Groups so that you can group your devices into organizational units and apply common policies to all of them.
This document helps you to create a Linux device profile and the various settings on offer.
Before You Begin
Start by signing into the Scalefusion Dashboard.
Creating and Configuring a Profile
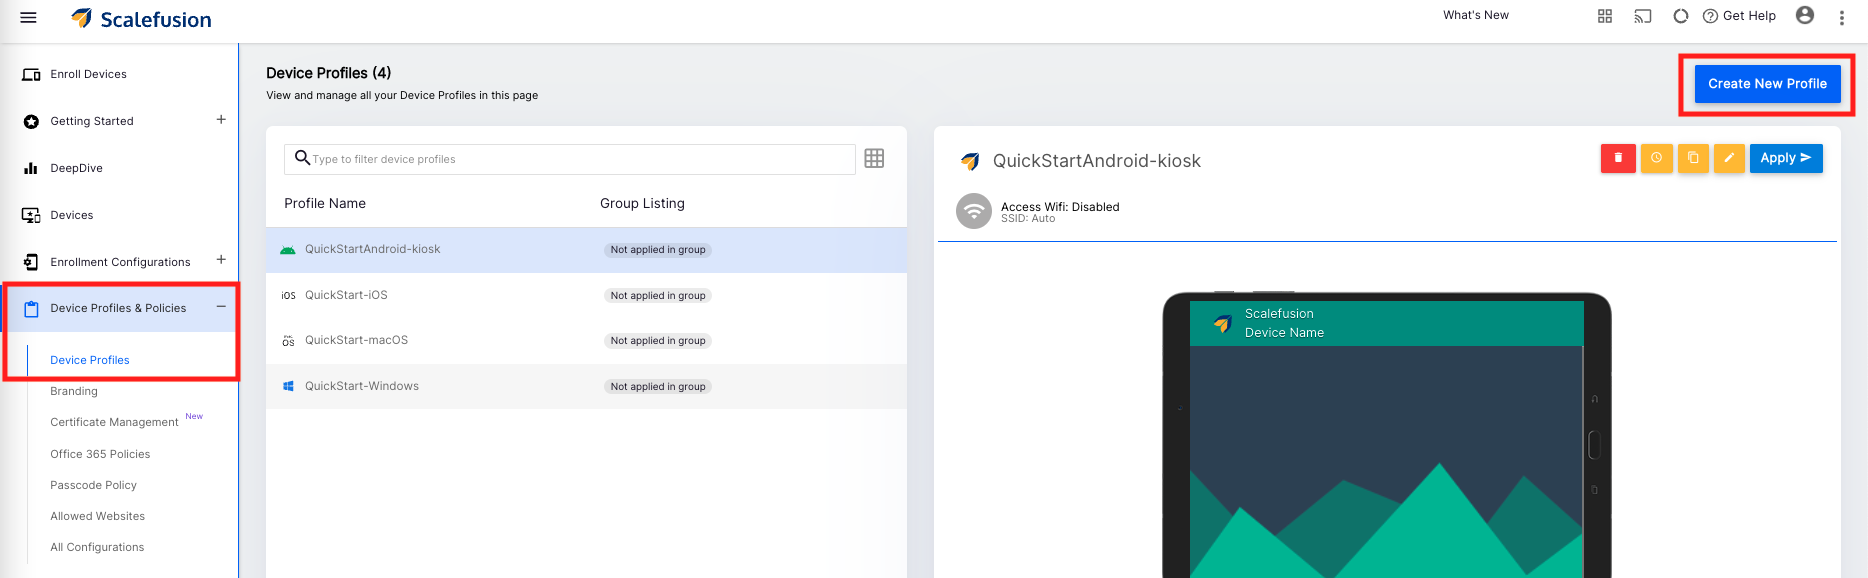
- Navigate to Device Profiles & Policies, click on Device Profiles and click on Create Device Profile
- Select Linux in the profile creation wizard, enter a name for your profile and click Submit

- Step 2 would launch the profile configuration wizard that allows you to configure the policies. Click on each section to configure,
- Network Settings: This section displays the Wifi configurations created from All Configurations > Wifi Settings. Enable the configurations that you want to push to the managed devices. Scalefusion creates these configurations on the managed devices so that the user can connect to them when the devices are in proximity.

- Restrictions: This section displays the restrictions that can be applied. Enable or Disable the settings as per your requirements.

- Block USB Devices: Enable this option to block connections from USB devices.Blocking USB devices blocks the USB keyboards and mouse. Please use this helper script and follow this guide to deploy the script to allow these devices.
- Block USB Devices: Enable this option to block connections from USB devices.
- Save: Once you have configured the profile, click Save on the top right corner to save the profile.
- Network Settings: This section displays the Wifi configurations created from All Configurations > Wifi Settings. Enable the configurations that you want to push to the managed devices. Scalefusion creates these configurations on the managed devices so that the user can connect to them when the devices are in proximity.
- Once the profile is saved properly, it will be shown in the list of profiles. The action panel displayed on the right side when a profile is selected allows you to perform the below actions, 

- Apply: Use this option to apply this profile to a group or device(s) that are not associated with a Linux profile.
- Edit: Use this option to make edits to the profile. Please note that all changes, once are saved, are pushed to the devices associated with this profile.
- Copy: Use this option to make a copy of this profile.
- Delete: Use this option to delete the profile. Once a profile is deleted, all devices would lose the policies that are configured on them.
- Password Policy: You can also create a password policy and apply it to the created profile by following our document here. This will ensure that all enrolled devices are forced to set a secure password as per the policies.


Frequently Asked Questions
- Question: Do the devices automatically connect to the Wi-Fi configurations pushed from the profile?
- Answer: No. They are simply configured on the devices, and the users can connect to them without having to enter the passwords.
- Question: Can we push Enterprise Wifi with PEAP/EAP settings to the managed devices?
- Answer: No. For now, you can only push Wi-Fi configurations with Basic authentication types.
- Question: Does the Block USB devices block USB keyboards or mouse?
- Answer: Yes. However, please use this script and deploy it to allow the usage of these devices.
Next Step
Now that you have created a device profile proceed to create an Enrollment configuration before you can start enrolling your devices.
Was this article helpful?