Full Disk Encryption with FileVault
- 29 Sep 2023
- 9 Minutes to read
- Print
- PDF
Full Disk Encryption with FileVault
- Updated on 29 Sep 2023
- 9 Minutes to read
- Print
- PDF
Article Summary
Share feedback
Thanks for sharing your feedback!
FileVault allows IT Admins to leverage the macOS built-in Full Disk Encryption program and encrypt the disk. An encrypted disk prevents unauthorized access to the data and documents on the disk and ensures that a password is required to boot into the disk before the data can be accessible.
This also helps safeguard the data in the event the device is misplaced or lost and also ensures that the data can be recovered in the event that the user forgets the password.
Scalefusion makes it easy for IT Admins to deploy a FileVault policy to all the managed macOS devices, thereby enforcing the disk encryption on all the devices; it also acts as an Escrow agent that stores the recovery keys and presents them to IT Admins in the event these keys are needed for recovery.
Prerequisites
- FileVault is supported starting macOS 10.13
- macOS Device must be enrolled in Scalefusion
- Scalefusion Enterprise Plan
- A macOS device to generate Recovery Keys
- A passcode Policyshould be applied on the device for FileVault encryption.Once FileVault is switched on, it cannot be switched off remotely, meaning the disk is encrypted, and to disable FileVault, physical access to the machine is required.
Overview of FileVault Encryption Keys
For any type of encryption, we typically need a Key to encrypt the data. In the case of FileVault, the following types of keys are supported for encryption,
- Personal Recovery Key (PRK): A personal recovery key is a randomized alphanumeric string generated by the OS when the FileVault is turned on. This string is shown to the user so that they can store it securely for recovery purposes. If FileVault has been enabled on the device post enrollment to Scalefusion, then these Keys are displayed in the Scalefusion portal as well.
- Institutional Recovery Key (IRK): An institutional recovery key is a certificate generated by the IT Admins that is used for encryption. The advantage is that enterprises can choose to generate the certificates and deploy them via the Scalefusion portal, and minimal user interaction is required when FileVault is enabled. Also, in the event the user forgets the password, the recovery key can be shared by the admins.
- Personal Recovery Key & Institutional Recovery Key (PRK & IRK): This form of encryption uses both the key types, meaning a PRK is displayed to the end user and also the IRK provided by IT Admin is used. In the event of recovery, either of the keys can be used.
The sections below help you to configure the FileVault payload in the macOS device profile and enforce full disk encryption.
Step 1: Decide the Encryption Strategy
Based on the information, choose the best approach for encryption keys for your inventory. We would typically suggest using an IRK or PRK & IRK, but in BYOD use cases, you can opt-in for a PRK approach as well. If you choose to use IRK, proceed to Step 2 else, proceed to Step 3.
Step 2: Generating an Institutional Recovery Key
If you intend to use an IRK approach or an Institutional Recovery Key, then follow the guidance from Apple or the steps below to generate the key. If you intend to use the PRK approach only, then you can skip the steps below.
- You would need a macOS machine to generate the keys. Please note that this machine need not be a managed device. This can be the IT Admin's machine.
- Open the Terminal app on your Mac, then enter the following command & hit enter key,Shell
security create-filevaultmaster-keychain ~/Desktop/FileVaultMaster.keychain - When prompted for a password, enter a password for this keychain; you will be asked to confirm the password; Please retype the same password. Terminal won't show the password you type. Hit the enter key after each step.
- Once the above command succeeds, a file named FileVaultMaster.keychain is saved to your desktop. Copy this file to a secure location, such as an encrypted disk image, on an external drive. This secure copy is the private recovery key that can unlock the startup disk of any Mac set up to use the FileVault master keychain. Note that this is not for distributionMake sure to store this file at a secure location, as this would be required if the need arises to recover a Mac.
- Navigate to Desktop and double-click on the newly created FileVaultMaster.keychain, which will open this file in the Keychain Accessprogram.
- If you see more than two items listed on the right, select another keychain in the sidebar, then select FileVaultMaster again to refresh the list.
- If the FileVaultMaster keychain is locked, click the Lock icon in the upper-left corner of Keychain Access, then enter the master password you created.

- The next step is to export the info and generate a certificate. On the right side, you would see a certificate & private key, and you would have to export the certificate.Note:To generate the IRK, exporting the certificate is enough. However, if you would like to use Scalefusion as a backup for your keychain, you can choose to export both certificate & private key. Irrespective of which key you export, we would recommend securely storing the FileVaultMaster.keychain.
- Exporting Only the Certificate: With only the certificate selected, click Files > Export Items
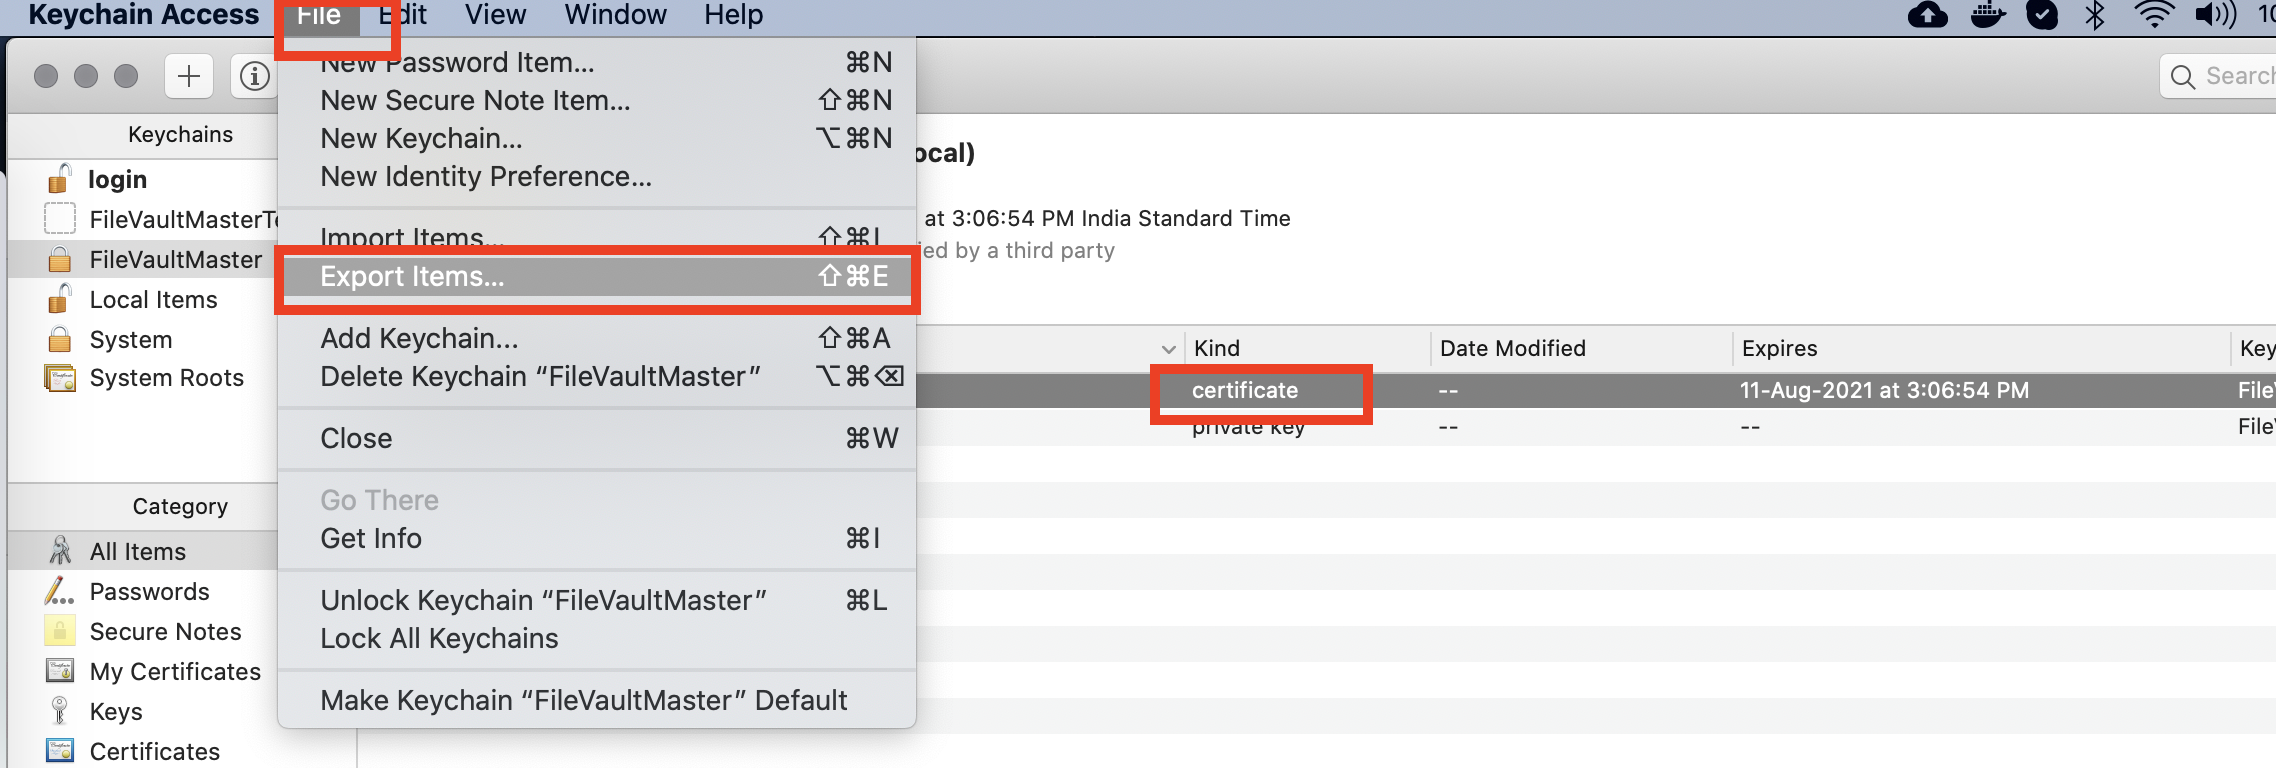
- Exporting Certificate and Private Key: With both the certificate & private key selected, click Files > Export Items
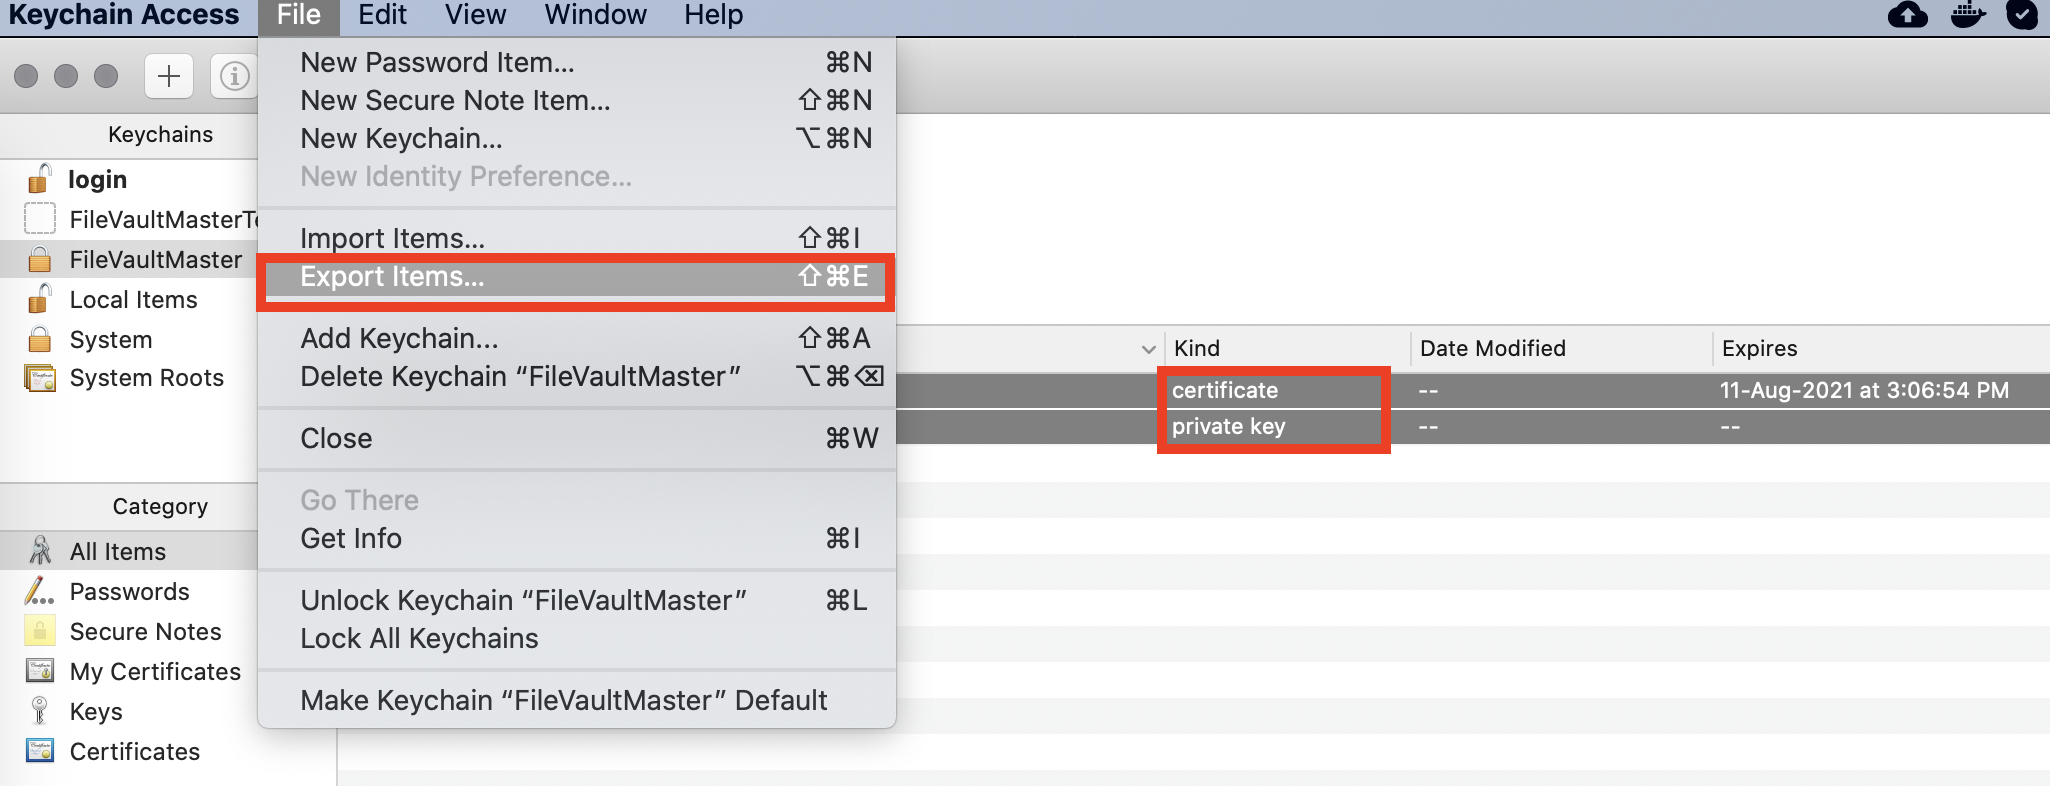
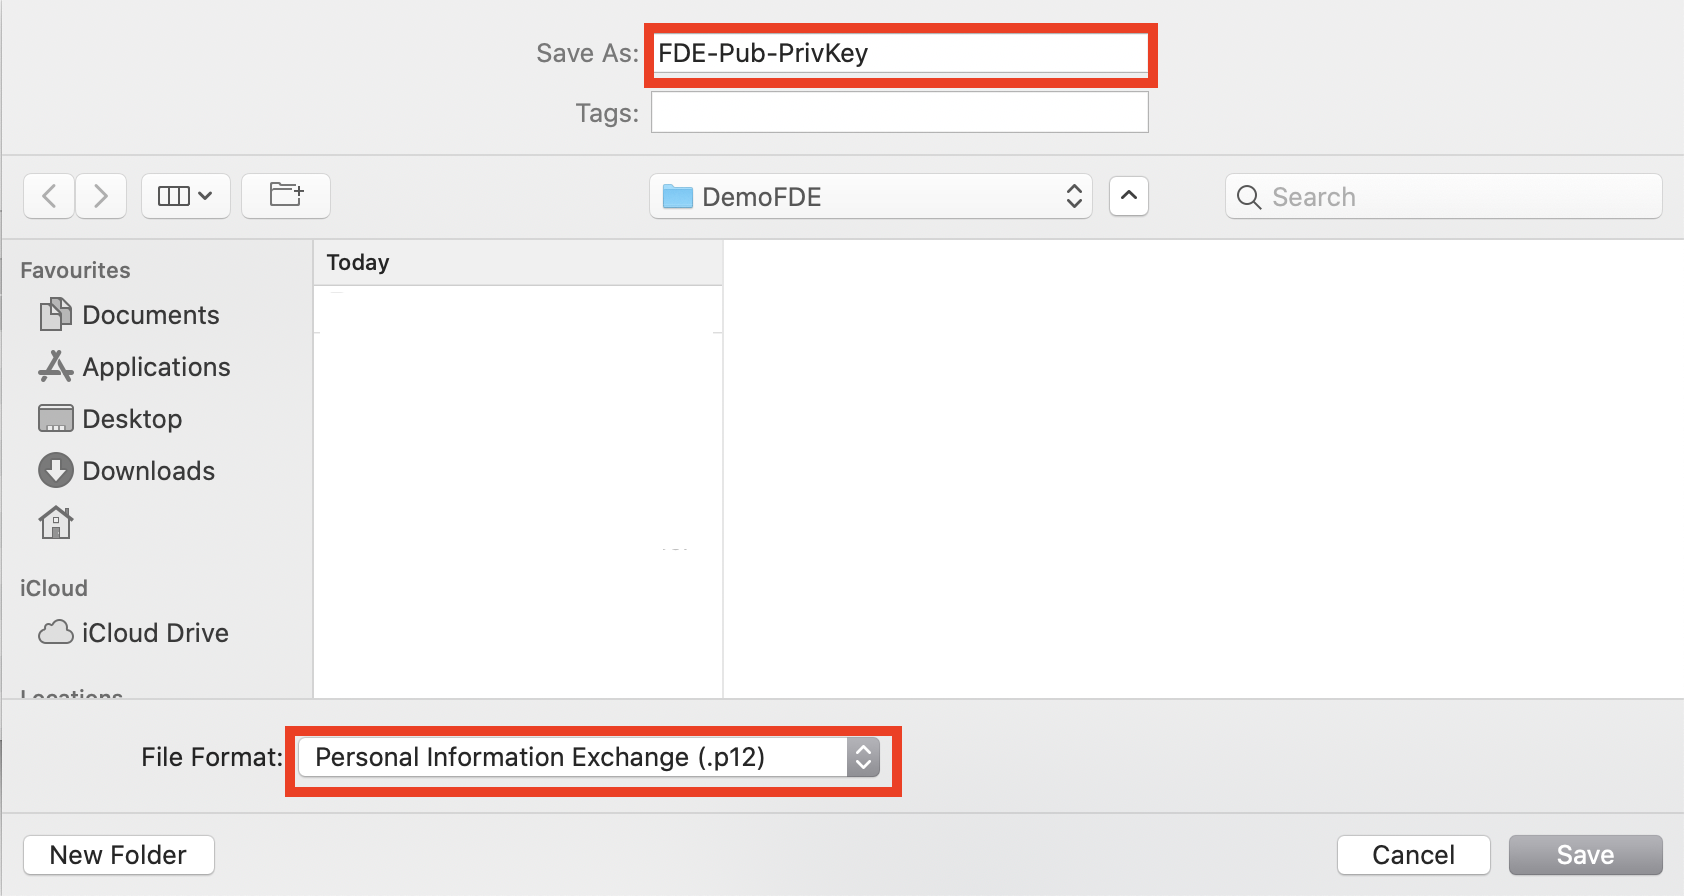
- Storing the Exported File: In either of the steps above, you would have to choose a file name for the exported file and save it to your disk. You will be prompted for a password for the exported items. Please remember this password. Select either .p12 format or .cer format and save the file.
- Exporting Only the Certificate: With only the certificate selected, click Files > Export Items
- Now that you have generated the certificate, please proceed to Step 3


Step 3: Configure FileVault in the macOS Device Profile
To deploy the FileVault policy to all your managed devices, you would have to configure the FileVault policy and push it to all devices.
Once the Policy is applied to devices, the FileVault settings cannot be changed unless the device is re-enrolled.
- Sign in to the Scalefusion dashboard and navigate to Device Management > Device Profile. Create a new macOS device profile or edit an existing one and click on the FileVault section. Toggle the Enable File Vault option to ON to configure the FileVault option.
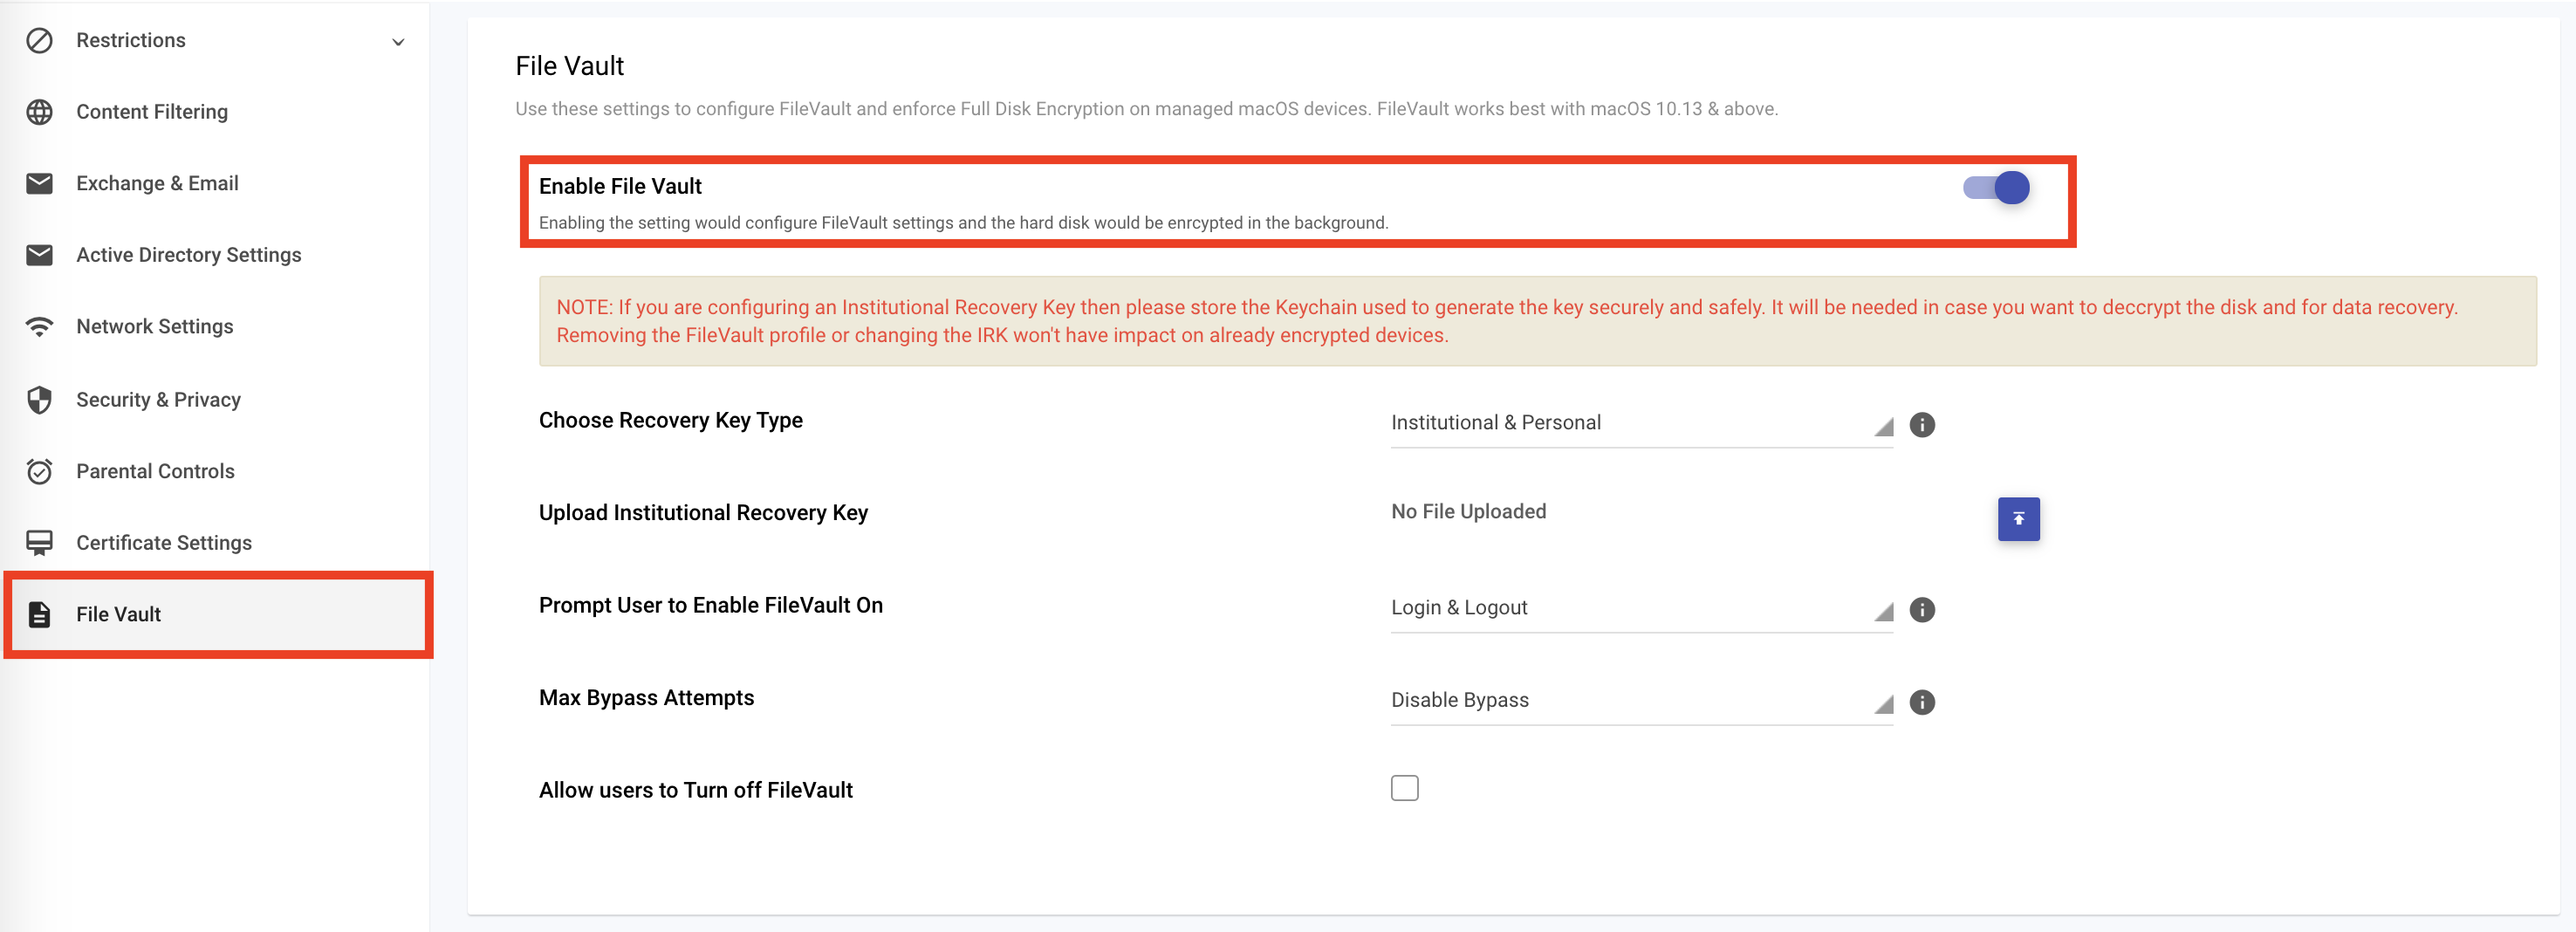
- Choose Recovery Key Type: The first option is to select the recovery key type that you want to enforce. The options are,

- Personal: Select this if you want to enforce PRK.
- Institutional: Select this if you want to enforce IRK.
- Institutional & Personal: Select this if you want to enforce IRK & PRK.
- Upload Institutional Recovery Key: If you had selected IRK or IRK & PRK as the recovery key type, then upload the certificate generated in Step 2. You would also need to enter the password if you had password-protected the exported file.

- Prompt User to Enable FileVault On: Select when do you want to show the end-users the prompt to enable FileVault. The options are
- Login & Logout: The prompt will be shown at Login & Logout
- Login: Prompt will be shown only at Login
- Logout: Prompt will be shown only at Logout.
- Max Bypass Attempts: Choose the number of times the user can log in without enabling the FileVault once enforced. Choosing Disable Bypass will enforce right at logout or the next time they log in.
- Allow users to Turn off FileVault: Enable this option to allow users to turn off FileVault once the disk is encrypted. Leave it unchecked to prevent users from turning off FileVault.
- SAVE the profile once done. The FileVault policy will be enabled on all the devices where this profile has been applied.


Step 4: Verify FileVault Status
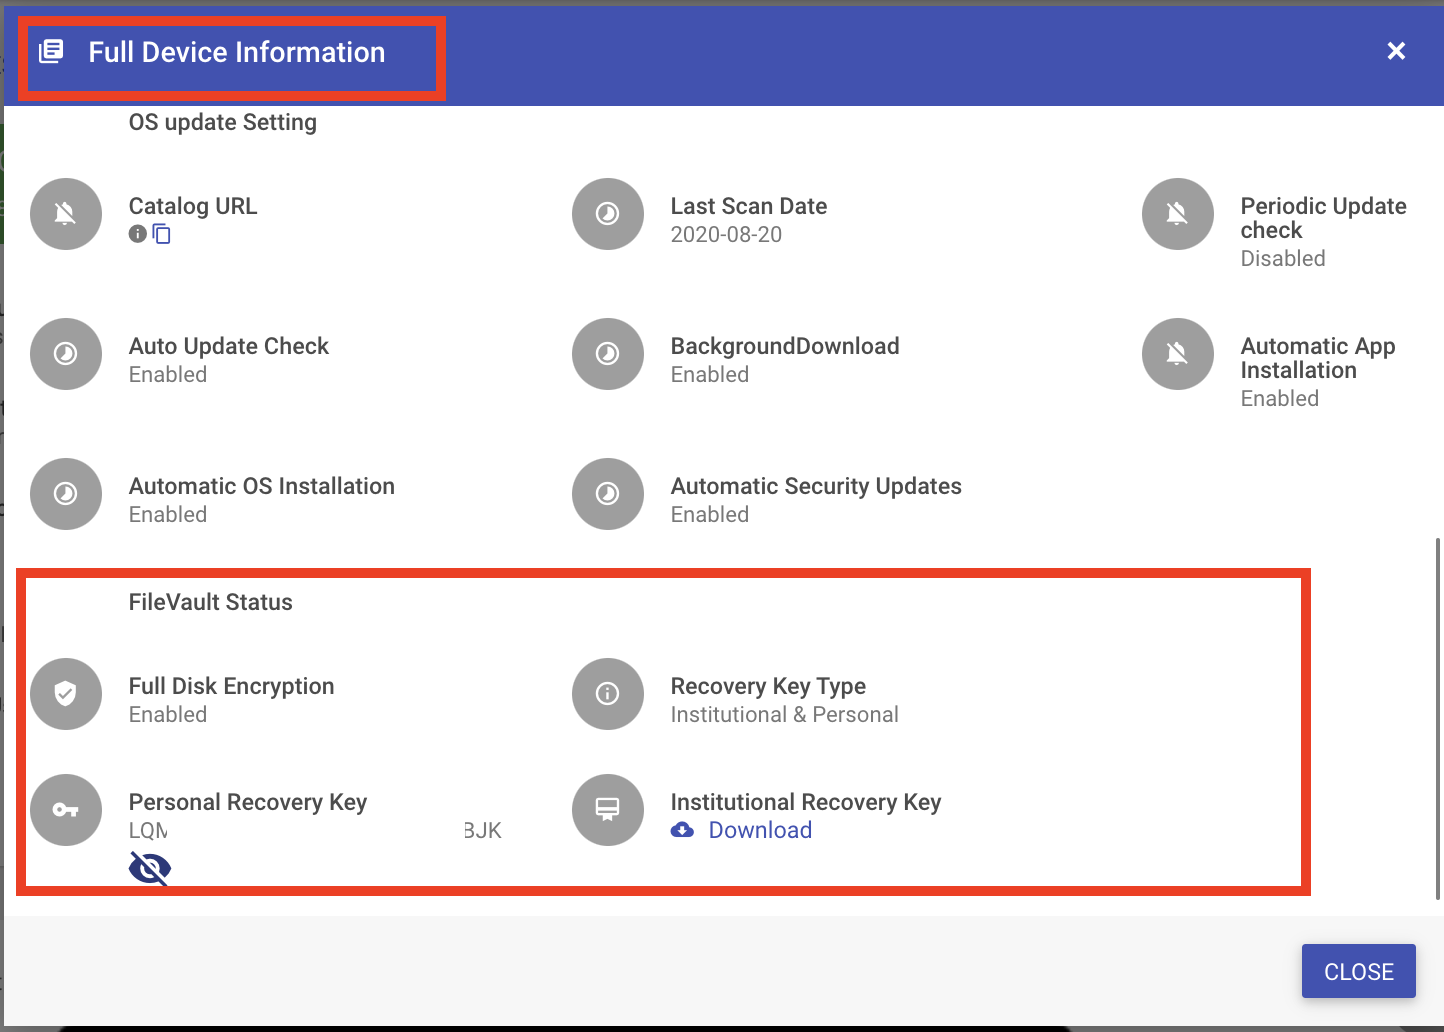
IT Admins can view the status of FileVault at a device level and view the PRK keys (if PRK was set). Depending on when the user enables FileVault, this may take some time before the keys are synced to the Dashboard.
Scalefusion Dashboard
- Navigate to the Devices section and customize the view to see the Encryption status

- Click on the device to see the device details and select the Full Device Information from the device details page option.


On the Mac device
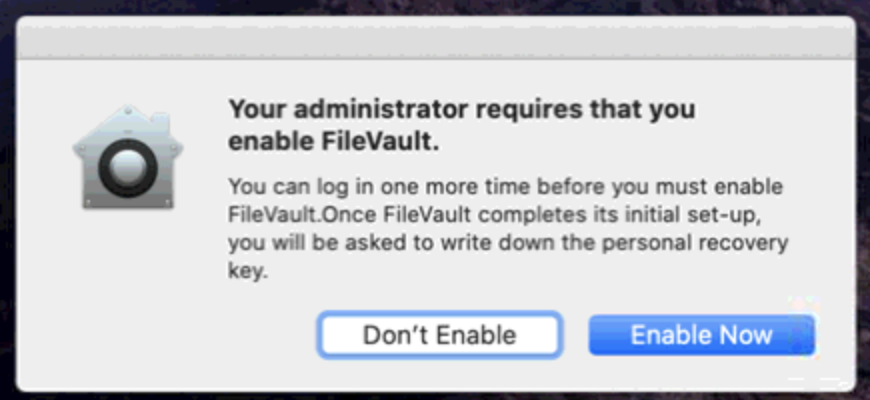
- Once FileVault policy has been applied on a device, a prompt is displayed to the user to Enable FileVault at Login or Logout
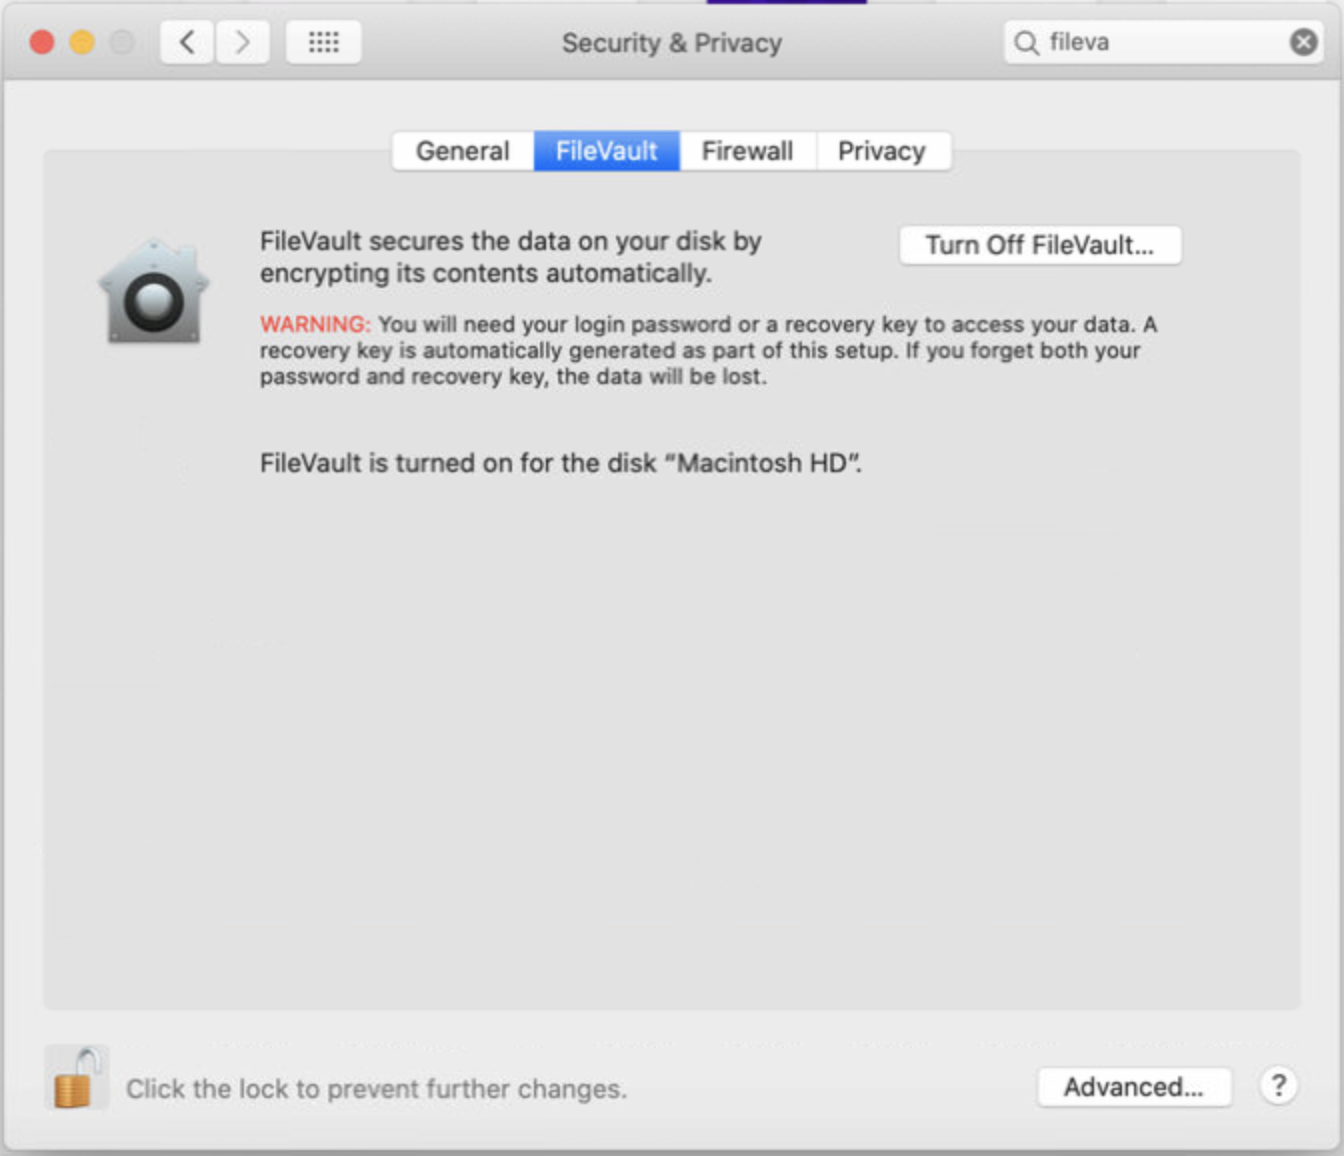
- Once FileVault is enabled, the following is displayed in System Preferences > FileVault


Frequently Asked Questions
Question: We have changed the FileVault policy, but it does not update/change the encryption type on the device.
Answer: Once a FileVault policy is applied, we retain that at the device level, and the policy cannot be changed. This is because macOS does not allow for the disk to be decrypted and a new key to be applied remotely.
Question: How do we unlock the encrypted volume/disk if the user forgets the password?
Answer: Please refer to Use the private key to unlock a user's startup disk section from the Apple document to use the FileVault master. Keychain and unlock the encrypted volume.
Question: What if the user forgets the password or has lost the Personal Recovery Key?
Answer: If you had enforced FileVault from Dashboard and the FileVault was enabled post enrollment to Scalefusion, then the Personal Recovery Key can be viewed at Full Device Information.
Question: What if we have lost/misplaced the master FileVaultMaster? Keychain used to generate the Institutional Recovery Key?
Answer: It is strongly recommended that the FileVaultMaster. The keychain is stored in a secure place. In case you have lost or misplaced it and if you had uploaded the IRK with the Private Key to Scalefusion Dashboard, then you can download the certificate from Full Device Information and regenerate the key. Follow the steps below to generate the keychain,
- Navigate to FullDevice Information and click Download to download the key.
- Contact our support team at support@scalefusion.com to get the password of the certificate if you don't remember it.
- On another Mac machine, open Keychain Access
- From the menu, select File > New Keychain
- Enter FileVaultMaster as the name of the new keychain and secure it using a password
- Select the FileVaultMaster keychain from the keychains list, and from the menu, select File > Import Items
- When prompted, select the certificate downloaded in Step 1 above and enter the password that was provided to you in Step 2
- Now navigate to /Library/Keychains and locate FileVaultMaster.keychain and copy it to an external drive to use it as the Keychain.
Question: We have not enabled FileVault, but when our users try to Turn On FileVault, they see a message asking them if they want to Store their Personal Recovery Key to Scalefusion. Why does this happen?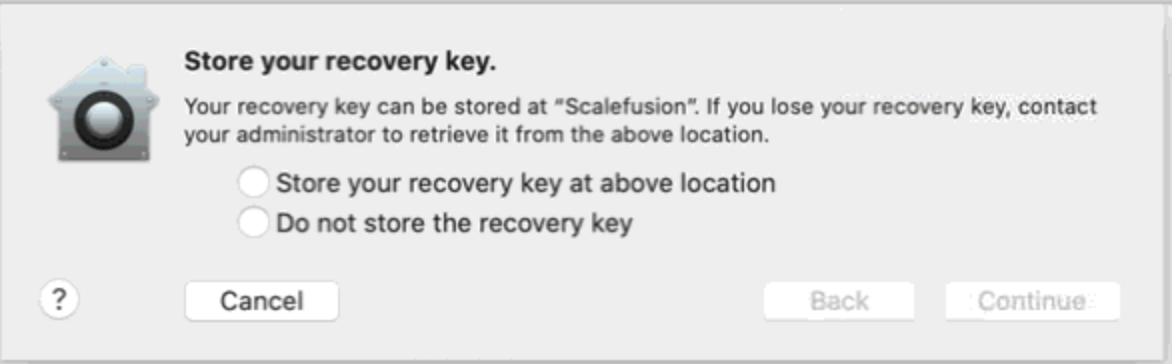
Answer: Irrespective of whether the FileVault policy is set or not, Scalefusion acts as the Escrow agent for PRK keys, so in this case, if the user chooses to save the keys to Scalefusion, then you, as an IT Admin, can view the keys in Scalefusion Dashboard making it easy in case users lose/misplace the PRK.
Question: Why do our users see the message "A recovery key has been set by your company, school, or institution", even after unenrolling the Mac device from Scalefusion?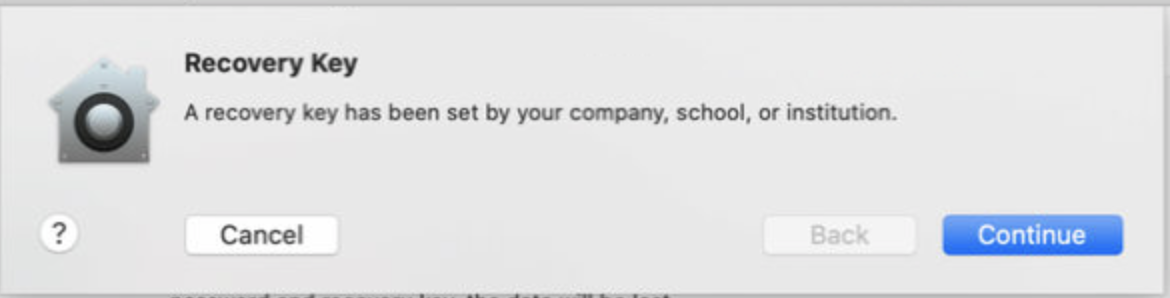
Answer: If an IRK was used to configure the FileVault policy when the device was enrolled, then macOS retains this key even after the device is enrolled. To remove/clean the IRK pushed from Scalefusion, delete the Filevaultmaster.Keychain from the following location,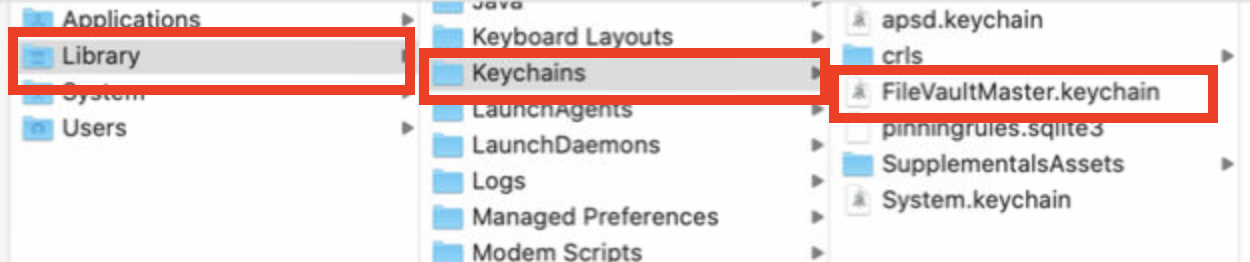
Was this article helpful?