Creating and Distributing an Enterprise Ready App
- 28 Sep 2023
- 2 Minutes to read
- Print
- PDF
Creating and Distributing an Enterprise Ready App
- Updated on 28 Sep 2023
- 2 Minutes to read
- Print
- PDF
Article Summary
Share feedback
Thanks for sharing your feedback!
Scalefusion MDM enables users to deploy Enterprise Apps on their iOS devices.
The document below describes how to create and distribute Enterprise Ready Apps.
Before You Begin
- You should have a MacOS device
Steps
Following are the steps involved in it:
- Create a Certificate Signing Request
- Create Enterprise Distribution Certificates
- Create Enterprise Build for Distribution
These are explained in detail below.
Step 1: Create a Certificate Signing Request
Keychain Access on your Mac allows you to create a certificate signing request (CSR).
- Navigate to /Applications/Utilities and launch Keychain Access.
.png)
- Go to Keychain Access > Certificate Assistant > Request a Certificate from a Certificate Authority
.png)
- This opens the Certificate Assistant dialog box. Enter the following Certificate Information,
- User Email Address: Enter an email address
- Common Name: Enter a name for the key (for example, John Doe)
- CA Email Address: Leave this field empty
- Request Is: Choose Saved to disk
- Click Continue after entering the above details.
.png)
- Select the path where you want the CSR(Certificate Signing Request) to be saved and save it. The Certificate Signing Request file gets created. For more information on this, click here
.png)
.png)
.png)
Step 2: Create Enterprise distribution certificates
The next step is to create Enterprise Distribution Certificates.
Prerequisite
An account enrolled in the Apple Developer Enterprise Program. To learn how to enroll in the Apple Developer Enterprise Program, click here
As a member of the Apple Developer Enterprise Program, you can create multiple enterprise distribution certificates.
Required role
Account Holder or Admin
- Log in to the Apple developer portal and navigate to the Certificates section in Certificates, Identifiers & Profiles
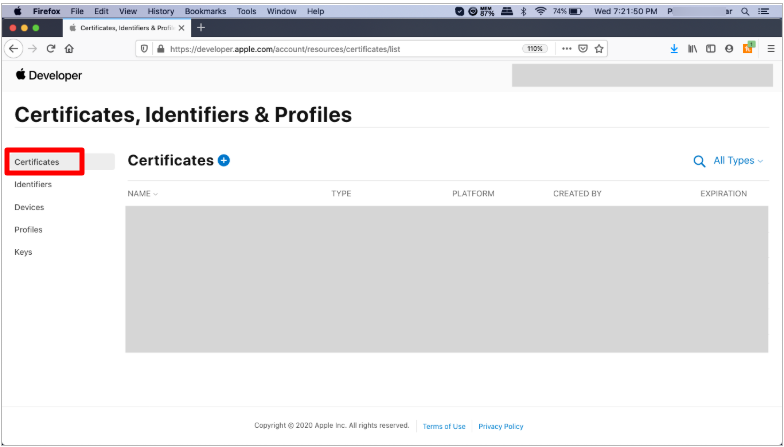
- In the upper-left corner, click the Add button (+).
- Under Software, select In-House and Ad Hoc, then click Continue.

- Follow the instructions above (Step 1) to create a certificate signing request file.
- Click Choose File.
- In the dialog that appears, select the certificate request file (a file with a .certSigningRequest file extension), then click Choose.
- Click Continue
- Click Download
- The certificate file (a file with a .cer file extension) appears in your Downloads folder.


For more information on this, click here
Step 3: Create Enterprise Build for Distribution
To create Enterprise Build for Distribution, follow these steps:
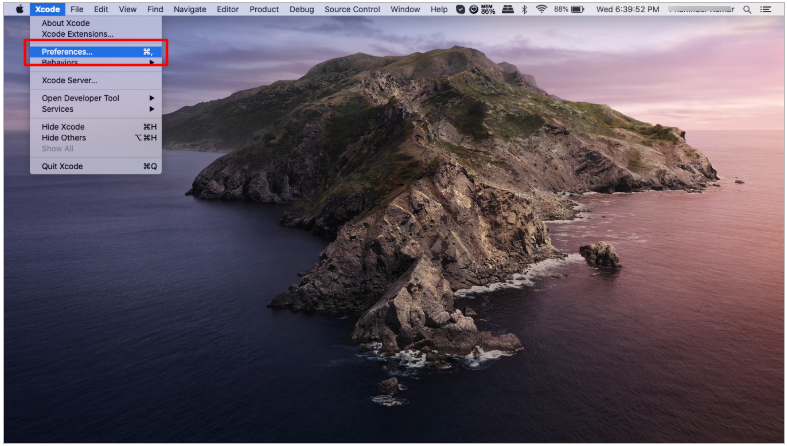
- In Xcode, navigate to Preferences to add your Apple ID account to the Accounts preferences. 
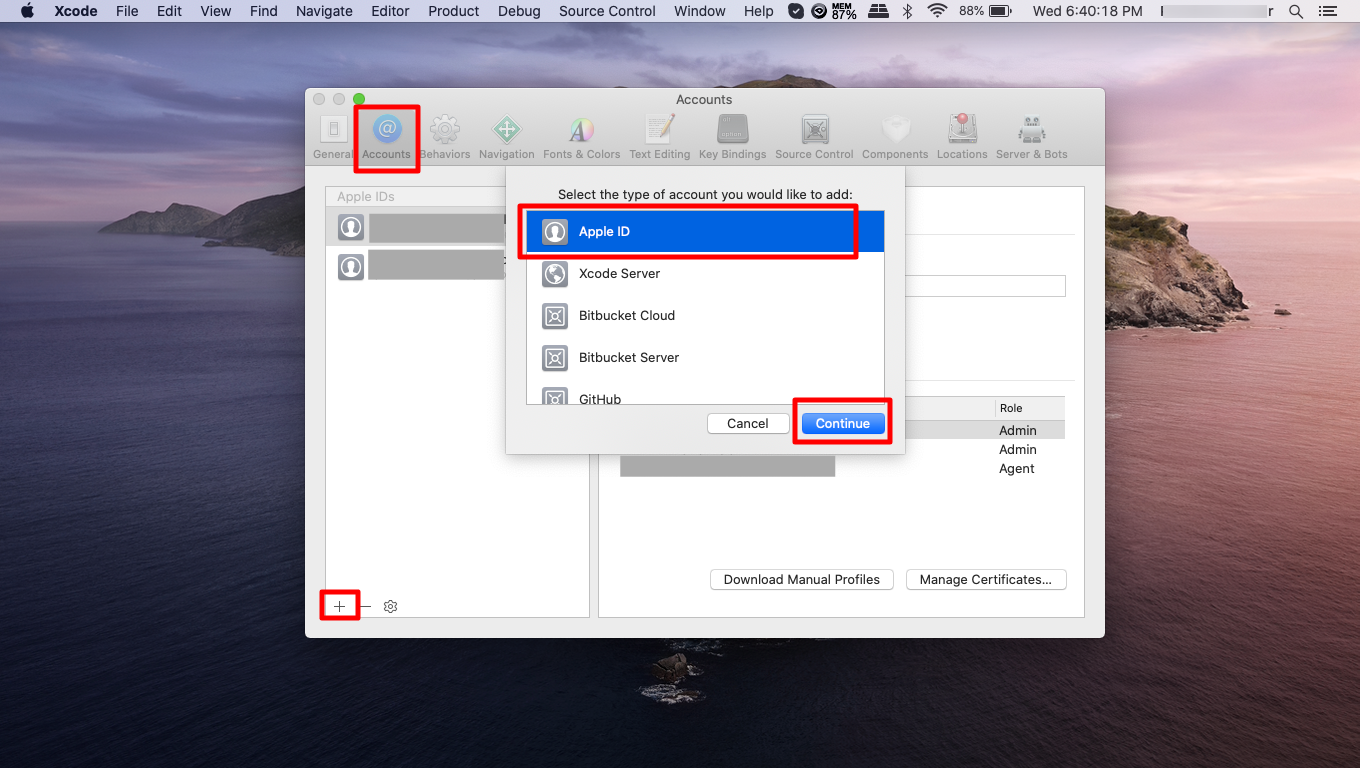
- In the Accounts window, click on the + button. A new small window will open. Here, select Apple ID and click Continue
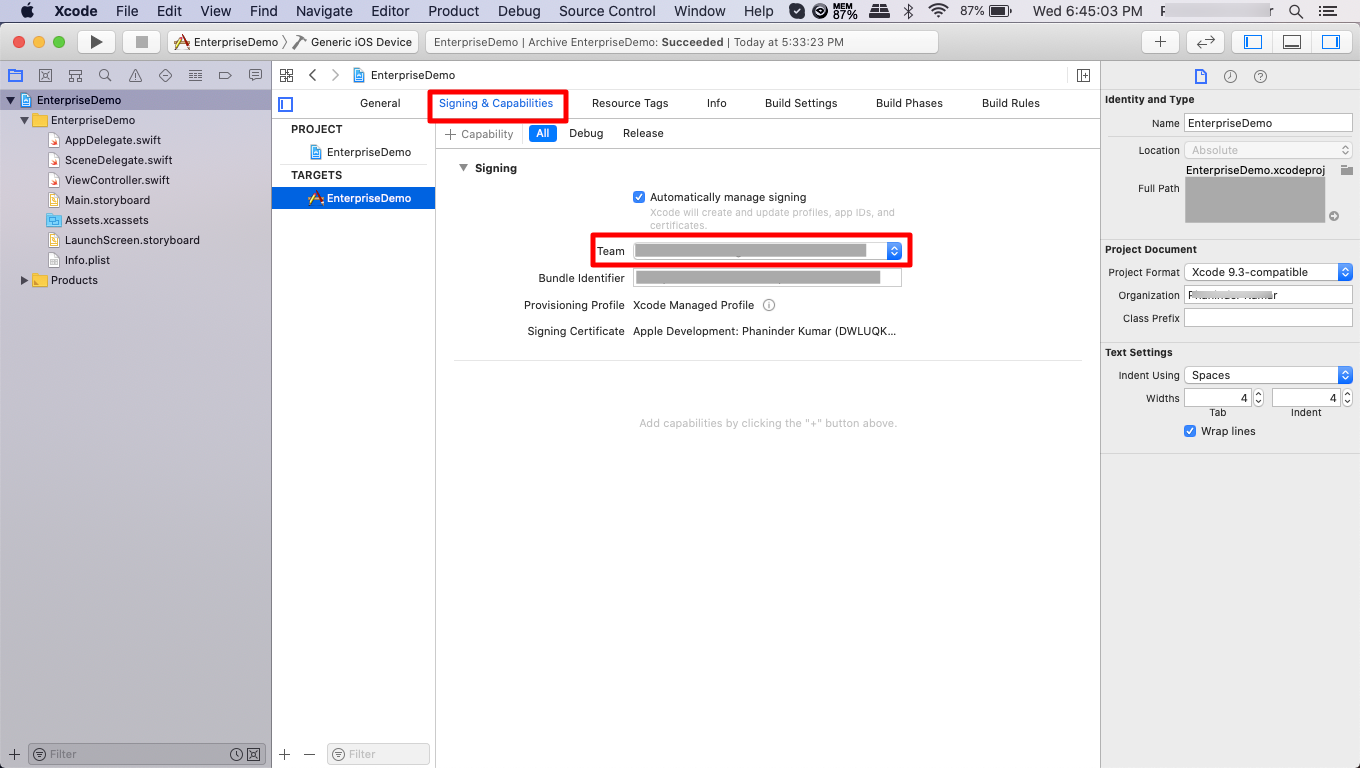
 If you have the Account Holder or Admin role, archive the app, and when you export the app, select the Enterprise distribution method.
 - Select your Appropriate team under the Signing & Capabilities section.
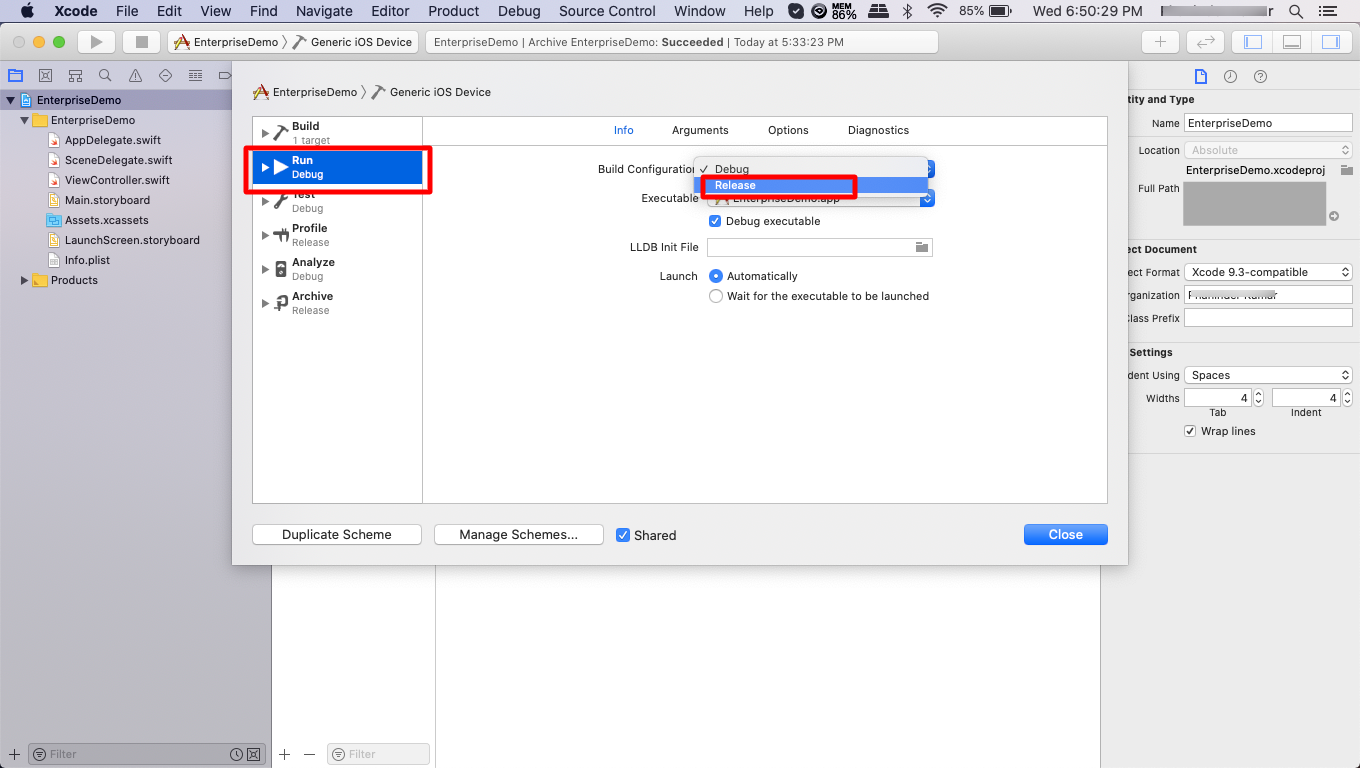
- Set the build configuration to Release by selecting the Edit Scheme button.
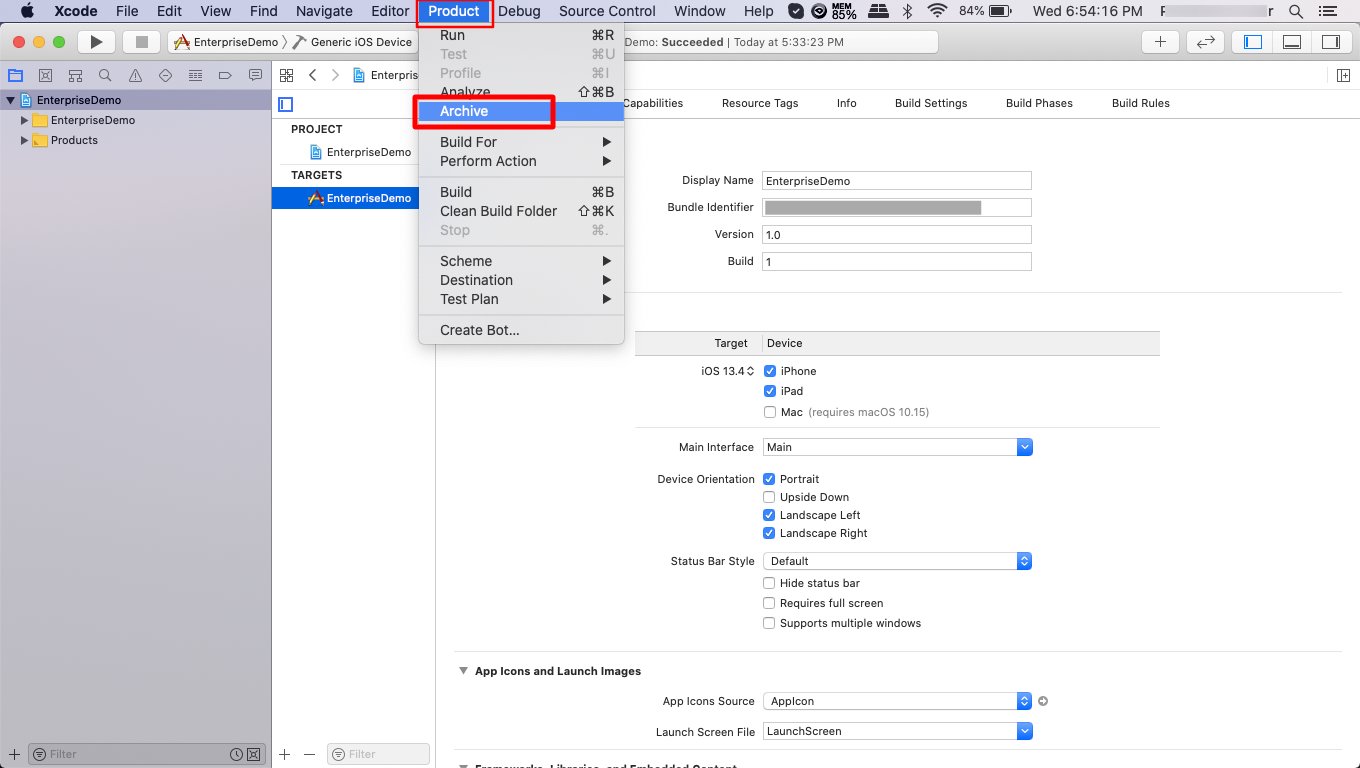
- In the menu, navigate to Product and click Archive to archive the Application
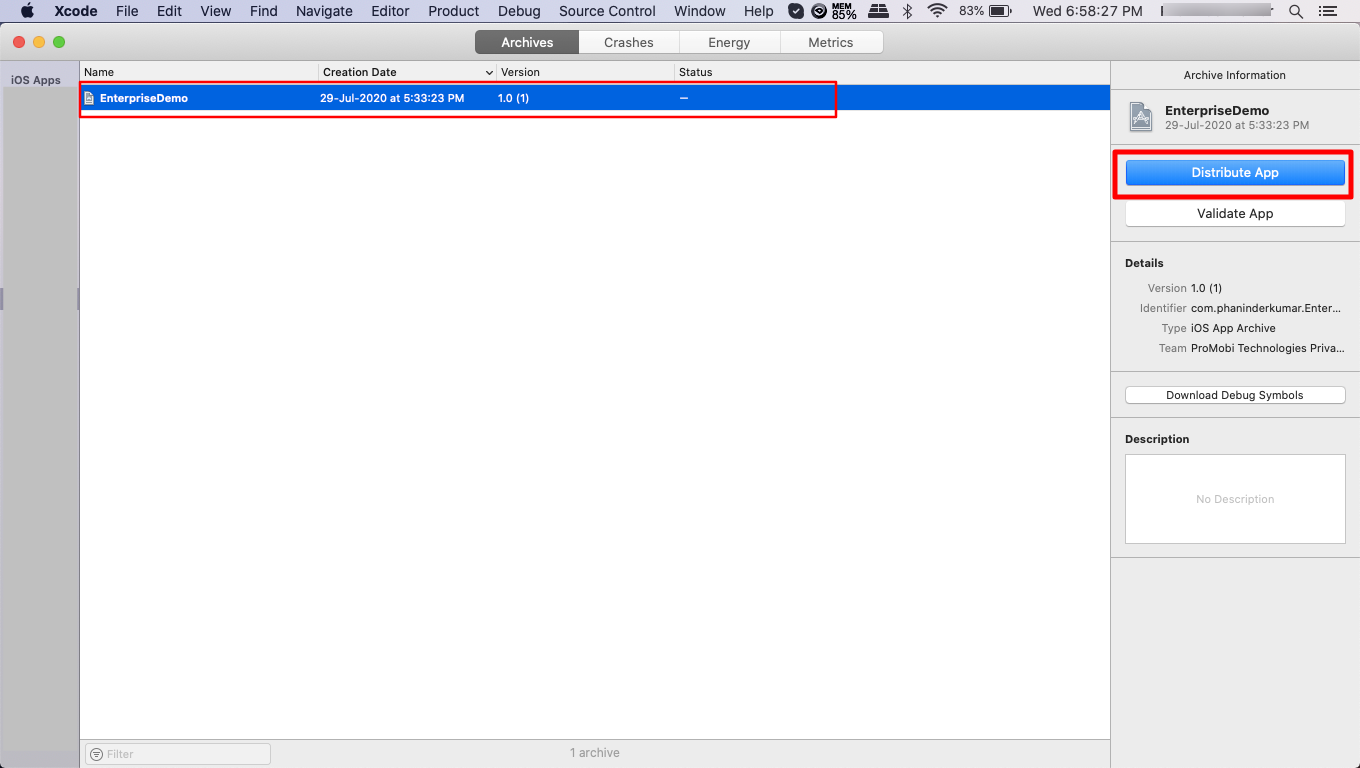
- Once the archive is successful, the Organizer window will be shown automatically. Alternatively, you can also open this window from the Window > Organizer option. Select the archived build and click on the Distribute App button.
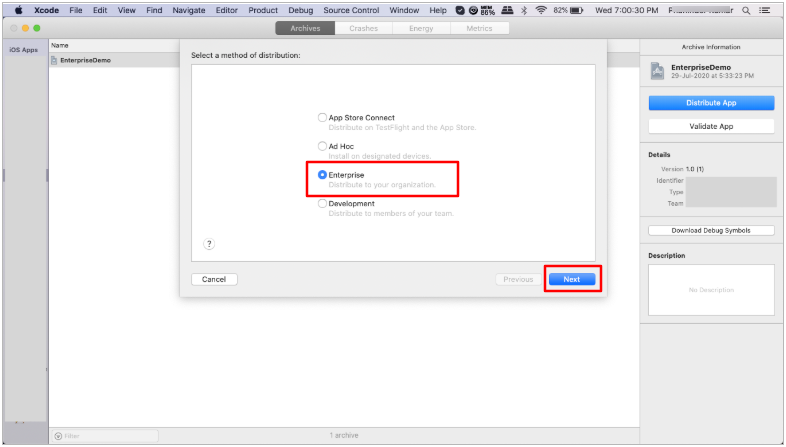
- In the next window, select the Enterprise option and click Next.
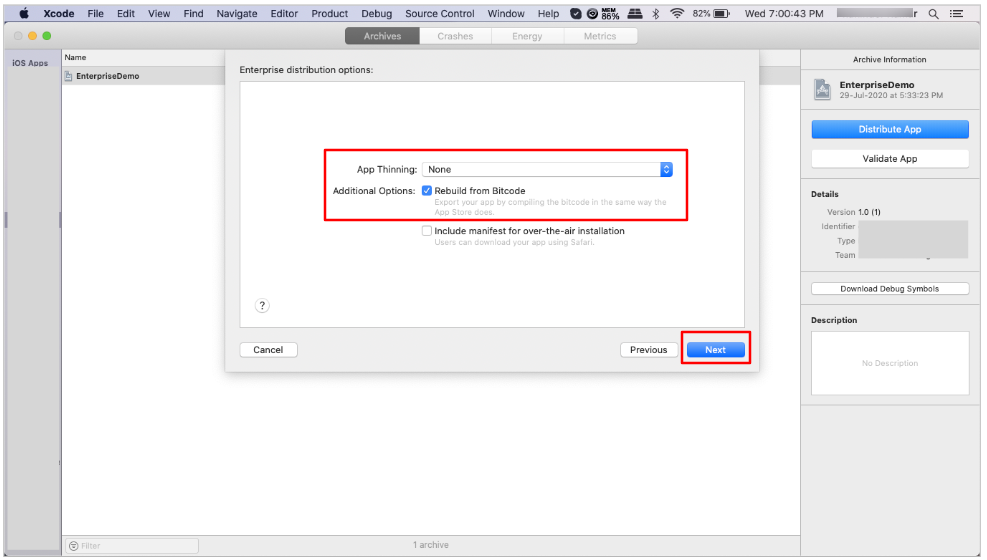
- Leave the default values as shown in the image and click Next.
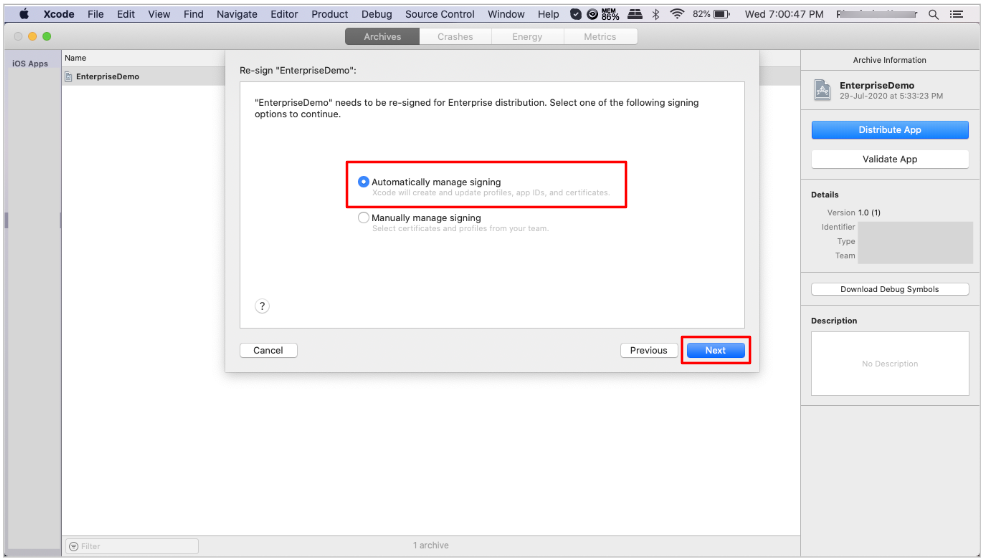
- Select Automatically Manage Signing and click Next.
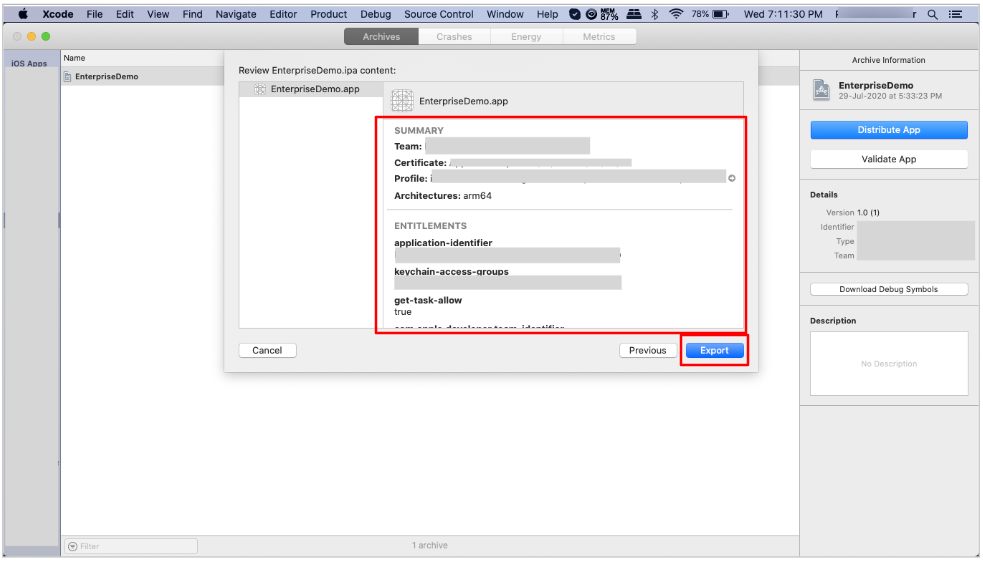
- Once the signing is completed, a summary window will show up containing build details. Click Export and save the build at a suitable location.
 The exported .app folder will contain the .ipa file, which needs to be uploaded to the Scalefusion dashboard through the Enterprise Store.


Was this article helpful?