Converting DMG files to PKG files for Enterprise Distribution
- 29 Sep 2023
- 4 Minutes to read
- Print
- PDF
Converting DMG files to PKG files for Enterprise Distribution
- Updated on 29 Sep 2023
- 4 Minutes to read
- Print
- PDF
Article Summary
Share feedback
Thanks for sharing your feedback!
Scalefusion offers support to distribute Apple VPP apps and PKG (product archive packages) natively using the Dashboard. Most Enterprise apps use either of the above mechanisms for distribution in an enterprise scenario, however, there might be certain cases where the developer has made the installer available in the form of a DMG (Disk Image File).
In such cases where only a DMG file is available, IT Admins can convert the DMG file to a PKG file, Sign in on it using their Apple Developer certificate and then deploy it via Scalefusion Dashboard.
Most Enterprise applications do offer a PKG installer for macOS devices, so it may be worthwhile to contact the developer to get an official version of their app. This document is a general guideline in the absence of a PKG distribution file.
Prerequisites
- Access to a macOS device where you can convert and sign the PKG file.
- DMG File that needs to be converted
- Apple Developer account
Step 1: Install or Extract the DMG file
- The first step is to double-click on the DMG file and extract the *.App to the Applications folder. This would install the application on your device.
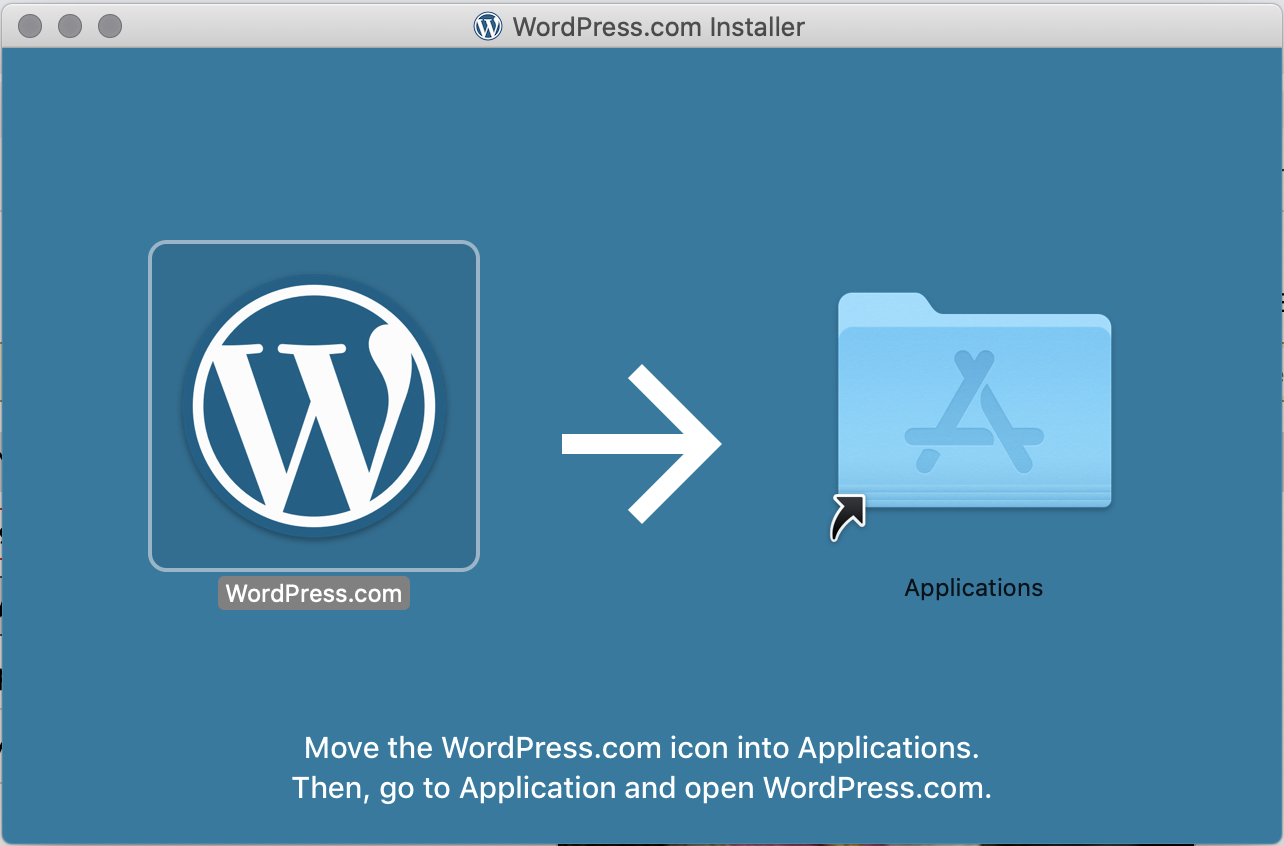
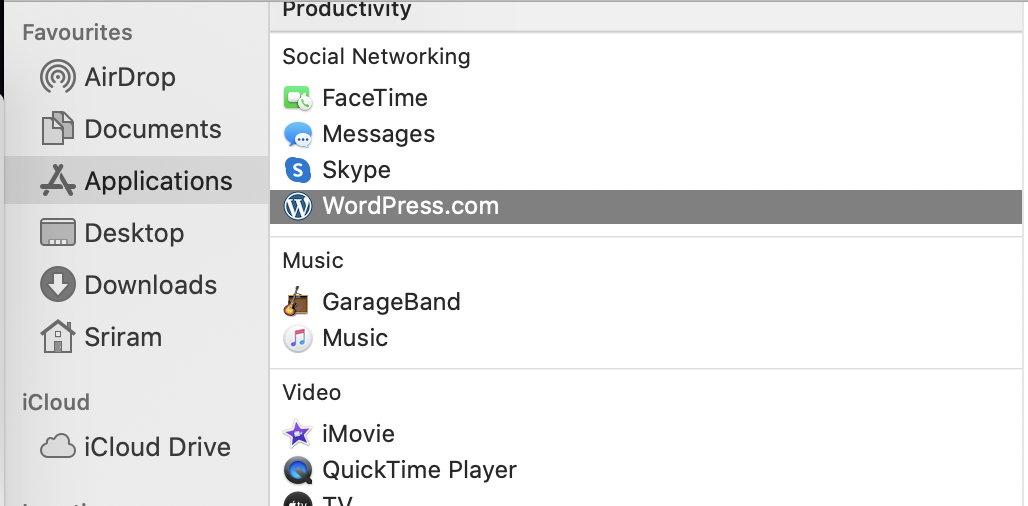
- This would install the application and copy the app to Applications. Open Applications to get the path to the installed application. Select the app and press CMD + C to copy the path to the clipboard.


Step 2: Convert the App to a PKG file
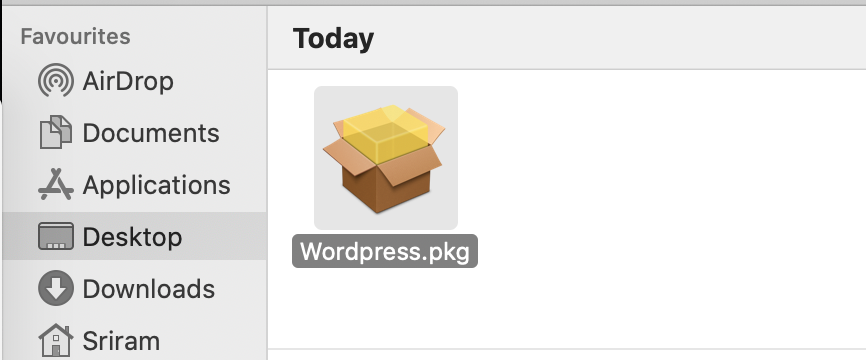
- Open a Terminal window and execute the following command, where APP_NAME.app is the name of the app (you can use CMD + V if you have copied the path as per Step 1) and the OUTPUT_FOLDER and CONVERTED_APPare the output folder and name for the converted app respectively.Shell
Command sudo productbuild --component /Application/APP_NAME.app /OUTPUT_FOLDER/CONVERTED_APP.pkg Example sudo productbuild --component /Applications/WordPress.com.app ~/Desktop/Wordpress.pkg - Executing the command will ask you for the password for your macOS device, and once provided, the PKG file will be generated in the output folder provided above.

Step 3: Signing a PKG File
macOS does not allow for applications from unidentified developers to be installed. Hence a PKG file would have to be signed with a developer certificate to provide an identity. Follow the steps below to sign a PKG file.
Creating a Certificate Signing Request
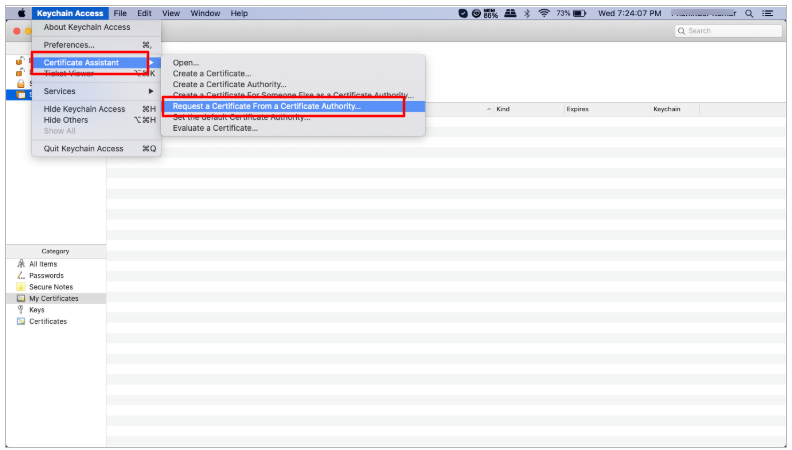
- Navigate to /Applications/Utilities and launch Keychain Access.
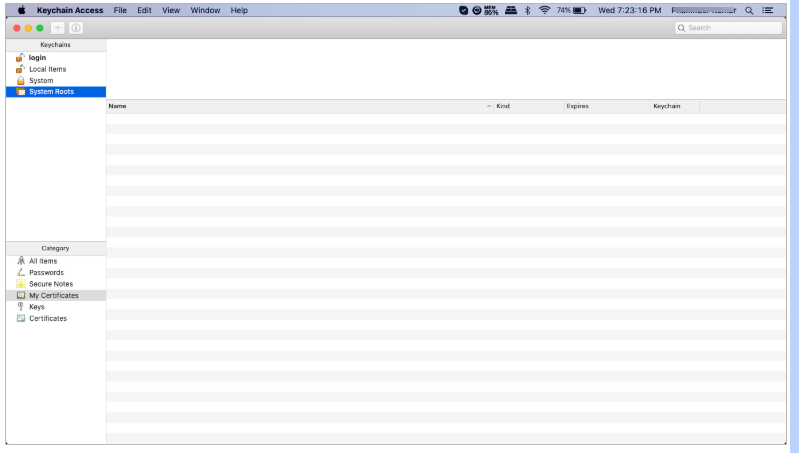
- Go to Keychain Access > Certificate Assistant > Request a Certificate from a Certificate Authority
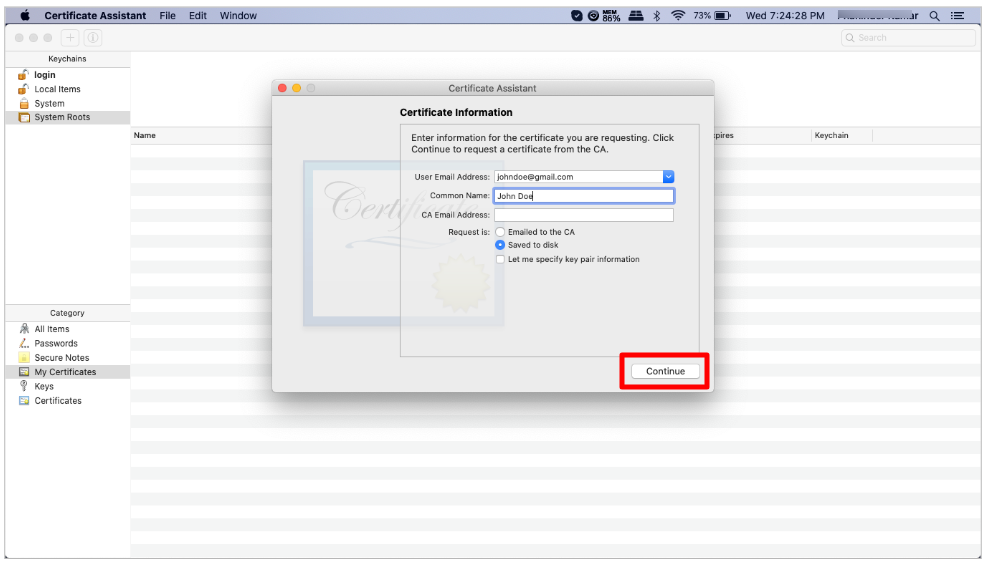
- This opens the Certificate Assistant dialog box. Enter the following Certificate Information,
- User Email Address: Enter an email address
- Common Name: Enter a name for the key (for example, John Doe)
- CA Email Address: Leave this field empty
- Request Is: Choose Saved to disk
- Click Continue after entering the above details.
- Select the path where you want the CSR(Certificate Signing Request) to be saved and save it. The Certificate Signing Request file gets created. This file would be required in the next step. For more information on this, click here.


Generate an Installer Certificate
- Sign Into the Apple Developer Portal.
- Navigate to Certificates, Identifiers & Profiles and click on the + symbol to create a new certificate

- Select Developer ID Application as you would need to distribute the app outside of the App Store and click ContinueIf this is your enterprise app and you are uploading it to the Apple App Store, then you can upload your Enterprise certificate for signing.

- In the next step, upload the CSR that you generated above and click Continue

- Click Download to download the *.cer file and double-click on it to install it in your Keychain
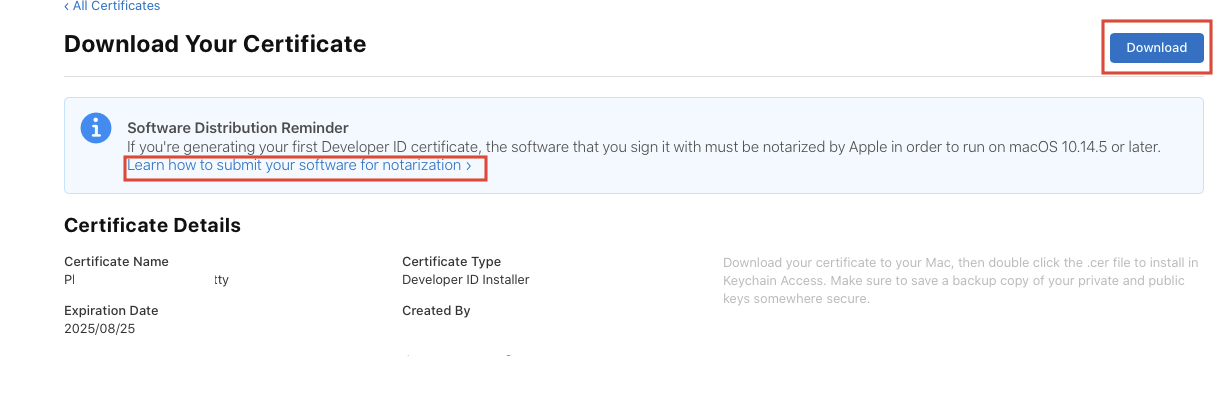 If you intend to use this certificate to Sign your in-house applications, please Notarize your software using the Learn how to Submit Your Software for notarization link.


Signing the PKG file
Once you have generated the certificate and installed it in your keychain, follow the steps below to sign the package generated in Step 2 or any pkg file.
- Open a Terminal window and use the productSigncommand to sign the package file by substituting the following,
- DEVELOPER ID INSTALLER: Apple Account Name (TEAM_ID): The name of your certificate is shown in KeyChain.
- FOLDER: Refers to the folder where the unsigned app is copied/stored on disk.
- UNSIGNED_APP.pkg: The name of the unsigned app/pkg file
- OUTPUT_FOLDER: The name of the output folder
- SIGNED_APP.pkg: Refers to the final signed version of the appShell
productsign -sign "Developer ID Installer: Apple Account Name (TEAM_ID)" ~/FOLDER/UNSIGNED_APP.pkg ~/OUTPUT_FOLDER/SIGNED_APP.pkg
Extra Tip: Generating and Signing an Installed Application
If you want to generate a PKG file for an application installed on your macOS machine, then follow the steps below,
- Copy the path of the installed application. Open the Applications folder, select the app and press CMD + C
- Open a Terminal window and run the pkgbuild command by substituting the values,Shell
sudo pkgbuild --component COPIED_PATH_TO_INSTALLED_APP --install-location /Applications --sign "Developer ID Installer: Apple Account Name (TEAM_ID)" ~/OUTPUT_FOLDER/SIGNED_APP.pkg- COPIED_PATH_TO_INSTALLED_APP: The Application path is copied in the first step.
- DEVELOPER ID INSTALLER: Apple Account Name (TEAM_ID): The name of your certificate is shown in KeyChain.
- OUTPUT_FOLDER: Name of the folder where the generated PKG will be stored
- SIGNED_APP.PKG: The generated signed PKG file.

Once you have generated the signed PKG file, please navigate to Installing Enterprise Apps/PKG Files on macOS devices to remotely push the app to all your managed macOS devices. Feel free to reach out to support@scalefusion.com in case you need further help.
Was this article helpful?